Ultimate Turkey Cheese Sandwich: The Perfect Deli-Style Lunch in 10 Minutes

When you’re craving something satisfying, delicious, and ready in minutes, nothing beats a perfectly crafted Turkey Cheese Sandwich. This classic American favorite combines tender slices of deli turkey, melty cheese, crisp vegetables, and flavorful condiments between two slices of your favorite bread. It’s the ultimate solution for busy weekday lunches, quick dinners, picnic baskets, and kids’ lunchboxes—a sandwich that never goes out of style and always delivers on taste and satisfaction.
What makes this easy turkey sandwich recipe so incredibly popular is its perfect balance of flavors and textures, plus its amazing versatility. You get protein-rich turkey, calcium-packed cheese, fresh crunchy vegetables, and your choice of spreads, all working together in delicious harmony. Whether you’re making lunch for one, meal-prepping for the week, or feeding a hungry family, this deli-style turkey sandwich is endlessly adaptable to suit everyone’s preferences. It’s comfort food that’s also nutritious, budget-friendly that tastes gourmet, and simple enough that anyone can master it while being impressive enough to serve to guests.
History & Background
The turkey sandwich as we know it today has deep roots in American culinary history, though its origins trace back to the 18th-century invention of the sandwich itself. Legend credits John Montagu, the 4th Earl of Sandwich, with popularizing the concept of meat between bread in England during the 1760s. However, the turkey sandwich specifically became an American staple, particularly as turkey became more accessible and affordable throughout the 20th century.
Initially, turkey sandwiches were primarily a way to use up leftovers from Thanksgiving and Christmas feasts. American families would slice leftover roasted turkey and create sandwiches with stuffing, cranberry sauce, and gravy—what we now call “Thanksgiving leftover sandwiches.” This tradition became so beloved that it’s still a highlight of the holiday season for many Americans, with some people claiming they look forward to the turkey sandwiches more than the actual holiday meal!
The deli-style cold turkey sandwich emerged as delicatessens became popular in American cities during the late 19th and early 20th centuries. Jewish delis in New York City, German delis in the Midwest, and Italian delis across the country all put their own spins on turkey sandwiches. When pre-sliced deli meats became widely available in supermarkets in the mid-20th century, the turkey sandwich transitioned from a special treat to an everyday staple in American homes.
Today, the turkey cheese sandwich represents the perfect evolution of this classic—combining the convenience of deli turkey with the indulgence of melted or cold cheese, fresh vegetables, and endless customization options. It’s become one of the most popular sandwich choices in America, regularly appearing on deli menus, in school cafeterias, and as a go-to homemade lunch option. The beauty of this sandwich lies in its simplicity and adaptability—you can keep it classic and straightforward or dress it up with gourmet ingredients depending on your mood and what you have available.
Why You’ll Love This Recipe
This homemade turkey cheese sandwich is about to become your new favorite go-to meal. It’s the kind of recipe that seems almost too simple to write down, yet it delivers consistent satisfaction every single time you make it. The combination of tender turkey, melty cheese, and fresh toppings creates a sandwich that’s greater than the sum of its parts.
Here’s why this sandwich will become a staple in your kitchen:
- Ready in just 10 minutes – From start to finish, you’ll have a delicious, satisfying meal faster than ordering takeout
- Incredibly versatile – Customize it endlessly with different breads, cheeses, and toppings to suit any taste
- Family-friendly favorite – Kids and adults alike love this classic combination
- Budget-friendly meal – Uses affordable, readily available ingredients that won’t break the bank
- High in protein – Keeps you full and energized throughout the day with quality protein from turkey and cheese
- Perfect for meal prep – Components can be prepped ahead for quick assembly all week long
- Lunchbox champion – Packs beautifully for work, school, or picnics
- Customizable for dietary needs – Easy to adapt for low-carb, gluten-free, or other dietary preferences
- No cooking skills required – Perfect for beginners or anyone who wants a fuss-free meal
- Crowd-pleaser for gatherings – Scale up easily to feed a group at parties or potlucks
- Balanced and nutritious – Provides protein, carbs, healthy fats, and vegetables in one convenient package
Ingredient Notes
The secret to an outstanding turkey and cheese sandwich is using quality ingredients and building thoughtful layers of flavor and texture. Let’s break down each component:
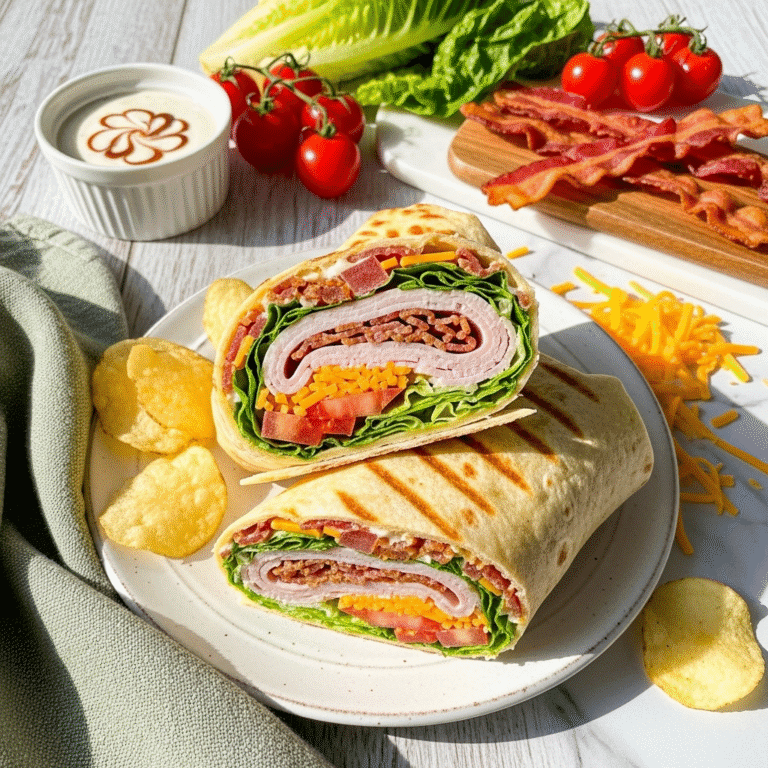
Bread: The foundation of any great sandwich! Choose bread that complements your fillings without overpowering them. Classic choices include soft white or wheat sandwich bread, which provides a neutral canvas. Sourdough adds tangy flavor and sturdy structure. Whole grain or multigrain offers nutty taste and extra nutrition. Italian or French bread works beautifully for sub-style sandwiches. Substitution: Ciabatta, focaccia, bagels, croissants, or wraps all work wonderfully. For low-carb diets, use lettuce wraps or low-carb tortillas. Gluten-free bread works perfectly for those with gluten sensitivities.
Deli Turkey: The star of the show! Look for quality deli turkey breast—either regular, honey-roasted, smoked, or pepper-crusted depending on your preference. Buy it freshly sliced from the deli counter rather than pre-packaged when possible, as it’s more flavorful and has better texture. Check the sodium content if you’re watching salt intake—lower-sodium options are available. Substitution: Leftover roasted turkey breast (sliced thin) is even better if you have it. Chicken breast, ham, or roast beef can substitute for variety. For vegetarian versions, use thick slices of extra-firm tofu, tempeh bacon, or vegetarian deli slices.
Cheese: Cheese adds richness, creaminess, and that satisfying melty or creamy texture. Classic choices include Swiss (nutty and mild), Cheddar (sharp and bold), Provolone (smooth and slightly tangy), Monterey Jack (creamy and mild), or American cheese (melts beautifully). Use 1-2 slices per sandwich. Substitution: Mozzarella, Havarti, Gouda, Pepper Jack (for spice), or Brie all work wonderfully. For dairy-free versions, use plant-based cheese slices—many brands melt surprisingly well.
Lettuce: Adds refreshing crunch and moisture. Iceberg lettuce is classic and crispy. Romaine offers more nutrition and sturdier leaves. Butter lettuce is tender and mild. Spring mix or arugula provides peppery flavor. Substitution: Spinach leaves, baby kale, or shredded cabbage work well. For extra crunch, use thinly sliced cucumber instead.
Tomato: Ripe, fresh tomatoes add juiciness and bright flavor. Use 2-3 slices of medium tomato per sandwich. Choose tomatoes that are firm but give slightly to pressure. In summer, nothing beats fresh garden tomatoes. Substitution: Sun-dried tomatoes (chopped) offer concentrated flavor. Roasted red peppers add sweetness. Skip entirely if tomatoes are out of season and tasteless.
Condiments: This is where you can really customize flavor! Mayonnaise is classic and adds creamy richness. Mustard (yellow, Dijon, or whole grain) provides tangy sharpness. Honey mustard offers sweet-tangy balance. Ranch dressing, chipotle mayo, or pesto are delicious alternatives. Substitution: Greek yogurt mixed with herbs makes a lighter spread. Hummus, avocado, or guacamole add healthy fats. Cranberry sauce is fantastic for a Thanksgiving-inspired twist.
Optional Add-Ins: Sliced red onion adds bite, pickles provide briny crunch, bacon adds smoky richness, avocado contributes creaminess, sprouts offer freshness, and jalapeños bring heat. Fresh herbs like basil or cilantro can elevate the whole sandwich.
Equipment Needed
One of the best things about this recipe is how minimal the equipment requirements are:
- Sharp knife – For slicing tomatoes, cheese, and cutting the sandwich
- Cutting board – For prep work
- Butter knife or offset spatula – For spreading condiments
- Plate – For assembling and serving
- Optional: Toaster or panini press – If you want to toast your bread or make a hot pressed sandwich
- Optional: Serrated knife – Helpful for crusty breads like baguettes or ciabatta
- Optional: Paper towels – For patting tomatoes dry to prevent sogginess

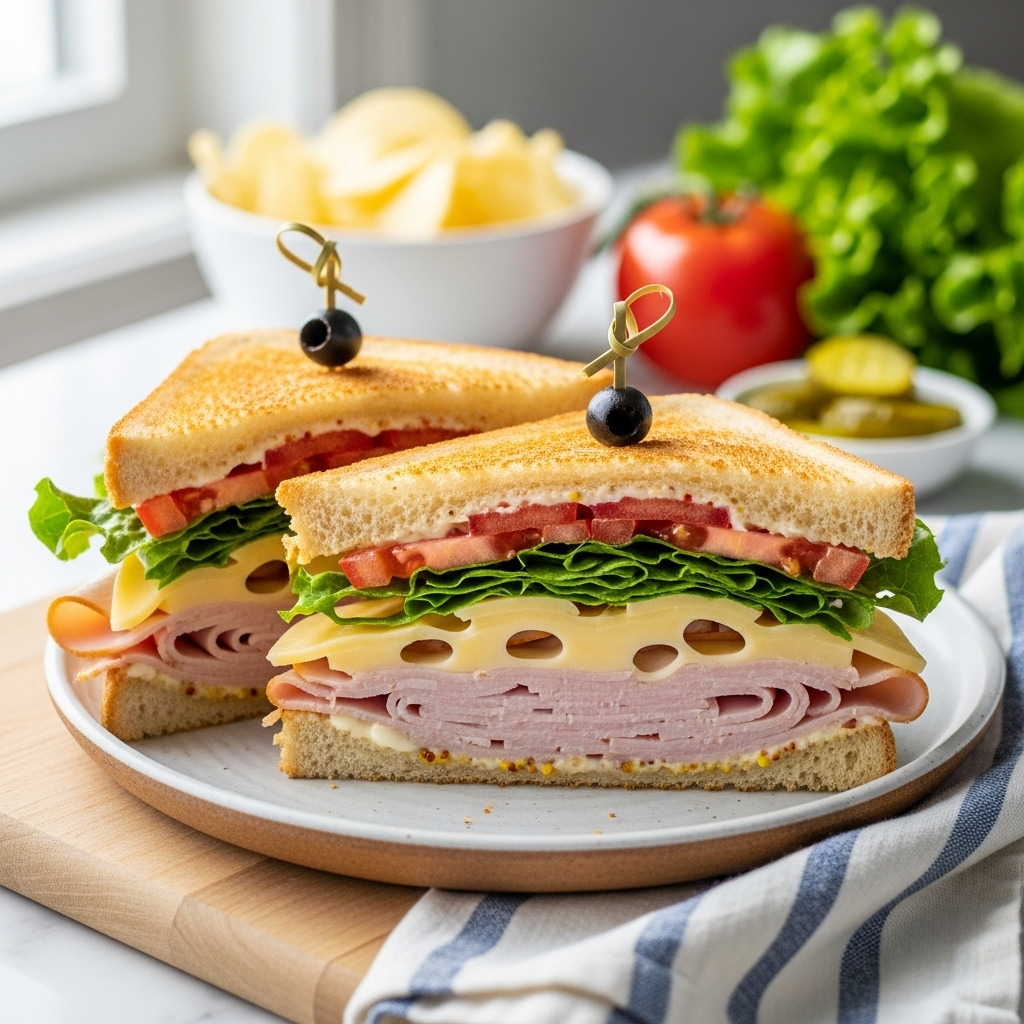
Turkey Cheese Sandwich
Turkey Cheese Sandwich features layers of tender deli turkey, your favorite cheese, crisp lettuce, juicy tomatoes, and flavorful spreads on your choice of bread. Ready in just 10 minutes, it’s the perfect lunch or quick dinner that’s completely customizable to your tastes. Packed with protein and endlessly versatile!
- Total Time: 10 minutes
- Yield: 1 sandwich (easily multiplied) 1x
Ingredients
- 2 slices bread (white, wheat, sourdough, or your choice)
- 3-4 ounces sliced deli turkey (about 4-6 slices)
- 1-2 slices cheese (Swiss, Cheddar, Provolone, or your favorite)
- 2-3 leaves lettuce (romaine, iceberg, or butter lettuce)
- 2-3 slices ripe tomato
- 2 tablespoons mayonnaise (or your preferred spread)
- 1 tablespoon mustard (yellow, Dijon, or honey mustard)
- Salt and freshly ground black pepper, to taste
- Optional: 2-3 slices bacon, cooked crispy
- Optional: 2-3 slices red onion
- Optional: 2-3 pickle slices or pickle chips
- Optional: ½ avocado, sliced
- Optional: 1 teaspoon butter (if toasting bread)
Instructions
- Prepare Your Bread: If you prefer toasted bread, lightly toast your bread slices until golden brown. This adds texture and helps prevent sogginess, especially if using juicy tomatoes. For a panini-style sandwich, skip this step and toast the assembled sandwich in a panini press later. If using bread as-is, simply place both slices on your work surface.
- Apply Your Spreads: Spread mayonnaise generously on one slice of bread, covering the entire surface from edge to edge. This creates a moisture barrier that protects against soggy bread. Spread mustard on the other slice of bread—you can adjust the amount based on how much mustard flavor you enjoy. The mayo-mustard combo provides that classic deli sandwich flavor profile.
- Layer the Cheese: Place your cheese slice(s) directly on top of the mayonnaise-covered bread. If you’re making a cold sandwich, this is fine as-is. If you want melted cheese, place this slice (with cheese) under the broiler for 1-2 minutes or in a toaster oven until the cheese just begins to melt. Watch carefully to prevent burning.
- Add the Turkey: Layer the deli turkey slices on top of the cheese. Don’t just stack them flat—instead, fold or ruffle the turkey slightly to create dimension and ensure every bite has plenty of turkey. This technique also makes the sandwich look more appealing and professional. Aim for 3-4 ounces (4-6 slices) of turkey for a satisfying sandwich.
- Build Your Vegetable Layers: Pat the tomato slices gently with a paper towel to remove excess moisture—this prevents a soggy sandwich. Season the tomato slices with a pinch of salt and freshly ground black pepper to enhance their flavor. Place the seasoned tomato slices on top of the turkey. Add your lettuce leaves next—they provide a protective barrier between juicy vegetables and the top bread slice.
- Add Optional Ingredients: If using bacon, layer it on top of the turkey before adding tomatoes. If adding avocado, place the slices on top of the lettuce. Red onion and pickles can go anywhere in your layering—some people prefer them next to the condiments, others place them near the vegetables. Arrange ingredients thoughtfully so the sandwich isn’t too tall to bite comfortably.
- Complete and Serve: Place the mustard-spread bread slice on top, spread-side down. Press down very gently to help everything stick together without squashing the fillings. Using a sharp knife, cut the sandwich diagonally (this makes it easier to handle and looks more appealing) or straight down the middle. For extra-tall sandwiches, secure each half with a toothpick or sandwich pick to keep everything together.
- Optional – Make It a Hot Sandwich: For a hot pressed sandwich, butter the outside of both bread slices lightly and grill in a skillet over medium heat for 2-3 minutes per side until golden and the cheese melts. Alternatively, use a panini press for 3-4 minutes until grill marks appear and cheese is melted.
Notes
- For the juiciest flavor, let cold deli turkey come to room temperature for 10-15 minutes before assembling—room temperature meat tastes much better than cold.
- If packing for lunch, pack wet ingredients (tomatoes, pickles) separately and add them just before eating to prevent sogginess.
- The salt-and-pepper on tomatoes trick makes a huge difference in flavor—don’t skip this step!
- For meal prep, prepare all components separately in containers and assemble fresh each day.
- If making multiple sandwiches for a party, set up an assembly line for efficiency.
- Prep Time: 8 minutes
- Cook Time: 2 minutes
- Category: Sandwich
- Method: No-Cook
- Cuisine: British-American
- Diet: Gluten Free
Nutrition
- Serving Size: 1 sandwich
- Calories: 435
- Sugar: 6g
- Sodium: 1,285mg
- Fat: 30g
- Saturated Fat: 7g
- Unsaturated Fat: 11g
- Trans Fat: 0g
- Carbohydrates: 35g
- Fiber: 3g
- Protein: 30g
- Cholesterol: 65mg
Tips & Variations
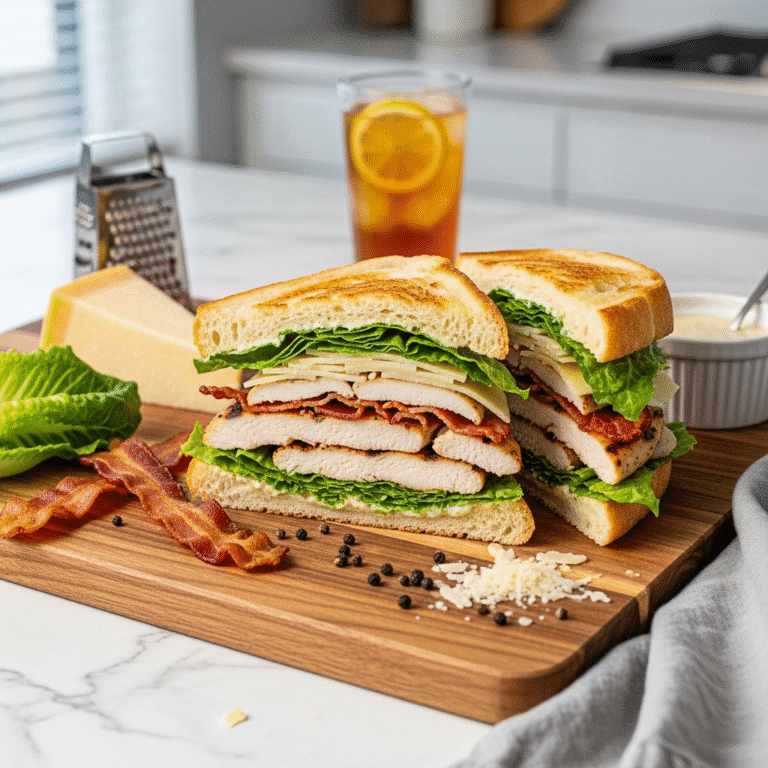
Classic Club Style: Add a third slice of toasted bread in the middle, extra bacon, and secure with toothpicks for a classic club sandwich presentation.
California Turkey: Add sliced avocado, sprouts, cucumber, and use a light ranch dressing instead of mayo for a fresh West Coast twist.
Cranberry Thanksgiving Style: Use leftover turkey (if available), add cranberry sauce, a small spoonful of stuffing, and cream cheese spread for a holiday-inspired flavor.
Hot and Spicy: Use pepper jack cheese, add sliced jalapeños, sriracha mayo, and crushed red pepper flakes for a sandwich with serious heat.
Mediterranean Twist: Use focaccia bread, add roasted red peppers, sun-dried tomatoes, fresh basil, and substitute pesto for mayo.
Honey Mustard BBQ: Mix honey mustard with a little BBQ sauce, add crispy onion straws, sharp cheddar, and bacon for sweet-tangy-smoky flavors.
Low-Carb/Keto Version: Skip the bread and wrap all ingredients in large lettuce leaves, or use low-carb tortillas or keto-friendly bread alternatives.
Grilled Cheese Turkey Melt: Butter the outside of your assembled sandwich and grill it in a skillet until golden and the cheese melts completely—ultimate comfort food!
Italian Deli Style: Use ciabatta bread, add salami, pepperoni, provolone, Italian dressing, banana peppers, and shredded lettuce for a sub-shop experience.
Pro Chef Tips
Layer Order Matters: The strategic placement of ingredients prevents sogginess and creates the best texture in every bite. Always place condiments directly on bread (creates moisture barrier), then cheese (another barrier), then proteins, then vegetables, with lettuce closest to the top bread to protect it from juicy tomatoes.
Bring Turkey to Room Temperature: Cold deli meat straight from the fridge lacks flavor. Let it sit out for 10-15 minutes before assembling—the difference in taste is remarkable. Room temperature ingredients also meld together better.
Season Your Vegetables: This is a game-changer that most people skip! Lightly season your tomato slices with salt and pepper, and you can even add a tiny drizzle of olive oil or balsamic vinegar. This small step dramatically enhances the overall flavor.
Toast for Structure: Even light toasting adds crunch and creates a sturdier base that resists sogginess. You don’t need dark toast—just a light golden color is perfect. Let the bread cool for 1-2 minutes before adding spreads so they don’t melt too much.
The Mayo-Edge Technique: Spread mayo all the way to the edges of your bread, not just the center. This creates a complete moisture barrier and ensures every bite has flavor. Use more than you think you need—generous spreading makes a better sandwich.
Fold, Don’t Stack: Instead of stacking meat and cheese flat, fold or ruffle the slices. This creates air pockets that make the sandwich easier to bite through and gives it a more professional, deli-style appearance. It also distributes ingredients more evenly throughout the sandwich.
Knife Sharpness is Critical: A sharp knife makes clean cuts through your sandwich without squashing it or causing fillings to slide out. Wipe your knife between cuts when slicing tomatoes to prevent slippage.
The Press and Wait Technique: After assembling, press down gently but firmly on the sandwich for 5-10 seconds before cutting. This helps everything adhere and makes cutting cleaner. For even better results, wrap the sandwich tightly and let it sit for 2-3 minutes before cutting.
Common Mistakes to Avoid
Overloading the Sandwich: More ingredients don’t always equal a better sandwich. Too many layers make it impossible to bite through comfortably and cause ingredients to slide out. Keep it balanced—you should be able to get all the flavors in one bite. If you want more, make two sandwiches instead of one overstuffed one.
Skipping the Moisture Barrier: Putting juicy vegetables directly on bread is a recipe for a soggy mess. Always spread condiments directly on the bread first (mayo, mustard, hummus, etc.) to create a protective barrier. This is the #1 secret to sandwiches that stay fresh and crisp.
Using Stale or Poor-Quality Bread: Your bread is half the sandwich, so make it count! Stale, hard bread ruins even the best fillings. Store bread properly and use it while fresh. If your bread is slightly stale, toasting can help revive it.
Cold Turkey Straight from the Fridge: Cold meat lacks flavor and has an unpleasant texture. This small detail makes a surprisingly big difference—let deli meat sit at room temperature for 10-15 minutes before making your sandwich.
Not Seasoning Ingredients: An unseasoned sandwich is a bland sandwich. At minimum, season your tomatoes with salt and pepper. Consider adding garlic powder, dried herbs, or other seasonings to your mayo for extra flavor depth.
Cutting Too Soon: If you cut your sandwich immediately after assembling, ingredients will slide everywhere and the sandwich will fall apart. Let it rest for 1-2 minutes (or wrap it and wait longer) so everything sets and adheres together.
Storage & Meal Prep
Assembled Sandwich Storage:
Fully assembled sandwiches can be stored wrapped tightly in plastic wrap or aluminum foil in the refrigerator for 4-6 hours maximum. Beyond that, the bread will become soggy and unappetizing. For best results, eat assembled sandwiches within 2-3 hours of making them.
Component Storage – The Best Approach:
Store all sandwich components separately for maximum freshness. Deli turkey stays fresh for 5-7 days in an airtight container. Cheese lasts 1-2 weeks properly wrapped. Washed and dried lettuce keeps for 3-5 days in a produce keeper or wrapped in paper towels. Store bread in a bread box or freezer. Tomatoes should stay at room temperature until cut, then refrigerate cut tomatoes in an airtight container for up to 2 days.
Meal Prep Strategy:
For weekday lunches, prep all components on Sunday. Pre-portion turkey and cheese into individual containers. Wash and dry lettuce, storing it with paper towels. Slice vegetables and store them separately. Each morning, assembly takes just 2-3 minutes. This is much better than making sandwiches ahead and refrigerating them.
Lunch Box Packing:
For packed lunches, use a divided container or bento box. Pack bread and condiments in one section, meats and cheese in another, and vegetables separately. Include a small ice pack to keep everything cool. Assemble the sandwich right before eating to maintain optimal texture. Alternatively, pack all components in small bags and assemble on-site.
Leftover Components:
Use leftover turkey within 5-7 days—it’s great in salads, wraps, or pasta dishes. Leftover cheese can be shredded for quesadillas or melted on nachos. Extra lettuce works in salads. Use extra tomatoes in salsa, pasta sauce, or salads.
Make-Ahead & Freezer Notes
Can It Be Made Ahead?
Fully assembled sandwiches are not ideal for making ahead due to sogginess issues. However, you can prep all components 1-2 days ahead and store them separately, making assembly quick and easy each day. If you absolutely must make sandwiches ahead, follow these rules: toast the bread lightly, use plenty of condiment as a moisture barrier, wrap extremely tightly, and eat within 4-6 hours.
Freezer-Friendly?
Traditional turkey cheese sandwiches do not freeze well assembled. The vegetables will become mushy and watery, the bread will get soggy, and the overall texture will be disappointing. However, you CAN freeze the bread separately and toast it from frozen, which actually works great. Turkey can be frozen in portions, though texture may be slightly affected.
Best Make-Ahead Approach for Parties:
For gatherings, set up a DIY sandwich bar where guests build their own. Arrange all ingredients in bowls and platters—sliced meats, various cheeses, multiple bread options, vegetables, and condiments. This keeps everything fresh and allows customization. If you must prep sandwiches ahead for an event, make them no more than 2 hours before serving and keep them refrigerated, covered with damp paper towels and plastic wrap.
Freezing Components:
Freeze bread slices with parchment paper between each slice for easy separation. Turkey can be frozen in portions (wrapped tightly) for up to 2 months, though freshness is best. Hard and semi-hard cheeses freeze reasonably well for up to 3 months—texture may change slightly but they’re still delicious. Never freeze lettuce, tomatoes, or other fresh vegetables.
Serving Suggestions
This classic turkey sandwich is satisfying enough to stand alone as a complete meal, but pairing it with the right sides takes lunch to the next level.
Classic Sides:
Potato chips (classic, kettle-cooked, or flavored) are the traditional partner—their salt and crunch perfectly complement the sandwich. Fresh fruit like apple slices, grapes, berries, or melon adds refreshing sweetness. A dill pickle spear is a deli-style classic that provides briny, tangy contrast. Coleslaw offers creamy, crunchy texture. Pasta salad or potato salad makes the meal more substantial.
Soup Pairings:
Tomato soup is the ultimate soup-and-sandwich combo. Chicken noodle soup adds warmth and comfort. Broccoli cheddar soup creates a rich, satisfying meal. Butternut squash or carrot-ginger soup work beautifully in fall. Minestrone adds Italian flair.
Salad Combinations:
A simple green salad with vinaigrette keeps things light and fresh. Caesar salad adds richness and bold flavor. Greek salad with feta and olives complements turkey wonderfully. Caprese salad echoes tomato flavors. Wedge salad with blue cheese makes it steakhouse-style.
Beverage Pairings:
Iced tea (sweetened or unsweetened) is refreshingly classic. Lemonade adds bright acidity. Sparkling water with lemon or lime cleanses the palate. For adults, a crisp beer or light white wine works nicely.
For Kids:
Serve with baby carrots, cucumber slices, cherry tomatoes, apple slices with peanut butter, cheese cubes, crackers, or a small treat like a cookie or brownie.
Picnic Perfect:
Pack sandwiches with bags of chips, fresh fruit, cookies, cold drinks, and napkins in a cooler for the ideal picnic lunch.
FAQs
How do I keep my turkey sandwich from getting soggy?
The key to preventing sogginess is creating moisture barriers. Spread condiments (mayo, mustard) directly on the bread to create a seal. Place cheese next to the condiments as an additional barrier. Pat tomatoes dry with paper towels and season them. Place lettuce closest to the top bread to protect it from juicy vegetables. Assemble sandwiches as close to eating time as possible, or pack wet ingredients separately.
What’s the best type of cheese for turkey sandwiches?
Swiss cheese is the classic choice—it’s mild, melts beautifully, and has that distinctive nutty flavor. Cheddar (white or yellow) offers sharp, bold taste. Provolone is smooth and slightly tangy. Monterey Jack melts wonderfully and is mild. Pepper Jack adds spicy kick. Havarti is creamy and buttery. Honestly, any cheese you enjoy will work—it’s all about personal preference!
Can I make turkey sandwiches the night before?
You can, but they won’t be as good as fresh. If you must make them ahead, use these strategies: lightly toast the bread, spread thick layers of condiments as moisture barriers, skip the tomatoes (pack them separately), wrap extremely tightly in plastic wrap, and store in the refrigerator. Eat within 12 hours maximum. For best results, prep all components separately and assemble in the morning.
How much deli turkey should I use per sandwich?
Generally, 3-4 ounces (about 4-6 slices) of sliced deli turkey per sandwich is the sweet spot. This provides enough protein to be satisfying without making the sandwich so tall it’s difficult to eat. If the turkey is sliced very thin, you might need 6-8 slices. For heartier appetites, go up to 5-6 ounces.
Can I make this sandwich healthier?
Absolutely! Use whole grain or sprouted grain bread for more fiber and nutrients. Choose low-sodium deli turkey. Substitute Greek yogurt mixed with lemon juice and herbs for mayo to cut fat and calories. Add extra vegetables like cucumber, sprouts, or spinach. Use low-fat cheese or reduce the amount. Skip bacon if using it. Add avocado for healthy fats. These swaps maintain deliciousness while boosting nutrition.
What’s the difference between deli turkey and leftover roasted turkey?
Deli turkey is typically cured, sometimes smoked, and sliced very thin with a distinctive texture and flavor. It’s convenient and consistent. Leftover roasted turkey has a more natural, home-cooked flavor, isn’t processed, and is generally healthier with less sodium. Both are delicious in sandwiches—roasted turkey makes an especially amazing sandwich but requires cooking a whole turkey or turkey breast first.
Can kids help make turkey sandwiches?
Yes! This is an excellent recipe for teaching kids kitchen skills. Young children (with supervision) can help wash vegetables, lay out bread, and add ingredients. Older kids can spread condiments, layer ingredients, and cut sandwiches (with appropriate knives for their age). Making their own sandwiches helps kids feel accomplished and more likely to eat what they’ve prepared.
Conclusion
This Ultimate Turkey Cheese Sandwich proves that sometimes the simplest recipes are the most satisfying. There’s a reason this classic has been a lunchbox and deli counter staple for generations—when made with care and quality ingredients, it’s absolutely delicious every single time. The combination of savory turkey, melty cheese, crisp vegetables, and tangy condiments creates perfect harmony in every bite.
Whether you’re packing lunches for the week, making a quick dinner, feeding a crowd at a gathering, or simply treating yourself to a satisfying midday meal, this easy deli-style turkey sandwich delivers on convenience, flavor, and nutrition. The beauty of this recipe lies in its versatility—follow it exactly for classic deliciousness, or use it as a template to create your own signature version with your favorite ingredients and flavor combinations.
I hope this recipe inspires you to embrace the art of the well-made sandwich. It’s a life skill that serves you well, whether you’re a busy parent, a student, a working professional, or simply someone who appreciates good food made simply. There’s genuine joy in creating something delicious with your own hands, even when it’s as straightforward as a sandwich.
Ready to make the best turkey sandwich you’ve ever had? Pin this recipe to your lunch ideas and sandwich boards on Pinterest so you’ll always have it when hunger strikes! If you make this homemade turkey cheese sandwich, I’d absolutely love to hear about it—drop a comment below and share your favorite variations. Did you make it hot and pressed? Add avocado and bacon? Go the Mediterranean route? Your creativity inspires other home cooks, so please share!
Here’s to delicious, satisfying lunches that make your day a little bit better! 🥪🧀