Tuna Cucumber Wrap Recipe: Fresh, Light, and Protein-Packed
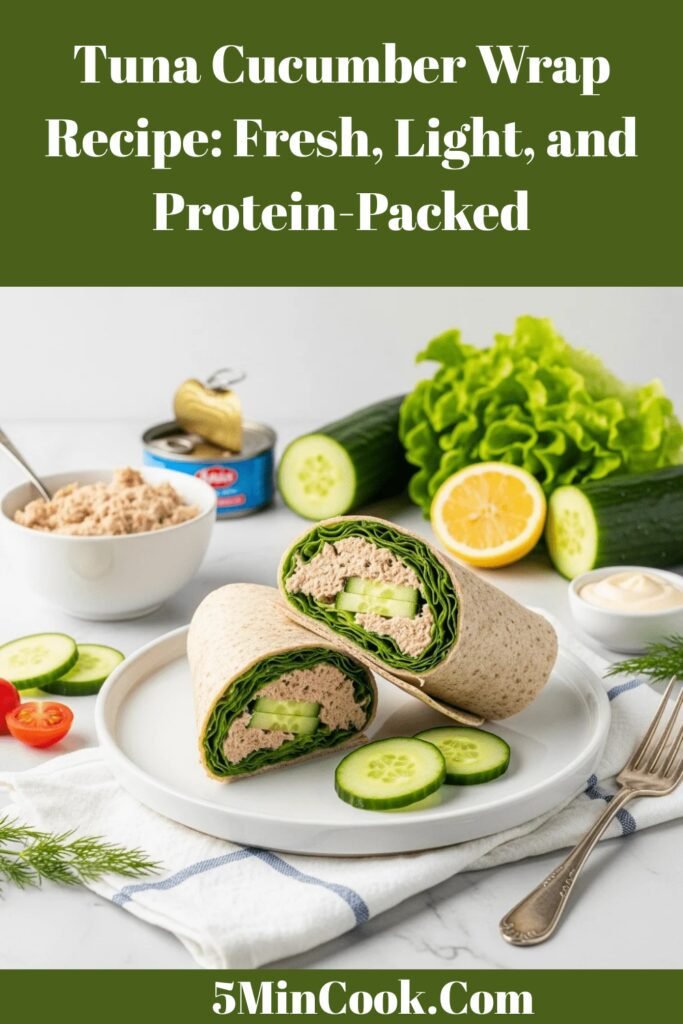
The tuna cucumber wrap is a refreshingly light, protein-packed lunch that combines creamy tuna salad with crisp, hydrating cucumber, all wrapped up in a soft tortilla for the ultimate convenient meal! This wholesome wrap features flaky canned tuna mixed with mayo and seasonings, paired with cool, crunchy cucumber slices and fresh greens, creating a satisfying combination of textures and flavors that’s both nourishing and delicious. The pairing of protein-rich tuna with refreshing cucumber creates a perfectly balanced meal that feels light yet keeps you full for hours. This easy tuna wrap recipe is perfect for so many occasions: pack it for work lunches where you need something that stays fresh and travels well, make it for quick weeknight dinners when you want something healthy without cooking, prepare it for meal prep Sundays to have grab-and-go lunches all week, enjoy it as a post-workout meal with excellent protein for recovery, create it for summer lunches when you don’t want to heat up the kitchen, or whip it up when you’re craving something fresh and satisfying but don’t want to spend time cooking. The beauty of this healthy tuna cucumber wrap lies in its incredible simplicity—it requires zero cooking, comes together in just 10 minutes, costs a fraction of buying lunch out, and delivers serious nutrition with lean protein, healthy fats, and hydrating vegetables. Whether you’re a busy professional seeking better lunch options, a fitness enthusiast looking for high-protein meals, someone who loves fresh Mediterranean-style flavors, or simply a wrap lover seeking the perfect combination of convenience and nutrition, this tuna salad cucumber wrap delivers incredible flavor, satisfying crunch, and wholesome goodness in every single bite!
History / Background
The tuna cucumber wrap represents a beautiful convergence of several culinary traditions: the American love affair with canned tuna, the Mediterranean appreciation for fresh vegetables, and the modern wrap sandwich format that took America by storm in the 1990s. Understanding this wrap’s background requires exploring each of these fascinating histories.
Canned tuna has been a pantry staple in American households since the early 20th century. While canning technology was developed in the early 1800s, tuna canning specifically began in California in 1903 when sardine canners turned to the abundant albacore tuna swimming off the Pacific coast. The Southern California Fishing Company (later Van Camp Seafood Company) pioneered tuna canning, making it accessible and affordable for American families. By the 1920s and 1930s, canned tuna had become incredibly popular, praised for its convenience, long shelf life, and high protein content.
Tuna salad as a specific dish emerged during this same era. The combination of canned tuna with mayonnaise (which had been mass-produced since 1913) became a natural pairing. During the Great Depression, tuna salad represented an economical way to create a protein-rich meal. It could be stretched with celery, pickles, and other inexpensive ingredients. By the 1950s and 1960s, tuna salad sandwiches were a fixture in American lunch culture—served in school cafeterias, packed in lunch boxes, and featured at casual gatherings.
The cucumber element brings a different cultural influence. While cucumbers have been cultivated for thousands of years and consumed across many cultures, their pairing with tuna reflects Mediterranean and European influences where fresh vegetables are emphasized. Greek cuisine, in particular, has long celebrated the combination of fish with fresh cucumbers, as seen in dishes like Greek salad with fish. The cooling, hydrating quality of cucumber provides perfect balance to rich, protein-heavy tuna.
The wrap format itself emerged in the 1990s as part of the health-conscious eating movement. California cuisine, with its emphasis on fresh ingredients and lighter preparations, played a significant role in popularizing wraps. Tortillas and flatbreads offered a thinner alternative to traditional sandwich bread, appealing to carb-conscious eaters. Fast-casual chains like Subway began offering wraps in the mid-1990s, and the format exploded in popularity.
The specific combination of tuna, cucumber, and wrap likely emerged in the late 1990s and early 2000s as health-conscious consumers and fitness enthusiasts sought lighter, more nutritious lunch options. The wrap format made tuna salad more portable and less messy than traditional sandwiches. The addition of cucumber was a natural evolution—it added refreshing crunch, hydration, and virtually no calories while enhancing the Mediterranean flavor profile.
By the 2010s, the tuna cucumber wrap had become a staple in delis, meal prep containers, and Pinterest boards across America. Food bloggers embraced it as the perfect example of healthy eating that didn’t feel like deprivation. It offered lean protein, healthy fats, fresh vegetables, and genuine satisfaction—all in a convenient, Instagram-worthy package. Today, this wrap represents modern healthy eating at its best: simple, nutritious, delicious, and accessible to everyone.
Why You’ll Love This Recipe
This tuna cucumber wrap recipe takes a simple concept and shows you exactly how to make it absolutely delicious every time! While it might seem straightforward—just mix tuna with mayo and wrap it up—there are actually specific techniques that elevate this from ordinary to extraordinary: properly draining and flaking tuna for ideal texture, seasoning the tuna salad so it’s flavorful rather than bland, preparing cucumber so it adds crunch without making things soggy, and assembling in the right order so everything holds together perfectly.
What makes this particular approach to the easy tuna wrap recipe special is the attention to balance and freshness. We’re not just opening a can and calling it done—we’re thinking about how to maximize flavor with simple seasonings, how to create textural contrast with crisp vegetables, how to achieve creaminess without using excessive mayo, and how to build a wrap that’s delicious, nutritious, and actually stays together when you eat it.
Here’s why this healthy tuna cucumber lunch will become your new favorite meal:
- Ready in 10 Minutes – Faster than going through any drive-through
- No Cooking Required – Perfect for hot summer days or busy schedules
- High Protein, Low Calorie – Ideal for weight management and muscle building
- Budget-Friendly – Costs just a few dollars per wrap
- Perfect for Meal Prep – Make tuna salad once, use all week
- Incredibly Portable – Travels beautifully in lunchboxes
- Naturally Dairy-Free – Great for those avoiding dairy
- Gluten-Free Option – Use gluten-free wraps
- Keto-Friendly – Low-carb with lettuce wrap option
- Kid-Friendly – Mild flavors most children enjoy
- Refreshing & Satisfying – Light yet filling
- Endlessly Customizable – Easy to adapt to your taste
Ingredient Notes
This wrap uses simple, pantry-friendly ingredients where quality makes a difference!
Canned Tuna: The protein foundation! Tuna packed in water is leaner and lighter, while tuna in oil is richer and more flavorful. Chunk light tuna is budget-friendly, while solid white albacore is more premium with better texture. Amount: One 5-ounce can per 2 wraps. Tip: Drain thoroughly and use a fork to flake into smaller pieces. Quality matters: Look for sustainably caught tuna (dolphin-safe, pole-and-line caught). Substitution: Canned salmon, chicken, or for vegetarians, mashed chickpeas work beautifully.
Mayonnaise: The creamy binder! Regular mayo is classic, light mayo reduces calories, avocado oil mayo offers healthier fats, Greek yogurt creates tanginess with extra protein. Amount: Start with 2-3 tablespoons per can of tuna and adjust. Tip: Don’t overdo it—you want creamy, not soupy! Substitution: Greek yogurt, mashed avocado, or a combination of mayo and yogurt.
Cucumber: The refreshing crunch! English (seedless) cucumbers are less watery and have thinner skin. Regular cucumbers work fine—just remove excess seeds if very watery. Amount: About ½ cucumber per wrap. Preparation: Slice thin for easier eating and wrap integrity. Tip: Pat slices dry with paper towels to prevent sogginess!
Large Tortillas: Your wrap vessel! Flour tortillas are traditional and soft, whole wheat adds fiber, spinach or tomato wraps add color and nutrients, low-carb tortillas reduce carbs significantly. Size: Use large 10-12 inch “burrito-size” tortillas for proper wrapping. Gluten-free: Many excellent gluten-free wraps available. Low-carb option: Use large lettuce leaves instead!
Lettuce or Greens: The crisp element! Romaine provides sturdy crunch, butter lettuce is tender and mild, spinach adds nutrition, mixed greens offer variety. Amount: About 1 cup per wrap. Tip: Always dry thoroughly after washing!
Seasonings: Salt and black pepper are essential. Lemon juice adds brightness. Garlic powder brings savory depth. Dried dill or parsley adds herbaceous flavor.
Optional Add-Ins:
- Celery for classic tuna salad crunch
- Red onion or green onion for sharpness
- Pickles or pickle relish for tangy brightness
- Capers for briny, salty pops
- Avocado for healthy fats and creaminess
- Cherry tomatoes for juicy sweetness
- Shredded carrots for crunch and color
- Hard-boiled egg for extra protein
- Everything bagel seasoning for flavor boost
Equipment Needed
This no-cook recipe requires minimal kitchen tools!
- Can opener (for canned tuna)
- Mixing bowl (medium size for tuna salad)
- Fork (for flaking tuna and mixing)
- Sharp knife (for slicing cucumber)
- Cutting board
- Strainer or colander (for draining tuna)
- Paper towels (for drying cucumber and lettuce)
- Measuring spoons
- Plate (for assembling wraps)
- Plastic wrap or parchment paper (for wrapping finished wraps)
That’s it! Zero cooking equipment needed—just basic prep tools.
Print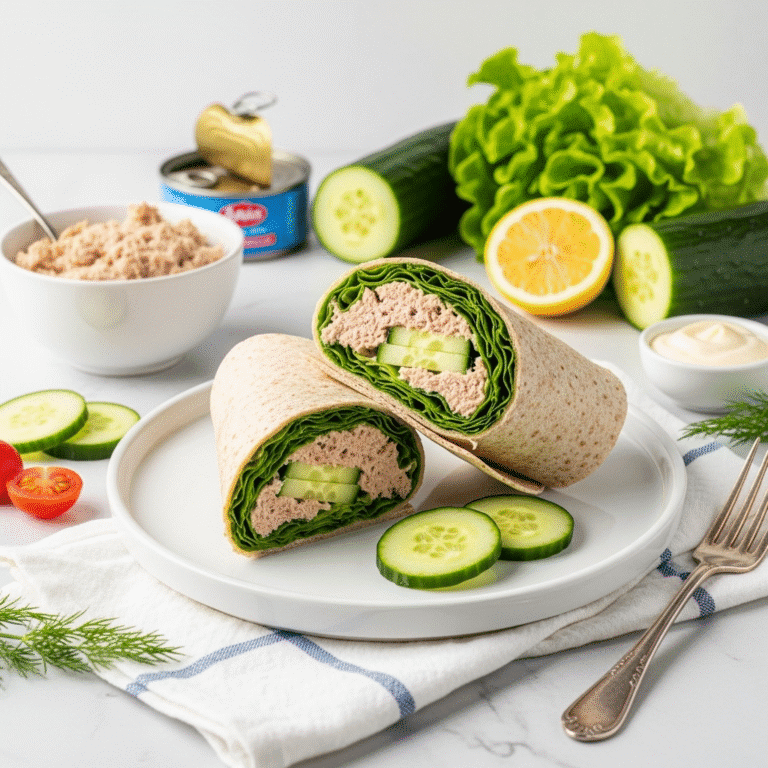
Tuna Cucumber Wrap Recipe
Easy tuna cucumber wrap with protein-rich tuna salad, crisp cucumber slices, and fresh greens wrapped in a soft tortilla. A refreshing, healthy lunch ready in just 10 minutes with no cooking required!
- Total Time: 10 minutes
- Yield: 2 wraps 1x
Ingredients
For the Tuna Salad:
- 1 can (5 ounces) tuna, drained (water or oil-packed)
- 3 tablespoons mayonnaise (or Greek yogurt, or combination)
- 1 teaspoon lemon juice
- ¼ teaspoon garlic powder
- ¼ teaspoon dried dill (or parsley)
- Salt and black pepper to taste
- Optional: 2 tablespoons finely diced celery
- Optional: 1 tablespoon finely diced red onion
For the Wraps:
- 2 large tortillas (10-12 inch, flour, whole wheat, or your choice)
- 1 medium cucumber, thinly sliced (about 20-24 slices)
- 2 cups lettuce or mixed greens
- Optional: ½ avocado, sliced
- Optional: ½ cup cherry tomatoes, halved
- Optional: 2 tablespoons shredded carrots
Instructions
Make the Tuna Salad:
- Drain the Tuna: Open the can of tuna and drain thoroughly. Press down with a fork or spoon to remove as much liquid as possible—excess liquid makes the tuna salad watery and wraps soggy. Transfer drained tuna to a medium mixing bowl.
- Flake the Tuna: Using a fork, break up the tuna into small, flaky pieces. You want it somewhat broken down but still with visible texture—not mushed into paste.
- Mix the Salad: Add mayonnaise (or Greek yogurt), lemon juice, garlic powder, dried dill, salt, and pepper to the bowl with tuna. Mix thoroughly with a fork until everything is evenly combined and creamy. If using celery or onion, add them now and stir to incorporate.
- Taste and Adjust: Taste the tuna salad and adjust seasonings as needed. Add more mayo if it seems dry, more lemon juice for brightness, or more salt and pepper for flavor. The tuna salad should be well-seasoned and flavorful!
Prepare the Vegetables:
- Prep the Cucumber: Wash the cucumber and slice it into thin rounds (about ⅛-inch thick). Place cucumber slices on paper towels and gently pat to remove excess moisture—this prevents soggy wraps!
- Prep the Lettuce: Wash lettuce or greens thoroughly and dry completely using a salad spinner or by patting with paper towels. Wet greens will make your wrap fall apart!
Assemble the Wraps:
- Warm the Tortilla (Optional): For easier rolling, warm tortillas for 10-15 seconds in the microwave (wrapped in a damp paper towel) or briefly in a dry skillet. This makes them more pliable.
- Lay Out Tortilla: Place one tortilla on a clean work surface or large plate.
- Add Lettuce: Arrange about 1 cup of lettuce in the center of the tortilla in a horizontal line, leaving 2-3 inches clear on each side and about 3 inches clear at the bottom edge.
- Add Tuna Salad: Spoon half of the tuna salad (about ⅓ to ½ cup) over the lettuce, spreading it in a line rather than a pile.
- Add Cucumber: Layer 10-12 cucumber slices over the tuna salad, slightly overlapping them.
- Add Optional Ingredients: If using avocado, tomatoes, carrots, or other add-ins, layer them now on top of the cucumber.
- Fold and Roll: Fold the bottom edge of the tortilla up and over the filling, pulling it tight to enclose the ingredients. Fold in the left and right sides, then continue rolling away from you, keeping tension so it stays tight. The final roll should seal at the top.
- Slice and Serve: Using a sharp knife, slice the wrap in half diagonally. Serve immediately, or wrap tightly in plastic wrap or parchment paper for later.
- Repeat: Make the second wrap with remaining ingredients.
Notes
- Tuna Drainage: Thoroughly draining tuna is crucial! Press down hard to remove all excess liquid, or your tuna salad will be watery.
- Mayo Amount: Start with 3 tablespoons and add more if needed. The tuna salad should be creamy but not soupy.
- Dry Vegetables: Pat cucumber and lettuce completely dry to prevent soggy wraps.
- Make it Lighter: Use Greek yogurt instead of mayo for fewer calories and more protein.
- Low-Carb: Use large lettuce leaves (butter lettuce or romaine) instead of tortillas.
- Storage: Tuna salad keeps in the fridge for 2-3 days. Assembled wraps are best eaten within 4-6 hours but can last up to 1 day refrigerated.
- Prep Time: 10 minutes
- Cook Time: 0 minutes
- Category: Wrap
- Method: No-Cook
- Cuisine: American
- Diet: Gluten Free
Nutrition
- Serving Size: 1 wrap
- Calories: 325
- Sugar: 3g
- Sodium: 580mg
- Fat: 14g
- Saturated Fat: 2g
- Unsaturated Fat: 11g
- Trans Fat: 0g
- Carbohydrates: 28g
- Fiber: 4g
- Protein: 22g
- Cholesterol: 35mg
Tips & Variations
Classic Tuna Celery: Add ½ cup finely diced celery and 2 tablespoons finely diced red onion to the tuna salad for traditional tuna salad sandwich flavors.
Mediterranean Style: Add diced Kalamata olives, diced tomatoes, crumbled feta cheese, and replace dill with oregano for Greek-inspired flavors.
Avocado Tuna: Mash half an avocado and mix it into the tuna salad in place of some mayo for healthy fats and creamy texture.
Spicy Tuna: Add sriracha or hot sauce to the tuna salad, use pepper jack cheese, and add sliced jalapeños for a spicy kick.
Asian-Inspired: Mix tuna with sesame oil, soy sauce, and a little mayo, then add shredded carrots, edamame, and top with sesame seeds.
Garden Veggie: Load up with extra vegetables—shredded carrots, bell peppers, sprouts, red onion, and more cucumber for maximum nutrition and crunch.
Egg & Tuna: Add chopped hard-boiled egg to the tuna salad for extra protein and richness.
Pickle Lovers: Mix pickle relish into the tuna salad and add pickle slices to the wrap for tangy, briny flavor throughout.
Lettuce Wrap: For ultra-low-carb, skip the tortilla and use large butter lettuce or romaine leaves as your “wrap.”
Caprese Tuna: Add sliced fresh mozzarella, fresh basil leaves, and cherry tomatoes for an Italian-inspired twist.
Pro Chef Tips
The Drainage Principle: Professional chefs know that thoroughly draining canned tuna is absolutely critical. After opening the can, press down firmly with a fork or the back of a spoon, tilting the can to let all liquid escape. Then, transfer tuna to a strainer and press again. This extra step removes up to 50% more liquid than just opening and draining, resulting in tuna salad that’s creamy rather than watery and wraps that stay intact.
Flake, Don’t Mash: When mixing tuna salad, use a fork to gently flake and combine—don’t mash it into paste. The texture should still show distinct pieces of tuna, creating a more interesting and restaurant-quality texture. Over-mixing creates a mushy, homogenous paste that’s less appealing.
Season in Stages: Professional cooks season each component individually. First, season the tuna itself with a pinch of salt and pepper before adding mayo. Then, add the other seasonings and taste. This ensures the tuna is well-seasoned throughout, not just the mayo coating.
The Acid Trick: Fresh lemon juice (or a splash of vinegar) is the secret ingredient that makes homemade tuna salad taste better than store-bought. The acid brightens all the flavors, cuts through the richness of mayo, and makes everything taste fresher. Don’t skip this crucial element!
Cucumber Prep Matters: Restaurant sandwich makers always remove excess moisture from cucumber before using it. After slicing, lay cucumber rounds on paper towels for 5 minutes—they’ll release water. Pat dry, then use. This simple step prevents soggy wraps and extends freshness by hours.
Temperature Awareness: Tuna salad tastes significantly better at cool room temperature rather than straight-from-the-fridge cold. The flavors are more pronounced and the texture is creamier. If making ahead, remove from refrigerator 10-15 minutes before eating for optimal flavor.
The Tight Roll Technique: The first fold is everything! After arranging ingredients, fold the bottom edge up and pull it TIGHT over the filling, tucking it under, before folding in the sides. This tension creates a compact wrap that holds together perfectly. Think of it like making a burrito—tension is key to structural integrity.
Common Mistakes to Avoid
Not Draining Tuna Thoroughly: The biggest mistake! Inadequately drained tuna releases liquid into the salad and wrap, creating a watery, unpleasant texture and causing wraps to fall apart. Always press down hard to remove every bit of liquid, and consider using a strainer for extra drainage. Those few extra seconds of draining make all the difference!
Using Too Much Mayo: Drowning tuna in mayonnaise makes the salad heavy, overly rich, and prone to making wraps soggy and messy. Start with less than you think you need—2-3 tablespoons per 5-ounce can. You can always add more, but you can’t take it away. The tuna should be lightly coated and creamy, not swimming in mayo.
Wet Vegetables: Adding freshly washed, still-dripping wet cucumber or lettuce guarantees a soggy, falling-apart wrap within an hour. Always dry vegetables thoroughly—use a salad spinner for lettuce, pat cucumber with paper towels. This one step is the difference between a wrap that holds together and one that disintegrates.
Over-Mixing the Tuna: Mashing and over-mixing tuna salad turns it into paste with no texture—unappetizing and mushy. Use a fork to gently combine ingredients, maintaining some flakiness and texture. The tuna should still be recognizable as fish, not transformed into a uniform spread.
Overfilling the Wrap: Piling too much filling makes wraps impossible to roll, causes ingredients to fall out when eating, and creates structural failure. Be generous but reasonable—about ⅓ to ½ cup tuna salad per wrap maximum, plus vegetables. You want a balanced bite, not an overstuffed disaster.
Cold Tortillas: Trying to roll cold, stiff tortillas from the refrigerator causes cracking and tearing. Always warm tortillas for 10-15 seconds before rolling—they become pliable, soft, and easy to work with. This takes virtually no time but prevents frustration and failed wraps.
Storage & Meal Prep
Tuna Salad Storage: The tuna salad component stores beautifully! Keep it in an airtight container in the refrigerator for 2-3 days. This makes it perfect for meal prep—make a batch on Sunday, then assemble fresh wraps throughout the week.
Assembled Wrap Storage: Assembled wraps can be stored wrapped tightly in plastic wrap or parchment paper in the refrigerator for 4-6 hours. They’re always best made fresh, but morning-made wraps for lunch are perfectly fine. Don’t store assembled wraps longer than 1 day—the vegetables soften and tortilla gets soggy.
Component Meal Prep Strategy (Best Approach): For optimal freshness and texture, store components separately:
- Tuna salad: Airtight container, 2-3 days
- Washed, dried lettuce: Wrapped in paper towels in container, 5-7 days
- Sliced cucumber: Store in container with paper towel, use within 2 days (or slice fresh daily)
- Tortillas: Room temperature or refrigerated
- Assemble: Takes just 2-3 minutes each morning
Lunchbox Packing: Pack wrapped wraps with an ice pack or in an insulated lunch bag. The tuna salad contains mayo, so it must stay cold for food safety. Don’t let wraps sit at room temperature for more than 2 hours.
Freezing Note: Do NOT freeze assembled tuna cucumber wraps. The cucumber becomes mushy and watery, the lettuce wilts completely, and mayo separates. The texture is ruined. Only freeze if you remove all vegetables first (freeze just tuna salad-filled tortilla).
Make-Ahead & Freezer Notes
Make-Ahead Success: Tuna salad is actually perfect for making ahead! Prepare it 1-3 days before using and store in an airtight container. The flavors meld and improve over time. Just keep vegetables separate and assemble wraps fresh.
Freezing Tuna Salad: While technically possible, freezing tuna salad with mayonnaise is not recommended. Mayo separates and becomes watery and grainy when thawed. The texture is significantly compromised. If you must freeze, consider making tuna salad with Greek yogurt instead (freezes slightly better) or freeze plain drained tuna and make salad fresh when needed.
Freezing Assembled Wraps: Unfortunately, assembled tuna cucumber wraps do NOT freeze well at all. The cucumber becomes soggy and limp, the lettuce wilts, and mayo separates. The result is unappetizing and unpleasant. Don’t freeze assembled wraps!
Best Prep Strategy: Make fresh tuna salad on Sunday (or Monday), store it refrigerated, and assemble wraps fresh each day. Each assembly takes under 3 minutes when tuna salad is ready. This gives you meal prep convenience with maximum freshness!
Alternative Approach: Buy several cans of tuna and store in your pantry. Making fresh tuna salad takes only 5 minutes, so you could make it fresh the morning you want wraps rather than making a big batch. Either approach works—it’s personal preference!
Serving Suggestions
Potato Chips or Crackers: Serve with sea salt kettle chips, pita chips, or whole grain crackers for satisfying crunch.
Fresh Fruit: Pair with apple slices, grapes, berries, melon, or orange segments for refreshing sweetness and balance.
Vegetable Sticks: Add carrot sticks, bell pepper strips, cherry tomatoes, and snap peas with hummus for extra vegetables.
Pickle Spear: Dill pickles or pickled vegetables add tangy, crunchy contrast to the creamy tuna.
Side Salad: A simple green salad or cucumber salad provides extra vegetables and freshness.
Soup Pairing: Serve with tomato soup, vegetable soup, or chicken noodle soup for a comforting lunch combo.
Cottage Cheese: A side of cottage cheese adds extra protein and pairs beautifully with tuna.
Hummus and Veggies: Hummus with raw vegetables makes a nutritious, protein-rich side.
Beverage Pairings: Serve with sparkling water (plain or flavored), iced tea (unsweetened or lightly sweetened), fresh lemonade, or for fitness-focused meals, a protein shake.
Hard-Boiled Eggs: Add extra protein with hard-boiled eggs on the side.
FAQs Section
Q: Can you make tuna cucumber wraps ahead of time?
A: Yes, but with guidelines! The tuna salad can (and should) be made 1-3 days ahead and stored refrigerated. Assembled wraps can be made up to 6 hours ahead, wrapped tightly, and refrigerated. However, they’re always best assembled fresh. For meal prep, prep the tuna salad in advance and assemble wraps fresh each morning—takes just 2-3 minutes!
Q: How do you keep tuna wraps from getting soggy?
A: Three essential steps: 1) Drain tuna thoroughly by pressing out all liquid; 2) Pat cucumber slices dry with paper towels after slicing; 3) Ensure lettuce is completely dry after washing. Also, don’t use excessive mayo—start with less. These steps keep wraps fresh for 6+ hours!
Q: Can you use Greek yogurt instead of mayo in tuna salad?
A: Absolutely! Greek yogurt is a fantastic substitute—it reduces calories and fat while adding protein and a tangy flavor. You can use it 100% in place of mayo, or do half mayo/half Greek yogurt for a balanced flavor. The texture is slightly different (less rich) but equally delicious and much healthier!
Q: What can I add to tuna to make it taste better?
A: Several flavor enhancers transform basic tuna: fresh lemon juice (essential!), garlic powder, dried dill or parsley, a pinch of salt and pepper, finely diced celery for crunch, pickle relish for tanginess, or capers for briny pops. The key is seasoning well—plain tuna and mayo is bland, but properly seasoned tuna salad is delicious!
Q: How long does tuna salad last in the fridge?
A: Properly stored in an airtight container, homemade tuna salad lasts 2-3 days in the refrigerator. After that, quality declines and food safety becomes a concern (mayo-based salads have limited shelf life). Always check for off smells before eating and discard if anything seems questionable.
Q: Is canned tuna healthy?
A: Yes! Canned tuna is an excellent source of lean protein (about 20g per 5-oz can), omega-3 fatty acids (especially albacore), vitamin D, and selenium. Choose water-packed for fewer calories, and look for “dolphin-safe” and sustainably caught options. For mercury concerns, limit to 2-3 servings per week, especially for pregnant women.
Q: Can you make tuna wraps without mayonnaise?
A: Definitely! Try Greek yogurt (tangy, high protein), mashed avocado (healthy fats, creamy), hummus (Mediterranean flavor), or a combination. Each creates a different flavor profile but still binds the tuna salad together. You can also use less mayo and add moisture with lemon juice or a splash of olive oil.
Conclusion
And there you have it—everything you need to make the most delicious, refreshing, protein-packed tuna cucumber wrap! While this recipe might seem incredibly simple on the surface, paying attention to the details—from thoroughly draining the tuna to properly preparing vegetables to rolling tightly—transforms a basic lunch into something genuinely satisfying and wholesome.
This easy tuna wrap recipe is proof that healthy eating doesn’t have to be complicated, time-consuming, or boring. With just 10 minutes and a handful of simple ingredients, you can create a lunch that’s nutritious, delicious, budget-friendly, and genuinely something to look forward to. It’s the kind of meal that makes healthy eating feel effortless rather than restrictive, and it proves you don’t need elaborate recipes to eat well!
Whether you’re making this healthy tuna cucumber lunch for weekly meal prep, quick weeknight dinners, post-workout nutrition, summer lunches, or simply because you’re craving something fresh and protein-rich, this tuna salad cucumber wrap delivers every single time. It’s light yet satisfying, simple yet flavorful, convenient yet wholesome—everything a great lunch should be!
Now it’s your turn to create your own perfect tuna cucumber wrap! I’d love to hear about your experience—did you try any of the variations? What’s your favorite way to season tuna salad? Did you add any creative extras? Share your thoughts, tips, and beautiful wrap photos in the comments below! Your feedback and creativity inspire other readers and help build our healthy cooking community.
Don’t forget to save this tuna cucumber wrap recipe to your Pinterest boards—pin it to “Healthy Lunch Ideas,” “Meal Prep Recipes,” “High-Protein Meals,” or “Easy Wrap Recipes” so you can find it whenever you need quick lunch inspiration. If you know someone who’s trying to eat healthier, looking for meal prep ideas, or loves simple nutritious recipes, share this article with them. And when you make your fresh, protein-packed, absolutely delicious wraps, snap a photo and tag me on social media—I absolutely love seeing your healthy creations!
Now go create your own refreshing lunch masterpiece—healthy eating never tasted so good!