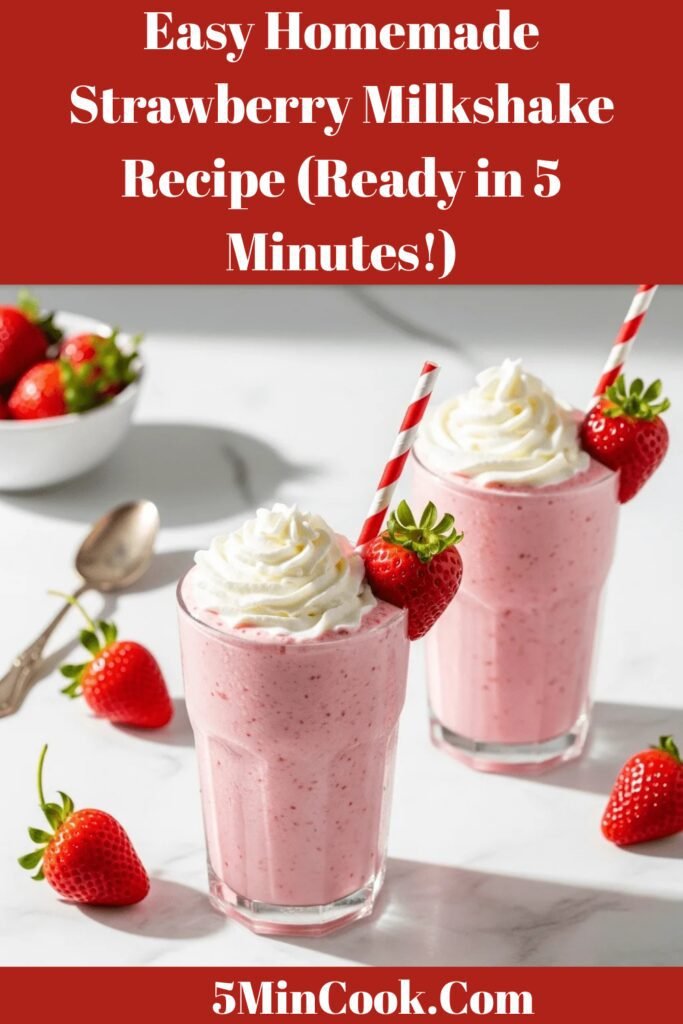
Easy Homemade Strawberry Milkshake Recipe (Ready in 5 Minutes!)
There’s something magical about a thick, creamy strawberry milkshake that instantly transports you back to childhood summers and diner counters. This homemade strawberry milkshake recipe captures that nostalgic sweetness with just four simple ingredients and five minutes of your time. Whether you’re craving a refreshing afternoon treat, looking for a fun dessert to make with the kids, or want to impress guests at your next backyard barbecue, this classic milkshake delivers every single time.
What makes this strawberry milkshake truly special is its versatility. You can whip it up as an after-school snack, serve it alongside birthday cake, or enjoy it as a sweet breakfast treat on lazy weekend mornings. The bright pink color and naturally sweet strawberry flavor make it a crowd-pleaser for all ages, and the creamy texture rivals anything you’d find at your favorite ice cream shop. Best of all, you control the ingredients, which means you can adjust the sweetness, thickness, and even sneak in some extra nutrition if you’d like.
This isn’t just any milkshake recipe—it’s the perfect balance of fresh strawberries, creamy vanilla ice cream, cold milk, and just a touch of sweetness. The result? A thick, sippable (or spoonable, depending on your preference!) milkshake that’s infinitely better than anything from a fast-food drive-through.
History / Background
The milkshake as we know it today has a fascinating evolution that spans more than a century. The term “milkshake” first appeared in the late 1800s, but back then, it referred to an alcoholic whiskey drink—a far cry from the family-friendly treat we enjoy today! It wasn’t until the early 1900s that milkshakes transformed into wholesome beverages made with chocolate, strawberry, or vanilla syrups mixed with milk.
The real game-changer came in 1922 when a Walgreens employee named Ivar “Pop” Coulson had a brilliant idea: add two scoops of ice cream to the traditional milkshake. This innovation created the thick, creamy consistency we associate with milkshakes today, and it quickly became a sensation across America. By the 1930s and 1940s, milkshakes had become a staple at soda fountains and diners nationwide, representing the quintessential American treat.
Strawberry milkshakes specifically gained popularity as strawberry ice cream became more widely available in the mid-20th century. The flavor represented freshness, summer, and a lighter alternative to chocolate. During the golden age of American diners in the 1950s and 1960s, strawberry milkshakes cemented their place in pop culture, appearing in movies, television shows, and becoming synonymous with teenage hangouts and wholesome family dining.
Today, the strawberry milkshake remains a beloved classic that connects us to simpler times. Making one at home has become even easier with modern blenders, yet the recipe has stayed remarkably true to its roots—proving that sometimes the classics really can’t be improved upon.
Why You’ll Love This Recipe
This homemade strawberry milkshake recipe is about to become your go-to dessert for so many reasons. Unlike complicated recipes that require specialty ingredients or advanced techniques, this one keeps things beautifully simple while delivering maximum flavor. You probably already have everything you need sitting in your kitchen right now!
Here’s why this recipe is a total winner:
- Lightning-fast preparation – From start to sipping, you’re looking at just 5 minutes of effort
- Minimal ingredients – Only 4 basic components create this delicious treat
- Kid-friendly and customizable – Perfect for picky eaters, and you can adjust sweetness to taste
- Budget-friendly indulgence – Costs a fraction of what you’d pay at an ice cream shop
- No special skills required – If you can press a button on a blender, you can make this
- Naturally gluten-free – Safe for those avoiding gluten (just check your ice cream labels)
- Perfect for hot summer days – A cooling, refreshing treat when temperatures soar
- Great for using up strawberries – Use fresh berries at their peak or frozen ones year-round
- Crowd-pleaser for all ages – From toddlers to grandparents, everyone loves this shake
- Easily doubled or tripled – Making milkshakes for a party? Just multiply the recipe
The beauty of this recipe lies in its foolproof nature. You really can’t mess it up, which makes it perfect for beginner cooks or for getting kids involved in the kitchen. It’s also endlessly adaptable—want it thicker? Add more ice cream. Prefer it thinner? Pour in extra milk. Craving more strawberry flavor? Toss in extra berries. This recipe gives you the perfect foundation to create your ideal milkshake every single time.
Ingredient Notes
Let’s break down exactly what goes into this delicious strawberry milkshake and why each ingredient matters. Understanding your ingredients helps you make smart substitutions and achieve the best possible results.
Strawberries: The star of the show! Fresh strawberries provide the most vibrant flavor and natural sweetness, especially when they’re in season during late spring and summer. Look for bright red berries with fresh green tops and a sweet aroma. However, frozen strawberries work beautifully year-round and are often more budget-friendly. If using frozen, there’s no need to thaw them first—they’ll actually help thicken your shake. You’ll need about 1 cup (approximately 8-10 medium strawberries). For substitutions, you can use strawberry preserves in a pinch (about 3-4 tablespoons), though fresh or frozen berries provide better nutrition and more authentic flavor.
Vanilla Ice Cream: This creates the signature creamy, thick texture that makes a milkshake a milkshake rather than just a smoothie. Use a high-quality vanilla ice cream for the best results—premium ice creams have more cream and less air, which means a richer shake. You’ll need about 2-3 generous scoops (approximately 1½ to 2 cups). The vanilla flavor complements the strawberries without competing with them. For substitutions, you can use strawberry ice cream for an extra-intense berry flavor, or try vanilla frozen yogurt for a tangier, slightly lighter version. Dairy-free? Coconut milk ice cream or almond milk ice cream work wonderfully.
Milk: This adjusts the consistency and makes your shake drinkable rather than spoonable. Whole milk creates the creamiest result, but 2% milk works perfectly fine and is what most people have on hand. You’ll need ½ to ¾ cup depending on your desired thickness. Start with less and add more as needed. For substitutions, any milk alternative works—almond milk, oat milk, cashew milk, or coconut milk all blend beautifully. Just note that non-dairy milks may create a slightly thinner consistency, so you might need to add an extra scoop of ice cream.
Sugar or Honey (Optional): Depending on the sweetness of your strawberries and your personal preference, you might want to add 1-2 tablespoons of granulated sugar, honey, or maple syrup. Taste your shake before adding sweetener—you might not need it at all! Ripe strawberries and sweet ice cream often provide plenty of sweetness on their own.
Vanilla Extract (Optional): Just ½ teaspoon enhances all the other flavors and adds depth to your shake. It’s not essential, but it does make a noticeable difference in the final taste.
Equipment Needed
The wonderful thing about making milkshakes at home is that you don’t need fancy equipment or gadgets. Here’s what you’ll need to whip up this delicious strawberry milkshake:
Blender: This is your most important tool. A standard countertop blender works perfectly—you don’t need anything expensive or high-powered. Even a basic blender will do the job in under a minute. If you have an immersion blender, you can technically use it, but a regular blender gives you better control and more even blending. High-powered blenders like Vitamix or Ninja will make extremely smooth shakes and can easily pulverize frozen berries, but honestly, any functional blender will work.
Measuring Cups: For accurately measuring your milk and ice cream. Liquid measuring cups work best for milk, while dry measuring cups are fine for scooping ice cream.
Measuring Spoons: If you’re adding optional sugar, honey, or vanilla extract.
Ice Cream Scoop: Makes portioning ice cream much easier and less messy. If you don’t have one, a large spoon works fine.
Tall Glasses: For serving your finished milkshake. Classic milkshake glasses or tall glasses (about 12-16 ounces) are ideal.
Straws: Thick, wide straws work best for sipping thick milkshakes. Paper or reusable straws both work great—just make sure they’re sturdy enough.
Knife and Cutting Board: For hulling and slicing fresh strawberries if you’re using them.
Rubber Spatula (Optional): Helpful for scraping down the sides of your blender and getting every last bit of milkshake out.
That’s truly all you need! No special equipment, no complicated tools—just the basics you probably already have in your kitchen.
Print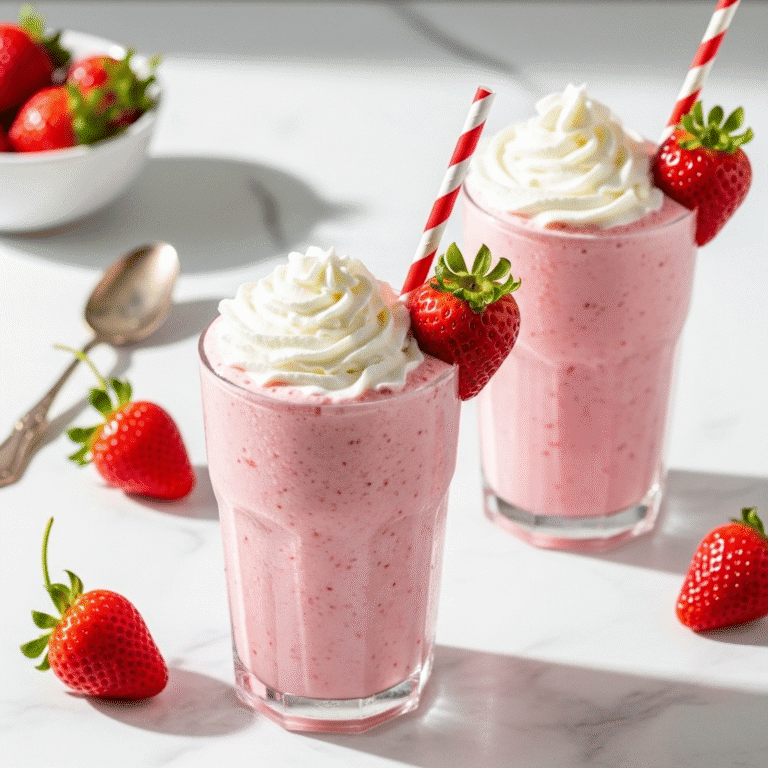
Homemade Strawberry Milkshake Recipe
This easy homemade strawberry milkshake recipe creates a thick, creamy, and perfectly sweet treat in just 5 minutes with only 4 simple ingredients. Better than any restaurant version, this classic milkshake is perfect for hot summer days, after-school snacks, or any time you’re craving something cool and delicious!
- Total Time: 5 minutes
- Yield: 2 servings 1x
Ingredients
- 1 cup fresh or frozen strawberries, hulled and halved (about 8-10 medium berries)
- 2-3 large scoops vanilla ice cream (about 1½ to 2 cups)
- ½ to ¾ cup whole milk (or milk of choice)
- 1-2 tablespoons granulated sugar or honey (optional, adjust to taste)
- ½ teaspoon vanilla extract (optional)
- Whipped cream, for topping (optional)
- Fresh strawberry slices, for garnish (optional)
Instructions
- Prepare the strawberries: If using fresh strawberries, rinse them under cold water, remove the green tops and stems, and cut them in half. If using frozen strawberries, you can add them directly to the blender without thawing.
- Add ingredients to blender: Place the strawberries in your blender first, followed by the vanilla ice cream. This layering helps the blending process go more smoothly. Add ½ cup of milk to start—you can always add more if needed.
- Add optional ingredients: If you’re using sugar, honey, or vanilla extract, add them now before blending.
- Blend until smooth: Start blending on low speed for a few seconds, then increase to medium-high speed. Blend for 30-45 seconds until the mixture is completely smooth and creamy with no chunks of strawberry or ice cream remaining. You should see a uniform pink color throughout.
- Check consistency: Stop the blender and check the thickness. If your milkshake is too thick to pour or drink through a straw, add 2-3 tablespoons more milk and blend for another 10-15 seconds. If it’s too thin, add another small scoop of ice cream and blend again.
- Taste and adjust: Give your milkshake a quick taste. If it needs more sweetness, add a tablespoon of sugar or honey and blend briefly to incorporate.
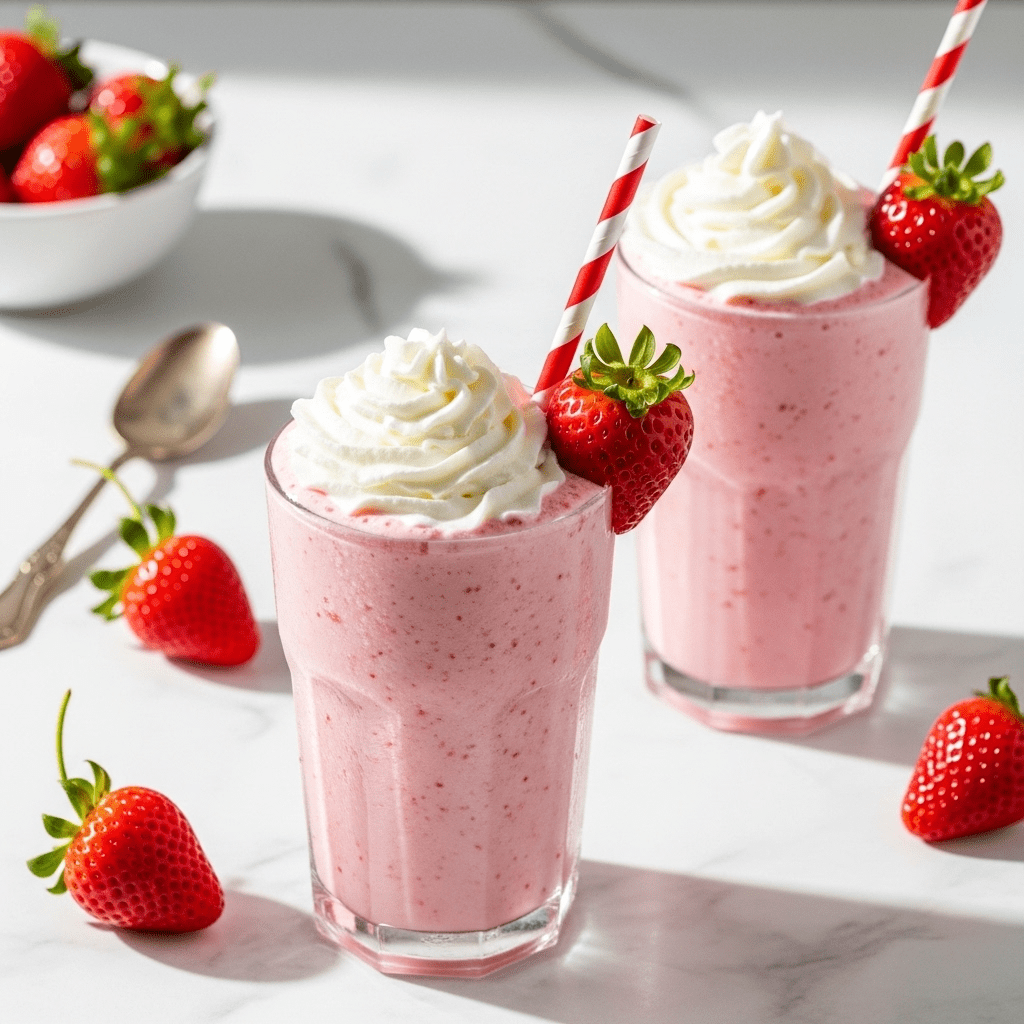
- Serve immediately: Pour the milkshake into tall glasses. Top with whipped cream and a fresh strawberry slice if desired. Serve with thick straws and enjoy right away while it’s cold and perfectly creamy!
Notes
- Thickness control: The ratio of ice cream to milk determines your shake’s thickness. For a thicker, spoon-style milkshake, use more ice cream and less milk. For a thinner, easier-to-sip version, increase the milk slightly.
- Sweetness adjustment: Always taste before adding extra sugar. Ripe strawberries and quality ice cream often provide plenty of sweetness. You can always add more, but you can’t take it away!
- Frozen vs. fresh berries: Both work beautifully! Frozen berries create a slightly thicker shake and are available year-round. Fresh berries provide brighter flavor when they’re in season.
- Make it ahead: Milkshakes are best enjoyed immediately, but if you need to wait, store in the freezer for up to 1 hour. Let it sit at room temperature for 5 minutes before serving and give it a quick stir.
- Scaling the recipe: This recipe easily doubles or triples for a crowd. Just blend in batches if your blender is small.
- Prep Time: 5 minutes
- Cook Time: 0 minutes
Nutrition
- Serving Size: 1 milkshake (approximately 12-14 oz)
- Calories: 285
- Sugar: 32g
- Sodium: 95mg
- Fat: 12g
- Saturated Fat: 7g
- Unsaturated Fat: 4g
- Trans Fat: 0g
- Carbohydrates: 38g
- Fiber: 2g
- Protein: 6g
- Cholesterol: 45mg
Tips & Variations
One of the best things about this strawberry milkshake recipe is how easily you can customize it to suit your taste preferences, dietary needs, or whatever ingredients you have on hand. Here are some delicious ways to mix things up:
Strawberry Banana Milkshake: Add half a ripe banana to the blender along with your strawberries. The banana adds natural sweetness and makes the shake even creamier. This combination is incredibly popular with kids and adds extra potassium and fiber.
Chocolate Strawberry Milkshake: Add 2 tablespoons of chocolate syrup or 1 tablespoon of cocoa powder for a chocolate-covered strawberry flavor. You can also use chocolate ice cream instead of vanilla for a double chocolate experience.
Strawberry Cheesecake Milkshake: Add 2-3 tablespoons of softened cream cheese to the blender for a tangy, cheesecake-inspired flavor. Add a few graham cracker crumbs on top for garnish to complete the effect.
Protein-Packed Version: Add a scoop of vanilla or strawberry protein powder to boost the protein content. This makes it more filling and turns it into a satisfying post-workout treat or breakfast shake.
Dairy-Free/Vegan Strawberry Milkshake: Use dairy-free ice cream (coconut, almond, or oat milk based) and your favorite non-dairy milk. The result is just as creamy and delicious!
Extra Thick Milkshake: Use 3 full scoops of ice cream and only ¼ cup of milk. This creates a super thick, almost soft-serve consistency that you’ll need to eat with a spoon.
Lighter Version: Swap half the ice cream for frozen banana and use low-fat milk. You can also use frozen yogurt instead of ice cream for fewer calories while maintaining creaminess.
Strawberry Basil Milkshake: Add 3-4 fresh basil leaves to the blender for a sophisticated, herb-infused twist. The combination of strawberry and basil is surprisingly delicious and refreshing.
Mixed Berry Milkshake: Replace half the strawberries with raspberries, blueberries, or blackberries for a mixed berry flavor profile. This adds complexity and different layers of berry flavor.
Pro Chef Tips
These professional insights will help you create the absolute best strawberry milkshake every single time:
Chill your glasses: Pop your serving glasses in the freezer for 10-15 minutes before making your milkshakes. This keeps them colder longer and prevents melting. It’s a simple trick that restaurants use to maintain that perfect frosty consistency.
Let ice cream soften slightly: Take your ice cream out of the freezer and let it sit at room temperature for about 5 minutes before using. Slightly softened ice cream blends more easily and creates a smoother texture without overworking your blender. You want it soft enough to scoop easily but not melting.
Layer ingredients strategically: Always add liquid (milk) first if your blender struggles with thick mixtures, or put strawberries at the bottom if you have a powerful blender. For most standard blenders, putting strawberries first helps them get chopped before the ice cream creates a thick barrier.
Don’t over-blend: Blend just until smooth and combined—usually 30-45 seconds maximum. Over-blending can make your milkshake too thin as the friction warms it up and melts the ice cream. You want it cold and thick, not soupy.
Use the pulse function: If you’re having trouble getting everything moving in the blender, use the pulse function a few times to break things up before going to continuous blending. This prevents the motor from straining and ensures even blending.
Taste as you go: Always taste your milkshake before serving. The sweetness of strawberries varies wildly depending on the season and variety. Adjust sweetness, vanilla, or thickness before pouring into glasses.
Add a pinch of salt: A tiny pinch of salt (just a few granules) enhances the strawberry flavor and makes everything taste brighter. This is a pastry chef secret that works wonders in sweet applications.
Quality ingredients matter: Use the best quality vanilla ice cream you can afford. Premium ice creams have higher butterfat content and less air, which creates a richer, creamier milkshake. The difference is absolutely noticeable.
Common Mistakes to Avoid
Even with such a simple recipe, there are a few pitfalls that can affect your final result. Here’s what to watch out for:
Using too much milk: The most common mistake is adding too much liquid, which turns your milkshake into a thin smoothie instead of a thick, creamy shake. Always start with less milk than you think you need—you can easily add more, but you can’t take it away. If you do accidentally add too much, simply add another scoop of ice cream to thicken it back up.
Blending too long: Over-blending generates heat through friction, which melts your ice cream and creates a thin, watery consistency. Blend just until smooth—usually 30-45 seconds is plenty. If you notice your shake getting thinner as you blend, stop immediately.
Using low-quality or expired ice cream: Ice cream that’s been in your freezer for months can develop ice crystals and an off flavor. It also tends to be harder to blend smoothly. Fresh, quality ice cream makes a noticeable difference in taste and texture. Check the expiration date and look for ice cream without visible ice crystals.
Not adjusting for frozen berries: Frozen strawberries add extra liquid as they melt and also make your shake colder and thicker. If using frozen berries, you’ll want to reduce your milk slightly and possibly skip any ice you might have added. Don’t use both frozen berries AND extra ice unless you want an extremely thick shake.
Forgetting to hull strawberries properly: Those green tops and white cores don’t blend well and can leave stringy bits in your shake. Take an extra minute to properly remove all the green parts and the tough white center core. Your smooth, perfect milkshake will thank you.
Serving in warm glasses: Putting a cold milkshake in a warm glass accelerates melting and dilutes the flavor. Always use chilled glasses or at minimum, room temperature ones. Never pour a milkshake into a glass that just came out of the dishwasher.
Not serving immediately: Milkshakes are meant to be enjoyed right away. The longer they sit, even in the freezer, the more they separate and lose their perfect texture. Make them right before you’re ready to drink them for the best experience.
Storage & Meal Prep
While milkshakes are absolutely best enjoyed fresh, there are times when you might need to store leftovers or plan ahead. Here’s what you need to know:
Immediate consumption is best: The ideal scenario is to make and drink your strawberry milkshake within 5-10 minutes of blending. This is when the texture is perfect and the flavors are at their brightest. The ice cream is still cold and creamy, and everything is perfectly incorporated.
Short-term storage (up to 2 hours): If you need to wait a bit before drinking, pour your milkshake into an airtight container or cover your glass tightly with plastic wrap and store it in the freezer. When you’re ready to enjoy it, let it sit at room temperature for about 5 minutes to soften slightly, then stir well before drinking. The texture won’t be quite as perfect, but it’s still delicious.
Refrigerator storage: You can store leftover milkshake in an airtight container in the refrigerator for up to 24 hours, but be warned—it will separate and become quite thin. The ice cream melts and the strawberry particles settle. If you go this route, give it a vigorous shake or quick blend before drinking to re-incorporate everything.
Reheating/Re-blending: If your stored milkshake has separated or become too thin, add a scoop of fresh ice cream and blend for 10-15 seconds. This brings back some of the original texture and temperature. You can also add a handful of ice cubes to thicken and chill it again.
Not ideal for meal prep: Unlike smoothies, milkshakes don’t make good meal prep items. The ice cream base simply doesn’t hold up well over time. However, you CAN prep your strawberries in advance by washing, hulling, and storing them in the refrigerator for up to 3 days, or freezing them in portioned bags for future use.
Make-Ahead & Freezer Notes
While fresh is always best for milkshakes, there are some strategies for planning ahead that can save you time:
Prep strawberries in advance: Wash, hull, and slice fresh strawberries, then store them in an airtight container in the refrigerator for up to 3 days. This way, they’re ready to toss in the blender at a moment’s notice. For longer storage, freeze prepared strawberries in single-layer on a baking sheet, then transfer to freezer bags once solid. They’ll keep for up to 6 months.
Freezing milkshakes: You can technically freeze blended milkshakes in freezer-safe containers for up to 1 month, but they’ll need significant work to bring back to drinkable consistency. They’ll freeze into a solid block that’s more like ice cream than a milkshake. To serve, let them thaw in the refrigerator for 20-30 minutes, then re-blend with a splash of fresh milk.
Create a milkshake station: Set up all your ingredients in an easy-to-access spot. Keep ice cream in the freezer (obviously!), strawberries prepped in the fridge, and milk nearby. This makes whipping up a quick milkshake super convenient when cravings hit.
Portion strawberries: If you buy strawberries in bulk, portion them into 1-cup servings in freezer bags. Freeze them flat so they stack nicely. When you want a milkshake, just grab one bag and blend—no measuring required.
Best reheating method: Since milkshakes are served cold, there’s no “reheating” per se. Instead, if you have a frozen milkshake, the best approach is to let it partially thaw in the refrigerator for 15-20 minutes, then transfer to a blender with a splash of fresh milk and pulse until smooth. This essentially makes a “new” milkshake but uses your frozen base.
Serving Suggestions
A strawberry milkshake is wonderful on its own, but pairing it with the right foods can create an even more memorable experience. Here are some delicious serving ideas:
Classic burger and fries: Nothing beats the iconic American diner combination of a thick milkshake with a juicy burger and crispy French fries. The cool, sweet shake perfectly balances the savory richness of the meal.
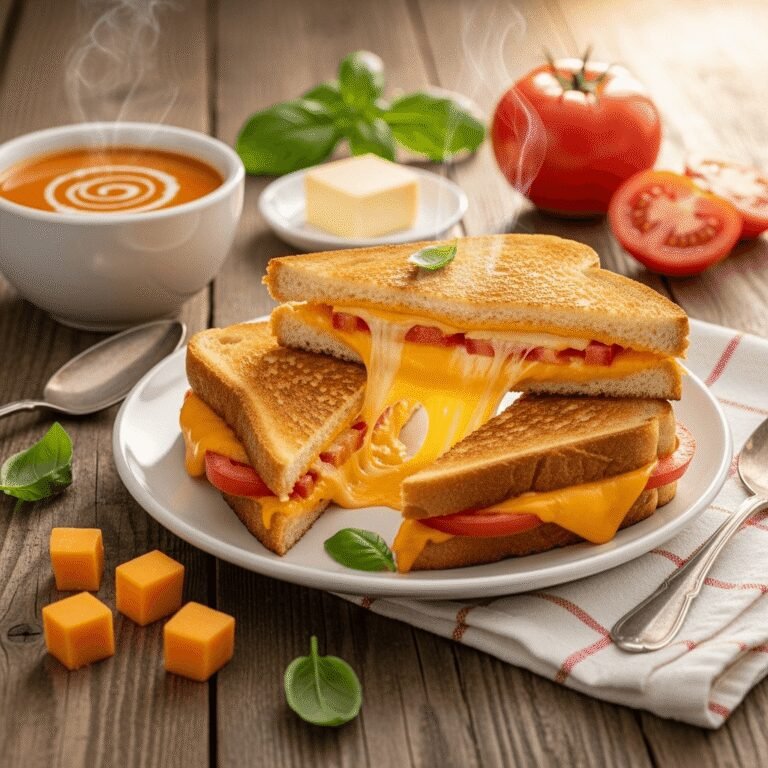
Grilled cheese sandwich: A creamy milkshake pairs surprisingly well with a crispy, gooey grilled cheese. The temperature contrast and flavor balance make this a comfort food dream team.
Pizza night: Serve strawberry milkshakes alongside homemade or takeout pizza for a fun family dinner. Kids especially love this combination, and it feels like a special treat.
Breakfast or brunch: Pair your milkshake with French toast, pancakes, or waffles for an indulgent weekend breakfast. The strawberry flavor complements maple syrup and buttery breakfast items beautifully.
BBQ and cookouts: Set up a milkshake bar at your next barbecue. Serve these strawberry shakes alongside grilled meats, potato salad, and coleslaw. They’re a refreshing dessert option that beats the heat.
Cookie accompaniment: Chocolate chip cookies, sugar cookies, or shortbread all pair wonderfully with strawberry milkshakes. Try dunking cookies into your shake for an extra-decadent treat.
Birthday parties: Skip the traditional cake and ice cream (or serve them alongside!) and offer strawberry milkshakes as part of the celebration. Kids and adults alike will love this fun twist.
Movie night: Serve these shakes during family movie night with popcorn and candy. The sweet treat makes any movie feel more special.
Toppings bar: Set out various toppings like whipped cream, chocolate chips, sprinkles, fresh berries, crushed cookies, and chocolate syrup. Let everyone customize their shake for a fun interactive dessert experience.
FAQs Section
Can I make a strawberry milkshake without ice cream?
Yes! While ice cream creates the traditional thick, creamy texture, you can make a delicious shake using frozen strawberries, frozen banana, milk (or yogurt), and a handful of ice cubes. Blend everything together until smooth. This creates more of a smoothie-shake hybrid that’s lighter and slightly healthier while still being thick and creamy. Another option is to use frozen yogurt instead of ice cream, which reduces calories while maintaining that frozen creaminess.
How do I make my milkshake thicker?
There are several ways to achieve an ultra-thick milkshake: Add more ice cream and less milk (start with 3 scoops ice cream and only ¼ cup milk), use frozen strawberries instead of fresh, add 2-3 ice cubes to the blender, or freeze your milkshake for 10-15 minutes after blending. You can also add a tablespoon of instant vanilla pudding mix, which thickens without changing the flavor. Finally, make sure you’re not over-blending, as this melts the ice cream and thins out your shake.
Can I use strawberry ice cream instead of vanilla?
Absolutely! Using strawberry ice cream creates an intensely strawberry-flavored shake. This is perfect if you want maximum berry flavor or if you’re using fewer fresh strawberries. Some people actually prefer this method because it guarantees a consistently strong strawberry taste regardless of how sweet your fresh berries are. You’ll get a pinker color and more pronounced strawberry flavor throughout.
Why is my milkshake separating?
Separation happens when the ingredients aren’t fully emulsified or when the shake sits too long. To prevent this, blend thoroughly until completely smooth (at least 30-45 seconds), serve immediately after blending, and make sure your ice cream isn’t too melted when you start. If your shake does separate, just give it a quick stir or reblend for 10 seconds. Adding a tiny bit of xanthan gum (about ⅛ teaspoon) can also help prevent separation if it’s a recurring problem.
Can I make this dairy-free or vegan?
Yes! Simply swap the regular ice cream for coconut milk ice cream, almond milk ice cream, or oat milk ice cream—all work beautifully. Use your favorite non-dairy milk (oat, almond, coconut, cashew, or soy all work great). The texture might be slightly less creamy depending on the brands you use, but the flavor will be just as delicious. Coconut milk ice cream tends to create the creamiest dairy-free version.
How long does a strawberry milkshake last?
Fresh is best—ideally, drink your milkshake within 10 minutes of making it. If absolutely necessary, you can store it in the freezer for up to 2 hours in an airtight container, but you’ll need to let it soften and stir it before drinking. In the refrigerator, it will keep for up to 24 hours but will separate and become thin—you’ll need to reblend with fresh ice cream. Milkshakes simply don’t have a long shelf life due to the ice cream base.
Can I add protein powder to make it healthier?
Definitely! Adding a scoop of vanilla, strawberry, or unflavored protein powder (about 20-30g) turns this into a high-protein treat that’s more filling and nutritious. Add the protein powder along with your other ingredients and blend thoroughly. You might need to add a tablespoon or two of extra milk since protein powder can thicken the shake. This makes it perfect as a post-workout recovery drink or a more substantial breakfast option.
Conclusion
There you have it—the ultimate guide to making the perfect homemade strawberry milkshake! This classic recipe proves that the best things in life really are simple. With just four basic ingredients and five minutes of your time, you can create a thick, creamy, restaurant-quality milkshake right in your own kitchen. No need for expensive trips to the ice cream shop when you can whip up something this delicious at home.
Whether you’re making this as an after-school treat for your kids, cooling down on a hot summer afternoon, or indulging in a sweet craving, this strawberry milkshake delivers pure happiness in a glass. The beautiful pink color, natural strawberry flavor, and velvety smooth texture make it irresistible to everyone who tries it. Plus, knowing exactly what goes into your milkshake means you can feel good about every sip.
Don’t forget to experiment with the variations and tips throughout this article—make it your own! Try the chocolate strawberry version, go dairy-free, boost the protein, or keep it classic. However you make it, I guarantee you’ll love the results.
Now it’s your turn! I’d love to hear how your strawberry milkshake turns out. Did you make any fun modifications? Serve it with a special meal? Drop a comment below and let me know! And if you loved this recipe as much as I do, please pin it to your favorite Pinterest board so you can find it again and share the milkshake love with your friends and family. Your kitchen is about to become the neighborhood milkshake destination—get ready!
Happy blending! 🍓🥛