Easy Raspberry Milkshake Recipe (Thick & Creamy!)
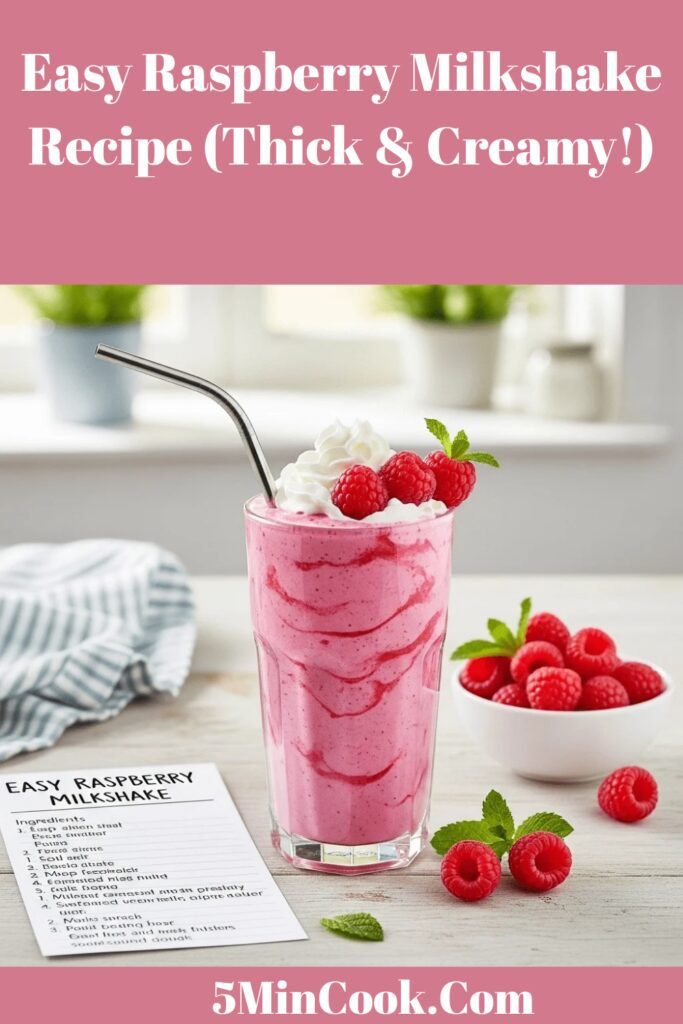
If you’re searching for the perfect pink-hued, berry-licious treat that captures summer in a glass, this raspberry milkshake recipe is exactly what you need. This thick, creamy, naturally sweet shake combines fresh or frozen raspberries with vanilla ice cream to create a dessert beverage that’s equal parts refreshing and indulgent. Whether you’re cooling down on a hot afternoon, treating the kids to a special snack, or serving up a fun beverage at your next gathering, this homemade raspberry milkshake delivers restaurant-quality results with minimal effort.
What sets this recipe apart is its gorgeous natural pink color (no artificial dyes needed!), its perfect balance of sweet and tart flavors, and its incredibly smooth, velvety texture. You can whip up this easy raspberry shake in just five minutes using simple ingredients you likely already have on hand. It’s perfect for celebrating berry season when raspberries are at their peak, but equally delicious year-round using frozen berries. Kids go absolutely wild for the bright color and sweet flavor, while adults appreciate the sophisticated berry taste that’s not overly sugary. Serve it as an after-dinner dessert, a mid-afternoon pick-me-up, or even as a fun breakfast treat on special occasions like birthdays or holidays.
History / Background
The milkshake’s journey from medicinal tonic to beloved dessert beverage is a fascinating slice of American culinary history. The term “milkshake” first appeared in print in 1885, initially referring to an alcoholic whiskey drink. By the early 1900s, milkshakes evolved into wholesome beverages made with milk, flavored syrups, and ice—more like what we’d call a malted milk today. The revolutionary moment came in 1922 when Walgreens employee Ivar “Pop” Coulson added ice cream to the mix, creating the thick, creamy milkshake that became an American icon.
The raspberry milkshake specifically has European roots intertwined with American innovation. Raspberries have been cultivated in Europe since the Middle Ages, with written records dating back to the 1500s. European settlers brought raspberry cultivation to North America in the 1700s, where the plants thrived in cooler climates from the Pacific Northwest to New England. By the mid-20th century, when American diner culture exploded, creative soda jerks began experimenting beyond the standard chocolate, vanilla, and strawberry trio.
Raspberry shakes gained particular popularity in the 1950s and 60s as frozen foods became more accessible to average American households. Home freezers meant families could stock frozen raspberries year-round, no longer restricted to the brief summer growing season. Ice cream parlors in berry-growing regions like Oregon, Washington, and upstate New York began featuring raspberry shakes as signature menu items, capitalizing on local pride in their raspberry harvests.
The aesthetic appeal of the raspberry milkshake cannot be understated—its natural pink-to-magenta color made it especially popular in the 1950s during the height of pink’s cultural moment, and later in the Instagram age where visually stunning foods reign supreme. Unlike strawberry shakes that sometimes turn an unappealing brown-pink, raspberry shakes maintain their jewel-toned vibrancy, making them perpetually Insta-worthy and Pinterest-perfect. Today’s health-conscious consumers also appreciate that raspberries pack serious nutritional punch—high in fiber, vitamin C, and antioxidants—giving this indulgent treat a slight health halo that makes it feel a bit less guilty than other desserts.
Why You’ll Love This Recipe
This thick raspberry milkshake checks all the boxes for what makes a recipe truly special: it’s incredibly simple to prepare, requires no cooking whatsoever, uses wholesome ingredients, and delivers impressive results that taste like they came from an upscale ice cream parlor. The natural tartness of raspberries balances beautifully with sweet vanilla ice cream, creating a complex flavor profile that’s sophisticated yet universally appealing.
Here’s why this recipe will become your new favorite summer staple:
- Ready in 5 minutes flat – One of the quickest desserts you’ll ever make, from ingredients to finished shake
- Naturally vibrant color – That gorgeous pink hue comes entirely from real raspberries, no artificial dyes needed
- Perfect sweet-tart balance – Raspberries provide natural tanginess that cuts through ice cream’s richness
- Incredibly versatile – Works beautifully with fresh or frozen berries, any season of the year
- Kid and adult approved – Children love the bright color and sweet taste; adults appreciate the sophisticated berry flavor
- No special skills required – If you can measure ingredients and press a blender button, you can make this
- Customizable thickness – Easily adjust consistency from thick and spoonable to thin and drinkable
- Budget-friendly treat – Costs significantly less than coffee shop or ice cream parlor shakes
- Impressive presentation – Looks fancy and special with minimal effort, perfect for entertaining
- Antioxidant boost – Raspberries are nutritional powerhouses packed with vitamins and fiber
- Dietary flexibility – Easily adaptable for dairy-free, vegan, or reduced-sugar diets
- Uses up berries – Perfect way to use raspberries before they go bad or clear out freezer space
Whether you’re an experienced home cook or a kitchen novice, this recipe guarantees success every time. There’s virtually no way to mess it up, and the result is always a creamy, dreamy shake that brings smiles to everyone who tries it.
Ingredient Notes
The magic of this fresh raspberry milkshake lies in its simplicity—just a handful of quality ingredients create something truly spectacular. Understanding each component helps you make smart substitutions and achieve perfect results every time:
Fresh or Frozen Raspberries – The star ingredient that gives this shake its signature flavor, color, and nutritional benefits. Fresh raspberries work beautifully during peak season (June through October in most areas) when they’re sweetest and most affordable. Look for berries that are deeply colored, plump, and firm without any mushiness or mold. However, frozen raspberries are equally delicious and often more practical—they’re picked at peak ripeness and flash-frozen to preserve nutrients and flavor. Frozen berries also create an extra-thick, frosty shake automatically without needing additional ice. One 12-ounce bag of frozen raspberries equals about 2 cups. If using fresh berries, don’t wash them until right before use to prevent premature spoiling. You can also use a raspberry blend (raspberries mixed with blackberries or strawberries) for a mixed berry shake variation.
Vanilla Ice Cream – This provides the creamy, decadent base that transforms simple fruit into a milkshake. Full-fat, premium vanilla ice cream creates the richest, most luxurious texture—brands like Häagen-Dazs, Ben & Jerry’s, or Tillamook work exceptionally well due to their higher butterfat content and minimal air incorporation. However, standard grocery store brands (like Breyers or Turkey Hill) work perfectly fine for everyday shakes. Avoid “frozen dairy dessert” products, as they contain less dairy and more air, resulting in less creamy shakes. French vanilla ice cream adds extra richness with egg custard, while vanilla bean provides visual appeal with those charming black specks. For a fun twist, try raspberry swirl ice cream or strawberry ice cream to intensify the berry flavor. The ice cream should be solid from the freezer but not rock-hard—letting it sit for 2-3 minutes at room temperature makes scooping easier.
Milk – This controls your shake’s consistency and makes blending easier by providing liquid to get things moving. Whole milk creates the creamiest, most indulgent result with a smooth mouthfeel, but 2%, 1%, or even skim milk all work depending on your dietary preferences. For extra decadence, substitute some of the milk with heavy cream or half-and-half. Dairy-free alternatives work beautifully too—oat milk provides the creamiest texture closest to dairy milk, while almond milk offers a lighter option. Coconut milk (from a carton, not canned) adds subtle tropical notes that complement raspberries nicely. Always start with less milk than you think you’ll need; it’s easy to add more but impossible to remove if you’ve made the shake too thin.
Sugar or Honey (Optional) – Raspberries are naturally tart, so you may want to add sweetener depending on your berries’ ripeness and your personal taste preferences. Granulated white sugar dissolves quickly and provides clean sweetness. Honey adds floral complexity that pairs beautifully with berries. Maple syrup contributes depth and works perfectly in dairy-free versions. Agave nectar dissolves instantly and has a milder flavor. For zero-calorie options, stevia or monk fruit sweetener work well. Always taste your berries first—if they’re very sweet, you might not need any additional sugar at all. You can also use vanilla-flavored sweetened condensed milk for both sweetness and extra creaminess.
Vanilla Extract (Optional) – A small splash enhances all the other flavors and adds aromatic depth. Pure vanilla extract is worth the investment for superior flavor, though imitation vanilla works in a pinch. Some cooks also like adding a tiny drop of almond extract (just ¼ teaspoon) which has a natural affinity with raspberries.
Ice Cubes (Optional) – If using fresh (not frozen) raspberries, adding 4-5 ice cubes creates that essential frosty, thick texture you want in a proper milkshake. Skip the ice if using frozen berries.
Equipment Needed
Making this creamy raspberry shake requires minimal equipment, most of which you probably already own:
- High-powered blender – The essential tool for smooth, lump-free milkshakes. High-performance blenders (Vitamix, Blendtec, Ninja) make quick work of frozen fruit and create ultra-smooth textures. Standard blenders work too; just blend a bit longer and be patient. Immersion blenders don’t work well for milkshakes—you need a traditional countertop blender with enough power to crush ice and frozen berries.
- Measuring cups – Both liquid (glass with a pour spout) and dry measuring cups for accurate ingredient portions. You’ll primarily use 1-cup and ½-cup measures.
- Measuring spoons – For vanilla extract and optional sweeteners (tablespoon and teaspoon sizes).
- Fine-mesh strainer (optional but recommended) – Raspberries contain tiny seeds that some people find unpleasant. Straining your shake creates a silky-smooth, seed-free texture that’s more elegant and easier to drink through a straw. This step is optional but worth it for special occasions.
- Ice cream scoop – Makes portioning ice cream faster and less messy than using spoons.
- Rubber spatula – Essential for scraping down blender sides and ensuring all ingredients get fully incorporated.
- Tall glasses – Classic diner-style fountain glasses, pint glasses, or large mason jars all work beautifully for serving. Pre-chill glasses in the freezer for 15 minutes before serving for an extra-frosty presentation.
- Wide straws – Standard straws are too narrow for thick milkshakes; use wide boba-style straws or thick smoothie straws.
- Long spoons – Iced tea spoons or sundae spoons help you reach the bottom of tall glasses.
Optional but helpful:
- Berry huller tool for prepping fresh raspberries
- Squeeze bottle for artful drizzle decorations
- Piping bag with star tip for fancy whipped cream swirls

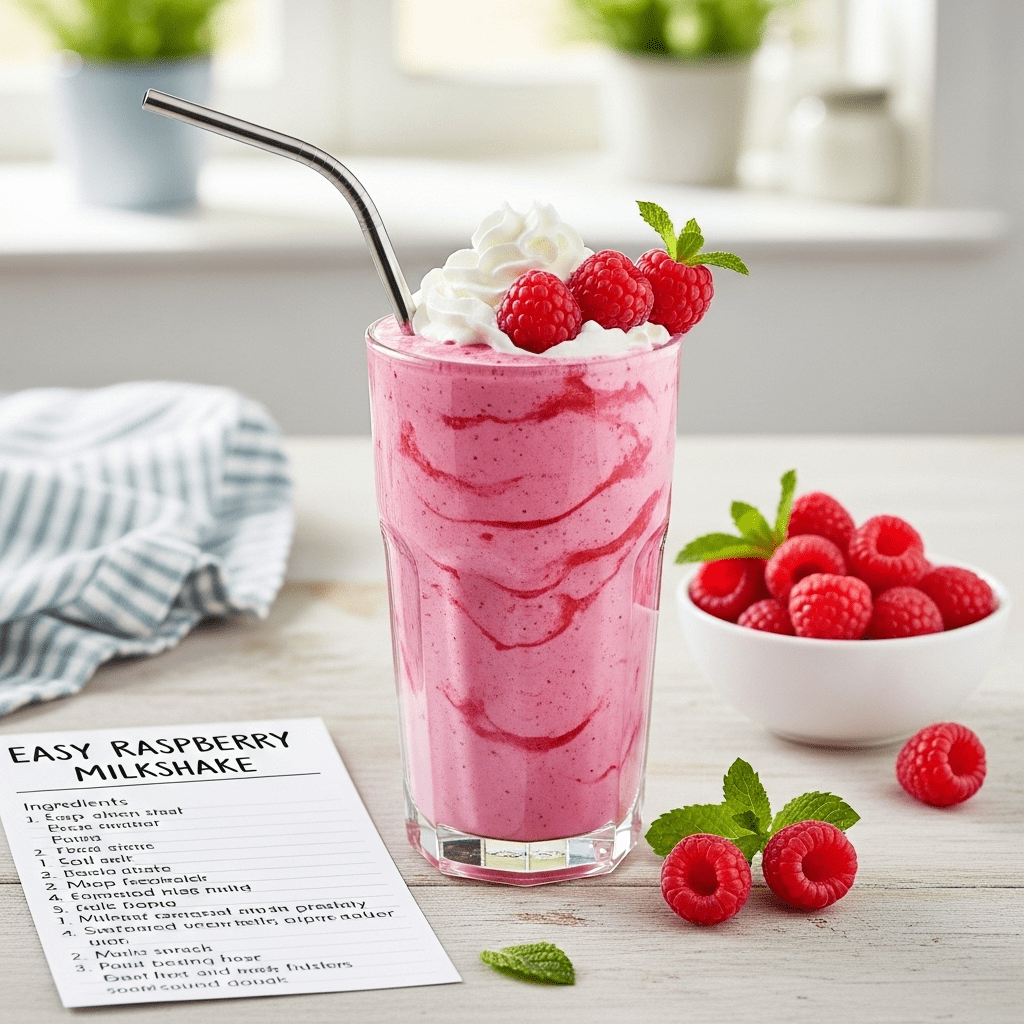
Raspberry Milkshake Recipe
This thick, creamy raspberry milkshake combines fresh or frozen raspberries with vanilla ice cream for a naturally pink, refreshingly tart-sweet treat. Ready in just 5 minutes, this easy homemade shake requires no special equipment and tastes better than anything from an ice cream shop.
- Total Time: 5 minutes
- Yield: 2 servings 1x
Ingredients
- 1½ cups fresh or frozen raspberries (about 6 ounces)
- 3 large scoops (about 1½ cups) vanilla ice cream
- ½ cup whole milk (adjust for desired thickness)
- 1-2 tablespoons sugar or honey (optional, taste berries first)
- ½ teaspoon pure vanilla extract (optional)
- 4-5 ice cubes (only if using fresh raspberries)
- Whipped cream, for topping (optional)
- Fresh raspberries, for garnish (optional)
- Mint leaves, for garnish (optional)
Instructions
- Prepare the raspberries: If using fresh raspberries, rinse them gently under cold water and pat dry with paper towels. Pick through and remove any mushy or moldy berries. If using frozen raspberries, measure them straight from the freezer—no thawing needed. For a completely smooth, seed-free shake, you can press raspberries through a fine-mesh strainer after rinsing to create a seedless puree (this step is optional but creates a more refined texture).
- Combine ingredients in blender: Add raspberries to your blender first, followed by the ice cream scoops, then milk. This layering helps create a proper blending vortex. Add optional vanilla extract and sweetener if using. If you’re using fresh (not frozen) raspberries, add 4-5 ice cubes to achieve that essential thick, frosty texture.
- Blend until smooth: Start blending on low speed to break everything up, then gradually increase to medium-high speed. Blend for 30-60 seconds until completely smooth with no visible berry chunks. If the mixture is too thick and not blending properly, stop and add milk 1 tablespoon at a time, then resume blending. If it’s too thin, add another small scoop of ice cream or a handful of frozen berries.
- Taste and adjust: Stop the blender and taste your shake. This is crucial because raspberry sweetness varies significantly by batch. If it’s too tart, add another tablespoon of sugar or honey and blend for 10 more seconds. If it’s perfect, proceed to straining (optional).
- Strain for smoothness (optional): For an ultra-smooth, seed-free shake, pour the mixture through a fine-mesh strainer into a large measuring cup or bowl, pressing with a rubber spatula to push the liquid through while leaving seeds behind. This step removes raspberry seeds for a more elegant, refined texture. If you don’t mind seeds (they add fiber!), skip this step.
- Serve immediately: Pour the raspberry milkshake into tall, pre-chilled glasses. The shake should be thick and creamy with a beautiful pink-to-magenta color. Top with a generous swirl of whipped cream if desired, garnish with a few fresh raspberries and a small mint sprig for a stunning presentation.
- Add finishing touches: Insert wide straws and long spoons. For extra flair, drizzle raspberry syrup or chocolate sauce over the whipped cream, or dust with a tiny pinch of freeze-dried raspberry powder for intense color. Serve immediately for best texture.
Notes
- Fresh vs. frozen berries: Frozen raspberries create a thicker, frostier shake automatically and are often sweeter than fresh off-season berries. Fresh berries provide slightly brighter flavor during peak season.
- Seed-free option: Straining removes seeds for silky-smooth texture, but you’ll lose about 15-20% of your volume. Make extra if serving guests.
- Thickness control: Start with less milk (even just ¼ cup) and add gradually. Every blender and ice cream brand is different.
- Sweetness varies wildly: Always taste your berries and the blended shake before finalizing. Some raspberries are candy-sweet; others are mouth-puckeringly tart.
- Adult version: Add 1-2 ounces of Chambord (raspberry liqueur), vodka, or vanilla rum for a boozy treat.
- Dairy-free adaptation: Use coconut milk ice cream or cashew-based ice cream with oat milk for completely dairy-free results.
- Color enhancement: A tiny drop of natural red food coloring intensifies the pink hue, though it’s unnecessary with quality raspberries.
- Prep Time: 5 minutes
- Cook Time: 0 minutes
Nutrition
- Serving Size: 1 milkshake (½ of recipe)
- Calories: 395
- Sugar: 48g
- Sodium: 98mg
- Fat: 16g
- Saturated Fat: 10g
- Unsaturated Fat: 5g
- Trans Fat: 0g
- Carbohydrates: 58g
- Fiber: 6g
- Protein: 8g
- Cholesterol: 60mg
Tips & Variations
The beauty of this homemade raspberry milkshake is its adaptability. Here are creative ways to customize it for different tastes, occasions, and dietary needs:
Flavor Variations:
- Raspberry Cheesecake Shake: Add 2 tablespoons of softened cream cheese and ¼ cup graham cracker crumbs, blend until smooth, then top with more crumbs
- Chocolate Raspberry Shake: Use chocolate ice cream instead of vanilla, or add 2 tablespoons chocolate syrup for a decadent chocolate-berry combination
- Raspberry Lemonade Shake: Add 2 tablespoons fresh lemon juice and 1 teaspoon lemon zest for a tangy, refreshing twist
- Triple Berry Blast: Mix raspberries with strawberries and blueberries (½ cup each) for a complex berry flavor
- Raspberry Coconut Dream: Use coconut milk and add ¼ teaspoon coconut extract for tropical vibes
- Raspberry Mint Cooler: Add 5-6 fresh mint leaves before blending for a refreshing herbal note
Healthier Modifications:
- Replace ice cream with frozen banana slices and Greek yogurt for a protein-packed smoothie version
- Use low-fat frozen yogurt or “light” ice cream to reduce calories and fat
- Sweeten only with dates (3-4 pitted Medjool dates) for natural, fiber-rich sweetness
- Add a scoop of vanilla protein powder for a post-workout recovery shake
- Sneak in a handful of baby spinach (you won’t taste it, but you’ll get extra nutrients!)
- Use unsweetened almond milk and stevia for a low-carb, keto-friendly adaptation
Texture Variations:
- Extra thick: Use only ¼ cup milk and eat with a spoon like soft-serve
- Smoothie-style: Add an extra ½ cup milk for a thinner, more drinkable consistency
- Frozen treat: Pour into popsicle molds and freeze for homemade raspberry ice pops
- Milkshake float: Pour shake over a scoop of vanilla ice cream in a glass for extra indulgence
Fun Add-Ins:
- White chocolate chips or dark chocolate chips for textural interest
- A tablespoon of peanut butter or almond butter for protein and richness
- Crushed freeze-dried raspberries stirred in after blending for intense berry flavor and fun texture
- A pinch of cardamom or a drop of rose water for sophisticated, exotic flair
- Fresh basil leaves (sounds weird, tastes amazing with berries!)
Pro Chef Tips
Elevate your raspberry milkshake recipe from good to absolutely extraordinary with these professional techniques:
Intensify Berry Flavor: For the most concentrated raspberry taste, make a quick raspberry reduction before blending. Simmer 1 cup raspberries with 2 tablespoons sugar for 5 minutes until thick and syrupy, cool completely, then use this instead of plain berries. This concentrates the flavor dramatically while reducing seeds. You can make batches of this and freeze in ice cube trays for future shakes.
The Two-Temperature Technique: Let your ice cream soften at room temperature for 3-5 minutes before scooping, but keep your berries frozen solid. This makes blending easier without requiring excess milk (which waters down flavor). Softened ice cream blends smoothly while frozen berries keep everything frosty and thick.
Strain Like a Pro: If removing seeds, place your strainer over a large measuring cup and work in batches. Use the back of a ladle to press the mixture through in circular motions—this is faster and more effective than a spatula. Scrape the bottom of the strainer frequently where smooth puree accumulates.
Balance Sweet and Tart: Professional pastry chefs use a “three-taste” rule—taste the berries raw, taste the blended shake before sweetening, then add sugar incrementally, tasting after each addition. This prevents over-sweetening and helps you find that perfect sweet-tart balance that makes raspberry shakes so crave-worthy.
Create Professional Layers: For Instagram-worthy presentation, blend your shake without berries first (just ice cream and milk), pour halfway into glasses, add a layer of fresh whole raspberries, then top with the full raspberry shake blend. This creates beautiful visible berry layers.
Master the Blending Order: Always add liquid first, then soft ingredients (ice cream), then hardest ingredients (frozen fruit) on top. This creates a vortex that pulls everything toward the blades for faster, more efficient blending. Pulse 3-4 times initially to break up large chunks, then blend continuously.
Control Temperature for Texture: The ideal milkshake temperature is 25-28°F—cold enough to be frosty but not so frozen that it’s difficult to drink. If your shake is too frozen, let it sit for 2-3 minutes; if too melty, stick it in the freezer for 5 minutes before serving.
Restaurant-Style Garnishing: Dip the rim of your glass in corn syrup, then in crushed freeze-dried raspberries or pink sanding sugar. Freeze the prepared glasses for 10 minutes. This creates a beautiful, professional-looking rim that adds extra flavor and visual appeal.
Common Mistakes to Avoid
Even with such a straightforward recipe, there are pitfalls that can compromise your thick raspberry milkshake. Here’s what to watch for:
1. Using old, freezer-burned berries: Frozen raspberries that have been in your freezer for over 6 months or have visible ice crystals lose flavor and develop off-tastes. Always check dates on frozen berry bags and use the oldest packages first. Fresh berries should be firm, never mushy or leaking juice. Moldy berries will ruin your entire batch—inspect carefully and discard any questionable ones. For best results, use frozen berries within 3-4 months of purchase and fresh berries within 2-3 days of buying.
2. Over-blending and melting the shake: Blending for more than 60-90 seconds creates friction heat that melts your ice cream, resulting in a thin, watery shake. As soon as you no longer see chunks and the mixture looks uniform, stop immediately. If you need more blending time, work in short 10-15 second bursts with breaks in between to prevent warming. Some people blend for 2-3 minutes thinking it will get smoother, but you’re actually making it worse.
3. Adding all the milk at once: This is the number one reason for thin, soupy shakes. Start with just ¼ cup of milk, blend, assess, then add more tablespoon by tablespoon. Different blenders, ice cream brands, and berry moisture contents all affect how much liquid you need. You can always thin a thick shake, but you can’t un-thin a watery one without adding more ice cream (which throws off your berry-to-cream ratio and flavor balance).
4. Forgetting to taste and adjust sweetness: Raspberry sweetness varies dramatically based on variety, growing conditions, and harvest time. One batch might be perfectly sweet; the next might be mouth-puckeringly tart. Always taste your raw berries and your blended shake before considering it finished. Don’t skip this step—the difference between good and great is proper seasoning (in this case, sweetening).
5. Using the wrong strainer or straining incorrectly: If you choose to remove seeds, using a strainer with holes that are too large lets seeds through, while holes too small clog immediately and take forever. Fine-mesh strainers (the kind used for tea) work perfectly. Also, don’t just pour and wait—you need to actively press with a spatula or ladle to push liquid through. Many people give up after 30 seconds when it really takes 2-3 minutes of active pressing to strain properly.
6. Serving in warm glasses: Pouring a frozen shake into a room-temperature glass causes immediate melting around the edges, which then dilutes your shake as you drink. Always pre-chill glasses in the freezer for at least 15 minutes, or keep a set of glasses in the freezer specifically for shakes and smoothies.
Storage & Meal Prep
While this fresh raspberry shake is absolutely best consumed immediately after blending, life happens and sometimes you need to store leftovers:
Immediate Storage: Pour any leftover milkshake into an airtight container (mason jars work great), leaving about ½ inch space at the top for expansion. Press plastic wrap directly onto the surface to prevent ice crystals from forming, seal tightly, and freeze for up to 1 week. The texture won’t be quite as smooth and creamy after freezing and re-thawing, but it’s still enjoyable. When ready to drink, let it sit at room temperature for 15-20 minutes until it reaches a scoopable soft-serve consistency, then either enjoy with a spoon or quickly re-blend with a splash of fresh milk to restore drinkable consistency.
Refrigeration (Not Recommended): Milkshakes don’t refrigerate well because the ice cream melts, separates, and creates an unappetizing watery layer. If you absolutely must refrigerate, store in a sealed container for no more than 2-3 hours maximum. Shake or stir vigorously before drinking, though the texture will be compromised and more smoothie-like than milkshake-like.
Component Storage: The smartest prep-ahead approach is storing components separately. Frozen raspberries keep for 8-10 months in the freezer in airtight bags or containers. You can even pre-portion them into 1½-cup servings in small freezer bags for grab-and-go convenience. Ice cream stays fresh for 1-2 months (though quality decreases over time as ice crystals form). Pre-measure optional sweeteners and flavorings into small containers so you can dump everything into your blender quickly.
Prepared Raspberry Puree: If you’re making seed-free shakes regularly, prepare a large batch of strained raspberry puree and freeze it in ice cube trays. Once frozen, transfer raspberry cubes to a freezer bag. Use 8-10 raspberry cubes per shake instead of whole berries—this saves straining time and creates ultra-smooth results. This puree keeps for 3-4 months frozen.
Make-Ahead & Freezer Notes
Planning ahead makes enjoying this easy raspberry milkshake even more convenient:
Freezer Shake Kits: Create ready-to-blend “milkshake kits” by portioning raspberries, pre-scooped ice cream balls, and any optional mix-ins into individual large freezer bags. Label with contents and date. When you want a shake, dump the frozen kit into your blender, add milk, and blend. These prep kits last 2-3 months and make shake-making almost instant. This is especially great for kids who can make their own shakes safely.
Raspberry Puree Cubes: As mentioned earlier, make a big batch of strained raspberry puree during peak berry season when raspberries are cheap. Freeze in ice cube trays, then store cubes in freezer bags. Each cube is roughly 2 tablespoons, so you’ll need about 6 cubes per shake. This method gives you year-round access to peak-season flavor and eliminates the straining step when you’re in a hurry.
Ice Cream Portion Control: Scoop ice cream into individual ¾-cup portions on a parchment-lined baking sheet. Freeze until solid (about 1 hour), then transfer to freezer bags. This prevents the entire ice cream container from softening every time you make a shake and makes measuring foolproof.
Berry Season Bulk Prep: When raspberries are in season and inexpensive (usually June-August), buy extra and freeze them yourself for better quality than most store-bought frozen berries. Spread fresh berries in a single layer on a parchment-lined baking sheet, freeze until solid (2-3 hours), then transfer to freezer bags. This prevents berries from freezing in one solid clump and preserves flavor better than commercially frozen options.
Best Thawing/Blending Method: If you’ve frozen complete prepared shakes, don’t microwave them—it creates hot spots and uneven melting. Instead, let them sit at room temperature for 20-30 minutes until you can break them up with a spoon, then transfer to your blender with 2-3 tablespoons fresh milk and pulse until smooth. Alternatively, enjoy them semi-frozen with a spoon like gelato—many people actually prefer this texture!
Party Planning Strategy: Hosting a gathering? Prepare a double or triple batch of the shake mixture (berries and ice cream only, no milk yet) and freeze in a large container. About 45 minutes before serving, remove from freezer and let soften slightly. Blend in batches, adding milk as needed to each batch. This lets you serve fresh shakes to a crowd without spending the entire party at the blender.
Serving Suggestions
This creamy raspberry milkshake is delicious solo, but pairing it thoughtfully with complementary foods creates a complete experience:
Classic Pairings:
- Warm brownies or blondies straight from the oven—the temperature contrast is spectacular
- Buttery shortbread cookies or lemon bars for an elegant dessert duo
- Fresh-baked chocolate chip cookies or oatmeal cookies for dunking
- A slice of angel food cake or pound cake with fresh berries
- Vanilla wafers or graham crackers for a lighter accompaniment
Breakfast & Brunch:
- Alongside fluffy buttermilk pancakes or Belgian waffles with berry compote
- With a fruit and cheese board featuring mild cheeses like brie, mascarpone, or fresh goat cheese
- After savory breakfast items like bacon, egg, and cheese sandwiches (sweet-savory balance)
- As part of a special occasion brunch spread with quiche and fresh fruit salad
Summer Gatherings:
- Following a backyard BBQ with grilled burgers, hot dogs, and corn on the cob
- At pool parties or beach picnics as a refreshing afternoon treat
- After a fish fry or seafood boil for a light, cooling dessert
- During outdoor movie nights with popcorn and other snacks
Casual Meals:
- With pizza (especially cheese or margherita) for a fun family dinner dessert
- After mac and cheese or grilled cheese sandwiches—kids love this combo
- Following a light summer salad lunch for a sweet finishing touch
- With finger foods like mini sliders, chicken nuggets, or mozzarella sticks at casual parties
Sophisticated Pairings:
- After a cheese course featuring aged cheeses and fresh fruit
- With petit fours, madeleines, or other delicate French pastries
- Alongside a chocolate tasting with different cacao percentages
- As a palate cleanser between dinner courses (served in small portions)
Beverage Companions:
- Hot coffee or espresso for a sweet-bitter contrast
- Iced tea (sweetened or unsweetened) for a full Southern-style experience
- Sparkling water with lemon to cleanse the palate between sips
- For adults: pair with dessert wines like moscato or a raspberry liqueur on the side
Presentation Ideas: Create a “milkshake bar” station at parties with various toppings: crushed cookies (Oreos, vanilla wafers), chocolate chips, fresh berries, chopped nuts (pecans, almonds), sprinkles, chocolate or caramel sauce, coconut flakes, and multiple whipped cream options. Let guests customize their own shakes for interactive fun that works for both kids and adults.
FAQs Section
Can I make this raspberry milkshake without ice cream? Absolutely! For a lighter, smoothie-style version, replace ice cream with 1 cup frozen banana slices and ¾ cup Greek yogurt or vanilla yogurt. Add ¼ cup milk to help blend. The texture will be less rich and creamy but still delicious and more nutritious. Frozen yogurt also works as a middle-ground option—it’s lighter than ice cream but richer than regular yogurt. For the creamiest non-ice cream version, try frozen whipped cream: freeze it until solid, then scoop and blend like ice cream.
Do I really need to strain out the raspberry seeds? No, it’s completely optional! Many people enjoy the seeds—they add fiber and don’t affect flavor. However, some find them unpleasant to drink through a straw or feel they get stuck in teeth. If making shakes for young children or guests with dental work, straining is considerate. For everyday family shakes, seeds are perfectly fine. A good compromise: strain half and leave half unstrained, then gently swirl together for some texture without overwhelming seeds.
Can I use other berries instead of raspberries? Definitely! This recipe works beautifully with strawberries, blueberries, blackberries, or mixed berries. Strawberries create a sweeter, milder shake; blueberries produce a gorgeous purple color and earthier flavor; blackberries taste similar to raspberries but slightly more intense.