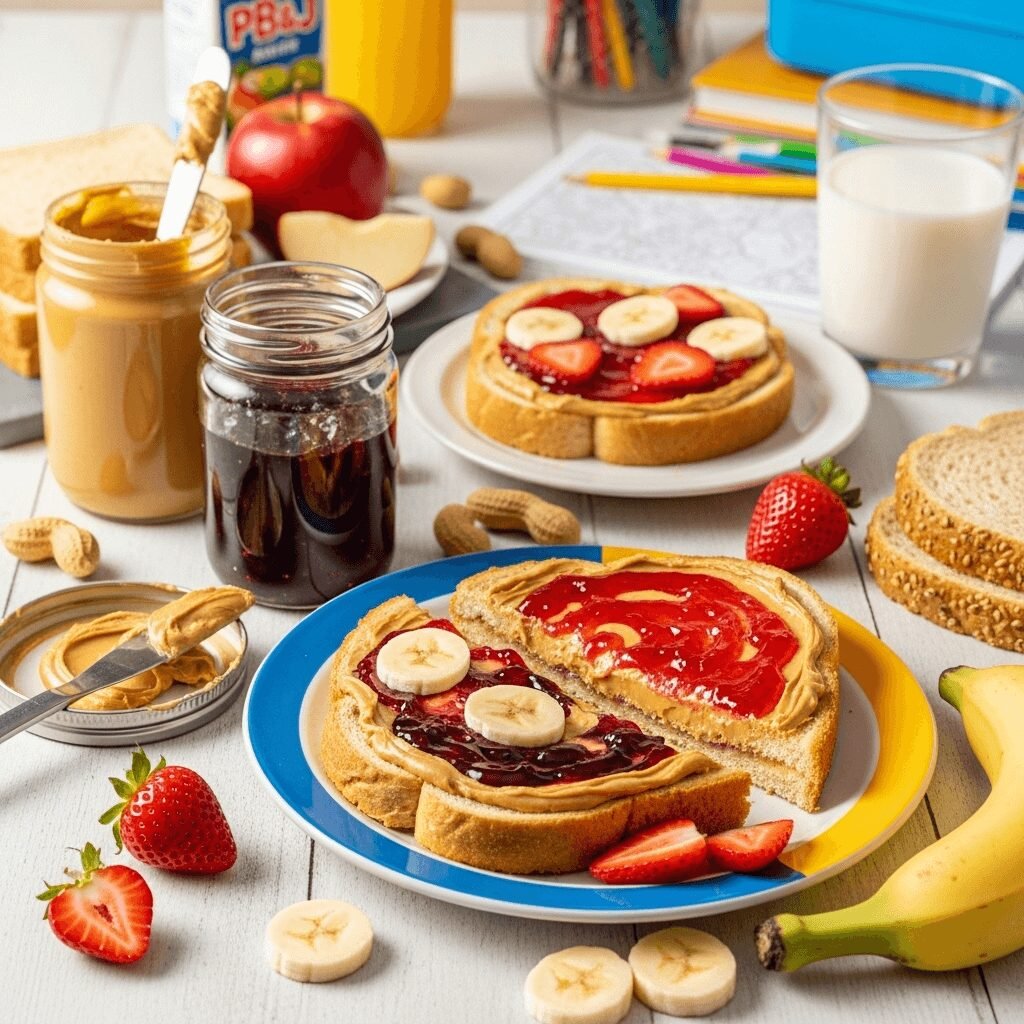
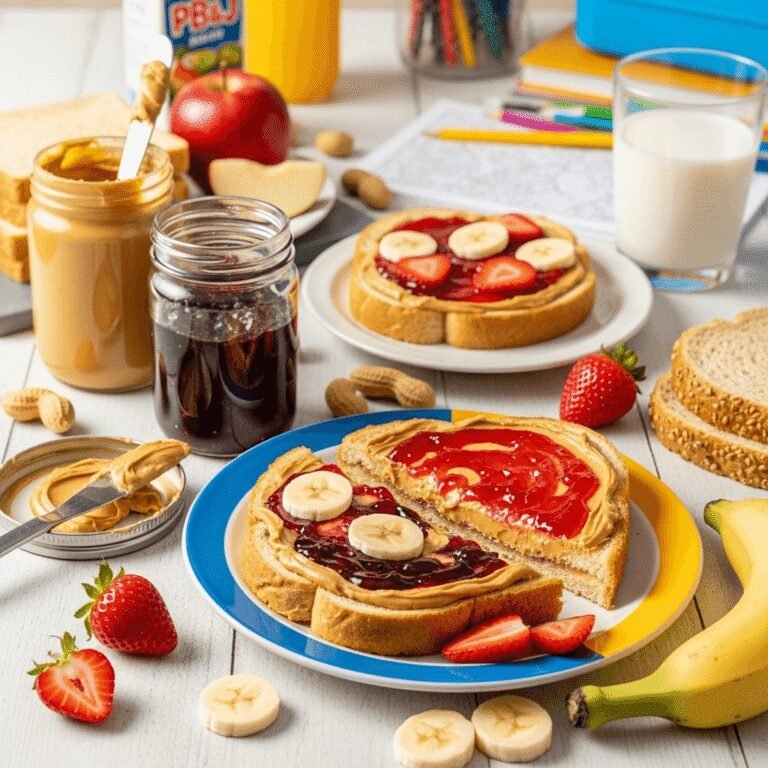
Classic Peanut Butter Jelly Toast Recipe – Nostalgic, Easy & Always Delicious!
Get ready to rediscover a childhood classic with this peanut butter jelly toast that’s simple, comforting, and absolutely delicious! This easy PB&J toast recipe takes the beloved flavors of a peanut butter and jelly sandwich and transforms them into an open-faced toast that’s both nostalgic and surprisingly sophisticated. With creamy peanut butter, sweet fruit jelly or jam, and perfectly golden toasted bread, this recipe delivers pure comfort food satisfaction in every bite. It’s the ultimate combination of sweet, salty, and nutty flavors on crispy, warm bread!
This quick breakfast toast is exactly what you need when you want something familiar, fast, and guaranteed to make everyone happy. The warm, toasted bread makes the peanut butter slightly melty and brings out its roasted, nutty aroma, while the sweet jelly provides that perfect fruity contrast. It’s more elevated than a regular sandwich because toasting adds texture and warmth that takes these classic flavors to the next level. Plus, it looks beautiful – perfect for those mornings when you want breakfast to feel special without any effort!
Whether you’re making a quick weekday breakfast, need an after-school snack kids will love, want a nostalgic comfort food fix, looking for easy lunch box ideas, or craving something sweet and satisfying, this PB&J toast recipe delivers every time. It’s naturally vegetarian, can easily be made vegan and gluten-free, takes just 5 minutes, and costs pennies to make. Serve it for breakfast, as a snack, for lunch, or even as a sweet treat. Once you try this toasted version of the classic PB&J, you might never go back to regular sandwiches!
History / Background
The peanut butter and jelly sandwich is one of the most iconic foods in American culinary history, and its evolution to toast form represents the natural progression of a beloved classic. To understand PB&J toast, we must first appreciate the origins of its sandwich predecessor.
Peanut butter as we know it today was developed in the late 1800s. While ancient Incas and Aztecs ground peanuts into paste, modern peanut butter was created around 1884 by Marcellus Gilmore Edson of Canada. Dr. John Harvey Kellogg (yes, the cereal Kellogg) patented a process for making peanut butter in 1895, initially as a protein-rich food for patients at his sanitarium. The peanut butter we recognize today – smooth, creamy, and shelf-stable – was popularized by companies like Skippy and Jif in the 1920s-1930s.
Jelly and jam have even older roots, dating back to the Middle Ages when preserving fruit in sugar was discovered. Grape jelly became particularly popular in America in the early 1900s, with Welch’s grape jelly (made from Concord grapes) becoming a household staple by 1918.
The actual combination of peanut butter and jelly is credited to American soldiers during World War II. Both ingredients were part of military rations – peanut butter for protein and jelly for quick energy. Soldiers began combining them on bread, and when they returned home after the war, they brought this combination with them. By the 1950s, the PB&J sandwich had become a staple of American childhood, featured in lunch boxes across the country.
The specific trend of peanut butter jelly toast – where the combination is served open-faced on toasted bread rather than as a sandwich – emerged more recently as part of the “elevated toast” movement of the 2010s. As food culture embraced artisanal breads and creative toast toppings, people began revisiting classic combinations like PB&J with a fresh perspective. Food bloggers and home cooks discovered that toasting the bread and serving it open-faced created a more interesting texture and made the flavors more pronounced.
What makes PB&J toast special is how it honors a beloved American classic while making it feel more contemporary and intentional. The warmth from toasting brings out the peanut butter’s oils and makes it more aromatic. The open-faced presentation feels more sophisticated than a sandwich. And somehow, eating it with a fork and knife makes it feel like a real meal rather than just a quick sandwich!
Why You’ll Love This Recipe
This easy PB&J toast recipe is about to become your new go-to comfort food! What makes this recipe absolutely irresistible is how it takes something wonderfully familiar and makes it even better. The toasted bread adds a satisfying crunch and slight char that enhances the nutty peanut butter flavor. Spreading the peanut butter on warm toast makes it slightly melty and more luscious. The jelly glistens on top and its sweetness perfectly balances the salty, savory peanut butter. It’s all the flavors you know and love, but elevated!
The beauty of this peanut butter jelly toast is its perfect combination of simplicity and satisfaction. It literally takes 5 minutes and uses ingredients you probably already have in your pantry. Kids love it because it tastes like a treat, adults love it because it’s nostalgic and comforting, and everyone loves it because it’s genuinely delicious. Plus, it’s so versatile – eat it for breakfast, lunch, snack, or even a sweet midnight treat. It works for any occasion and never disappoints!
Here’s why you’ll absolutely love this peanut butter jelly toast:
- Ready in 5 minutes – Literally the fastest breakfast ever!
- Only 3 main ingredients – Simple pantry staples
- No cooking required – Just toasting and spreading!
- Kid-approved – Even picky eaters love it
- Nostalgic comfort food – Tastes like childhood
- Budget-friendly – Costs less than $1 per serving
- Naturally vegetarian – Can be vegan too!
- Endlessly customizable – So many variations
- Perfect any time of day – Breakfast, snack, lunch, dessert
- Great for meal prep – Components store easily
- Satisfying and filling – Protein and carbs for energy
- Allergy-friendly options – Easy substitutions available
- Zero cleanup – Just one plate!
Ingredient Notes
Let’s talk about the simple, classic ingredients that create this perfect peanut butter jelly toast:
Bread – Your foundation! Choose your favorite bread – white, whole wheat, sourdough, or multigrain all work beautifully. You’ll need 2 slices per serving. Thicker slices (¾-1 inch) work best as they can support generous toppings without getting soggy. For gluten-free, use your favorite GF bread. Brioche creates an extra-indulgent version, while whole grain makes it more nutritious. The bread should be toasted until golden brown and lightly crispy. Fresh bakery bread makes this even better!
Peanut Butter – The nutty, protein-rich star! Use your preferred style – creamy, crunchy, natural, or conventional – about 2-4 tablespoons per 2 toasts. Creamy peanut butter spreads most easily and creates smooth coverage. Crunchy adds texture and interest. Natural peanut butter (just peanuts and salt) is healthier but can be more oily and harder to spread. Conventional peanut butter (like Jif or Skippy) is sweeter and creamier with added oils and sugar. For allergies, use almond butter, cashew butter, sunflower seed butter (SunButter), or cookie butter!
Jelly or Jam – The sweet, fruity element! Classic grape jelly is traditional, but strawberry jam is equally beloved – use about 2-4 tablespoons per 2 toasts. Jelly is made from fruit juice (clearer, smoother), while jam contains fruit pieces (chunkier, more textured). Grape and strawberry are classics, but raspberry, blackberry, apricot, or mixed berry all work beautifully. For lower sugar, use fruit preserves or sugar-free jelly. For a sophisticated twist, try fig jam or cherry preserves!
Butter (Optional) – For extra richness! Some people like to butter the bread before adding peanut butter for extra richness and flavor – about 1 teaspoon per slice. This is traditional in some households and adds a wonderful buttery layer. Completely optional but delicious!
Optional Enhancements:
- Honey – Drizzle for extra sweetness
- Banana slices – Classic Elvis-style addition
- Chocolate chips – Sprinkle on warm PB for melty chocolate
- Cinnamon – Sprinkle for warm spice
- Sliced strawberries – Fresh fruit addition
- Flaky sea salt – Enhances sweet-salty contrast
Equipment Needed
Making this peanut butter jelly toast requires minimal kitchen equipment:
- Toaster, toaster oven, or oven – For perfectly golden toast
- Butter knife or offset spatula – For spreading peanut butter and jelly
- Serving plate – For presentation
- Measuring spoons – For portion control (optional)
Peanut Butter Jelly Toast Recipe
This classic Peanut Butter Jelly Toast features creamy peanut butter and sweet jelly on perfectly golden toasted bread. It’s nostalgic, comforting, and ready in just 5 minutes – the ultimate easy breakfast or snack!
- Total Time: 5 minutes
- Yield: 1 serving (2 toasts) 1x
Ingredients
- 2 slices bread (white, whole wheat, sourdough, or gluten-free)
- 2-4 tablespoons peanut butter (creamy or crunchy)
- 2-4 tablespoons jelly or jam (grape, strawberry, or your favorite)
- Optional: 2 teaspoons butter (for spreading on bread first)
- Optional: banana slices, honey drizzle, or cinnamon
Instructions
- Toast the Bread – Place bread slices in toaster, toaster oven, or under broiler. Toast until golden brown and lightly crispy, about 2-3 minutes depending on your method and desired darkness. For oven toasting, use 375°F for 3-4 minutes per side. The bread should be golden with a slight crunch but not burnt or too dark. You want it crispy enough to provide satisfying crunch but not so hard it’s difficult to bite.
- Optional Butter Layer – If using butter, spread a thin layer on the hot toast immediately after toasting (the residual heat will melt it slightly). This step is completely optional but adds extra richness and flavor. Many families have strong opinions about whether to butter first – it’s a personal preference!
- Spread the Peanut Butter – While the toast is still warm (this is important!), generously spread peanut butter over each slice. Use about 1-2 tablespoons per piece of toast, or more if you’re feeling indulgent! Spread all the way to the edges for even flavor in every bite. The warmth from the toast will make the peanut butter slightly melty and easier to spread. If using natural peanut butter that separated, stir it well first!
- Add the Jelly – Spread jelly or jam over the peanut butter layer. Use about 1-2 tablespoons per toast, spreading evenly. You can spread it completely over the peanut butter, or leave some peanut butter visible around the edges for a pretty contrast. Some people like to create a “jelly stripe” down the middle instead of full coverage – totally up to you!
- Add Optional Toppings – If desired, now is the time to add fun extras: sliced bananas arranged in rows, a drizzle of honey, a sprinkle of cinnamon, a few chocolate chips (they’ll melt slightly from the warm toast), or fresh strawberry slices. Get creative!
- Slice and Serve – For easier eating, you can cut each toast in half diagonally or into strips (especially great for kids!). Transfer to a plate and serve immediately while the toast is still warm. These are best eaten within 10 minutes while the toast is crispy and the peanut butter is slightly melty.
- Enjoy – Eat with your hands like toast, or use a fork and knife if you’ve added lots of toppings. The combination of warm, crispy bread with creamy peanut butter and sweet jelly is pure comfort food perfection!
Notes
- Peanut Butter Types: Creamy spreads easiest; crunchy adds texture; natural is healthiest but can be harder to spread.
- Temperature Matters: Spreading peanut butter on warm toast makes it easier and slightly melty – don’t skip the toasting!
- Jelly vs. Jam: Jelly is smoother; jam has fruit pieces. Both work perfectly!
- Allergy Alternatives: Use almond butter, sunflower seed butter, or soy nut butter for peanut allergies.
- Make it Vegan: Use vegan bread and skip the optional butter (or use vegan butter).
- Storage: Best eaten fresh, but components store separately for easy assembly later.
- Prep Time: 2 minutes
- Cook Time: 3 minutes
- Category: Breakfast
- Method: Toasting
- Cuisine: American
- Diet: Vegetarian
Nutrition
- Serving Size: 2 toasts with toppings
- Calories: 420
- Sugar: 20g
- Sodium: 480mg
- Fat: 18g
- Saturated Fat: 3g
- Unsaturated Fat: 14g
- Trans Fat: 0g
- Carbohydrates: 54g
- Fiber: 4g
- Protein: 14g
- Cholesterol: 0mg
Tips & Variations
This peanut butter jelly toast is perfect as-is, but here’s how to customize it:
Bread Variations:
- White bread: Classic, soft, nostalgic
- Whole wheat: Nutty, more nutritious
- Sourdough: Tangy flavor complements sweet jelly
- Brioche: Buttery, indulgent, dessert-like
- Cinnamon raisin bread: Extra flavor dimension
- Gluten-free: Your favorite GF bread
- English muffins: Use toasted muffin halves
Peanut Butter Alternatives:
- Almond butter: Milder, slightly sweet
- Cashew butter: Creamy, naturally sweet
- Sunflower seed butter: Allergy-friendly, earthy
- Cookie butter (Biscoff): Sweet, spiced, indulgent
- Nutella: Chocolate-hazelnut version
- Tahini: Sesame seed butter, savory option
Jelly/Jam Variations:
- Grape jelly: Classic American choice
- Strawberry jam: Most popular alternative
- Raspberry preserves: Tart and sophisticated
- Apricot jam: Sweet and elegant
- Blackberry jam: Rich, complex flavor
- Mixed berry: Best of all berries
- Fig jam: Grown-up, sophisticated
- Honey: Natural alternative to jelly
Flavor Combinations:
- Elvis Special: PB + banana + honey (+ bacon for true Elvis!)
- Chocolate PB&J: Spread Nutella with peanut butter
- Apple Pie: Peanut butter + apple butter + cinnamon
- Tropical: PB + pineapple jam + coconut flakes
- Berry Medley: PB + mixed berry jam + fresh berries
- Fluffernutter: PB + marshmallow fluff (New England classic!)
Healthy Upgrades:
- Use whole grain bread for fiber
- Choose natural peanut butter (just peanuts + salt)
- Use sugar-free or fruit-only preserves
- Add banana slices for potassium
- Sprinkle chia seeds or flax for omega-3s
- Use almond butter for different nutrients
Indulgent Additions:
- Chocolate chips or cacao nibs
- Drizzle of honey or maple syrup
- Sliced strawberries or raspberries
- Granola for crunch
- Mini marshmallows
- Crushed graham crackers
- Coconut flakes
- Chopped nuts
Pro Chef Tips
Want to make an absolutely perfect peanut butter jelly toast? Here are professional secrets:
Toast to Golden Brown, Not Dark – The bread should be golden and lightly crispy, not deeply toasted or burnt. Over-toasted bread is too hard and can overwhelm the creamy toppings. Under-toasted bread gets soggy too quickly. That perfect golden-brown toast provides ideal crunch while still being tender enough to bite through easily.
Spread on Warm Toast – This is crucial! Always spread peanut butter on toast while it’s still warm from toasting. The residual heat slightly melts the peanut butter, making it easier to spread without tearing the bread and creating a more luscious, creamy texture. Cold toast makes peanut butter hard to spread and doesn’t taste as good!
Use Enough Peanut Butter – Don’t be stingy! A good peanut butter jelly toast needs a generous layer of peanut butter – at least 1-2 tablespoons per slice. Too little peanut butter means you’ll taste mostly bread and jelly. The peanut butter is the protein-rich, satisfying element that makes this more than just sweet toast.
Balance PB and Jelly Ratios – The ideal ratio is about equal parts peanut butter and jelly, or slightly more peanut butter. Too much jelly overwhelms the nutty flavor and makes it overly sweet. Too little jelly and you miss that fruity sweetness contrast. Aim for harmonious balance where you taste both components!
Stir Natural Peanut Butter First – If using natural peanut butter (the kind with oil on top), always stir thoroughly before using to incorporate the separated oils. Unstirred natural PB is either too oily or too dry and crumbly. A good stir creates smooth, spreadable consistency.
Layer Strategically – For best results: spread peanut butter first (the warm toast makes it slightly melty and it creates a moisture barrier), then add jelly on top (its moisture won’t seep into bread because of PB barrier). This keeps your toast crispier longer!
Cut for Better Eating – Cutting toasts in half diagonally or into strips makes them easier to eat, especially for kids. It also makes presentation more appealing and feels more like a “meal” than just toast.
Serve Immediately – PB&J toast is best enjoyed within 10 minutes of making it, while the toast is still warm and crispy and the peanut butter is slightly melty. After that, it’s still good, but the toast loses its crispness.
Common Mistakes to Avoid
Don’t let these errors ruin your perfect peanut butter jelly toast!
Spreading Peanut Butter on Cold Toast – This is mistake #1! Cold, crispy toast makes peanut butter nearly impossible to spread without tearing the bread. You’ll end up with torn toast and clumpy peanut butter instead of smooth coverage. Always spread while toast is still warm – the gentle heat makes peanut butter easier to work with and creates better texture!
Using Too Much Jelly – While it’s tempting to load up on sweet jelly, too much makes the toast cloyingly sweet and can make it soggy. The jelly should complement the peanut butter, not drown it out. Use about equal amounts of PB and jelly, or slightly less jelly. Remember: you can always add more, but you can’t remove it!
Not Toasting Enough – Barely-toasted bread won’t provide the satisfying crunch that makes PB&J toast special. It will also get soggy faster from the moisture in jelly. Toast until the bread is golden brown and you can hear a slight crunch when you bite. Proper toasting is what separates this from a regular sandwich!
Spreading Too Thinly – A wimpy, thin layer of peanut butter won’t provide enough nutty flavor or protein to balance the sweet jelly. Be generous with your peanut butter! You want substantial peanut butter in every bite. Don’t be afraid to use 2 tablespoons per slice.
Using Jelly Straight from Refrigerator – Cold jelly is stiff and hard to spread, often tearing the peanut butter layer underneath. Let jelly sit at room temperature for 5-10 minutes before using, or microwave for 10-15 seconds to soften. Room temperature jelly spreads like butter!
Forgetting to Spread to Edges – Leaving bare bread around the edges creates sad, dry bites. Spread both peanut butter and jelly all the way to the crusts for consistent flavor throughout!
Storage & Meal Prep
While peanut butter jelly toast is best enjoyed fresh, here’s how to handle storage and prep:
Immediate Consumption: PB&J toast is at its absolute best within 10 minutes of assembly, while the toast is still warm and crispy. After about 30 minutes, the toast loses its crispness and becomes softer. It’s still edible but not as satisfying texturally.
Short-Term Storage: If you need to save assembled toast for a few hours (like for a packed lunch), wrap tightly in plastic wrap or aluminum foil. It will become softer and less crispy, but still tasty. Best consumed within 4-6 hours of making.
Component Storage for Easy Assembly:
- Bread: Store in original packaging or bread box at room temperature for up to 5-7 days
- Peanut butter: Store at room temperature (unless label says refrigerate) for up to 3 months after opening
- Jelly: Store in refrigerator after opening for up to 6 months
Meal Prep Strategy: For easy weekday breakfasts:
- Keep bread, peanut butter, and jelly conveniently accessible
- Pre-slice bread if buying from a loaf
- Each morning: Toast (3 min), spread (1 min), enjoy fresh!
Packed Lunches: To prevent sogginess:
- Pack components separately (bread, PB, jelly in separate containers)
- Assemble just before eating, OR
- Make “sandwich” with two toasts facing each other (PB and jelly touch, not the bread)
Make-Ahead & Freezer Notes
PB&J toast is best made fresh, but you can prep components:
Advance Preparation:
- Toast bread up to 2 hours ahead (store uncovered at room temp)
- Soften jelly by leaving at room temp
- Have all components ready for quick assembly
Freezing:
- Bread: Freeze sliced bread, toast directly from frozen (adds 1 min to toast time)
- Peanut butter: Doesn’t freeze well (becomes grainy); store at room temp
- Jelly: Can freeze but unnecessary; stores well in fridge
- Assembled toast: Not recommended – texture suffers significantly
Batch “Prep”:
- While you can’t make these ahead, you CAN prep a week’s worth of pre-toasted bread
- Toast 10-14 slices on Sunday
- Store in airtight container at room temp
- Each morning: spread PB and jelly on pre-toasted bread (no additional toasting needed if eating within 24 hours)
Reheating: If toast got cold, place in toaster oven for 1 minute (before adding PB and jelly). Don’t reheat assembled toasts – PB will melt and jelly will get too liquidy.
Serving Suggestions
This peanut butter jelly toast pairs beautifully with:
Breakfast:
- Fresh fruit salad or berries
- Yogurt or Greek yogurt
- Scrambled eggs (for protein boost)
- Breakfast sausage or bacon
- Orange juice or milk
- Coffee for adults
Lunch:
- Baby carrots and celery sticks
- Apple slices
- Pretzels or chips
- Cheese stick or cubes
- Chocolate milk
- Fruit cup
After-School Snack:
- Glass of cold milk (classic combo!)
- Fresh fruit
- String cheese
- Granola bar
- Trail mix
- Smoothie
Breakfast for Dinner:
- Scrambled eggs
- Breakfast potatoes
- Fruit salad
- Bacon or sausage
- Pancakes (PB&J theme!)
FAQs Section
Q: Should I use creamy or crunchy peanut butter?
A: It’s completely personal preference! Creamy peanut butter spreads more easily and creates smooth, even coverage – it’s the classic choice especially for kids. Crunchy peanut butter adds texture and interest with little peanut pieces in every bite – great for adults who want more complexity. Try both and see which you prefer!
Q: What’s the best jelly flavor?
A: The two classic choices are grape jelly and strawberry jam, and both are equally beloved! Grape jelly (especially Welch’s Concord grape) is the most traditional American choice. Strawberry jam is a close second and many people prefer its fresher, less sweet flavor. Raspberry, blackberry, apricot, and mixed berry are all delicious too. Choose your favorite!
Q: Can I make this ahead for packed lunches?
A: You can, but texture won’t be as good! For best results, pack components separately and assemble just before eating. If you must assemble ahead, make it “sandwich style” with two pieces of toast facing each other (PB and jelly touch, bread sides face out). Wrap tightly. It will be softer but still tasty. Consume within 4-6 hours.
Q: Is this healthy enough for breakfast?
A: It can be! PB&J toast provides protein from peanut butter, carbohydrates from bread for energy, and some fruit from jelly. To make it healthier: use whole grain bread (more fiber), natural peanut butter (less sugar and additives), sugar-free or fruit-only jelly, and add banana slices (extra potassium and fiber). Pair with fruit and milk for a more complete breakfast. It’s certainly better than many sugary breakfast options!
Q: What can I use instead of peanut butter for allergies?
A: Many alternatives work great! SunButter (sunflower seed butter) is the most popular allergy-friendly option with similar texture to peanut butter. Wow Butter (soy nut butter) tastes very close to peanut butter. Almond butter or cashew butter work if you’re only allergic to peanuts, not all tree nuts. Each creates a slightly different flavor but all pair beautifully with jelly!
Q: Do I need to butter the toast first?
A: No, it’s completely optional! Some families always butter first (it adds richness and extra flavor), while others never do (keeping it simpler). It’s a matter of family tradition and personal preference. Try it both ways and see which you prefer. If you do butter, use just a thin layer so it doesn’t overpower the peanut butter.
Q: Can I use jam instead of jelly?
A: Absolutely! Jam actually works beautifully. The difference: jelly is made from fruit juice (smooth, clear), while jam contains crushed fruit pieces (chunkier, more texture). Many people prefer jam because it has more fruit flavor and texture. Preserves (even chunkier with whole fruit pieces) also work great!
Q: Why does my peanut butter tear the bread when I spread it?
A: This happens when: (1) bread is cold instead of warm – always spread on freshly toasted, still-warm bread, (2) peanut butter is too cold or stiff – let it come to room temperature or microwave for 10 seconds, (3) you’re pressing too hard – use a gentle spreading motion, or (4) bread is too thin or delicate – choose sturdier, thicker-sliced bread!
Conclusion
And there you have it – the ultimate peanut butter jelly toast recipe that’s simple, nostalgic, and absolutely delicious! This easy PB&J toast recipe proves that sometimes the best recipes are the simplest ones, especially when they bring back wonderful childhood memories. With creamy peanut butter, sweet jelly, and perfectly golden toast, this recipe delivers pure comfort food satisfaction that works for any age and any time of day!
This quick breakfast toast is perfect for busy mornings, easy lunches, after-school snacks, or anytime you need something fast, filling, and guaranteed to make everyone happy. Whether you’re making it for kids, treating yourself to nostalgic comfort food, or just need the easiest breakfast ever, this toast delivers every single time. The combination of warm, crispy bread with slightly melty peanut butter and sweet jelly is timeless perfection!
I absolutely can’t wait to hear how your peanut butter jelly toast turns out! Drop a comment below and tell me about your experience. Do you prefer grape or strawberry? Creamy or crunchy PB? Did you add any fun toppings? Share all the delicious details! And please pin this recipe to your Pinterest boards – save it to your “Easy Breakfast Ideas,” “Kid-Friendly Recipes,” and “Quick Snacks” collections so you can find it whenever you need something simple and satisfying. Share a photo of your creation on Instagram and tag me!
Now grab that peanut butter and jelly – the easiest, most nostalgic breakfast you’ve ever made is just 5 minutes away! 🥜🍓