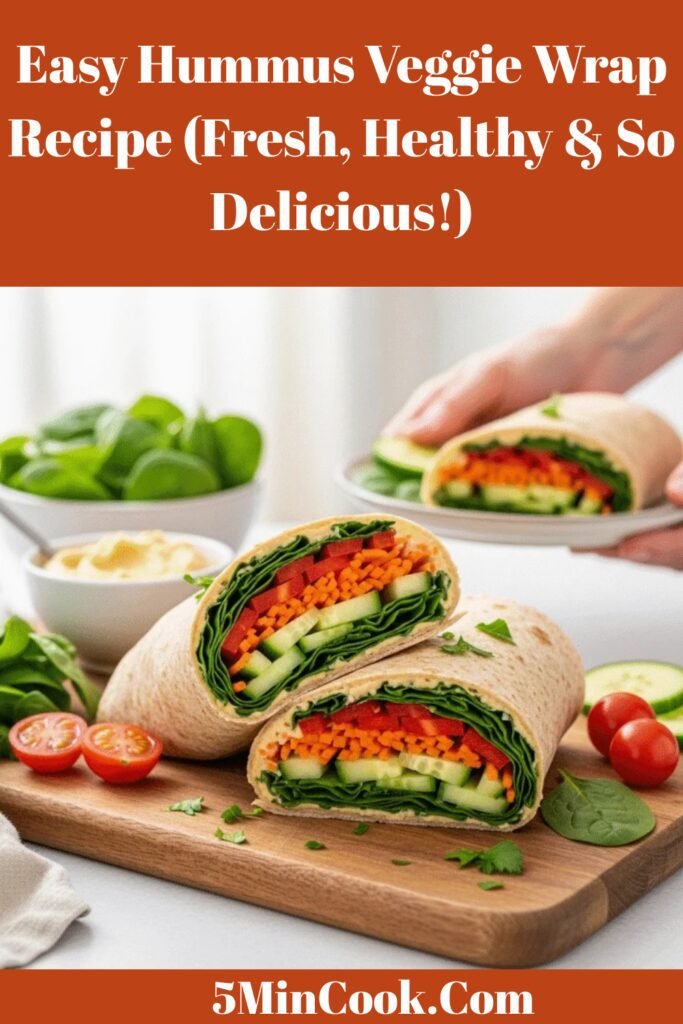
Easy Hummus Veggie Wrap Recipe (Fresh, Healthy & So Delicious!)
If you’re looking for a lunch that’s healthy, colorful, incredibly satisfying, and comes together in just 10 minutes, this hummus veggie wrap is about to become your new best friend. This easy hummus veggie wrap combines creamy, protein-rich hummus with a rainbow of crisp vegetables, all wrapped up in a soft tortilla for the perfect portable meal that actually makes you feel good about what you’re eating.
What makes this healthy veggie wrap recipe so special is its beautiful simplicity. There’s no cooking involved, no complicated techniques, and absolutely no special skills required—just fresh ingredients, good hummus, and a little bit of assembly. It’s the kind of recipe that works for rushed Monday mornings, leisurely weekend lunches, meal prep Sundays, and everything in between. Whether you’re packing school lunches, fueling up before yoga class, or looking for a light dinner option, this Mediterranean-inspired wrap delivers big flavors without weighing you down.
The best part? This hummus wrap recipe is endlessly customizable. Use whatever vegetables you have in your crisper drawer, swap in different hummus flavors, add protein if you want it, or keep it simple with just the basics. It’s naturally vegetarian, easily made vegan, and can be adapted to be gluten-free. Plus, it’s budget-friendly and uses ingredients you can find at any grocery store. This is real food that’s good for you, tastes amazing, and fits into the busiest of schedules.
History / Background
The humble wrap, as we know it today, is a relatively modern invention that emerged from the collision of multiple culinary traditions. While people around the world have been rolling food in flatbreads for thousands of years—think Chinese spring rolls, Mexican burritos, Turkish dürüm, and Indian kathi rolls—the cold sandwich wrap as a lunch staple really gained popularity in America during the 1990s health food movement.
Hummus itself has ancient roots in the Middle East, with origins dating back at least to 13th century Egypt, though various forms of mashed chickpea dishes likely existed even earlier. The word “hummus” comes from the Arabic word for chickpeas, and the full Arabic name “ḥummuṣ bi ṭaḥīna” literally means “chickpeas with tahini.” For centuries, hummus has been a staple across the Levantine region—including modern-day Lebanon, Syria, Palestine, Israel, and Jordan—with each culture claiming it as their own and adding regional variations.
The hummus veggie wrap as we know it today is a beautiful fusion of Mediterranean ingredients and American wrap culture. In the 1990s, as Americans became more health-conscious and interested in international flavors, wraps exploded in popularity as a “healthier” alternative to traditional sandwiches. Cafés, delis, and quick-service restaurants began offering wraps as a way to pack more vegetables and lighter proteins into portable meals.
The combination of hummus and fresh vegetables in a wrap gained particular traction during the early 2000s when Mediterranean diets were being celebrated for their health benefits. Restaurants like Panera Bread and countless independent cafés put their own versions of hummus veggie wraps on menus, and they quickly became a lunch staple for health-conscious eaters, vegetarians, and anyone looking for a lighter but still satisfying meal.
Today, the hummus veggie wrap has transcended its health-food-store origins to become mainstream meal-prep gold. It’s especially beloved by busy professionals, students, parents packing lunches, and home cooks who appreciate that you can make something this delicious and nutritious without turning on a single appliance. It represents the best of modern eating—fresh, fast, flexible, and full of flavor.
Why You’ll Love This Recipe
This isn’t just another boring salad wrap—it’s a carefully balanced combination of creamy, crunchy, tangy, and fresh that makes every single bite interesting and satisfying. The hummus provides protein and healthy fats that keep you full, while the rainbow of vegetables delivers fiber, vitamins, and that essential crunch factor that makes eating fun.
Here’s why this hummus veggie wrap will become your go-to healthy lunch:
- Ready in 10 minutes – Seriously, that’s all it takes from start to finish, no cooking required
- Incredibly healthy – Packed with fiber, plant-based protein, vitamins, and nutrients
- Naturally vegetarian and vegan-friendly – Perfect for plant-based eaters or Meatless Mondays
- Budget-friendly – Costs just a few dollars per wrap, way less than takeout
- Perfect for meal prep – Make components ahead and assemble throughout the week
- Kid-approved – Even picky eaters love the familiar vegetables and creamy hummus
- Portable and lunchbox-friendly – Travels beautifully without getting soggy
- Customizable to your taste – Use your favorite veggies and hummus flavors
- No cooking or special skills needed – If you can spread and roll, you can make this
- Gluten-free option available – Just use gluten-free tortillas or lettuce wraps
- Filling without being heavy – Satisfies hunger without that afternoon food coma
- Rainbow of nutrients – Different colored vegetables provide different health benefits
Ingredient Notes
Let’s talk about what makes this wrap so deliciously satisfying—it’s all about quality, fresh ingredients that work together perfectly.
Hummus: This is your protein-rich, creamy base that holds everything together and adds incredible flavor. Classic chickpea hummus works beautifully, but feel free to experiment with roasted red pepper, garlic, cilantro-jalapeño, roasted pine nut, or any other variety. Store-bought is convenient and delicious, but homemade hummus takes it to another level. Look for hummus with a short ingredient list—chickpeas, tahini, lemon juice, garlic, and salt should be the main components.
Tortillas or Wraps: Large flour tortillas are traditional and widely available. Whole wheat tortillas add extra fiber and a slightly nutty flavor. Spinach, tomato, or herb-flavored wraps add color and subtle flavor variations. For gluten-free options, use certified gluten-free wraps or large collard green leaves for a low-carb alternative. The key is choosing soft, pliable wraps that won’t crack when rolled.
Cucumbers: Add refreshing crunch and hydration without making the wrap soggy. English cucumbers are ideal because they have fewer seeds and less water content than regular cucumbers. Always slice thin for the best texture and easier eating.
Bell Peppers: Any color works, but a mix of red, yellow, and orange creates a beautiful presentation and offers slightly different flavors. Red peppers are sweetest, while green peppers are more crisp and vegetal. Slice into thin strips for even distribution and easy biting.
Carrots: Provide sweetness, crunch, and vibrant color. Shredded or julienned carrots work best—they distribute evenly and are easier to bite through. Pre-shredded carrots from the store are a convenient shortcut that saves prep time.
Lettuce or Greens: Romaine, butter lettuce, spinach, or mixed baby greens all work wonderfully. Lettuce adds bulk and freshness without overwhelming other flavors. Always wash and thoroughly dry greens to prevent soggy wraps—this is crucial.
Tomatoes: Cherry or grape tomatoes sliced in half work better than large tomatoes because they’re less watery. If using regular tomatoes, remove the seeds and excess moisture before adding to prevent sogginess.
Red Onion: Thinly sliced red onion adds a sharp, tangy bite that contrasts beautifully with the creamy hummus. If raw onion is too intense for you, soak slices in cold water for 10 minutes to mellow the flavor, or substitute with green onions or chives.
Avocado (Optional): Adds extra creaminess, healthy fats, and that trendy California vibe. Slice just before assembling to prevent browning, or toss with a little lemon juice.
Feta Cheese (Optional): Crumbled feta adds tangy, salty, creamy pockets of flavor throughout the wrap. It’s not traditional in all versions but adds a wonderful Mediterranean touch. Omit for vegan versions.
Fresh Herbs (Optional): Cilantro, parsley, or mint add bright, fresh flavor that elevates the wrap from good to amazing. Don’t underestimate the power of fresh herbs!
Lemon Juice: A squeeze of fresh lemon brightens all the flavors and prevents avocado from browning. Always use fresh lemon juice, never bottled—the difference is noticeable.
Seasonings: A sprinkle of salt, black pepper, and optional red pepper flakes or za’atar spice blend adds depth and complexity.
Equipment Needed
One of the most beautiful things about this recipe is how minimal the equipment needs are. You probably already have everything!
- Sharp knife – For slicing vegetables cleanly and precisely
- Cutting board – For all your prep work
- Vegetable peeler – If you need to peel cucumbers or carrots
- Grater or julienne peeler – For shredding carrots if not buying pre-shredded
- Small bowl – For any optional dressings or seasonings
- Spoon or offset spatula – For spreading hummus evenly
- Plate or clean work surface – For assembling your wraps
Optional but helpful:
- Salad spinner – For drying lettuce perfectly
- Mandoline slicer – For uniform, thin vegetable slices
- Parchment paper or foil – For wrapping finished wraps for storage or transport
That’s it! No stove, no oven, no appliances—just basic kitchen tools and fresh ingredients.
Print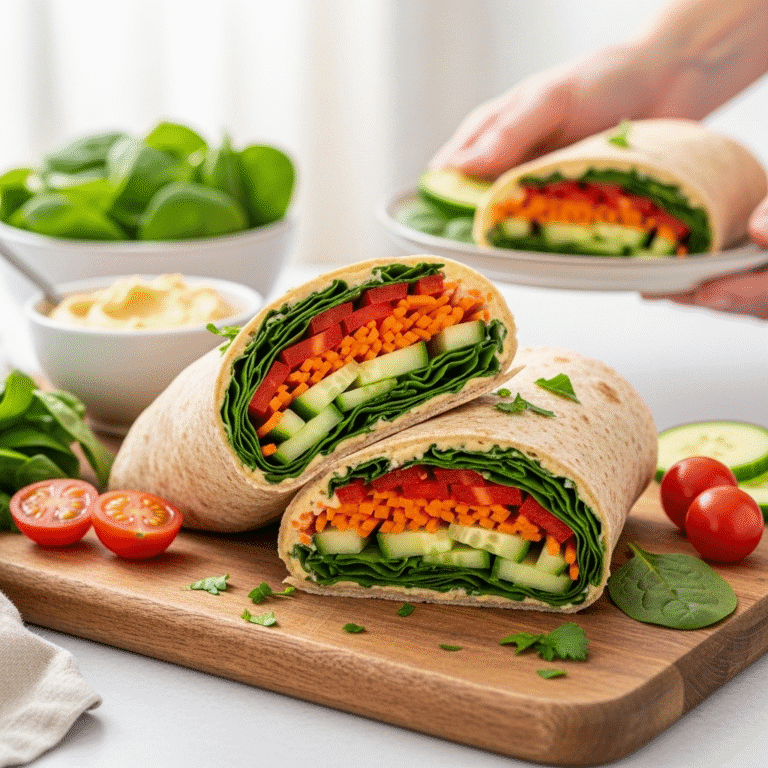
Hummus Veggie Wrap Recipe
This Easy Hummus Veggie Wrap is a fresh, healthy, and incredibly satisfying lunch packed with creamy hummus, crisp vegetables, and optional feta cheese, all rolled up in a soft tortilla. Ready in just 10 minutes with no cooking required, it’s perfect for meal prep, lunchboxes, or anytime you want a nutritious meal on the go!
- Total Time: 10 minutes
- Yield: 4 wraps 1x
Ingredients
For the Wraps:
- 4 large flour tortillas or whole wheat wraps (10-inch diameter)
- 1 cup hummus (any variety—classic, roasted red pepper, garlic, etc.)
- 2 cups romaine lettuce or baby spinach, chopped
- 1 large cucumber, thinly sliced (about 1.5 cups)
- 1 large red bell pepper, thinly sliced into strips
- 1 cup shredded carrots
- 1 cup cherry tomatoes, halved
- 1/4 red onion, very thinly sliced (about 1/2 cup)
- 1 ripe avocado, sliced (optional)
- 1/2 cup crumbled feta cheese (optional, omit for vegan)
- 1/4 cup fresh cilantro or parsley, chopped (optional)
- 2 tablespoons fresh lemon juice
- Salt and black pepper, to taste
- Pinch of red pepper flakes or za’atar (optional)
Optional Add-Ins:
- Sliced olives (Kalamata or black)
- Roasted red peppers
- Sprouts or microgreens
- Sunflower seeds or pumpkin seeds for crunch
- Pickled vegetables
Instructions
Step 1: Prepare All Vegetables
Wash and thoroughly dry all your vegetables—this is essential for preventing soggy wraps. Chop the lettuce into bite-sized pieces, slice the cucumber into thin rounds or half-moons, cut the bell pepper into thin strips, shred the carrots if needed, halve the cherry tomatoes, and slice the red onion paper-thin. If using avocado, slice it just before assembly and toss with a little lemon juice to prevent browning.
Step 2: Warm the Tortillas (Optional but Recommended)
For the most pliable, easy-to-roll wraps, warm your tortillas slightly. You can do this in a dry skillet over medium heat for 10-15 seconds per side, microwave wrapped in a damp paper towel for 15-20 seconds, or leave them at room temperature for 10 minutes if they’ve been refrigerated. Warm tortillas are much less likely to crack or tear when rolling.
Step 3: Spread the Hummus Base
Lay one tortilla flat on a clean work surface or large plate. Spread about 1/4 cup of hummus in an even layer across the entire surface of the tortilla, leaving about a 1-inch border around the edges. Don’t skip the edges—the hummus acts as “glue” that helps seal the wrap. Use the back of a spoon or an offset spatula for even spreading.
Step 4: Layer the Vegetables Strategically
In the center third of the tortilla (forming a horizontal line from left to right), layer your vegetables in this order: Start with lettuce or greens as your base, then add cucumber slices, bell pepper strips, shredded carrots, tomatoes, red onion, avocado slices if using, and finally sprinkle with feta cheese and fresh herbs if using. Keep the vegetables in a concentrated line rather than spreading them all over—this makes rolling much easier.
Step 5: Season and Add Final Touches
Squeeze a little fresh lemon juice over the vegetables, then sprinkle lightly with salt, black pepper, and optional red pepper flakes or za’atar. Don’t overdo the seasoning—the hummus and feta already provide plenty of flavor.
Step 6: Roll the Wrap Tightly
This is the crucial step! Fold the bottom edge of the tortilla up and over the filling, tucking it under the vegetables snugly. Fold in both sides of the tortilla toward the center like an envelope, then continue rolling tightly away from you, keeping the sides tucked in and applying gentle but firm pressure. The hummus on the edges will help seal the wrap closed.
Step 7: Slice and Serve
Place the wrap seam-side down on a cutting board. Using a sharp serrated knife, cut the wrap in half diagonally for easier eating and a beautiful presentation. For meal prep, wrap tightly in parchment paper, foil, or plastic wrap before refrigerating.
Step 8: Enjoy Immediately or Store
These wraps are best enjoyed fresh but can be stored in the refrigerator for up to 24 hours. If eating immediately, serve with extra hummus for dipping, chips, or a side salad. If packing for lunch, keep refrigerated until ready to eat.
Notes
- Prevent sogginess: Pat vegetables dry with paper towels before adding to the wrap, especially tomatoes and cucumbers
- Hummus as glue: Spreading hummus all the way to the edges helps seal the wrap and prevents it from unrolling
- Rolling technique: The tighter you roll, the easier the wrap is to eat and the less likely ingredients are to fall out
- Warm tortillas: Room temperature or slightly warmed tortillas are much easier to work with and less likely to crack
- Customize freely: Use whatever vegetables you have on hand—this recipe is incredibly flexible
- Make it vegan: Simply omit the feta cheese or use vegan feta alternative
- Gluten-free option: Use certified gluten-free tortillas or large collard green leaves as wraps
- Protein boost: Add grilled chicken, turkey, hard-boiled eggs, or chickpeas for extra protein
- Prep Time: 10 minutes
- Cook Time: 0 minutes
- Category: Lunch
- Method: Assembly
- Cuisine: Mediterranean
- Diet: Vegetarian
Nutrition
- Serving Size: 1 wrap
- Calories: 285
- Sugar: 6g
- Sodium: 520mg
- Fat: 11g
- Saturated Fat: 2g
- Unsaturated Fat: 8g
- Trans Fat: 0g
- Carbohydrates: 38g
- Fiber: 8g
- Protein: 10g
- Cholesterol: 8mg
Tips & Variations
Mediterranean Rainbow Wrap: Load up with Kalamata olives, artichoke hearts, roasted red peppers, sun-dried tomatoes, and extra feta. Use roasted red pepper hummus for an extra flavor boost. This version brings all those beautiful Greek and Italian flavors together.
Spicy Southwest Hummus Wrap: Use cilantro-jalapeño or chipotle hummus, add black beans, corn, diced jalapeños, and top with a drizzle of sriracha or hot sauce. Swap regular lettuce for shredded cabbage for extra crunch.
Green Goddess Wrap: Use spinach or kale instead of lettuce, add avocado, cucumber, green bell pepper, and use cilantro-jalapeño or herb-forward hummus. Include fresh herbs like basil, cilantro, and mint for an ultra-fresh, green-on-green masterpiece.
Protein-Packed Wrap: Add grilled chicken strips, sliced hard-boiled eggs, or seasoned chickpeas to make it more filling. This transforms the wrap from a light lunch to a substantial meal that keeps you full for hours.
Fall Harvest Wrap: Swap some vegetables for roasted sweet potato cubes, add dried cranberries, chopped apples, and use butternut squash hummus if you can find it. This seasonal variation is perfect for autumn lunches.
Thai-Inspired Wrap: Use peanut sauce instead of hummus (or mix peanut butter into hummus), add shredded purple cabbage, carrots, edamame, and fresh cilantro. Top with crushed peanuts and a squeeze of lime for an Asian fusion twist.
Breakfast Wrap: Add scrambled eggs, sautéed spinach, and tomatoes to your hummus for a protein-packed breakfast option that’s different from typical breakfast burritos.
Crunchy Chickpea Wrap: Add roasted or pan-fried seasoned chickpeas for extra protein and a satisfying crunch that complements the soft hummus perfectly.
Pro Chef Tips
Master the “dry zone” technique: Keep your vegetables in the center third of the tortilla, leaving the top and bottom thirds relatively clear. This creates a “dry zone” that prevents the wrap from getting soggy at the ends where you’re holding it.
Salt your vegetables separately: Instead of salting the assembled wrap, lightly salt your tomatoes and cucumbers in a separate bowl 5 minutes before assembling, then pat dry. This seasons them deeply while removing excess moisture that would otherwise make your wrap soggy.
Create a lettuce barrier: Place your lettuce or greens directly on the hummus as your first layer. This creates a protective barrier between the wet hummus and wet vegetables like tomatoes, keeping everything contained and preventing sogginess.
Use the “burrito fold” method: Professional wrap artists fold the bottom up first (about 2 inches), then fold in the sides, then roll forward. This creates a closed bottom that prevents ingredients from falling out when you eat—crucial for messy wraps with lots of fillings.
Shingle your vegetables: Instead of piling vegetables randomly, layer them in an overlapping pattern like roof shingles. This distributes them evenly throughout the wrap so every bite has a bit of everything, rather than getting all tomatoes in one bite and all carrots in another.
Toast for structure: For an even sturdier wrap that holds together better, place the assembled wrap seam-side down in a dry skillet over medium heat for 2-3 minutes. This toasts the outside slightly and “seals” the wrap, making it much easier to eat and less likely to fall apart.
Cut on the bias: Always cut wraps diagonally rather than straight across. This exposes more of the colorful interior, makes it easier to eat, and looks more professional and appetizing.
Portion control is key: Overfilling is the #1 reason wraps fall apart. Less is more—you can always make a second wrap if you’re still hungry, but you can’t undo an overstuffed, falling-apart wrap.
Common Mistakes to Avoid
Using too many wet vegetables without preparation: Tomatoes, cucumbers, and other high-moisture vegetables can turn your wrap into a soggy mess if you don’t prepare them properly. Always pat vegetables dry with paper towels, and consider removing tomato seeds. Better yet, place wetter vegetables in the center surrounded by drier ingredients.
Not spreading hummus all the way to the edges: When you don’t spread hummus to the edges, your wrap won’t seal properly and will unroll as you eat it. The hummus acts as an edible glue—use this to your advantage by spreading it evenly across the entire tortilla surface.
Overfilling the wrap: More ingredients doesn’t mean better—it just means a wrap that’s impossible to roll and even harder to eat. Stick to about 1.5 to 2 cups of vegetables maximum per wrap. If you have leftover ingredients, make another wrap rather than trying to stuff everything into one.
Using cold tortillas straight from the fridge: Cold tortillas are stiff and prone to cracking when you try to roll them. Always bring tortillas to room temperature or warm them slightly before assembling. This simple step prevents 90% of cracking and tearing issues.
Rolling too loosely: A loosely rolled wrap falls apart, makes a mess, and is frustrating to eat. Apply firm, steady pressure as you roll, pulling back slightly toward yourself with each turn to create tension. The wrap should feel snug and compact when finished.
Not drying lettuce thoroughly: Wet lettuce is a major culprit of soggy wraps. After washing, always dry lettuce completely using a salad spinner or pat it dry with paper towels. Even a small amount of water will seep into your tortilla and make it mushy.
Cutting with a dull knife: A dull knife squashes the wrap and makes all your beautiful ingredients squeeze out the sides. Always use a sharp serrated knife and cut with a gentle sawing motion rather than pressing down hard.
Storage & Meal Prep
Immediate Consumption: Hummus veggie wraps are definitely best enjoyed within a few hours of making them when vegetables are at peak freshness and crispness, and the tortilla hasn’t had time to absorb moisture from the filling.
Same-Day Storage: If making wraps in the morning for lunch later that day, wrap them tightly in parchment paper or foil and refrigerate. They’ll stay fresh and delicious for up to 8-10 hours. The parchment paper is better than plastic wrap because it allows some air circulation while still protecting the wrap.
Component Storage for Maximum Freshness: This is by far the best method for meal prep. Store all your components separately in airtight containers:
- Prepared vegetables: Up to 4 days in separate containers in the crisper drawer
- Hummus: 5-7 days in its original container or airtight container
- Tortillas: Keep at room temperature in their original package for up to 1 week
- Greens: Up to 5 days washed, dried, and wrapped in paper towels in a sealed container
- Sliced avocado: 1 day tossed with lemon juice, stored with plastic wrap pressed directly on the surface
Assembled Wrap Storage: Fully assembled wraps can be stored in the refrigerator for up to 24 hours maximum. After that, the tortilla becomes too soggy and the vegetables lose their crisp texture. Wrap tightly in parchment paper or foil, never plastic wrap, and store seam-side down.
Lunchbox Strategy: Pack your wrap in parchment paper, include a small ice pack, and store in an insulated lunch bag. This keeps it at the proper temperature while preventing excessive moisture buildup. Include any extra hummus in a small sealed container rather than packing it into the wrap.
Freezer Information: I do not recommend freezing these wraps. The high water content in the fresh vegetables means they’ll become mushy and watery when thawed, and the texture of the tortilla will deteriorate significantly. Hummus can be frozen separately for up to 3 months, but fresh vegetables should always be used fresh.
Make-Ahead & Freezer Notes
Meal Prep Sunday Strategy: For the freshest, most convenient hummus veggie wraps all week long, follow this smart prep plan:
Weekend Prep (30 minutes total):
- Wash, dry, and chop all vegetables except avocado and tomatoes
- Store each vegetable type in its own airtight container with a paper towel to absorb moisture
- Portion hummus into 1/4-cup servings in small containers for grab-and-go convenience
- Wash and thoroughly dry lettuce, wrap in paper towels, and store in a sealed container
- Prep any add-ins like sliced olives or crumbled feta
Daily Assembly: Each morning or right before lunch, simply assemble your wrap with fresh ingredients. This takes only 3-5 minutes but results in a wrap that tastes freshly made because it is! This method gives you restaurant-quality wraps every single day without any sogginess.
Deconstructed Lunch Box: For the absolute freshest option, pack all your ingredients separately in a divided container: hummus in one section, vegetables in others, and tortillas wrapped separately. Assemble at lunchtime for maximum freshness and crunch. This is especially great for kids who like to build their own.
Batch Assembly for the Week: If you prefer to assemble multiple wraps at once, make them in batches but follow these rules:
- Only make wraps for 2-3 days maximum
- Wrap each one individually in parchment paper, then foil
- Store seam-side down in the refrigerator
- Don’t add tomatoes or avocado until day-of consumption
- Expect some texture loss after day one, but they’ll still be delicious
Freezing Components: While assembled wraps don’t freeze well, you can freeze some components:
- Hummus: Freezes perfectly for up to 3 months in airtight containers or freezer bags; thaw overnight in fridge
- Cooked grains (if adding): Quinoa or rice freeze well and can be added to wraps for extra bulk
- Tortillas: Can be frozen for up to 2 months; thaw at room temperature for 30 minutes before use
Best Reheating Method: These wraps are meant to be served cold or at room temperature. If you want a warm version, assemble without lettuce and other fresh greens, then heat in a dry skillet over medium heat for 2-3 minutes per side, or press in a panini maker for 3-4 minutes until warmed through and slightly crispy.
Serving Suggestions
While a hummus veggie wrap is certainly satisfying enough to be a complete meal on its own, pairing it with the right sides transforms a simple lunch into something special and well-rounded.
Perfect Side Pairings:
- Crispy baked pita chips – Make your own by cutting pitas into triangles, brushing with olive oil, and baking until golden
- Fresh fruit – Grapes, apple slices, berries, or melon cubes add natural sweetness and freshness
- Raw veggies with extra hummus – Carrot sticks, bell pepper strips, or cherry tomatoes with hummus for dipping
- Olives and pickles – Kalamata olives, dill pickles, or pickled vegetables add a tangy, briny contrast
- Simple side salad – Mixed greens with lemon vinaigrette keeps the meal light and fresh
- Crispy chickpeas – Roasted, seasoned chickpeas add protein and satisfying crunch
- Tabouli or Israeli couscous salad – Mediterranean grain salads complement the wrap’s flavors
Soup Pairings:
- Lentil soup – Warming and protein-rich, perfect for cooler weather
- Tomato soup – Classic comfort that pairs beautifully with the fresh vegetables
- Minestrone – Italian vegetable soup adds heartiness without heaviness
- Butternut squash soup – Creamy and slightly sweet, creates a nice contrast
Beverages:
- Iced mint tea or lemonade – Refreshing and cleansing
- Sparkling water with cucumber and lime – Light, hydrating, and sophisticated
- Fresh vegetable juice – Carrot, beet, or green juice doubles down on nutrients
- Kombucha – Probiotic-rich and available in countless flavors
- Cold brew coffee – For afternoon lunches when you need an energy boost
Make it a Mediterranean Mezze Platter: Serve your hummus veggie wrap alongside a selection of Mediterranean appetizers: extra hummus, baba ganoush, tzatziki, dolmas (stuffed grape leaves), olives, feta cheese, cherry tomatoes, and warm pita bread. This turns a simple wrap into an impressive spread perfect for entertaining or special family meals.
Lunch Box Complete Meal: Pack your wrap with a piece of fruit, a handful of nuts or trail mix, and a small square of dark chocolate. This combination provides protein, healthy fats, complex carbs, and a little treat—everything you need for sustained energy.
FAQs Section
How do I keep my hummus veggie wrap from getting soggy?
The key is managing moisture. First, thoroughly dry all vegetables after washing—especially lettuce and cucumbers. Second, spread hummus all the way to the edges to create a moisture barrier. Third, place lettuce directly on the hummus before adding wetter vegetables like tomatoes. Fourth, if meal prepping, store components separately and assemble just before eating. Finally, wrap finished wraps in parchment paper rather than plastic wrap to allow some air circulation.
Can I make these wraps ahead of time?
Yes, but with some considerations. Assembled wraps are best within 8-10 hours of making them. For longer storage or meal prep, I highly recommend storing all components separately and assembling fresh each day—this only takes 5 minutes and results in a much better wrap. If you do assemble ahead, wrap tightly in parchment paper, store seam-side down in the refrigerator, and skip ingredients like tomatoes and avocado until right before eating.
What’s the best hummus to use for wraps?
Any hummus you love will work beautifully! Classic chickpea hummus is reliable and universally appealing. Roasted red pepper adds color and sweetness, garlic hummus provides extra punch, and herb-forward varieties like cilantro-jalapeño or basil pesto hummus add exciting flavor. The key is choosing a hummus with good consistency—not too thick (hard to spread) or too thin (will make the wrap soggy). Mid-priced store brands like Sabra, Cedar’s, or Trader Joe’s work wonderfully.
Can I make this wrap vegan and gluten-free?
Absolutely! The wrap is naturally vegetarian and easily adapted. For vegan, simply omit the feta cheese or use vegan feta alternative. For gluten-free, use certified gluten-free tortillas (many brands now available) or go ultra-low-carb with large collard green leaves as wraps—blanch them briefly in boiling water for 30 seconds to make them pliable. You could also use rice paper wrappers, though the technique is slightly different.
What if I don’t have all these vegetables?
That’s the beauty of this recipe—it’s incredibly flexible! Use whatever fresh vegetables you have on hand. The essential components are hummus, some type of greens, and at least 2-3 different vegetables for variety and crunch. Great substitutions include: shredded cabbage instead of lettuce, zucchini ribbons, roasted vegetables, beets, radishes, snap peas, or whatever looks good at your market. The recipe is more of a template than strict rules.
How many calories are in a hummus veggie wrap?
A basic hummus veggie wrap typically contains 280-320 calories, depending on the size of your tortilla and how much hummus you use. This makes it a perfect light lunch or snack. If you add avocado and cheese, expect closer to 400-450 calories. For a lower-calorie option, use a smaller wrap (8-inch instead of 10-inch), use less hummus, and load up on vegetables. These wraps are quite filling for their calorie count thanks to the high fiber content.
Can I add protein to make it more filling?
Definitely! While hummus provides plant-based protein, you can add more with: grilled chicken strips, turkey slices, hard-boiled eggs (sliced), seasoned chickpeas, grilled tofu, tempeh bacon, or canned tuna. For vegetarians, quinoa, lentils, or additional legumes work wonderfully. Just remember that adding protein also adds calories, so adjust other components accordingly if you’re watching intake.
How do I prevent my wrap from falling apart when I eat it?
The secret is in the rolling technique and not overfilling. Spread hummus all the way to the edges to act as glue, don’t overload with ingredients (less is more), roll tightly with firm pressure, and use the “burrito fold” method where you fold the bottom up first, then sides in, then roll forward. Cutting the wrap in half diagonally also makes it easier to handle and eat.