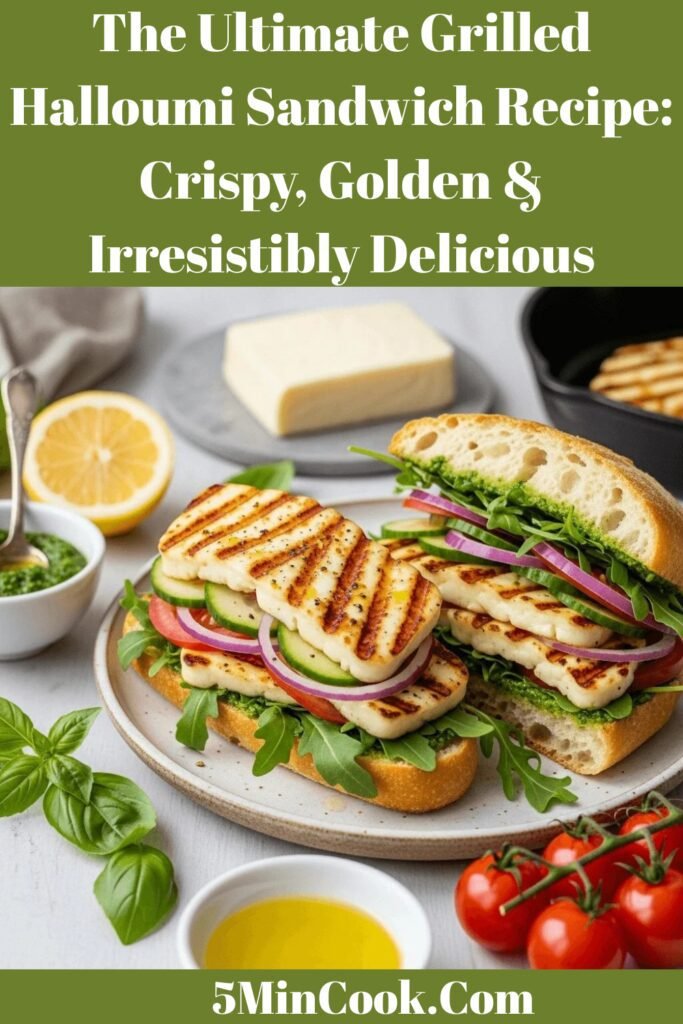
The Ultimate Grilled Halloumi Sandwich Recipe: Crispy, Golden & Irresistibly Delicious
If you’ve never experienced the magic of grilled halloumi, you’re in for an absolute treat! This grilled halloumi sandwich recipe combines the unique, squeaky texture of pan-fried halloumi cheese with fresh vegetables, flavorful spreads, and perfectly toasted bread to create a vegetarian sandwich that’s anything but boring.
Halloumi is a semi-hard cheese that has the remarkable ability to hold its shape when heated, developing a gorgeous golden-brown crust on the outside while staying soft and slightly gooey on the inside. When you bite into this sandwich, you’ll experience crispy, salty cheese paired with cool, crunchy vegetables and bright, tangy condiments—it’s a flavor and texture combination that keeps you coming back for more.
This easy halloumi sandwich is perfect for those times when you want something special but don’t have hours to spend in the kitchen. It’s ideal for weekend brunches, quick weeknight dinners, packed lunches with a gourmet twist, casual entertaining, or Meatless Mondays when you still want something hearty and satisfying. The recipe comes together in about 15 minutes but tastes like you’ve spent far longer creating something restaurant-worthy.
History / Background
Halloumi cheese has a rich history that stretches back centuries in the Eastern Mediterranean region, particularly in Cyprus, where it’s considered a national treasure. The cheese’s origins likely date back to the Medieval Byzantine period, though some historians believe it may be even older, with roots in ancient cheese-making traditions.
Traditionally, halloumi was made from a mixture of goat’s and sheep’s milk, though modern versions often incorporate cow’s milk as well. Cypriot farmers developed this unique cheese as a way to preserve milk during the hot Mediterranean summers. The cheese’s high melting point—which comes from its specific preparation method that doesn’t involve acid or acid-producing bacteria—made it perfect for grilling or frying, a revelation in a time when most cheeses would simply melt into a puddle.
The name “halloumi” is believed to come from the Cypriot word “almi,” referring to the brine in which the cheese is stored. For generations, halloumi was a staple food in Cyprus, Greece, Turkey, and other Mediterranean countries, often enjoyed for breakfast, grilled as part of mezze spreads, or paired with watermelon in summer.
However, it wasn’t until the late 20th and early 21st centuries that halloumi began its journey to international fame. As global food culture became more interconnected and people sought out vegetarian protein options, halloumi found its way onto restaurant menus worldwide. The rise of food blogging and social media, particularly Instagram and Pinterest, catapulted “grillable cheese” into the spotlight, making it a trendy ingredient beloved by food enthusiasts.
The grilled halloumi sandwich as we know it today is a more modern creation—a delicious fusion that takes this ancient Mediterranean cheese and pairs it with various international flavor profiles. It represents the beautiful evolution of traditional ingredients meeting contemporary tastes, and it’s become a vegetarian favorite that even meat-lovers enthusiastically embrace.
Why You’ll Love This Recipe
This grilled halloumi sandwich recipe is about to become your new favorite meatless meal, and here’s why it deserves a permanent spot in your cooking rotation.
The beauty of halloumi lies in its unique characteristics—it doesn’t melt like regular cheese, so you get these gorgeous, crispy, golden slices that maintain their shape and add substantial heartiness to your sandwich. It’s filling enough to satisfy even the biggest appetites without feeling heavy or overly rich.
Here’s why this recipe will win your heart:
- Ready in 15 minutes – From start to finish, you’ll have a gourmet-quality sandwich on your plate faster than delivery
- Vegetarian protein powerhouse – Each serving delivers substantial protein, making it a complete meal that keeps you satisfied for hours
- No special skills required – If you can flip food in a pan, you can make this perfectly; it’s truly beginner-friendly
- Impressive yet effortless – Looks and tastes restaurant-quality but uses simple techniques anyone can master
- Endlessly customizable – Easy to adapt with different breads, vegetables, and spreads to suit your taste preferences
- Texture heaven – The combination of crispy cheese, crunchy vegetables, and soft bread creates an incredibly satisfying eating experience
- Naturally vegetarian – No meat substitutes needed; halloumi is substantial and satisfying on its own
- Kid-approved – The mild, salty flavor and fun “squeaky” texture make it appealing even to picky eaters
- Perfect for entertaining – Fancy enough for guests but casual enough for everyday meals
Ingredient Notes
Let’s break down what makes this grilled halloumi sandwich recipe truly special. Each component plays a crucial role in creating that perfect bite.
Halloumi Cheese: The star ingredient! Look for halloumi in the specialty cheese section of your grocery store, often near feta or other Mediterranean cheeses. It comes packed in brine, which keeps it fresh and adds to its characteristic salty flavor. Brands vary slightly in texture and saltiness—Cypriot brands tend to be traditional and squeakier, while other varieties might be slightly milder. You’ll want to use about 7-8 ounces for generous sandwich portions. No good substitutes exist for halloumi’s unique properties, but if unavailable, try paneer (Indian cheese) which also holds its shape when cooked, though it lacks halloumi’s signature squeakiness.
Bread: Choose sturdy bread that can stand up to the hearty filling without getting soggy. Ciabatta rolls are excellent with their crispy crust and airy interior, sourdough provides wonderful tang and structure, focaccia adds herb-infused flavor, whole grain bread offers nutty taste and nutrition, or pita pockets make for a more casual, handheld option. Avoid soft sandwich bread—it won’t hold up to the juicy tomatoes and spreads.
Olive Oil: Essential for grilling the halloumi to golden perfection. Extra virgin olive oil adds the best flavor, but regular olive oil works fine if that’s what you have. The oil prevents sticking and helps achieve that gorgeous caramelized crust.
Fresh Vegetables: This is where you add color, crunch, and freshness. Ripe tomatoes bring juiciness and acidity, crisp lettuce or arugula adds peppery bite, thinly sliced red onion provides sharpness (soak in cold water if too pungent), and cucumber slices contribute cool crunch. You can absolutely customize based on what’s fresh and in season.
Spread/Sauce: This component ties everything together with moisture and flavor. Pesto (basil, sun-dried tomato, or arugula) brings herby richness, hummus adds creaminess and earthiness, tzatziki provides cool tanginess, or harissa mayo delivers spicy kick. Choose based on your flavor preferences—this is where you can really make the sandwich your own.
Lemon Juice: A quick squeeze brightens all the flavors and cuts through the richness of the cheese. Fresh lemon is always best, but bottled will work in a pinch.
Optional Add-ins: Consider roasted red peppers for sweetness, avocado for creaminess, pickled jalapeños for heat, or fresh herbs like mint or basil for aromatic freshness.
Equipment Needed
One of the best things about this grilled halloumi sandwich recipe is that you likely already have everything required:
- Non-stick skillet or grill pan – For cooking the halloumi; cast iron works beautifully too
- Spatula – A thin, wide spatula makes flipping the cheese slices easy
- Sharp knife – For slicing the halloumi and vegetables
- Cutting board – A clean workspace for prep
- Paper towels – For patting the halloumi dry before cooking
- Toaster or toaster oven (optional) – If you want to toast your bread
- Small bowl – For mixing any sauce ingredients
- Tongs (optional) – Can help with flipping if you prefer them to a spatula
- Grill (optional) – If you want to cook the halloumi outdoors for smoky flavor
That’s all you need! No fancy equipment, no complicated gadgets—just basic kitchen tools that make this recipe accessible to everyone.
Print
Grilled Halloumi Sandwich Recipe
This golden, crispy grilled halloumi sandwich features perfectly pan-fried halloumi cheese with fresh vegetables, flavorful spreads, and toasted bread for an irresistibly delicious vegetarian meal that’s ready in just 15 minutes!
- Total Time: 15 minutes
- Yield: 2 sandwiches (or 4 halves) 1x
Ingredients
For the Grilled Halloumi:
- 8 ounces halloumi cheese, cut into ½-inch thick slices
- 2 tablespoons olive oil (for cooking)
- Freshly squeezed lemon juice (from ½ lemon)
- Freshly ground black pepper, to taste
For the Sandwiches:
- 4 slices of bread or 2 large ciabatta rolls, sliced in half
- 4 tablespoons pesto, hummus, or tzatziki (your choice of spread)
- 1 large ripe tomato, sliced
- 1 cup fresh arugula or lettuce leaves
- ½ small red onion, thinly sliced
- ½ cucumber, thinly sliced
- Optional: roasted red peppers, avocado slices, or fresh herbs
Instructions
Step 1: Prepare the Halloumi
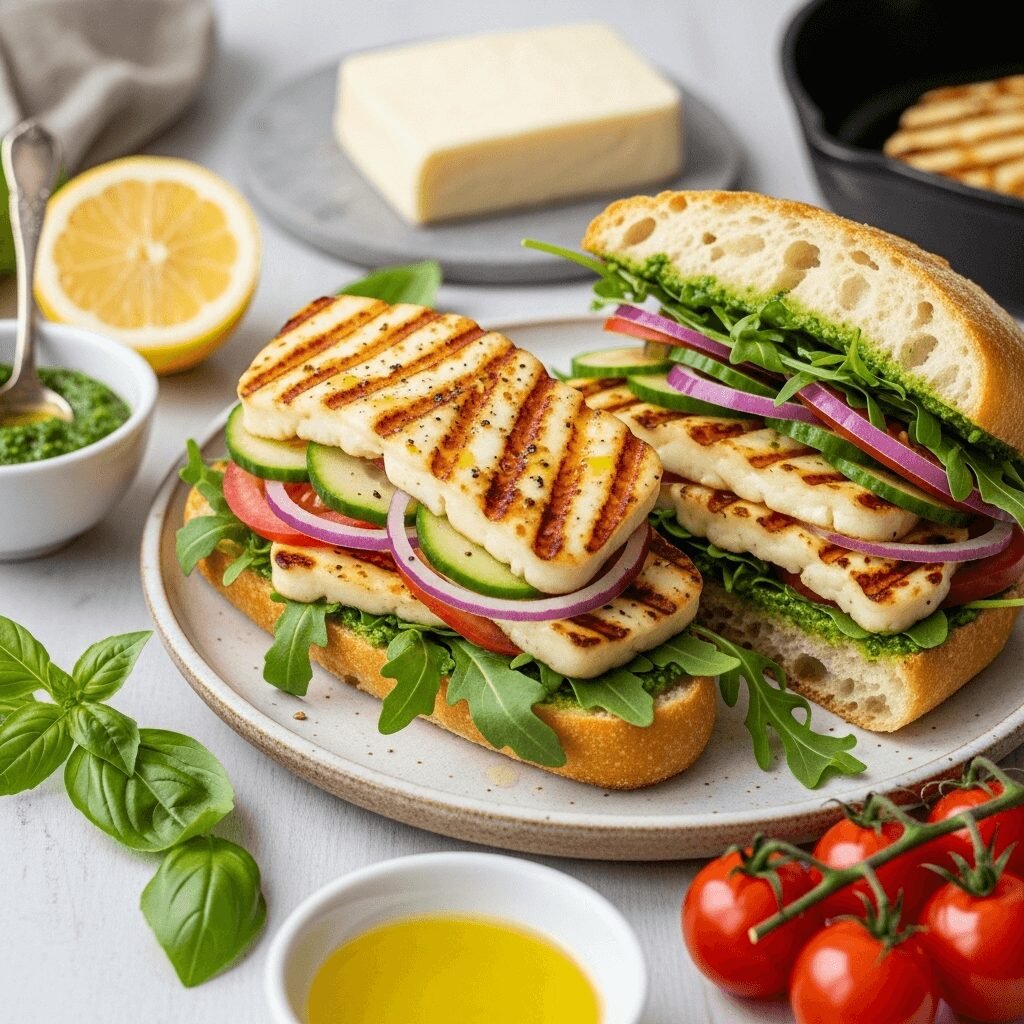
Remove the halloumi from its brine packaging and pat it completely dry with paper towels. This is crucial—any excess moisture will prevent proper browning and create steam instead of that desirable crispy crust. Once dry, cut the halloumi block into slices about ½-inch thick. You should get 6-8 slices depending on the size of your block. Set aside on a clean plate.
Step 2: Prep Your Vegetables and Bread
While you’re preparing the halloumi, slice your tomatoes, cucumber, and red onion into thin, even pieces. Wash and dry your lettuce or arugula leaves. If you’re using any optional add-ins like roasted red peppers or avocado, prepare those as well. If you prefer toasted bread, toast your slices now and set them aside. Having everything ready means quick assembly once your halloumi is cooked.
Step 3: Heat Your Pan
Place a non-stick skillet or grill pan over medium-high heat. Let it heat for 2-3 minutes until hot but not smoking. You want a good sear on the halloumi, but not so hot that it burns before developing that golden crust. Test the temperature by dropping a tiny bit of water on the pan—it should sizzle immediately.
Step 4: Cook the Halloumi
Add 1 tablespoon of olive oil to your hot pan and swirl to coat the surface. Carefully lay your halloumi slices in the pan, making sure they’re not touching (work in batches if necessary). Let them cook undisturbed for 2-3 minutes. You’ll see the edges start to turn golden. Resist the urge to move them around—patience gives you that beautiful crust! When the bottom is deep golden brown with some darker caramelized spots, flip each slice using a spatula. Add the remaining tablespoon of olive oil if the pan looks dry. Cook the second side for another 2-3 minutes until equally golden and crispy.
Step 5: Finish the Halloumi
Once both sides are beautifully browned, immediately squeeze fresh lemon juice over the hot halloumi slices and add a few grinds of black pepper. The lemon juice will sizzle and create a lovely, bright finish. Remove from heat promptly—halloumi can become rubbery if overcooked.
Step 6: Assemble Your Sandwiches
Lay out your bread or sliced rolls. Spread your chosen sauce (pesto, hummus, or tzatziki) generously on both slices of each sandwich. This creates a flavorful moisture barrier and helps everything stay together. On the bottom slice, layer your arugula or lettuce first, then add the warm grilled halloumi slices (about 3-4 per sandwich), followed by tomato slices, cucumber, and red onion. Add any optional ingredients you’re using. Top with the second slice of bread and press down gently to help everything adhere.
Step 7: Slice and Serve
Cut each sandwich in half diagonally for easier eating and that appealing presentation. Serve immediately while the halloumi is still warm and at its best texture. The contrast between the hot, crispy cheese and the cool, fresh vegetables is what makes this sandwich so special!
Notes
- Don’t skip drying the halloumi: Moisture is the enemy of crispy, golden cheese. Pat it thoroughly dry for best results.
- Temperature matters: Medium-high heat is ideal. Too low and the cheese won’t develop color; too high and it burns before the interior softens.
- Serve immediately: Halloumi is best enjoyed right after cooking when it’s warm and has that perfect texture. It becomes firmer and chewier as it cools.
- Adjust salt carefully: Halloumi is naturally quite salty, so taste before adding any additional salt to your sandwich components.
- Make it vegan: Unfortunately, halloumi is cheese and can’t be made vegan, but you can substitute with firm tofu that’s been pressed, sliced, and pan-fried with similar seasonings.
- Prep Time: 10 minutes
- Cook Time: 5 minutes
- Category: Sandwich
- Method: Grilling
- Cuisine: Mediterranean
- Diet: Vegetarian
Nutrition
- Serving Size: 1 sandwich
- Calories: 485
- Sugar: 6g
- Sodium: 890mg
- Fat: 28g
- Saturated Fat: 12g
- Unsaturated Fat: 14g
- Trans Fat: 0g
- Carbohydrates: 35g
- Fiber: 4g
- Protein: 22g
- Cholesterol: 45mg
Tips & Variations
The beauty of this grilled halloumi sandwich is its versatility. Here are some delicious ways to make it your own:
Mediterranean Style: Use pesto as your spread, add sun-dried tomatoes, Kalamata olives, roasted red peppers, and fresh basil leaves. Serve on focaccia bread for an Italian-inspired twist that’s bursting with flavor.
Greek-Inspired Version: Spread tzatziki generously on your bread, add the grilled halloumi, sliced cucumbers, tomatoes, red onion, and fresh dill. Serve in warm pita bread for an authentic Mediterranean experience that’s reminiscent of a Greek taverna.
Spicy Middle Eastern: Mix harissa paste with mayo for a spicy spread, add the halloumi, pickled turnips, cucumber, and fresh mint or cilantro. The heat from the harissa plays beautifully against the cooling cucumber and herbs.
Breakfast Sandwich: Add a fried egg to your grilled halloumi sandwich along with avocado, tomato, and arugula for a protein-packed breakfast or brunch option that will keep you energized all morning.
Summer Fresh: Use hummus as your base, then pile on grilled zucchini, eggplant, or summer squash along with the halloumi, fresh tomatoes, and basil for a seasonal celebration.
Low-Carb Option: Skip the bread entirely and serve your grilled halloumi and vegetables over mixed greens as a salad, or wrap everything in large lettuce leaves for a lighter but equally satisfying meal.
Add Sweetness: Include honey drizzled over the halloumi, or add fig jam to your spread for a sweet-savory combination that’s absolutely divine. Dried cranberries or sliced pears also work beautifully.
Make it Heartier: Add crispy bacon for non-vegetarians, chickpeas for extra protein and fiber, or sliced avocado for healthy fats and creaminess.
Pro Chef Tips
Taking your grilled halloumi sandwich from good to extraordinary comes down to these professional insights:
Pat the halloumi completely dry before cooking. This cannot be stressed enough. Any surface moisture will prevent proper browning and create steam instead of a crust. Use several paper towels and really press to absorb all the brine.
Cut uniform slices for even cooking. Aim for consistent ½-inch thickness. Thinner slices cook faster but can become tough, while thicker slices might not develop good color before the outside overcooks.
Don’t overcrowd your pan. Give each slice space to breathe. Overcrowding lowers the pan temperature, causing steaming instead of searing. Cook in batches if necessary for the best golden-brown crust.
Let the cheese develop a crust before flipping. Resist moving or flipping too early. When halloumi is ready to flip, it will release easily from the pan. If it’s sticking, it needs more time to develop that caramelized crust.
Serve immediately for best texture. Halloumi’s unique appeal is that perfect contrast between crispy exterior and soft interior, which is at its peak right after cooking. As it cools, it firms up and becomes chewier, losing some of that magic.
Layer strategically for structural integrity. Start with lettuce or arugula on the bottom bread to create a moisture barrier, add your warm halloumi, then pile on juicy tomatoes and other wet ingredients. This prevents soggy bread.
Season the vegetables too. A light sprinkle of salt and pepper on your tomatoes and cucumbers elevates the entire sandwich. Just remember that halloumi is salty, so season lightly.
Toast your bread for added texture. Even a light toasting creates a barrier against moisture and adds another textural element that makes the sandwich more interesting to eat.
Common Mistakes to Avoid
Even with a straightforward recipe like this, a few missteps can compromise your perfect grilled halloumi sandwich:
Not drying the halloumi sufficiently. This is the number one mistake home cooks make. Wet halloumi won’t brown properly and can become rubbery. Always pat it thoroughly dry with multiple paper towels before it hits the pan.
Using too low heat. Timid heat won’t give you that gorgeous golden crust. Halloumi needs medium-high heat to develop proper color and texture. You should hear a satisfying sizzle when it hits the pan.
Overcooking the cheese. While halloumi is forgiving, cooking it too long or over excessive heat makes it tough and rubbery instead of tender with a crispy exterior. Watch for golden-brown color, not deep brown or black spots.
Forgetting the acid component. That squeeze of lemon juice at the end isn’t optional—it brightens the entire dish and cuts through the richness and saltiness of the cheese. Without it, the sandwich can taste flat and one-dimensional.
Assembling too far in advance. This sandwich is meant to be eaten fresh. The hot halloumi against cool vegetables creates perfect contrast. If assembled ahead, everything reaches the same temperature and the bread can get soggy from the vegetables’ moisture.
Not tasting for salt before adding more. Halloumi is naturally very salty from its brine. Adding more salt without tasting first can make your sandwich unpleasantly salty. Always taste and adjust seasoning at the end.
Storage & Meal Prep
While this grilled halloumi sandwich is best enjoyed fresh, here’s how to handle storage and prep:
Cooked Halloumi Storage: If you have leftover cooked halloumi, store it in an airtight container in the refrigerator for up to 2 days. The texture changes significantly when cold—it becomes firmer and chewier. You can eat it cold in salads or gently reheat it in a dry skillet over medium heat for 1-2 minutes per side.
Uncooked Halloumi: The sealed package can be stored in the refrigerator for several weeks, even months, depending on the expiration date. Once opened, keep unused halloumi in its brine in an airtight container for up to 1 week.
Assembled Sandwiches: Not recommended for storage. The moisture from vegetables will make bread soggy, and the halloumi loses its appealing texture as it cools. If you must prepare ahead, keep components separate and assemble just before eating.
Prepped Vegetables: Slice your vegetables up to 1 day in advance and store them separately in airtight containers. Keep onions separate as their smell can transfer to other ingredients.
Best Approach for Meal Prep: Prepare all your vegetables and have your spread ready in the fridge. Keep the uncooked halloumi on hand. When ready to eat, it takes just 5 minutes to grill the cheese and assemble—almost as fast as reheating would be, but with infinitely better results.
Make-Ahead & Freezer Notes
Planning ahead can save time, but this recipe has some limitations:
Make-Ahead Strategy: The beauty of this sandwich is its freshness and the contrast between hot and cold elements, so extensive make-ahead isn’t ideal. However, you can prep all vegetables and have them refrigerated in separate containers. Prepare your spread or sauce and keep it ready. When mealtime comes, you’ll only need 5 minutes to cook the halloumi and assemble.
Freezing Considerations: Cooked halloumi doesn’t freeze well—it becomes crumbly and loses its characteristic texture when thawed. Fresh, uncooked halloumi can technically be frozen for up to 6 months, but the texture may change slightly, becoming more crumbly and less squeaky after freezing and thawing.
Best Freezer Approach: If you want freezer-friendly components, consider making and freezing pesto or other spreads in ice cube trays. Roasted vegetables can also be frozen. But the halloumi itself is best kept fresh and cooked to order.
Batch Cooking: If cooking for a crowd, you can grill multiple batches of halloumi and keep them warm in a low oven (200°F) for up to 15 minutes while you prepare sandwiches. Beyond that, the texture begins to suffer.
The Bottom Line: This is a quick-cooking recipe that’s best made fresh. Since it only takes 15 minutes start to finish, there’s little benefit to elaborate make-ahead strategies.
Serving Suggestions
A delicious grilled halloumi sandwich deserves equally wonderful accompaniments:
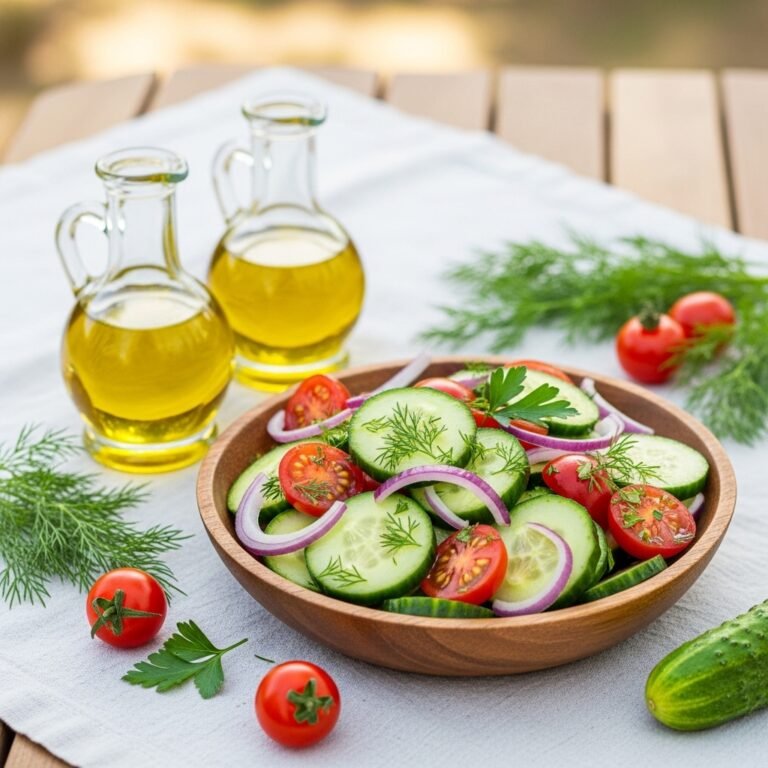
Classic Mediterranean Sides: Serve with crispy Greek-style oven fries, a simple tomato and cucumber salad with olive oil and lemon, tabbouleh for fresh herby flavors, or warm pita chips with hummus for a complete Mediterranean spread.
Fresh Salads: Pair with a Greek salad featuring tomatoes, cucumbers, red onion, and Kalamata olives, fattoush salad with crispy pita chips and sumac dressing, simple mixed greens with lemon vinaigrette, or a colorful quinoa salad with roasted vegetables.
Soup Combinations: This sandwich pairs beautifully with tomato basil soup for a comforting meal, roasted red pepper soup for sweet and savory contrast, lentil soup for added protein and heartiness, or gazpacho in summer for a refreshing light meal.
Crispy Sides: Seasoned sweet potato fries, crispy baked zucchini fries, homemade potato chips, or vegetable crisps provide satisfying crunch that complements the sandwich.
Beverage Pairings: Iced mint tea for authentic Mediterranean flavor, fresh lemonade for brightness, sparkling water with cucumber and lemon for refreshment, or even a crisp white wine like Sauvignon Blanc or Pinot Grigio for adult gatherings.
Make it a Platter: Deconstruct your sandwich elements onto a large platter—grilled halloumi slices, fresh vegetables, spreads, olives, pickled vegetables, and toasted bread pieces. Let everyone build their own for interactive, casual entertaining.
FAQs Section
Q: Can I grill halloumi on an outdoor grill?
A: Absolutely! Halloumi is actually fantastic on the grill. Use direct medium-high heat and cook for 2-3 minutes per side until grill marks form and the cheese is golden. The smoky flavor from the grill adds another delicious dimension. Just make sure your grill grates are clean and well-oiled to prevent sticking.
Q: Why is my halloumi rubbery or tough?
A: This usually happens from overcooking. Halloumi should only be cooked until golden brown on both sides—about 2-3 minutes per side. Extended cooking or excessively high heat causes the proteins to tighten too much, resulting in a rubbery texture. Remove it from heat as soon as it’s golden.
Q: Is halloumi healthy?
A: Halloumi is a good source of protein and calcium, making it nutritious in many ways. However, it is high in saturated fat and particularly high in sodium due to the brining process, so it should be enjoyed in moderation as part of a balanced diet. If watching sodium intake, look for reduced-salt versions or balance it with lots of fresh vegetables.
Q: Can I make this sandwich vegan?
A: Halloumi is a dairy cheese, so it can’t be made vegan. However, you can create a similar sandwich using extra-firm tofu that’s been pressed, sliced, and pan-fried until golden. Marinate the tofu first in olive oil, lemon juice, and herbs for added flavor. The texture won’t be identical, but it’s still delicious.
Q: Where can I buy halloumi cheese?
A: Halloumi has become increasingly popular and is now available at most major grocery stores in the specialty cheese section, often near feta or other imported cheeses. Trader Joe’s, Whole Foods, and Mediterranean or Middle Eastern markets typically carry it. If your local store doesn’t stock it, ask—they may be able to order it for you.
Q: Can I use regular cheese instead of halloumi?
A: Regular cheese will melt when grilled, so it won’t work the same way. Halloumi’s unique characteristic is its high melting point, which allows it to be grilled or fried while maintaining its shape. If you can’t find halloumi, paneer (Indian cheese) is the closest substitute as it also holds its shape when cooked, though it lacks the signature squeakiness.
Q: Why does halloumi squeak when you eat it?
A: The “squeaky” texture comes from halloumi’s unique production process and protein structure. Unlike most cheeses, halloumi doesn’t use acid or acid-producing bacteria in its production, resulting in a tighter protein network that creates that characteristic squeak against your teeth. Fresh, good-quality halloumi squeaks more than older cheese.
Conclusion
This grilled halloumi sandwich recipe proves that vegetarian meals can be just as satisfying, hearty, and crave-worthy as any meat-based dish. The combination of crispy, golden cheese with fresh, crunchy vegetables and flavorful spreads creates something truly special—a sandwich that’s simple enough for busy weeknights but impressive enough to serve to guests.
Whether you’re a committed vegetarian, trying Meatless Mondays, or simply looking to expand your lunch repertoire, this easy halloumi sandwich delivers on every level. It’s quick to make, endlessly customizable, and absolutely delicious. The unique texture of halloumi—crispy on the outside, soft on the inside—makes every bite an experience worth savoring.
I’d love to hear how your grilled halloumi sandwiches turn out! Did you try any of the variations? What spread did you use? Did you discover a new favorite combination? Drop a comment below and share your experience. And please don’t forget to save this recipe to your Pinterest boards—your future self will thank you when that halloumi craving hits! Here’s to simple, satisfying cooking that brings a little Mediterranean sunshine to your kitchen. Happy grilling, friends! 🧀