The Best Creamy Blue Cheese Dip Recipe (Ready in 10 Minutes!)
If you’ve ever found yourself at a party reaching for that bowl of tangy, creamy blue cheese dip again and again, you know exactly why this recipe deserves a permanent spot in your repertoire. This homemade blue cheese dip recipe is the ultimate crowd-pleaser that works beautifully as an appetizer dip, game day snack, or party spread. Whether you’re dunking crispy buffalo wings, fresh celery sticks, or crunchy tortilla chips, this rich and flavorful dip delivers restaurant-quality taste right in your own kitchen.
What makes this blue cheese dip so irresistible is its perfect balance of creamy, tangy, and savory flavors with just the right amount of blue cheese bite. Unlike store-bought versions that often taste artificial or overly salty, this homemade version uses real ingredients and comes together in just 10 minutes. It’s incredibly versatile, pairs with practically everything, and can be customized to your preferred level of blue cheese intensity. Best of all, you probably already have most of the ingredients in your refrigerator right now!
History / Background
Blue cheese dip has deep roots in American culinary tradition, particularly connected to the birth of Buffalo wings in Buffalo, New York. The story goes back to 1964 at the Anchor Bar, where Teressa Bellissimo created the now-famous Buffalo chicken wings. While the original accompaniment was actually a combination of celery sticks and blue cheese dressing, the concept of pairing spicy, tangy wings with cooling blue cheese quickly became inseparable in American food culture.
Blue cheese itself has ancient origins dating back to the 7th century in European caves, where the specific mold (Penicillium roqueforti) naturally developed in aging cheeses. French Roquefort, Italian Gorgonzola, and English Stilton are the most famous varieties, each with protected designations of origin. When European immigrants brought their cheese-making traditions to America, domestic blue cheese production began, with companies like Maytag Dairy Farms in Iowa becoming renowned for their artisanal blue cheese.
The transformation from blue cheese dressing to the thicker, dippable version we love today happened organically as American entertaining culture evolved in the 1970s and 80s. As casual gatherings, Super Bowl parties, and tailgating became popular social activities, hosts needed finger foods that were easy to eat while standing and mingling. The blue cheese dip—thicker than salad dressing but still creamy and scoopable—fit this need perfectly. Today, it’s become as synonymous with game day as the wings themselves, and has expanded beyond its Buffalo origins to become a beloved staple across the entire United States.
Why You’ll Love This Recipe
This homemade blue cheese dip is about to become your go-to recipe for entertaining, and here’s why: it combines the bold, sophisticated flavor of quality blue cheese with a creamy base that’s absolutely addictive. Unlike thin, runny dressings, this dip has the perfect thick and scoopable consistency that clings beautifully to whatever you’re dipping.
Here’s what makes this blue cheese dip recipe absolutely irresistible:
- Lightning-fast preparation – Ready in just 10 minutes with minimal effort and zero cooking required
- Incredible flavor – Perfectly balanced tanginess with rich, creamy texture and bold blue cheese taste
- Budget-friendly – Uses simple, affordable ingredients you can find at any grocery store
- Make-ahead friendly – Actually tastes better after the flavors meld in the refrigerator overnight
- Highly customizable – Easily adjust the blue cheese intensity, add heat, or make it lighter
- Versatile serving options – Works with wings, vegetables, chips, crackers, burgers, and more
- Crowd-pleasing – Appeals to blue cheese lovers while remaining approachable for those new to it
- Restaurant-quality results – Tastes better than anything you’d buy pre-made or order out
- No special equipment needed – Just a bowl and a spoon are all you need
Ingredient Notes
Understanding your ingredients is key to making the best blue cheese dip possible. Here’s what goes into this recipe and why each component matters:
Blue Cheese – The star of the show! Use crumbled blue cheese for the best texture and flavor. Quality matters here—Danish blue, Gorgonzola, Roquefort, or domestic varieties like Point Reyes or Maytag all work beautifully. The cheese should be crumbly but still moist. Substitution: If blue cheese is too strong for your taste, start with half the amount and gradually add more to taste, or try a milder Gorgonzola dolce.
Sour Cream – Provides the tangy base and thick, luxurious texture that makes this a dip rather than a dressing. Full-fat sour cream works best for richness and stability. Substitution: Greek yogurt works well for a protein boost and slightly tangier flavor, though the consistency will be a bit thinner.
Mayonnaise – Adds creaminess, richness, and helps bind everything together while contributing to that classic dip mouthfeel. Use real mayonnaise (not Miracle Whip) for best results. Substitution: You can use all sour cream for a lighter version, though you’ll sacrifice some richness.
Buttermilk – Thins the dip to perfect consistency while adding authentic tangy flavor. The acidity also helps balance the richness of the cheese and mayo. Substitution: Regular milk with a squeeze of lemon juice, or thin with a bit of heavy cream for extra richness.
Garlic – Fresh minced garlic or garlic powder both work. Fresh provides brighter, more pungent flavor while powder offers mellower, more evenly distributed taste. Most recipes use powder for convenience and consistency.
Worcestershire Sauce – Adds umami depth and subtle complexity that makes people wonder what your secret ingredient is. Just a small amount transforms the flavor profile from good to amazing.
Fresh Lemon Juice – Brightens all the flavors and cuts through the richness with pleasant acidity. Always use fresh lemon juice rather than bottled for the best taste.
Black Pepper – Freshly cracked black pepper adds subtle heat and aromatics that complement the blue cheese perfectly.
Fresh Herbs (Optional) – Chopped chives, parsley, or dill add color, freshness, and an extra layer of flavor sophistication.
Equipment Needed
The beauty of this recipe is that you need almost nothing in terms of special equipment. Here’s what you’ll use:
- Mixing bowl – Medium-sized bowl for combining all ingredients
- Whisk or fork – For blending the creamy ingredients smoothly
- Measuring cups and spoons – For accurate ingredient proportions
- Rubber spatula – Helpful for scraping down the sides and folding in the blue cheese
- Storage container – Airtight container for refrigerating the dip
- Serving bowl – An attractive bowl for presentation when serving
Optional but helpful:
- Food processor or blender – If you prefer a completely smooth dip without any cheese chunks
- Microplane or garlic press – For finely mincing fresh garlic if using
Creamy Blue Cheese Dip Recipe
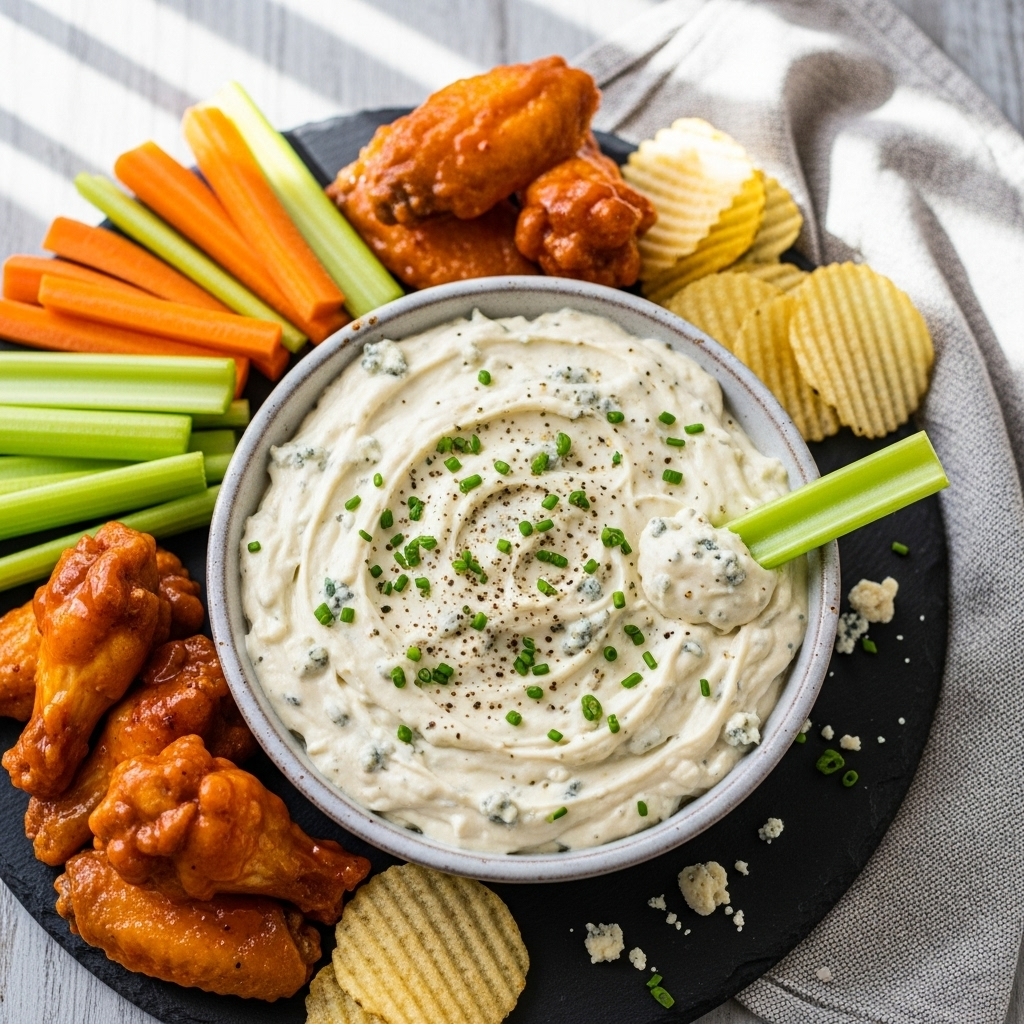
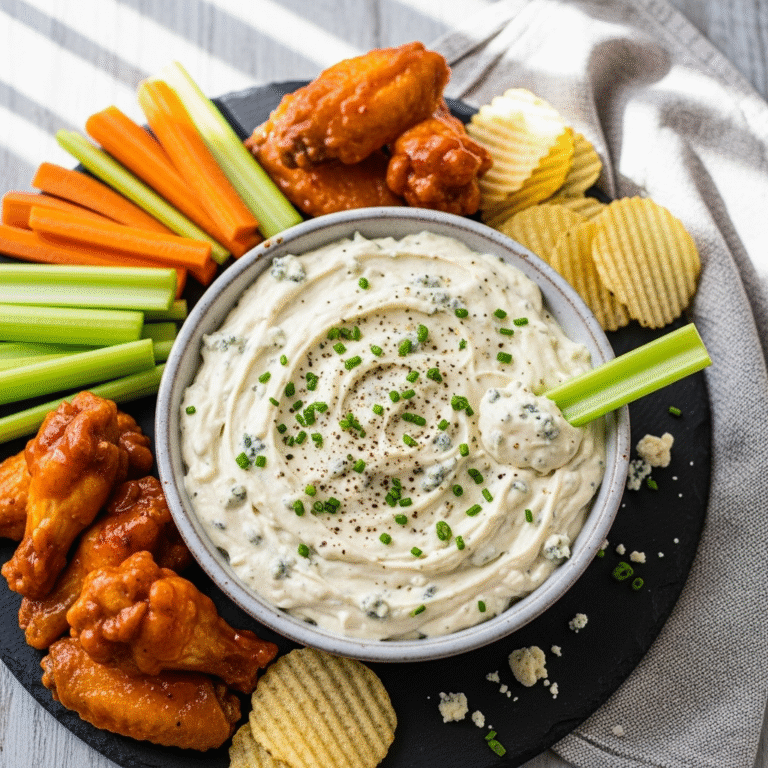
This creamy, tangy blue cheese dip is the perfect accompaniment to buffalo wings, fresh vegetables, and chips. Made with real blue cheese crumbles, sour cream, and mayonnaise, it’s ready in just 10 minutes and tastes better than any restaurant version. The bold blue cheese flavor is perfectly balanced with rich creaminess and bright acidity.
- Total Time: 10 minutes
- Yield: About 2 cups (16 servings, 2 tablespoons each) 1x
Ingredients
- 1 cup sour cream (full-fat recommended)
- ½ cup mayonnaise
- ¼ cup buttermilk (plus more to thin if needed)
- 6 ounces blue cheese, crumbled (about 1½ cups)
- 1 tablespoon fresh lemon juice
- 1 teaspoon Worcestershire sauce
- 1 clove garlic, minced (or ½ teaspoon garlic powder)
- ¼ teaspoon freshly ground black pepper
- ⅛ teaspoon salt (adjust to taste)
- 2 tablespoons fresh chives, chopped (optional)
- 1 tablespoon fresh parsley, chopped (optional)
Instructions
- Prepare your workspace: Gather all ingredients and measuring tools. If your blue cheese came in a block, crumble it into small pieces. Set aside about ¼ cup of the crumbled cheese for adding texture at the end.
- Create the creamy base: In a medium mixing bowl, combine the sour cream, mayonnaise, and buttermilk. Whisk together until smooth and well blended with no lumps. The mixture should be thick but pourable.
- Add the flavorings: Add the lemon juice, Worcestershire sauce, minced garlic, black pepper, and salt to the creamy base. Whisk thoroughly until all ingredients are fully incorporated and the mixture is uniform.
- Incorporate the blue cheese: Add the majority of your crumbled blue cheese (reserving that ¼ cup you set aside earlier) to the bowl. Use a fork to mash about half of the cheese into the mixture, breaking it down to release its flavor. This creates that signature blue cheese taste throughout the dip.
- Add texture: Gently fold in the reserved blue cheese crumbles and fresh herbs (if using) with a rubber spatula. These larger pieces provide delightful pockets of intense blue cheese flavor and give the dip visual appeal and interesting texture.
- Adjust consistency: If your dip seems too thick, add buttermilk 1 tablespoon at a time until you reach your desired consistency. For a thicker dip perfect for vegetables, keep it as is. For a thinner consistency better suited for wings, add 2-3 tablespoons additional buttermilk.
- Chill and serve: Cover the bowl with plastic wrap and refrigerate for at least 30 minutes before serving. This allows the flavors to meld together beautifully. The dip can be served immediately if needed, but it truly shines after resting. Give it a good stir before transferring to a serving bowl.
Notes
- Blue cheese intensity: For milder flavor, use 4 ounces of blue cheese. For bold, intense flavor, use up to 8 ounces.
- Make it smooth: If you prefer a completely smooth dip without any chunks, pulse all ingredients in a food processor until creamy.
- Flavor development: This dip tastes significantly better after sitting in the refrigerator for several hours or overnight as the flavors meld.
- Consistency adjustment: The dip will thicken slightly as it sits. Add a splash of buttermilk or milk when serving if needed.
- Serving temperature: Serve slightly chilled or at cool room temperature for the best flavor. Remove from refrigerator 10-15 minutes before serving.
- Prep Time: 10 minutes
- Cook Time: 0 minutes
Nutrition
- Serving Size: 2 tablespoons
- Calories: 95
- Sugar: 1g
- Sodium: 185mg
- Fat: 9g
- Saturated Fat: 3g
- Unsaturated Fat: 4g
- Trans Fat: 0g
- Carbohydrates: 2g
- Fiber: 0g
- Protein: 3g
- Cholesterol: 15mg
Tips & Variations
Spicy Blue Cheese Dip: Add 2-3 tablespoons of hot sauce (Frank’s RedHot works perfectly), a pinch of cayenne pepper, or some finely diced jalapeños for heat that complements the blue cheese beautifully.
Lighter Version: Replace half the mayonnaise with additional Greek yogurt or use light sour cream and light mayo. You’ll sacrifice some richness but significantly reduce calories and fat.
Extra Creamy: Add 2 ounces of softened cream cheese to the mixture and blend until completely smooth for an even richer, more luxurious texture.
Bacon Blue Cheese Dip: Fold in 4 slices of cooked, crumbled bacon for a smoky, savory twist that everyone will love.
Buffalo Blue Cheese Dip: Mix in 3-4 tablespoons of buffalo wing sauce to create a spicy, tangy dip that doubles down on those classic wing flavors.
Herb Garden Version: Add fresh dill, tarragon, or basil along with the chives and parsley for a more herbaceous, garden-fresh flavor profile.
Ranch-Style Blue Cheese: Add dried dill, dried parsley, onion powder, and a touch more garlic for a dip that combines the best of ranch and blue cheese flavors.
Pro Chef Tips
Choose quality blue cheese: The cheese is the star here, so don’t skimp. Look for cheese that’s creamy and crumbly rather than dry and chalky. Specialty cheese counters often have better options than pre-packaged supermarket varieties.
Temperature matters: All your dairy ingredients should be at cool room temperature, not ice-cold from the refrigerator. This allows them to blend more smoothly and creates better texture.
Mash and fold technique: By mashing half the blue cheese into the base and folding in the rest, you achieve both intense flavor throughout and those satisfying chunks of cheese in every bite. This two-step approach is what separates great blue cheese dip from mediocre versions.
Season gradually: Blue cheese varies in saltiness depending on the brand and variety. Start with less salt than you think you need, taste after chilling, then adjust. It’s easier to add more than to fix an over-salted dip.
Let it rest: The single most important tip for incredible flavor is patience. That 30-minute minimum rest time (or ideally overnight) allows the blue cheese to permeate the entire dip, the garlic to mellow, and all the flavors to harmonize into something truly special.
Control the consistency: Make your dip slightly thicker than your target consistency, as it will thin slightly when it comes to room temperature. It’s much easier to thin a dip than to thicken it.
Common Mistakes to Avoid
Using pre-crumbled cheese from a bag: While convenient, pre-crumbled blue cheese often contains anti-caking agents that can make your dip grainy and affect the flavor. Buy a wedge and crumble it yourself for the creamiest, most flavorful results.
Over-mixing the dip: Once you’ve folded in those final cheese chunks, resist the urge to keep stirring. Over-mixing will break down all the cheese and eliminate that wonderful chunky texture that makes each bite interesting.
Serving it too cold: Blue cheese dip served straight from the refrigerator has muted flavors and stiff texture. Let it sit at room temperature for 10-15 minutes before serving so the flavors can fully bloom and the consistency becomes perfectly creamy and dippable.
Skipping the resting time: I know you’re excited to dig in, but serving this dip immediately after mixing means you’re missing out on the magic that happens when the flavors meld together. Even 30 minutes makes a dramatic difference.
Wrong ratio of creamy to chunky: If you mash all the blue cheese into the base, you’ll have an intensely flavored but one-dimensional dip. If you leave all the cheese in chunks, the base will be bland with occasional intense bites. The mash-and-fold technique creates perfect balance.
Storage & Meal Prep
Refrigerator Storage: Store your blue cheese dip in an airtight container in the refrigerator for up to 5-7 days. Press plastic wrap directly against the surface of the dip before sealing the container to prevent a skin from forming and to keep it fresh longer.
Consistency After Storage: The dip will thicken considerably after a day or two in the refrigerator. Simply stir in a tablespoon or two of buttermilk or milk to restore the perfect consistency before serving.
Freshness Tips: The dip is actually at its flavor peak on day 2 or 3 after making it, so don’t hesitate to make it well in advance. The garlic mellows, the blue cheese flavor distributes evenly, and everything becomes harmonious.
Signs of Spoilage: Discard the dip if you notice any off odors, mold growth (other than the intentional blue cheese veining), or if the dairy has separated and won’t recombine with stirring.
Meal Prep Strategy: Make a double batch on Sunday and portion it into smaller containers for easy weeknight snacking, lunch box additions, or impromptu entertaining throughout the week.
Make-Ahead & Freezer Notes
Make-Ahead Instructions: This dip is absolutely perfect for making ahead—in fact, I recommend it! Prepare the dip up to 3 days in advance and store it covered in the refrigerator. The flavor improves dramatically as it sits, making it ideal for stress-free party preparation.
Freezing: While technically possible, freezing blue cheese dip is not recommended. The dairy will separate upon thawing, creating a watery, grainy texture that’s difficult to restore. The mayonnaise and sour cream base simply don’t freeze well, and you’ll be disappointed with the results.
Alternative Freezing Method: If you absolutely must freeze it, whip the thawed dip in a food processor with a tablespoon of fresh sour cream to help re-emulsify it. However, fresh is always better.
Best Timing: For optimal flavor and texture, make the dip 12-24 hours before serving. This gives you the convenience of advance preparation while ensuring the absolute best quality.
Serving Suggestions
Blue cheese dip is incredibly versatile and pairs beautifully with so many foods. Here are the best serving companions:
Classic Pairings:
- Buffalo wings (obviously!) – both traditional and boneless
- Crispy celery and carrot sticks
- Fresh vegetable crudité (cucumber, bell peppers, cherry tomatoes, radishes)
- Potato chips and kettle chips
- Tortilla chips and corn chips
Creative Serving Ideas:
- As a spread on burgers and sandwiches
- Drizzled over wedge salads
- Alongside grilled or air-fried chicken tenders
- With crispy french fries or sweet potato fries
- As a topping for baked potatoes
- With soft pretzels or pretzel bites
- Spread on crostini or crackers
- As a dip for pizza crusts
Build a Complete Spread: Pair your blue cheese dip with other appetizers like mozzarella sticks, jalapeño poppers, loaded nachos, spinach artichoke dip, and a selection of olives and pickles for an impressive game day or party spread.
Beverage Pairings: The bold, tangy flavors work beautifully with cold beer (IPAs and lagers especially), crisp white wines, or classic cocktails like margaritas and Moscow mules.
FAQs Section
Can I make this dip without buttermilk? Absolutely! You can substitute regular milk mixed with a teaspoon of lemon juice or white vinegar. Let it sit for 5 minutes to curdle slightly, then use as directed. Heavy cream thinned with a splash of lemon juice also works wonderfully.
How do I make this dip less strong if I’m not a huge blue cheese fan? Start with just 4 ounces of blue cheese instead of 6, and choose a milder variety like Gorgonzola dolce. You can also mix in an extra ounce or two of cream cheese to mellow the flavor while maintaining creaminess.
Can I make this dip dairy-free or vegan? Yes, though the flavor will be quite different. Use vegan sour cream, vegan mayonnaise, and dairy-free blue cheese alternatives. The texture and tanginess can be replicated reasonably well, but the distinctive blue cheese flavor is harder to match.
Why is my dip watery? This usually happens if you’ve added too much liquid (buttermilk or lemon juice) or if your blue cheese was particularly wet. Fix it by draining off excess liquid and stirring in a tablespoon of mayonnaise or sour cream to thicken it back up.
Can I use this as a salad dressing? Definitely! Just thin it with additional buttermilk until it reaches pourable consistency. It makes an incredible dressing for wedge salads, Buffalo chicken salads, and cobb salads.
What’s the best blue cheese to use? For the most authentic flavor, use Danish blue, domestic Maytag blue, or Point Reyes blue cheese. Gorgonzola (particularly Gorgonzola dolce) offers a milder, creamier option. Roquefort is more intense and crumbly. Avoid pre-crumbled cheese if possible.
How can I make this dip smoother without any chunks? Simply combine all ingredients (including all the blue cheese at once) in a food processor or blender and process until completely smooth. Some people prefer this ultra-creamy consistency for spreading on sandwiches or drizzling over salads.
Conclusion
There you have it—the ultimate homemade blue cheese dip recipe that’s going to elevate every game day gathering, party, and casual weeknight snack session in your future! This creamy, tangy, boldly flavored dip proves that the best things in life really are the simplest. With just a handful of ingredients and 10 minutes of your time, you can create something infinitely better than anything you’d find in the grocery store or at a restaurant.
The beauty of this recipe lies in its flexibility. Make it ahead for stress-free entertaining, customize the blue cheese intensity to your preference, add heat if you’re feeling spicy, or keep it classic and traditional. However you make it, you’ll love having this reliable recipe in your cooking arsenal.
I’d love to hear how your blue cheese dip turns out! Did you make any creative variations? What did you serve it with? Drop a comment below and let me know, and if you loved this recipe, please share it on Pinterest so other home cooks can discover it too. Don’t forget to pin it to your appetizer board for easy access whenever those party plans come up!
Now grab that blue cheese from your refrigerator and get mixing—your best dip ever is just minutes away!