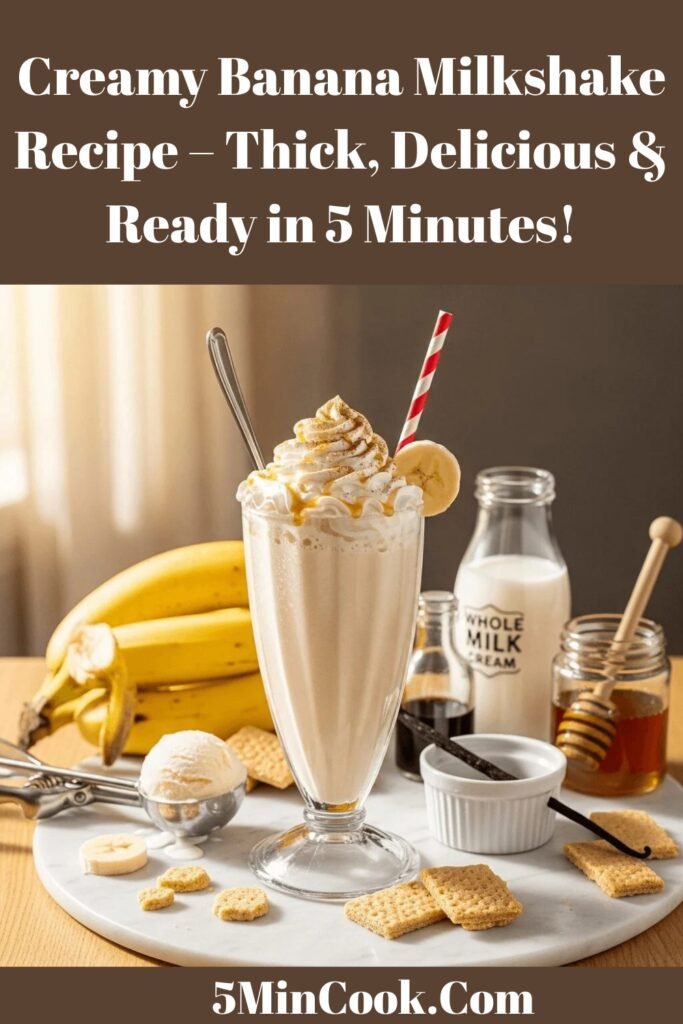
Creamy Banana Milkshake Recipe – Thick, Delicious & Ready in 5 Minutes!
Get ready to fall in love with the easiest, creamiest, most delicious banana milkshake you’ve ever tasted! This homemade banana milkshake is thick, naturally sweet, and incredibly satisfying – it tastes like a dessert but is made with simple, wholesome ingredients you probably already have in your kitchen. With ripe bananas, vanilla ice cream, and a splash of milk, you can create a restaurant-quality shake in just 5 minutes flat!
This easy banana milkshake is the ultimate comfort drink that appeals to everyone from toddlers to grandparents. The natural sweetness and creamy texture of bananas blend perfectly with vanilla ice cream to create a shake that’s both indulgent and nourishing. Unlike artificial-tasting fast-food shakes, this homemade version lets you control every ingredient, ensuring you’re getting real fruit, quality dairy, and no weird additives or preservatives.
Whether you’re looking for a quick breakfast on busy mornings, an after-school treat for the kids, a post-workout recovery drink, or a sweet dessert that comes together in minutes, this creamy banana shake is your answer. It’s naturally gluten-free, packed with potassium and calcium, and so delicious that even people who claim they don’t like bananas absolutely love it! Plus, it’s endlessly customizable – add peanut butter, chocolate, honey, or spices to make it uniquely yours. Ready to blend up happiness in a glass? Let’s get started!
History / Background
The banana milkshake represents a beautiful marriage between American soda fountain culture and tropical fruit that traveled thousands of miles to become a kitchen staple. While milkshakes originated in the late 1800s, the addition of bananas to these creamy concoctions became popular in the early-to-mid 20th century as bananas became more widely available and affordable in the United States.
Bananas themselves have a fascinating history. Native to Southeast Asia and Papua New Guinea, bananas have been cultivated for over 7,000 years. They made their way to Africa, then to the Caribbean and Central America through Portuguese and Spanish explorers in the 15th and 16th centuries. The United Fruit Company (now Chiquita) began importing bananas to the United States in the late 1800s, and by the 1900s, bananas had become one of America’s favorite fruits.
The classic American milkshake evolved dramatically with the invention of the electric blender in the 1920s and 1930s. Hamilton Beach and Waring introduced blenders specifically designed for making smooth, creamy drinks, which revolutionized soda fountain beverages. When someone had the brilliant idea to add ripe bananas to the traditional vanilla milkshake, magic happened. The banana’s natural creaminess, sweetness, and mild flavor made it the perfect addition to ice cream and milk.
Banana milkshakes gained particular popularity in the 1950s and 1960s during the golden age of American diners and soda fountains. They were promoted as a healthy, energy-boosting drink – and rightfully so! Bananas provide potassium, vitamin B6, vitamin C, and natural sugars for quick energy. Athletes began drinking banana shakes for post-workout recovery, while parents served them to kids as a nutritious snack disguised as a treat.
In many cultures around the world, banana-based drinks have their own traditions. In India, banana lassi has been enjoyed for centuries. In Latin America, batidos de banana are popular breakfast drinks. The American-style banana milkshake recipe we know and love today combines the best of these traditions – it’s thick like a shake, nutritious like a smoothie, and absolutely delicious like the best dessert!
Why You’ll Love This Recipe
This easy banana milkshake is about to become your new favorite go-to recipe, and here’s why it’s so incredibly special! What makes this shake truly magical is how it takes two simple, everyday ingredients – bananas and vanilla ice cream – and transforms them into something that tastes like pure indulgence. The ripe bananas provide natural sweetness, so you don’t need to add refined sugar, while their creamy texture creates a thick, satisfying shake that keeps you full for hours.
The beauty of this recipe is its perfect balance of health and happiness. Yes, it contains ice cream (because life is short and ice cream is delicious!), but it also delivers real nutritional benefits from the banana – potassium for heart health, vitamin B6 for energy metabolism, and natural fiber for digestion. It’s the kind of treat that makes you feel good about what you’re putting in your body while tasting absolutely amazing.
Here’s why you’ll absolutely love this banana milkshake:
- Ready in 5 minutes – Literally one of the fastest recipes ever
- Only 4 basic ingredients – Banana, ice cream, milk, and vanilla extract
- Naturally sweet – No refined sugar needed thanks to ripe bananas
- Incredibly thick and creamy – Restaurant-quality texture at home
- Kid-approved – Even picky eaters love this sweet, smooth shake
- Budget-friendly – Uses affordable, everyday ingredients
- Nutritious treat – Packed with potassium, calcium, and protein
- Customizable – Easy to add your favorite flavors and mix-ins
- Energy-boosting – Perfect pre or post-workout fuel
- Naturally gluten-free – Safe for those avoiding gluten
- No artificial ingredients – Just real, wholesome foods
- Great for using overripe bananas – Reduces food waste!
- Family-friendly – Everyone from toddlers to seniors loves it
Ingredient Notes
Let’s talk about the simple but important ingredients that create the perfect banana milkshake:
Ripe Bananas – The star ingredient! You want bananas that are ripe with brown spots or even slightly overripe – these are sweeter, more flavorful, and blend smoother than green or barely-yellow bananas. The riper the banana, the sweeter your shake will be and the less additional sweetener you’ll need. Bananas provide natural sweetness, creamy texture, potassium (great for heart health and muscle function), vitamin B6, and fiber. For the thickest, coldest shake, use frozen banana chunks! Simply peel ripe bananas, break into pieces, and freeze in a bag. You’ll need 1-2 large bananas per serving. Can’t use bananas? You could substitute with frozen mango for sweetness, though the flavor will obviously be different.
Vanilla Ice Cream – This creates that classic milkshake texture and adds rich creaminess. Use good quality vanilla ice cream with a short ingredient list – premium brands with real cream and vanilla make a noticeable difference in taste. Full-fat ice cream creates the best texture, but you can use low-fat if preferred (though it won’t be as creamy). French vanilla or vanilla bean ice cream with visible specks adds extra flavor dimension. You’ll need about 2-3 scoops per serving. For a healthier option, use frozen yogurt or even Greek yogurt ice cream. Dairy-free? Use your favorite non-dairy vanilla ice cream – coconut, oat, or almond milk based all work beautifully!
Milk – The liquid that helps everything blend smoothly. Whole milk creates the richest, creamiest shake, but you can use 2%, 1%, or even skim milk if that’s your preference (though lower fat means less creamy texture). The amount of milk you use determines thickness – start with ½ cup and add more if needed. For an extra-rich shake, use half milk and half heavy cream. Can’t do dairy? Almond milk, oat milk, coconut milk, or soy milk all work wonderfully! Oat milk is especially creamy and creates amazing texture.
Vanilla Extract – A small but mighty ingredient! Pure vanilla extract enhances the banana flavor and adds aromatic depth. Just ½ teaspoon makes a noticeable difference. Always use pure vanilla extract, not imitation – the flavor quality is significantly better. You can also use vanilla bean paste for extra visual appeal and intense flavor.
Optional Add-Ins for Extra Deliciousness:
- Honey or maple syrup (1-2 teaspoons) – If your bananas aren’t super ripe or you want extra sweetness
- Peanut butter (2 tablespoons) – Creates a banana-PB shake that’s incredibly satisfying
- Cocoa powder (1-2 tablespoons) – For a chocolate banana shake
- Cinnamon (¼ teaspoon) – Adds warmth and complements banana perfectly
- Pinch of salt – Enhances all other flavors
- Ice cubes (3-4) – If using fresh bananas instead of frozen, for extra thickness
Equipment Needed
Making this banana milkshake requires just basic kitchen equipment:
- Blender – Any standard blender works! You don’t need a high-powered Vitamix (though it helps). A basic countertop blender, personal blender, or even an immersion blender can get the job done
- Measuring cups and spoons – For accurate portions
- Knife and cutting board – For slicing bananas
- Tall glasses – For serving your beautiful shake (16 oz glasses are perfect)
- Thick straws or spoons – Regular straws might be too narrow for thick shakes!
- Spatula – For scraping down blender sides and getting every last bit
- Ice cream scoop – Makes portioning ice cream easy
Creamy Banana Milkshake Recipe
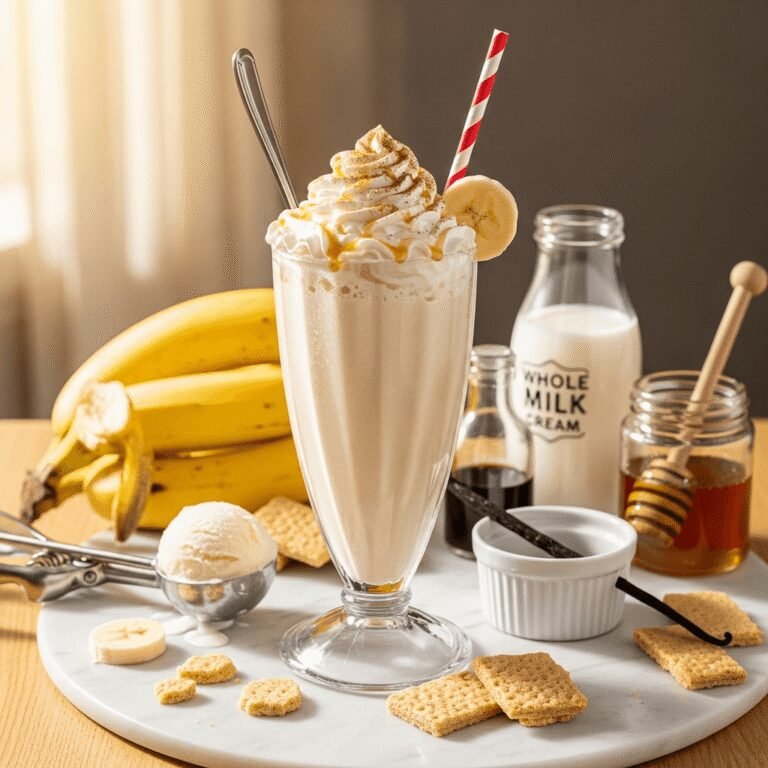
This creamy Banana Milkshake is thick, naturally sweet, and absolutely delicious! Made with ripe bananas, vanilla ice cream, milk, and a splash of vanilla, it’s ready in just 5 minutes. Perfect for breakfast, snacks, or dessert – everyone loves this classic shake!
- Total Time: 5 minutes
- Yield: 2 servings 1x
Ingredients
- 2 large ripe bananas (fresh or frozen), broken into chunks
- 3 cups vanilla ice cream (about 6 scoops)
- ¾ cup whole milk (adjust for desired thickness)
- ½ teaspoon pure vanilla extract
- 1-2 teaspoons honey or maple syrup (optional, if bananas aren’t very ripe)
- Pinch of salt (optional, enhances flavor)
- 4-5 ice cubes (optional, only if using fresh bananas)
For Serving (Optional):
- Whipped cream
- Sliced banana
- Chocolate or caramel drizzle
- Crushed graham crackers or vanilla wafers
Instructions
- Prepare Your Bananas – If using fresh bananas, peel them and break into chunks. For the thickest, coldest shake, use frozen banana chunks! To freeze bananas: peel ripe bananas, break into 1-inch pieces, and freeze on a parchment-lined tray for 2 hours, then transfer to a freezer bag. Frozen bananas create the best texture without watering down your shake.
- Soften Ice Cream Slightly – Remove vanilla ice cream from the freezer and let it sit at room temperature for 3-5 minutes until it’s soft enough to scoop easily but still very cold and firm. This makes blending easier and prevents your blender motor from straining. Don’t let it melt – it should still hold its shape!
- Add Ingredients to Blender – Place ingredients in this strategic order for best results: milk first (helps blades move freely), then banana chunks, vanilla ice cream scoops, vanilla extract, and a pinch of salt. If using fresh (not frozen) bananas, add 4-5 ice cubes for thickness. Don’t add optional honey yet – taste first!
- Start Blending on Low – Secure the blender lid and start on the lowest speed setting for 10-15 seconds. This breaks down the larger pieces without straining the motor. You’ll hear the blender working to incorporate everything.
- Increase to Medium-High Speed – Once ingredients start moving, gradually increase to medium-high speed. Blend for 30-45 seconds until the mixture is completely smooth, creamy, and uniformly combined with no banana or ice cream chunks remaining. Use the blender’s tamper if you have one to push ingredients toward the blades.
- Stop and Scrape Down Sides – Turn off the blender and use a spatula to scrape down any ingredients stuck to the sides. This ensures everything blends evenly and you don’t waste any of that delicious shake!
- Blend Again Briefly – Give it one more 10-15 second blend to make sure everything is perfectly smooth and creamy.
- Check Consistency and Adjust – Your shake should be thick and creamy but still pourable – think soft-serve ice cream consistency. If it’s too thick and won’t blend, add 2-3 tablespoons more milk and pulse briefly. If it’s too thin, add another scoop of ice cream or a few more frozen banana chunks and blend again.
- Taste and Perfect – Give your shake a taste! If it needs more sweetness (depends on banana ripeness), add 1-2 teaspoons honey or maple syrup and blend for 10 seconds. If you want stronger vanilla flavor, add another ¼ teaspoon vanilla extract.
- Serve Immediately – Pour into tall glasses and serve right away while perfectly cold and thick! Top with whipped cream, a banana slice, or a drizzle of chocolate sauce if desired. Enjoy with a thick straw or spoon!
Notes
- Banana Ripeness: Brown-spotted or slightly overripe bananas are ideal – they’re sweeter and more flavorful than green or barely-yellow bananas.
- Frozen vs. Fresh Bananas: Frozen bananas create a thicker, colder shake without needing ice. If using fresh, add ice cubes for thickness.
- Milk Amount: Start with less milk (½ cup) and add more as needed. It’s easier to thin a shake than thicken it!
- Ice Cream Quality: Premium ice cream makes a noticeably better shake. Look for brands with cream as the first ingredient.
- Blending Time: Don’t over-blend! 30-45 seconds is usually enough. Over-blending warms the shake and makes it thin.
- Sweetness: Ripe bananas usually provide enough sweetness. Only add honey if needed after tasting.
- Prep Time: 5 minutes
- Cook Time: 0 minutes
Nutrition
- Serving Size: 1 milkshake (approximately 14 oz)
- Calories: 380
- Sugar: 52g
- Sodium: 150mg
- Fat: 14g
- Saturated Fat: 8g
- Unsaturated Fat: 5g
- Trans Fat: 0g
- Carbohydrates: 60g
- Fiber: 3g
- Protein: 9g
- Cholesterol: 50mg
Tips & Variations
This banana milkshake is delicious as-is, but here’s how to make it uniquely yours!
Flavor Variations:
- Peanut Butter Banana: Add 2-3 tablespoons creamy peanut butter for a protein-packed, satisfying shake
- Chocolate Banana: Add 2 tablespoons cocoa powder or chocolate syrup for a chocolate-banana combo
- Banana Nutella: Blend in 2 tablespoons Nutella for hazelnut-chocolate richness
- Caramel Banana: Swirl in caramel sauce and top with sea salt
- Cinnamon Banana: Add ½ teaspoon cinnamon and a dash of nutmeg for warm spice
- Coffee Banana: Add 2 tablespoons cold brew coffee or 1 shot espresso
Healthy Modifications:
- Protein-Packed: Add a scoop of vanilla protein powder or Greek yogurt
- Lower Sugar: Use sugar-free ice cream and less banana (just 1 instead of 2)
- Lower Calorie: Use frozen banana, almond milk, and low-fat frozen yogurt instead of ice cream
- Smoothie Style: Skip ice cream entirely, use frozen banana, Greek yogurt, and milk for a lighter version
- Add Greens: Throw in a handful of spinach (you won’t taste it, I promise!)
Texture Adjustments:
- Extra Thick: Use frozen bananas, less milk (½ cup), and eat with a spoon
- Thinner/Easier to Sip: Add more milk gradually until desired consistency
- Creamier: Add ¼ avocado or a tablespoon of heavy cream
- Icier: Add extra ice cubes for a more frozen texture
Mix-In Ideas:
- Crushed Oreos or graham crackers
- Fresh or frozen berries
- A spoonful of Nutella or cookie butter
- Chia seeds or flax seeds for nutrition
- Rolled oats for extra fiber
- Dates for natural sweetness
Topping Suggestions:
- Fresh whipped cream
- Sliced banana
- Crushed nuts (walnuts, pecans, almonds)
- Chocolate chips or shavings
- Caramel or chocolate drizzle
- Crumbled cookies
- Coconut flakes
Pro Chef Tips
Want to make an absolutely perfect banana milkshake? Here are professional secrets:
Freeze Bananas at Peak Ripeness – Don’t throw away overripe bananas! That’s when they’re sweetest and perfect for shakes. Peel them, break into chunks, and freeze in bags. Keep a stash in your freezer so you’re always ready to make banana shakes. Frozen bananas create the thickest, creamiest texture possible without any ice that would water down the flavor.
The Banana-to-Ice Cream Ratio Matters – The perfect ratio is about 1 large banana to 1½ cups (3 scoops) ice cream. Too much banana and it tastes too “healthy” and banana-forward. Too much ice cream and you lose the banana flavor. This recipe’s ratio is tested and perfected for balanced flavor.
Start with Less Liquid – This is crucial! It’s infinitely easier to thin a shake than thicken it. Always start with ½ cup milk, blend, check consistency, and add more liquid gradually if needed. A too-thin shake is disappointing and can’t be fixed without adding more ice cream.
Use Brown-Spotted Bananas – The brown spots on banana peel indicate that the starches have converted to sugars. These bananas are sweeter, more flavorful, and blend smoother than green or barely-yellow bananas. If your bananas aren’t ripe enough, your shake will taste starchy and bland.
Don’t Over-Blend – Blend just until smooth (30-45 seconds). Over-blending introduces too much air (making it frothy instead of creamy), warms up the shake from friction, and can make it thin and runny. As soon as everything is smooth and incorporated, stop immediately!
Add a Pinch of Salt – This might sound weird, but a tiny pinch of salt enhances sweetness and makes all the flavors pop. It doesn’t make the shake taste salty – it just brings everything to life and adds complexity to the flavor profile.
Chill Your Glasses – Put your serving glasses in the freezer for 15 minutes before making your shake. Cold glasses keep the shake colder longer and prevent it from melting too quickly. This small step makes a big difference in enjoyment!
Layer for Photos – Want that perfect Instagram shot? Pour your shake slowly and intentionally. Add whipped cream, then drizzle chocolate or caramel sauce artistically down the sides of the glass. Add a banana slice on the rim and a straw at an angle. Natural lighting near a window is your best friend!
Common Mistakes to Avoid
Don’t let these common errors ruin your perfect banana milkshake!
Using Green or Underripe Bananas – This is mistake #1! Underripe bananas are starchy, not very sweet, and have a chalky, unpleasant taste in shakes. They won’t blend as smoothly either. Always use ripe bananas with brown spots or even slightly overripe ones. The banana should be soft to touch and aromatic. If your bananas aren’t ripe, let them sit on the counter for a few days until they develop spots.
Adding Too Much Milk – A watery, thin milkshake is so disappointing! Many people add too much liquid, creating a shake that’s more like flavored milk than a thick, creamy milkshake. Start with just ½ cup of milk and add more only if absolutely necessary. Remember: you can always thin it, but you can’t thicken it without adding more ice cream or frozen banana.
Using Ice Cream That’s Too Hard – Rock-solid ice cream straight from a deep freezer will strain your blender motor, leave chunks, and potentially burn out the motor. Let ice cream soften at room temperature for 3-5 minutes before using. It should scoop easily but still be very cold and firm, not melty or drippy.
Over-Blending – More blending does NOT equal better results! Over-blending warms up your shake from friction, makes it thin and frothy instead of thick and creamy, and can even change the texture of the ice cream. Blend just until smooth and stop – usually 30-45 seconds is plenty.
Skipping the Taste Test – Always taste before serving! This is your chance to adjust sweetness, add more vanilla, or perfect the consistency. Banana ripeness varies so much that what’s perfect for one batch might need adjustment for another. Take 5 seconds to taste and adjust – it ensures you’re serving something delicious.
Not Using Quality Ice Cream – Budget ice cream with lots of air whipped in and artificial ingredients creates disappointing shakes that taste fake and have poor texture. Invest a couple extra dollars in premium ice cream with real cream and vanilla – it makes all the difference in the world.
Storage & Meal Prep
While banana milkshakes are absolutely best enjoyed fresh, here are your storage options:
Immediate Consumption: Banana milkshakes are at their prime within the first 10-15 minutes after making them. The texture is perfect, they’re ice-cold, and they haven’t separated yet. Always serve and drink immediately when possible!
Short-Term Refrigeration: If you must wait, pour the shake into an airtight container and refrigerate for up to 2 hours maximum. The shake will separate as the ice cream melts – this is natural. Before drinking, give it a vigorous stir or 10-second re-blend to re-incorporate everything. The bananas may oxidize slightly, causing some browning, but it’s still safe to drink.
Freezer Storage: Pour leftover shake into freezer-safe containers and freeze for up to 1 month. When ready to enjoy, let it thaw in the refrigerator for 20-30 minutes until it reaches a slushy consistency, then either drink it semi-frozen or give it a quick blend to restore the creamy texture. The texture won’t be quite as perfect as fresh, but it’s still delicious!
Preventing Oxidation: Bananas oxidize (turn brown) when exposed to air. To minimize this, add a squeeze of lemon juice to your shake before storing, or press plastic wrap directly onto the surface before sealing the container. This limits air exposure.
Make-Ahead & Freezer Notes
While fresh is always best, here are smart prep strategies:
Pre-Freeze Banana Chunks: The ultimate make-ahead strategy! Whenever you have ripe bananas, peel them, break into 1-inch chunks, and freeze on a parchment-lined baking sheet. Once frozen solid (about 2 hours), transfer to freezer bags labeled with the date. These keep for up to 3 months and are ready whenever a shake craving hits!
Pre-Portion Ingredients: Measure banana chunks (about 1½ bananas per serving) into individual freezer bags or containers. When you want a shake, grab a pre-portioned bag, add to blender with ice cream and milk, and blend. This saves time and ensures consistent results.
Ice Cream Scoop Prep: Scoop ice cream portions onto a parchment-lined tray and refreeze until solid. Store the frozen scoops in a container or bag. This makes it super easy to grab exactly what you need without dealing with hard ice cream.
Smoothie Packs: Create complete “milkshake kits” by combining frozen banana chunks and any mix-ins (like cocoa powder, peanut butter, cinnamon) in individual bags. Label each with “add ice cream + milk.” These keep for 2-3 months.
Batch Freezing for Parties: Making shakes for a crowd? Blend a large batch, pour into individual cups with lids, and freeze. About 20-30 minutes before serving, move them to the refrigerator. They’ll be perfectly thick and slushy – thick enough to eat with a spoon but still drinkable!
Best “Thawing” Method: If you’ve frozen a pre-blended shake, the best approach is refrigerator thawing for 20-30 minutes until slushy. Then give it a 10-second blend to restore smoothness. This gives you better results than fully thawing it.
Serving Suggestions
This banana milkshake is delicious on its own, but here’s how to serve it for different occasions:
Classic Pairing: Serve with burgers, fries, and onion rings for a complete retro diner experience! The sweet, creamy shake perfectly balances salty, savory foods. It’s the ultimate American comfort food combination.
Breakfast Companion:
- Whole grain waffles or pancakes with maple syrup
- Scrambled eggs and toast
- Peanut butter toast
- Granola and yogurt
- Fresh fruit salad
Dessert Pairing:
- Warm chocolate chip cookies (the temperature contrast is incredible!)
- Brownies or blondies
- Banana bread (double banana delight!)
- Apple pie or cobbler
- Pound cake or angel food cake
Snack Time:
- Graham crackers or vanilla wafers for dipping
- Pretzels (sweet and salty combo!)
- Trail mix
- Fresh fruit kabobs
- Cheese and crackers (surprisingly good contrast!)
Party Serving Ideas:
- Set up a milkshake bar with toppings like whipped cream, chocolate chips, crushed cookies, nuts, and various drizzles
- Serve in small 6 oz portions for dessert at dinner parties
- Make banana split shakes by adding strawberries and chocolate sauce
- Create a boozy adult version with banana liqueur or rum for evening gatherings
Special Occasions:
- Birthday parties (add sprinkles!)
- Summer BBQs and pool parties
- Movie nights at home
- After-school treats for kids
- Post-game celebration drinks for sports teams
FAQs Section
Q: Can I make a banana milkshake without ice cream?
A: Yes! For a lighter, smoothie-style version, use frozen banana chunks, ½ cup Greek yogurt or regular yogurt, ¾-1 cup milk, 1 tablespoon honey, and ½ teaspoon vanilla. Blend until smooth. The texture will be different – more like a thick smoothie than a traditional milkshake – but it’s still delicious and much lower in calories. You can also use frozen yogurt instead of ice cream for a middle-ground option.
Q: Why is my banana milkshake too thin?
A: Thin milkshakes usually result from: (1) Too much milk – use less liquid next time, starting with just ½ cup, (2) Ice cream too soft – it should be slightly softened but still very cold and firm, not melty, (3) Bananas not frozen – frozen bananas create much thicker texture than fresh ones, (4) Over-blending – this warms the shake and makes it thin. To fix a thin shake immediately, add 1-2 more scoops of ice cream or ½ frozen banana and blend briefly.
Q: How ripe should bananas be for milkshakes?
A: Ideally, bananas should have brown spots all over the yellow peel – this indicates peak ripeness and maximum sweetness. The banana should feel soft when gently pressed and smell sweet and aromatic. Even slightly overripe bananas (more brown than yellow) work perfectly! Green or barely-yellow bananas are starchy, less sweet, and won’t taste as good. If you only have underripe bananas, add an extra teaspoon or two of honey to compensate for the lack of natural sweetness.
Q: Can I make this banana milkshake dairy-free?
A: Absolutely! Use dairy-free vanilla ice cream (coconut, almond, oat, or cashew milk based) and your choice of plant-based milk. Oat milk creates the creamiest dairy-free shakes because it’s naturally thick and sweet. Brands like Oatly ice cream, So Delicious coconut milk ice cream, or Ben & Jerry’s non-dairy work wonderfully. The flavor will be slightly different from dairy versions but can be equally delicious!
Q: Is a banana milkshake healthy?
A: It depends on your definition of “healthy”! This shake contains nutritious ingredients – bananas provide potassium, vitamin B6, fiber, and natural energy. The dairy provides calcium and protein. However, it also contains ice cream, which means sugar and fat. Consider it a “healthier treat” – better than most desserts and fast-food shakes because it contains real fruit and no artificial ingredients. For a healthier version, use frozen banana, Greek yogurt, and milk instead of ice cream, or use smaller portions. Everything in moderation!
Q: Can I add protein powder to my banana milkshake?
A: Yes! This is a great way to turn your shake into a complete meal or post-workout recovery drink. Add 1 scoop of vanilla or unflavored protein powder when you add the other ingredients. You may need to add 2-3 tablespoons more liquid since protein powder absorbs moisture. Whey, casein, or plant-based protein powders all work. Start with one scoop and adjust to taste – too much protein powder can make the shake taste chalky.
Q: How can I make my banana milkshake thicker?
A: For an extra-thick shake: (1) Use frozen banana chunks instead of fresh, (2) Use less milk (start with just ½ cup), (3) Add an extra scoop of ice cream, (4) Add a few ice cubes, (5) Add a tablespoon of peanut butter (adds thickness and flavor), (6) Include ¼ of an avocado (you won’t taste it, but it creates incredible creaminess), or (7) Blend in 2 tablespoons of oats. The ultimate thick shake uses only frozen bananas and ice cream with no liquid at all – eat it with a spoon!
Q: My banana milkshake turned brown – is it still safe to drink?
A: Yes, it’s completely safe! Bananas naturally oxidize when exposed to air, causing them to turn brown. This is the same reaction that happens when you slice an apple and leave it out. The browning doesn’t affect safety or nutrition, just appearance. To prevent browning, drink immediately after making, add a squeeze of lemon juice (the acid slows oxidation), or store in an airtight container with minimal air exposure. If you’re making it ahead, expect some browning – it’s normal and harmless!
Conclusion
And there you have it – the ultimate creamy banana milkshake recipe that’s thick, naturally sweet, and absolutely irresistible! This easy banana milkshake proves that the best recipes don’t need to be complicated. With just ripe bananas, vanilla ice cream, milk, and vanilla extract, you can create a shake that tastes better than anything from a restaurant or ice cream shop – all in your own kitchen in just 5 minutes!
This homemade banana milkshake is so much more than just a drink – it’s comfort in a glass, a quick energy boost, a nutritious treat, and a guaranteed way to make anyone smile. Whether you’re making it for yourself as a special treat, serving it to kids who will think you’re the coolest parent ever, or impressing guests with your milkshake-making skills, this recipe delivers perfect results every single time.
I absolutely can’t wait to hear how your banana milkshake turns out! Drop a comment below and tell me about your experience. Did you add peanut butter? Make it with frozen bananas? Create any fun flavor variations? I want to hear all the details! And please pin this recipe to your Pinterest boards – save it to your “Easy Desserts,” “Quick Recipes,” and “Family Favorites” collections so you can find it whenever a milkshake craving strikes. Share a photo of your beautiful creation on Instagram and tag me so I can celebrate your delicious shake with you!
Now grab those ripe bananas and fire up that blender – the creamiest, dreamiest banana milkshake you’ve ever tasted is just 5 minutes away! 🍌🥤