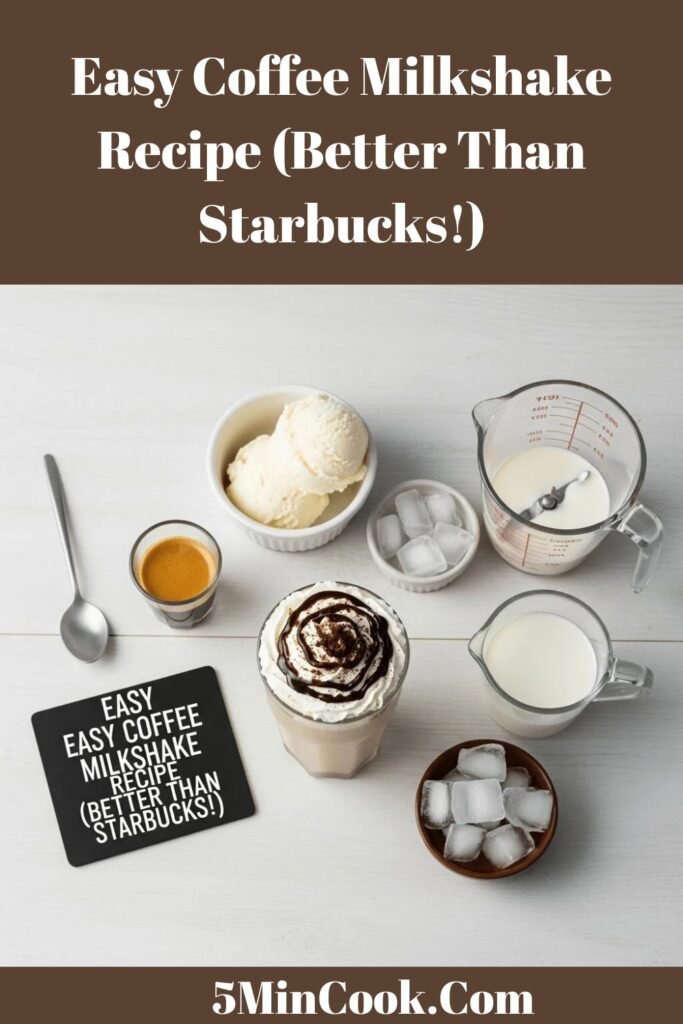
Easy Coffee Milkshake Recipe (Better Than Starbucks!)
Calling all coffee lovers! This creamy coffee milkshake is the ultimate treat that combines the rich, bold flavor of coffee with the indulgent sweetness of a classic milkshake. It’s essentially a drinkable coffee ice cream dessert that’s ready in just five minutes—perfect for those moments when you can’t decide between a caffeine boost and a sweet treat. Why choose when you can have both?
This homemade coffee milkshake recipe is incredibly versatile and works for so many occasions. Serve it as an afternoon pick-me-up when that post-lunch slump hits, whip it up as a special breakfast treat on lazy weekend mornings, or offer it as a sophisticated dessert after dinner parties. It’s also perfect for those sweltering summer days when hot coffee just won’t cut it, but you’re still craving that coffee flavor you love.
What makes this iced coffee milkshake truly special is its simplicity combined with café-quality results. You’ll get that perfect balance of coffee intensity, creamy sweetness, and thick milkshake texture without any of the hassle or expense of heading to your favorite coffee shop. Plus, you control exactly how strong you want the coffee flavor and how sweet you make it—something you can’t always guarantee when ordering out. Whether you’re a die-hard coffee enthusiast or someone who enjoys an occasional coffee-flavored treat, this recipe is about to become your new obsession.
History / Background
The marriage of coffee and ice cream has a rich history that spans continents and cultures. Coffee-flavored frozen desserts date back to 17th century Italy, where gelato makers in Naples and Sicily began experimenting with adding espresso to their creamy frozen creations. This innovation gave birth to “gelato al caffè,” which quickly became a beloved staple throughout Italy and remains popular to this day.
The concept crossed the Atlantic in the early 20th century when Italian immigrants brought their gelato-making traditions to American cities like New York, Boston, and Philadelphia. As American ice cream parlors and soda fountains flourished during the 1920s and 1930s, creative soda jerks began blending coffee syrup and coffee ice cream with milk to create what we now recognize as the coffee milkshake. This innovation aligned perfectly with America’s growing love affair with both coffee culture and ice cream treats.
The coffee milkshake gained significant momentum in the 1950s and 1960s when diners and drive-ins were at their cultural peak. It became the sophisticated alternative to chocolate and vanilla shakes—a choice for the more “grown-up” palate. Coffee ice cream was originally considered quite exotic and refined, making coffee milkshakes a premium offering at many establishments.
In the 1990s and early 2000s, the explosion of coffee shop culture, led by chains like Starbucks, brought coffee milkshakes into the mainstream in new forms. Frappuccinos and blended coffee drinks essentially modernized the classic coffee milkshake concept, making it accessible and trendy for a whole new generation. Today’s coffee milkshakes honor that long tradition while embracing the craft coffee movement’s emphasis on quality ingredients and bold flavors.
The beauty of the homemade coffee milkshake is that it connects us to this rich culinary history while giving us complete creative control. You’re not just making a drink—you’re participating in a tradition that spans centuries and continents, all from the comfort of your own kitchen.
Why You’ll Love This Recipe
This easy coffee milkshake recipe is about to become your new favorite way to enjoy coffee, and here’s why it’s such a winner. First and foremost, it delivers café-quality flavor at a fraction of the cost. Those fancy coffee shop frappuccinos can easily run you $6-8 each, but you can make this homemade version for less than $2 per serving. That’s serious savings, especially if you’re someone who craves these treats regularly!
Here’s what makes this coffee milkshake recipe absolutely irresistible:
- Ready in 5 minutes flat – From craving to sipping, you’re looking at minimal effort and maximum reward
- Only 4 basic ingredients – No fancy syrups or hard-to-find items required
- Customizable caffeine levels – Control exactly how much coffee kick you want
- Cheaper than coffee shops – Save money while getting better quality and flavor
- Perfect texture every time – Thick, creamy, and smooth without being icy
- No special barista skills needed – If you can press a blender button, you’ve got this
- Naturally energizing – Gets you caffeinated while satisfying your sweet tooth
- Great for any time of day – Works as breakfast, snack, dessert, or afternoon boost
- Impressive to guests – Looks and tastes like you spent way more effort than you did
- Endlessly adaptable – Easily modified to suit your taste preferences
- Kid-friendly option available – Use decaf for children who want to feel grown-up
- Works year-round – Refreshing in summer, indulgent in winter
The real magic of this recipe lies in its foolproof nature. Unlike making the perfect espresso or brewing pour-over coffee, there’s virtually no way to mess this up. The blender does all the hard work, and you get to enjoy a perfectly balanced coffee milkshake that rivals anything from high-end coffee shops. It’s also wonderfully forgiving—prefer it sweeter? Add more ice cream or sugar. Want it stronger? Use more coffee. Need it thinner? Pour in extra milk. This recipe gives you a perfect starting point that you can customize endlessly.
Ingredient Notes
Let’s dive deep into each ingredient that makes this coffee milkshake absolutely delicious. Understanding what each component brings to the table helps you make smart substitutions and achieve the best possible results every time.
Brewed Coffee: This is the star flavor of your milkshake, so quality matters! You’ll need ½ to ¾ cup of strong brewed coffee, and here’s the crucial part—it must be completely cooled before using. Hot or even warm coffee will melt your ice cream into a soupy mess. Brew your coffee at least an hour ahead (or the night before) and refrigerate it. For the best flavor, use freshly brewed coffee from quality beans rather than instant coffee, though instant will work in a pinch. The strength of your brew directly impacts the final flavor—go stronger than you’d normally drink it since the ice cream and milk will dilute it. French press, drip coffee, or even cold brew all work beautifully. For substitutions, you can use 2-3 shots of cooled espresso for an extra-intense flavor, or ¼ cup of coffee concentrate mixed with ¼ cup water.
Coffee Ice Cream: This doubles down on the coffee flavor while providing the signature thick, creamy texture. You’ll need 2-3 generous scoops (about 1½ to 2 cups). High-quality coffee ice cream makes a noticeable difference—look for brands that list real coffee or espresso in the ingredients rather than just coffee flavoring. Premium brands like Häagen-Dazs or Talenti work exceptionally well because they have higher butterfat content and more intense coffee flavor. For substitutions, vanilla ice cream works if you want a milder coffee taste (the brewed coffee still provides plenty of flavor), or try chocolate ice cream for a mocha milkshake variation. Dairy-free? Coffee-flavored coconut or oat milk ice cream creates excellent results.
Milk: This adjusts the consistency from spoonable to sippable. You’ll need about ½ to ¾ cup, depending on your preferred thickness. Whole milk creates the richest, creamiest result, but 2% works perfectly well and is what most people have readily available. Start with less milk and add more as needed—it’s much easier to thin out a shake than to thicken one. For substitutions, any milk alternative works here: almond milk adds a subtle nutty undertone that’s lovely with coffee, oat milk creates exceptional creaminess, and coconut milk adds tropical richness. Just remember that non-dairy milks may create a slightly thinner consistency initially.
Sweetener (Optional): Depending on your sweet tooth and the sweetness of your ice cream, you might want 1-2 tablespoons of granulated sugar, honey, maple syrup, or even a flavored syrup like vanilla or caramel. Many coffee ice creams are already quite sweet, so taste before adding more sweetness. If you’re a coffee purist who prefers less sweetness, you might skip this entirely. Brown sugar adds a lovely molasses note that complements coffee beautifully.
Chocolate Syrup (Optional): Adding 1-2 tablespoons transforms this into a mocha milkshake. Chocolate and coffee are natural partners, and this addition is highly recommended if you love mocha flavor.
Whipped Cream (For Topping): While optional, this really takes your presentation to the next level and adds extra indulgence. Use store-bought or homemade—both work great.
Equipment Needed
Making the perfect coffee milkshake requires minimal equipment, and chances are you already have everything you need sitting in your kitchen right now:
Blender: Your most essential tool—and the only appliance you truly need. A standard countertop blender handles this recipe beautifully. You don’t need an expensive high-powered model like a Vitamix (though they do create exceptionally smooth shakes). Even basic blenders work perfectly fine since you’re blending relatively soft ingredients. If your blender has a “pulse” function and variable speeds, you’ll have better control, but it’s not mandatory.
Measuring Cups: Both liquid measuring cups (for milk and coffee) and dry measuring cups (for scooping ice cream) will help you get the proportions right. Accurate measuring ensures consistent results every time you make this recipe.
Measuring Spoons: If you’re adding optional sweeteners, chocolate syrup, or other flavorings, measuring spoons help you track what you’ve added so you can replicate success.
Ice Cream Scoop: Makes portioning ice cream cleaner and easier. A good ice cream scoop with a release mechanism is a kitchen workhorse that you’ll use constantly. If you don’t have one, a large sturdy spoon works just fine.
Coffee Maker or Kettle: You’ll need something to brew your coffee initially. This could be a standard drip coffee maker, French press, pour-over setup, espresso machine, or even just a kettle for instant coffee.
Refrigerator Space: Essential for cooling your brewed coffee completely before use. Trying to rush this step is one of the biggest mistakes people make.
Tall Glasses: For serving your finished masterpiece. Classic milkshake glasses (12-16 ounce capacity) are ideal, but any tall glass works. Clear glasses show off that beautiful coffee color.
Thick Straws: Wide-diameter straws work best for thick milkshakes. Paper, metal, or reusable plastic straws all work great—just make sure they’re sturdy enough to handle a thick shake.
Rubber Spatula (Optional): Helpful for scraping every last bit of milkshake from your blender. Nothing’s worse than leaving deliciousness behind!
That’s everything! No fancy espresso machines or specialty equipment required—just basic kitchen tools you likely already own.
Print
Coffee Milkshake Recipe
This easy homemade coffee milkshake combines rich brewed coffee with creamy coffee ice cream for the ultimate coffee lover’s treat. Ready in just 5 minutes, this thick and creamy iced coffee milkshake tastes better than anything from a coffee shop and costs a fraction of the price. Perfect for breakfast, dessert, or an afternoon pick-me-up!
- Total Time: 5 minutes
- Yield: 2 servings 1x
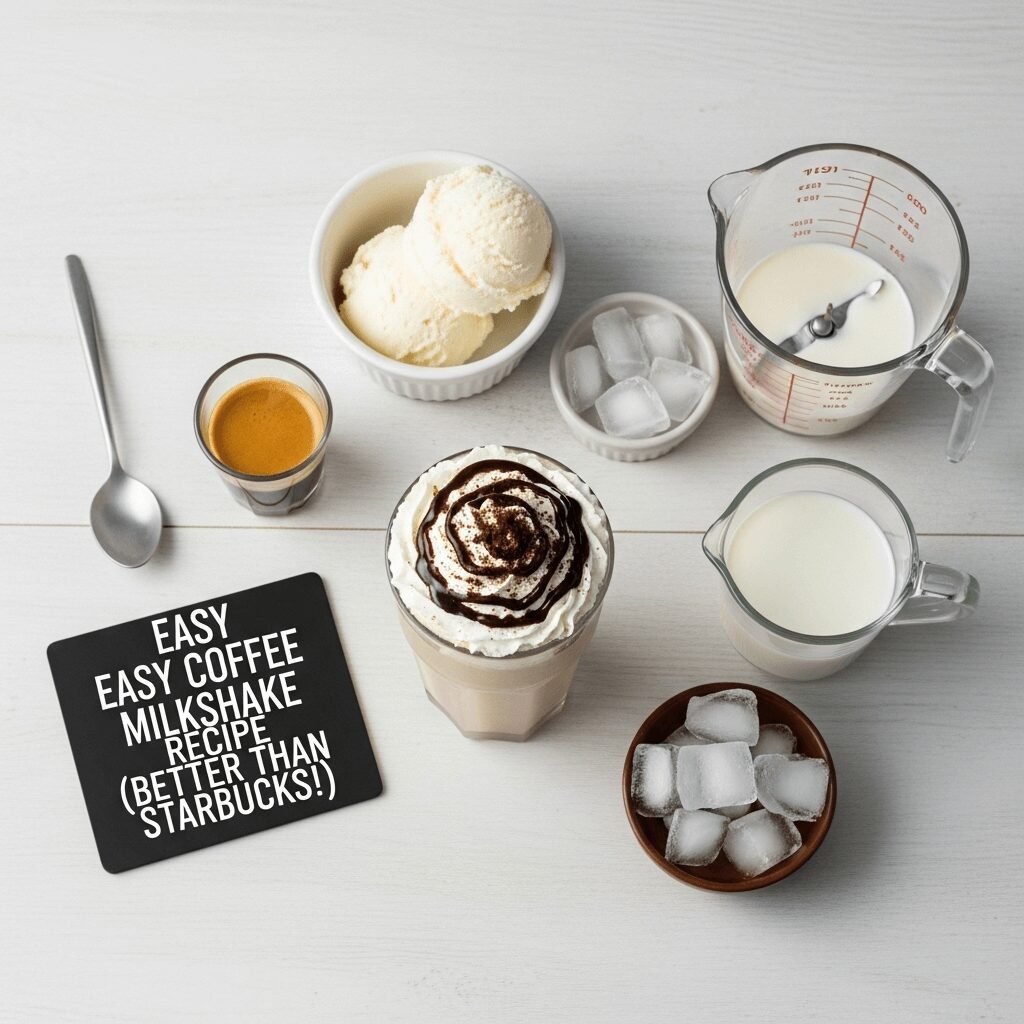
Ingredients
- ½ to ¾ cup strong brewed coffee, completely cooled (refrigerate for at least 1 hour)
- 2-3 large scoops coffee ice cream (about 1½ to 2 cups)
- ½ to ¾ cup whole milk (or milk of choice)
- 1-2 tablespoons granulated sugar, honey, or maple syrup (optional, adjust to taste)
- 1-2 tablespoons chocolate syrup (optional, for mocha flavor)
- Whipped cream, for topping (optional)
- Chocolate shavings or cocoa powder, for garnish (optional)
- Coffee beans, for garnish (optional)
Instructions
- Brew and cool coffee: If you haven’t already, brew ½ to ¾ cup of strong coffee using your preferred method. Make it stronger than you’d normally drink since it will be diluted. Let it cool to room temperature, then refrigerate for at least 1 hour until completely cold. This step is crucial—warm coffee will melt your ice cream.
- Prepare your blender: Take your coffee ice cream out of the freezer and let it soften at room temperature for about 5 minutes. This makes blending easier and smoother. Slightly softened ice cream blends better without overworking your blender motor.
- Layer ingredients strategically: Pour the cold brewed coffee into your blender first. Add the milk next—start with ½ cup; you can always add more. Then add your scoops of coffee ice cream on top.
- Add optional ingredients: If you’re using sweetener (sugar, honey, or syrup), add it now. For a mocha version, add 1-2 tablespoons of chocolate syrup at this stage.
- Blend until smooth: Start blending on low speed for a few seconds to get things moving, then increase to medium-high speed. Blend for 30-45 seconds until completely smooth and uniformly combined. You should see no chunks of ice cream and a consistent light brown color throughout.
- Check consistency: Stop the blender and check the thickness. The milkshake should be thick enough to coat a spoon but thin enough to drink through a straw. If it’s too thick, add 2-3 tablespoons more milk and blend for another 10-15 seconds. If it’s too thin, add another small scoop of ice cream and blend briefly.
- Taste and adjust: Give it a quick taste test. Need more coffee flavor? Add 2 tablespoons more brewed coffee. Too bitter? Add a tablespoon of sugar or honey. Want it sweeter? Add more ice cream or sweetener. Blend briefly to incorporate any additions.
- Serve immediately: Pour your coffee milkshake into tall, preferably chilled glasses. Top with a generous swirl of whipped cream if desired. Garnish with chocolate shavings, a dusting of cocoa powder, or even a few whole coffee beans for a café-worthy presentation. Insert thick straws and enjoy right away while it’s perfectly cold and creamy!
Notes
- Coffee strength matters: Use coffee that’s stronger than you’d normally drink. A good rule is to use 50% more coffee grounds than usual when brewing, as the ice cream and milk will dilute the flavor significantly.
- Temperature is critical: Never add warm or hot coffee to your milkshake. It must be completely chilled. Make your coffee the night before or use cold brew coffee for convenience.
- Texture control: The ice cream-to-milk ratio determines thickness. More ice cream and less milk creates a spoonable, ultra-thick shake. More milk creates a thinner, easier-to-sip version.
- Decaf option: Use decaffeinated coffee and decaf coffee ice cream (harder to find, but some brands make it) for an evening treat without the caffeine.
- Make it boozy: Adults can add 1-2 ounces of coffee liqueur (Kahlúa), Irish cream (Baileys), or vanilla vodka for a dessert cocktail version.
- Sweetness varies: Different coffee ice cream brands have vastly different sweetness levels. Always taste before adding extra sugar.
- Prep Time: 5 minutes
- Cook Time: 0 minutes
Nutrition
- Serving Size: 1 milkshake (approximately 12-14 oz)
- Calories: 320
- Sugar: 35g
- Sodium: 105mg
- Fat: 14g
- Saturated Fat: 9g
- Unsaturated Fat: 4g
- Trans Fat: 0g
- Carbohydrates: 42g
- Fiber: 0g
- Protein: 4g
- Cholesterol: 55mg
Tips & Variations
The beauty of this coffee milkshake recipe is its incredible versatility. Here are delicious ways to customize it to match your exact preferences or try exciting new flavor combinations:
Mocha Coffee Milkshake: Add 2 tablespoons of chocolate syrup or 1 tablespoon of cocoa powder to create that beloved coffee-chocolate combination. You can also use chocolate ice cream instead of coffee ice cream for a lighter coffee flavor with intense chocolate richness. Top with chocolate whipped cream for extra decadence.
Caramel Coffee Milkshake: Swirl in 2-3 tablespoons of caramel sauce before blending, and drizzle extra caramel on top of your whipped cream. This creates a flavor similar to a caramel macchiato in milkshake form. Salted caramel takes it to the next level.
Vanilla Latte Milkshake: Use vanilla ice cream instead of coffee ice cream for a milder coffee flavor that highlights vanilla notes. Add ½ teaspoon of vanilla extract to enhance the flavor. This is perfect for those who find straight coffee flavor too intense.
Protein Coffee Shake: Add a scoop (20-30g) of vanilla or chocolate protein powder to boost nutrition and make it more filling. This transforms it into a substantial breakfast or post-workout recovery drink. You may need to add an extra splash of milk since protein powder thickens the mixture.
Frozen Coffee Shake: Use coffee ice cubes instead of (or in addition to) regular brewed coffee. To make them, freeze leftover coffee in ice cube trays. This prevents dilution while adding intense coffee flavor. Use 6-8 coffee ice cubes with regular ice cream.
Affogato-Style Milkshake: Pour a shot of hot espresso over your finished, topped milkshake right before serving for dramatic presentation and temperature contrast. The hot espresso melts into the cold shake creating pockets of intense coffee flavor.
Lighter Version: Use low-fat vanilla frozen yogurt or light ice cream instead of premium coffee ice cream. Use skim or low-fat milk. Skip added sugars and rely on the natural sweetness of the frozen dairy. This cuts calories roughly in half while maintaining creamy texture.
Mint Coffee Milkshake: Add ¼ teaspoon of peppermint extract or 2 tablespoons of crème de menthe (for adults) for a refreshing mint-coffee combination similar to a grasshopper cookie. Top with crushed Andes mints.
Nutty Coffee Shake: Add 2 tablespoons of almond butter, peanut butter, or hazelnut spread (like Nutella) for a nutty richness that pairs beautifully with coffee. Hazelnut especially creates that beloved hazelnut latte flavor.
Vietnamese Coffee Shake: Use sweetened condensed milk instead of regular milk (use about ⅓ cup) for that rich, sweet Vietnamese iced coffee flavor profile. The condensed milk adds incredible creaminess and authentic sweetness.
Pro Chef Tips
These professional insights will elevate your coffee milkshake from good to absolutely extraordinary:
Use cold brew concentrate for superior flavor: Cold brew coffee has lower acidity and smoother flavor than hot-brewed coffee, making it ideal for milkshakes. If you have cold brew concentrate, use ¼ cup concentrate mixed with ¼ cup water, or use ½ cup straight cold brew coffee. The naturally sweet, mellow flavor creates a more balanced shake without bitterness.
Freeze your glasses: Place your serving glasses in the freezer for 15-20 minutes before serving. This simple trick keeps your milkshake colder longer and prevents rapid melting. It’s what professional ice cream shops and diners do for all frozen beverages.
Add a pinch of salt: Just a tiny pinch of salt (barely ⅛ teaspoon) enhances all the flavors and reduces any bitter notes in the coffee. This is a professional pastry chef secret that works wonders in coffee-based desserts. Salt makes everything taste more complex and balanced.
Layer your glass: Before pouring in your milkshake, drizzle chocolate or caramel sauce around the inside of your glass. As you pour the shake, it creates beautiful streaks and adds visual appeal that’s totally Instagram-worthy. This presentation technique makes it look like you ordered from a fancy café.
Use espresso powder for intensity: If you want extra coffee punch without adding more liquid, stir ½ to 1 teaspoon of instant espresso powder into your cold coffee before blending. This concentrated coffee flavor doesn’t dilute your shake while dramatically increasing coffee intensity.
Don’t over-blend: Blend just until smooth—usually 30-45 seconds maximum. Over-blending generates heat through friction, which melts your ice cream and creates a thin, soupy consistency. The moment everything looks uniformly combined, stop blending immediately.
Toast your coffee beans for garnish: If garnishing with whole coffee beans, lightly toast them in a dry skillet for 2-3 minutes. This releases their oils and creates an incredible aroma that enhances the entire drinking experience. Plus, toasted beans look more appealing as garnish.
Balance coffee bitterness with vanilla: If your coffee tastes bitter, add ½ teaspoon of pure vanilla extract rather than more sugar. Vanilla naturally masks bitterness while adding depth and complexity. This is how professional baristas smooth out overly bitter espresso.
Use weight, not volume, for ice cream: For the most consistent results, weigh your ice cream rather than using cup measurements. 300-350 grams of ice cream creates the perfect consistency every time, regardless of how airy or dense your particular brand is.
Common Mistakes to Avoid
Even with such a straightforward recipe, there are several pitfalls that can compromise your perfect coffee milkshake. Here’s what to watch out for:
Using warm or room temperature coffee: This is the number one mistake people make, and it’s catastrophic. Warm coffee immediately melts your ice cream, creating a thin, watery disappointment instead of a thick, creamy shake. Always refrigerate your brewed coffee for at least an hour, preferably longer. If you’re in a rush, brew it strong, then pour it over ice to cool it quickly, but remember those ice cubes will dilute it, so brew extra strong to compensate.
Making coffee too weak: Since ice cream and milk dilute the coffee flavor significantly, you need to start with stronger coffee than you’d normally drink. A good rule of thumb is using 50% more coffee grounds when brewing specifically for milkshakes. Weak coffee results in a milkshake that tastes more like sweet cream than coffee. If you can’t taste strong coffee flavor in the finished shake, your brew wasn’t strong enough.
Over-blending: More blending doesn’t equal better results. The friction from extended blending generates heat, which melts your ice cream and thins out your shake. Blend just until smooth and uniform—usually 30-45 seconds maximum. If you notice your shake becoming thinner as you blend, you’ve gone too far. Stop immediately and add another scoop of ice cream to save it.
Adding too much milk at once: It’s tempting to pour in milk liberally, but this is how you end up with a thin smoothie instead of a thick milkshake. Always start with less milk than you think you need—you can easily add more, but you can’t remove it. Begin with ½ cup and add more tablespoon by tablespoon until you reach your desired consistency.
Using low-quality ice cream: Budget or low-fat ice cream contains more air and less cream, which means less flavor and a less creamy texture. These ice creams also tend to melt faster and create icier textures. Invest in premium or super-premium ice cream brands for dramatically better results. The difference in taste and texture is absolutely worth the extra dollar or two.
Skipping the taste test: Coffee ice cream brands vary wildly in sweetness, coffee intensity, and flavor profile. Always taste your shake before serving and adjust as needed. Some brands are very sweet and need no additional sugar, while others are more subtle and benefit from extra sweetness or coffee.
Not serving immediately: Coffee milkshakes separate and thin out quickly at room temperature. Unlike some drinks that can sit for a while, milkshakes must be enjoyed right away. Make them immediately before you’re ready to drink them, not ahead of time.
Storage & Meal Prep
While coffee milkshakes are absolutely best enjoyed fresh, there are situations where you might need to store them or prepare components in advance. Here’s everything you need to know:
Immediate consumption is ideal: The perfect coffee milkshake should be consumed within 5-10 minutes of blending. This is when the texture is at its peak—thick, creamy, and perfectly cold. The ice cream hasn’t started melting, and all the ingredients are beautifully emulsified together.
Short-term storage (1-2 hours): If you must wait before drinking, pour your milkshake into an airtight container or tightly cover your glass with plastic wrap and place it in the freezer (not the refrigerator). When ready to enjoy, let it sit at room temperature for 3-5 minutes to soften slightly, then stir vigorously with a spoon before drinking. The texture won’t be quite as perfect as fresh, but it’s still very enjoyable.
Refrigerator storage (not recommended): You can technically store leftover milkshake in an airtight container in the refrigerator for up to 24 hours, but the results are disappointing. The shake will completely separate with ice cream melting and coffee settling to the bottom. The mixture becomes thin and watery. If you do this, you’ll need to re-blend with fresh ice cream to restore texture.
Re-blending separated shakes: If your stored milkshake has separated or become too thin, add a fresh scoop of coffee ice cream and blend for 10-15 seconds. This brings back most of the original texture and temperature. You can also add 3-4 ice cubes to thicken and chill it again, though this dilutes the coffee flavor slightly.
Coffee prep ahead: The one component you absolutely should prepare in advance is the brewed coffee. Make a full pot of strong coffee, let it cool, and store it in a sealed container in the refrigerator for up to one week. This way, you can make coffee milkshakes on demand whenever the craving hits without waiting for coffee to cool.
Make-Ahead & Freezer Notes
While milkshakes are best fresh, there are smart strategies for preparing components ahead and even freezing finished shakes with the right approach:
Brew coffee in advance: Make a batch of extra-strong coffee and store it in an airtight container in the refrigerator for up to one week. This is the best make-ahead strategy because cold coffee is always ready when you want a milkshake. You can even brew a large batch and portion it into ½-cup servings in small containers for grab-and-go convenience.
Use cold brew coffee: Cold brew coffee keeps even longer than regular brewed coffee—up to two weeks in the refrigerator. Make a big batch on Sunday and have coffee milkshake ingredients ready all week long. Cold brew’s smooth, less acidic flavor is actually ideal for milkshakes.
Coffee ice cubes: Freeze leftover coffee in ice cube trays. When you want a milkshake, use 6-8 coffee ice cubes in place of regular brewed coffee. This adds intense coffee flavor without any dilution. These cubes keep for up to 3 months in the freezer.
Freezing finished milkshakes: You can freeze blended coffee milkshakes in freezer-safe containers for up to one month, but they’ll solidify into a block. To serve, transfer to the refrigerator for 20-30 minutes to partially thaw, then re-blend with a splash of fresh milk (about ¼ cup) to restore the drinkable consistency. Honestly, this is more work than just making a fresh shake, but it’s possible if you’ve made too much.
Milkshake popsicles: A better use for leftover milkshake is to pour it into popsicle molds and freeze for coffee milkshake pops. These are incredible on hot days and actually benefit from being frozen solid. They keep for up to 2 months and taste like frozen coffee treats.
Portion ice cream: If you make coffee milkshakes frequently, portion your ice cream into individual servings (about 1½ cups each) in freezer bags or containers. This makes whipping up a shake even faster since you don’t have to scoop frozen ice cream.
Best approach for entertaining: If you’re having guests and want to serve coffee milkshakes, prep all your ingredients and chill your glasses ahead of time. Then blend shakes fresh when it’s time to serve—it only takes 5 minutes and ensures everyone gets the best possible texture and temperature.
Serving Suggestions
A coffee milkshake is wonderful on its own, but pairing it thoughtfully can create memorable food experiences. Here are delicious ways to serve this treat:
Breakfast and brunch pairings: Serve your coffee milkshake alongside Belgian waffles, French toast, or fluffy pancakes for an indulgent weekend breakfast. The coffee provides your morning caffeine while the milkshake satisfies your sweet tooth. Pair with bacon or sausage for the sweet-savory contrast that makes brunch so appealing. Buttery croissants or chocolate croissants are also excellent companions.
Dessert accompaniments: Coffee milkshakes pair beautifully with chocolate desserts—brownies, chocolate chip cookies, chocolate cake, or chocolate lava cake. The coffee enhances chocolate flavors while the cold shake provides temperature contrast. Tiramisu is a natural pairing since it already combines coffee and cream. Biscotti, particularly almond or hazelnut varieties, are perfect for dunking.
Afternoon snack pairings: Serve with a slice of pound cake, coffee cake, banana bread, or cinnamon rolls for a substantial afternoon pick-me-up. The combination provides energy and satisfaction to power through the rest of your day. Graham crackers or digestive biscuits are lighter options that still complement the coffee flavor.
Casual dinner dessert: After pizza night, burgers, or barbecue, a coffee milkshake is a refreshing dessert that cleanses the palate. It’s less heavy than many traditional desserts while still feeling indulgent and special. The coffee also aids digestion after rich, heavy meals.
Coffee shop at home: Create a full café experience by serving coffee milkshakes alongside an assortment of muffins, scones, or Danish pastries. Set up a toppings bar with whipped cream, chocolate shavings, caramel sauce, and cocoa powder so everyone can customize their shake. This makes for a fun family activity or special treat for guests.
Movie night: Serve coffee milkshakes with popcorn (sweet or salty—both work!), candy, and other movie snacks. For adults, this creates a sophisticated alternative to typical movie beverages while still feeling fun and treat-like.
Summer parties: Set up a coffee milkshake bar at your next barbecue or pool party. Pre-make the coffee and chill it, then let guests blend their own shakes with various add-ins like chocolate chips, caramel, peanut butter, or different syrups. It’s interactive, fun, and guaranteed to be a hit.
Adult dessert cocktails: For evening entertaining, serve boozy coffee milkshakes with Irish cream, coffee liqueur, or amaretto. Pair with small desserts like petit fours, truffles, or chocolate-covered espresso beans for an elegant after-dinner experience.
FAQs Section
Can I use instant coffee instead of brewed coffee?
Yes, absolutely! Instant coffee works well for milkshakes. Dissolve 2-3 teaspoons of instant coffee or espresso powder in ½ cup of cold water, stir thoroughly until completely dissolved, then use it just like brewed coffee. Instant coffee is actually convenient for this purpose because you can control the strength easily and there’s no waiting for it to cool. For even more intense flavor, some people add instant coffee powder directly to the blender (1-2 teaspoons), though this can sometimes leave a slightly grainy texture if not fully dissolved.
How do I make this without a blender?
While a blender creates the smoothest results, you can make a coffee milkshake without one using a whisk or immersion blender. Let your ice cream soften significantly (almost to soft-serve consistency), then whisk it vigorously with the cold coffee and milk in a large bowl. This requires serious arm workout and won’t be quite as smooth, but it’s doable. An immersion blender works better than a whisk, though it’s still not quite as effective as a countertop blender. You could also use a food processor in a pinch.
Is this safe for kids with the caffeine content?
That depends on your family’s approach to caffeine and the child’s age. A full coffee milkshake contains roughly the same amount of caffeine as a cup of coffee (80-100mg if using regular coffee), which is quite a bit for children. For kids, you have several options: use decaffeinated coffee and decaf coffee ice cream for a caffeine-free version that still tastes like coffee, use vanilla ice cream with just a small amount of regular coffee for mild flavor and reduced caffeine, or skip the coffee entirely and use chocolate ice cream with chocolate syrup for a similar treat without caffeine. Many parents save full-strength coffee milkshakes for teenagers and adults.
Can I make this dairy-free or vegan?
Definitely! Use dairy-free coffee ice cream (brands like So Delicious, Ben & Jerry’s Non-Dairy, and Oatly make excellent versions) and your favorite non-dairy milk. Oat milk creates especially creamy results, while almond milk works well too. Coconut milk ice cream tends to be particularly rich and indulgent.