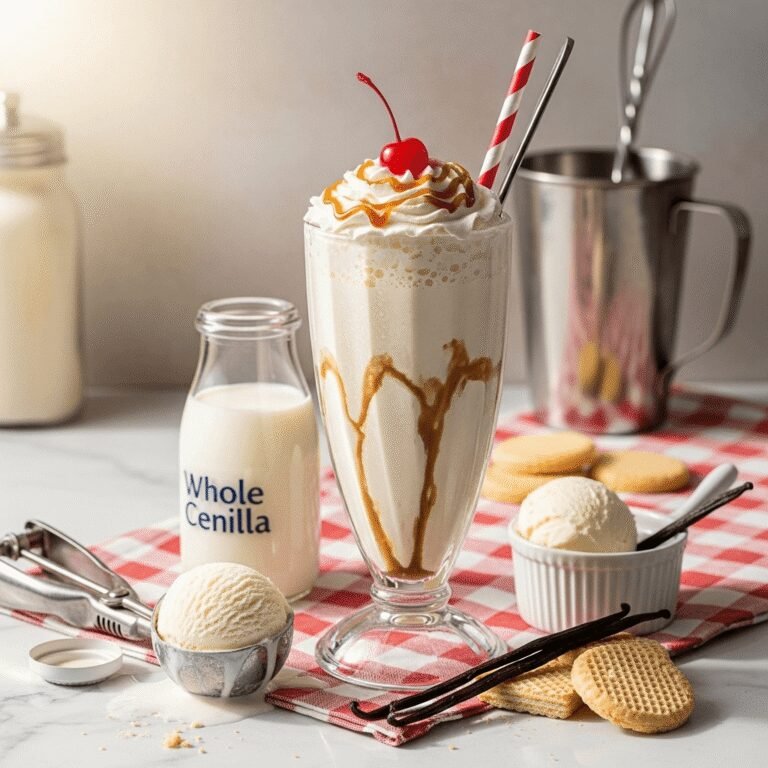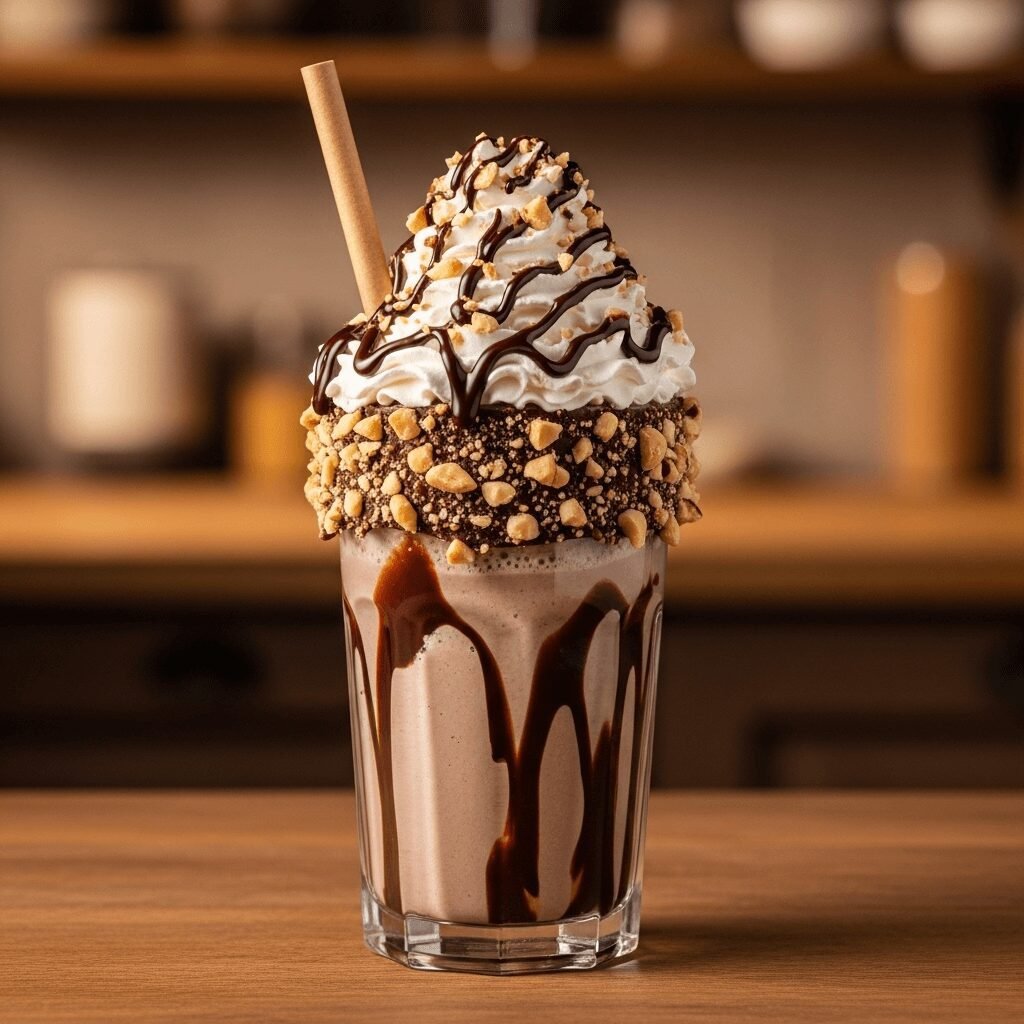
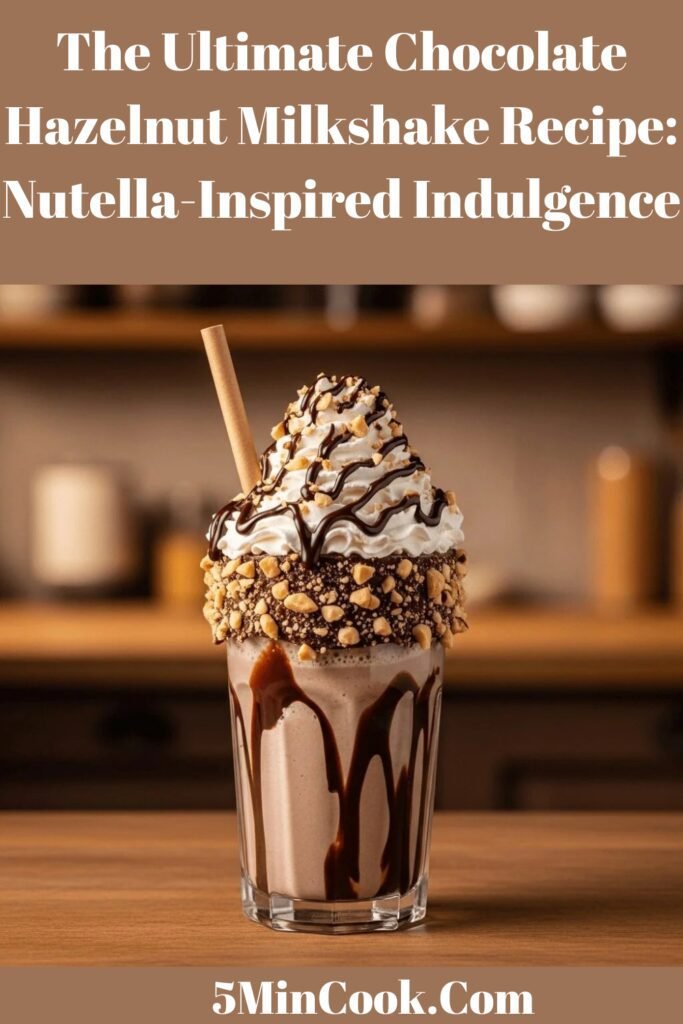
The Ultimate Chocolate Hazelnut Milkshake Recipe: Nutella-Inspired Indulgence
If you’ve ever wanted to drink a jar of chocolate hazelnut spread through a straw, this chocolate hazelnut milkshake recipe is your dream come true. This decadent, creamy milkshake combines rich chocolate ice cream with luscious hazelnut spread to create a dessert beverage that tastes like liquid Nutella heaven. It’s the kind of treat that makes you close your eyes and savor every single sip.
Perfect for hot summer afternoons, special celebrations, date nights at home, or those moments when only something extraordinarily indulgent will do, this homemade chocolate hazelnut shake takes just five minutes to prepare but delivers gourmet café quality. Whether you’re a die-hard Nutella fan or simply love the classic combination of chocolate and hazelnuts, this easy chocolate hazelnut milkshake will become your new favorite dessert.
The magic happens when creamy chocolate ice cream meets silky hazelnut spread, creating layers of flavor that are both familiar and exciting. It’s thick enough to eat with a spoon, sweet enough to satisfy any craving, and photogenic enough to make your Pinterest followers swoon. Plus, with just a handful of ingredients and one kitchen appliance, you can whip up this restaurant-quality treat faster than you can drive to your local ice cream shop.
History / Background
The love affair between chocolate and hazelnuts has deep European roots, particularly in Italy where this iconic pairing was born out of necessity and creativity. During the early 19th century, chocolate was an expensive luxury in Europe. When Napoleon’s Continental Blockade limited cocoa imports to Italy, Piedmontese chocolatiers faced a crisis. Their ingenious solution? Extend their precious chocolate supply by blending it with abundant local hazelnuts from the Langhe region.
This resourceful innovation led to the creation of “gianduja” (pronounced jan-DOO-yah) in Turin around 1806—a smooth paste combining chocolate with at least 30% hazelnut. The name comes from Gianduja, a carnival character representing the region. This chocolate-hazelnut blend became so beloved that it remained popular long after cocoa became readily available again.
Fast forward to post-World War II Italy, when Pietro Ferrero, a pastry maker from Piedmont, created a solid block of chocolate-hazelnut paste called “Giandujot” that could be sliced and eaten on bread. In 1964, his son Michele Ferrero transformed the recipe into a creamy, spreadable version and named it “Nutella”—combining “nut” with the Italian suffix “-ella” to make it sound sweet and appealing.
Nutella exploded in popularity worldwide, becoming the chocolate hazelnut spread that graces breakfast tables in over 160 countries. In America, Nutella arrived in 1983 and quickly became a cultural phenomenon. Food bloggers, home cooks, and professional chefs began incorporating this magical spread into everything from pancakes to cheesecakes.
The chocolate hazelnut milkshake emerged as one of the most beloved ways to enjoy this flavor combination in liquid form. American diners and ice cream parlors, always innovating with milkshake flavors, embraced the European chocolate-hazelnut tradition and transformed it into the thick, creamy shakes we know today. This recipe represents a beautiful fusion of Italian confectionery heritage and classic American soda fountain culture—proof that the best recipes transcend borders and generations.
Why You’ll Love This Recipe
This creamy chocolate hazelnut milkshake isn’t just another dessert drink—it’s an experience that combines nostalgia, indulgence, and pure chocolate-hazelnut bliss in one frosty glass. If you’re searching for a show-stopping treat that requires minimal effort but tastes like it came from a gourmet dessert bar, you’ve found your perfect recipe.
This decadent milkshake will quickly become your favorite indulgence, and here’s exactly why:
- Incredibly Quick: Ready in just 5 minutes from start to finish—no waiting, no complicated steps
- Only 4 Core Ingredients: Simple pantry staples create extraordinary flavor without specialty shopping
- No-Bake Convenience: Perfect for scorching summer days when turning on the oven is unthinkable
- Universally Loved: Kids and adults alike go crazy for the chocolate-hazelnut combination
- Completely Customizable: Adjust sweetness, thickness, or add your favorite mix-ins with ease
- Café-Quality Results: Tastes like a $10 specialty shake from a trendy dessert shop
- Budget-Friendly Luxury: Creates an upscale experience using affordable grocery store ingredients
- Nostalgia in a Glass: Captures that beloved Nutella flavor from childhood in drinkable form
- Foolproof Method: Virtually impossible to mess up—if you can press “blend,” you can make this
- Instagram-Worthy: Looks professionally styled with minimal effort, perfect for social media sharing
- Rich & Satisfying: One serving is genuinely filling and satisfies even the strongest sweet tooth
- Versatile Treat: Equally perfect as an afternoon pick-me-up, after-dinner dessert, or party showstopper
Ingredient Notes
Understanding what goes into your chocolate hazelnut shake and why each ingredient matters will help you create the perfect consistency and flavor every single time:
Chocolate Ice Cream: This forms the decadent base of your milkshake and contributes the primary chocolate flavor. Choose high-quality chocolate ice cream with a rich, dark chocolate taste rather than light chocolate or chocolate-flavored varieties. Premium brands with higher butterfat content (14-18%) create a thicker, creamier shake with better mouthfeel. Look for ice cream where chocolate is listed as one of the first ingredients. Substitution: Double chocolate ice cream for extra intensity, chocolate fudge for added richness, or even vanilla ice cream if you want the hazelnut flavor to dominate. Avoid chocolate-chip or cookies-and-cream as the mix-ins interfere with the smooth texture.
Chocolate Hazelnut Spread: This is your star ingredient providing that signature Nutella-style flavor. Nutella is the most recognized brand, but other quality chocolate hazelnut spreads work beautifully (like Justin’s, Nocciolata, or store brands). The spread adds both hazelnut flavor and silky texture to your shake. Make sure it’s at room temperature for easier blending—cold spread can create lumps. Substitution: Pure hazelnut butter combined with cocoa powder (use 3 tablespoons hazelnut butter + 1 tablespoon cocoa powder + 1 tablespoon sugar), though the flavor will be nuttier and less sweet.
Whole Milk: This adjusts your milkshake to the perfect drinking consistency. Whole milk provides richness and helps the flavors blend smoothly without making the shake too thin. The fat content carries the chocolate and hazelnut flavors beautifully while maintaining that classic milkshake texture. Substitution: Heavy cream for ultra-decadent thickness (use half the amount), 2% milk for a slightly lighter version, or hazelnut milk for extra hazelnut flavor boost. Almond milk or oat milk work for dairy-free versions, though the texture will be less creamy.
Optional Enhancements: A tablespoon of chocolate syrup intensifies the chocolate notes, a shot of espresso or cold brew creates an adult mocha-hazelnut version, a handful of toasted hazelnuts adds authentic nutty crunch, and a pinch of sea salt elevates all the flavors by providing sweet-salty contrast.
For Garnish: Whipped cream adds visual appeal and creamy contrast, chocolate shavings or cocoa powder provide professional presentation, crushed hazelnuts offer textural interest and reinforce the hazelnut flavor, and a drizzle of extra chocolate hazelnut spread creates that Instagram-worthy swirl.
Equipment Needed
Creating this luxurious chocolate hazelnut milkshake requires minimal equipment, most of which you probably already own:
- High-Powered Blender: The most important tool for achieving silky-smooth consistency. Vitamix, Blendtec, or Ninja blenders work exceptionally well. Standard blenders are fine but may require longer blending time and more liquid.
- Measuring Cups: For accurate portioning of ice cream, milk, and hazelnut spread—consistency matters in milkshake making.
- Measuring Spoons: For adding optional flavor enhancers like vanilla extract or espresso.
- Rubber Spatula: Essential for scraping down blender sides and ensuring no delicious hazelnut spread gets wasted.
- Ice Cream Scoop: Makes portioning the ice cream much easier and more consistent than digging with a spoon.
- Tall Milkshake Glasses: Classic soda fountain glasses, mason jars, or any tall glass with 12-16 oz capacity for proper serving.
- Wide Straws: Standard straws work, but thick smoothie straws are better for this rich, thick shake.
- Optional – Piping Bag or Squeeze Bottle: For creating decorative chocolate hazelnut drizzles inside your glass.
- Optional – Microplane or Grater: For creating chocolate shavings as garnish.
- Optional – Small Skillet: If toasting hazelnuts for garnish, a dry skillet works perfectly.

Chocolate Hazelnut Milkshake Recipe
This ultra-creamy chocolate hazelnut milkshake combines rich chocolate ice cream with luscious hazelnut spread for a 5-minute dessert that tastes like drinkable Nutella. Thick, indulgent, and café-quality delicious.
- Total Time: 5 minutes
- Yield: 2 servings 1x
Ingredients
- 3 cups chocolate ice cream (about 4 generous scoops, slightly softened)
- 1/3 cup chocolate hazelnut spread (Nutella or similar brand)
- 1/2 cup whole milk (adjust for desired thickness)
- Optional: 1 tablespoon chocolate syrup
- Optional: 1 shot espresso or 2 tablespoons cold brew (for adults)
- Optional: 1/4 teaspoon vanilla extract
- Optional: Pinch of sea salt
For Garnish:
- Whipped cream
- Chocolate shavings or cocoa powder
- Crushed toasted hazelnuts
- Extra chocolate hazelnut spread for drizzling
Instructions
- Prepare Your Ingredients: Remove chocolate ice cream from the freezer and let it sit at room temperature for 3-5 minutes to soften slightly—it should be scoop-able but not melting. Check your chocolate hazelnut spread; if it’s very thick or cold from the pantry, microwave it for 10-15 seconds until it becomes pourable and easier to blend. This prevents lumps and ensures smooth integration.
- Optional Toast Hazelnuts: If using hazelnuts for garnish, toast them now so they can cool. Place whole or roughly chopped hazelnuts in a dry skillet over medium heat. Toast for 3-4 minutes, shaking the pan frequently, until fragrant and lightly golden. Transfer immediately to a plate to cool, then roughly chop or crush in a plastic bag with a rolling pin.
- Layer Ingredients in Blender: Add ingredients in the optimal order for best blending: start with the softened chocolate ice cream on the bottom (this creates the proper vortex), followed by the chocolate hazelnut spread, then the milk. If using optional additions like chocolate syrup, espresso, vanilla extract, or salt, add them now.
- Blend to Perfection: Start your blender on the lowest speed to begin incorporating ingredients without air pockets. Gradually increase to medium-high speed and blend for 30-45 seconds until completely smooth and uniformly colored. The shake should have no visible streaks of hazelnut spread and should look glossy and thick. Stop once and scrape down the sides with your rubber spatula if needed, then blend for another 10-15 seconds.
- Check and Adjust Consistency: Your ideal texture is thick enough to coat a spoon but pourable. Dip a spoon in the shake—it should leave a thick coating that slowly drips off. If too thick (won’t pour easily), add milk 1-2 tablespoons at a time, pulsing to incorporate. If too thin (runs right off the spoon), add more ice cream 1/2 cup at a time and blend again. Remember: easier to thin than thicken, so err on the side of less milk initially.
- Prepare Glasses for Wow Factor (Optional but Impressive): Warm 2-3 tablespoons of chocolate hazelnut spread in the microwave for 15-20 seconds until it’s thin enough to drizzle. Using a spoon, squeeze bottle, or piping bag, create decorative swirls on the inside of your serving glasses. Place prepared glasses in the freezer for 2-3 minutes to set while you finish blending—this keeps the drizzle from sliding down when you pour the shake.
- Pour and Build: Remove glasses from freezer and pour your chocolate hazelnut milkshake carefully, dividing evenly between glasses. Pour slowly to avoid disrupting your decorative drizzle work. Fill to about 1 inch from the rim to leave space for toppings.
- Garnish Like a Pro: Top each milkshake generously with whipped cream, creating a nice tall swirl. Sprinkle with chocolate shavings or dust with cocoa powder using a fine-mesh sieve. Add crushed toasted hazelnuts for crunch and authentic flavor. For the final touch, drizzle additional warmed chocolate hazelnut spread over the whipped cream in an artistic zigzag pattern.
- Serve Immediately: This milkshake is at its absolute best when served immediately while perfectly cold and thick. Provide both a wide straw and a long spoon—this shake is thick enough that you’ll want both options. Encourage drinking/eating it within 10-15 minutes for the best texture experience.
Notes
- Ice Cream Softening is Key: Slightly softened (but not melted) ice cream blends smoothly without requiring excess liquid, keeping your shake thick.
- Hazelnut Spread Temperature: Room temperature or slightly warmed spread incorporates much more smoothly than cold spread straight from the pantry.
- Start with Less Milk: Begin with 1/3 cup milk and add more only if needed—you can always thin a shake, but thickening requires more ice cream.
- Adult Version: The espresso addition creates a sophisticated mocha-hazelnut flavor perfect for grown-up palates.
- Make It Boozy: Add 1-2 oz of Frangelico (hazelnut liqueur), Irish cream, or chocolate vodka for adults.
- Dairy-Free Option: Use non-dairy chocolate ice cream and plant-based milk; most chocolate hazelnut spreads are already dairy-free.
- Prep Time: 5 minutes
- Cook Time: 0 minutes
Nutrition
- Serving Size: 1 large milkshake (approximately 16 oz)
- Calories: 625
- Sugar: 64g
- Sodium: 210mg
- Fat: 32g
- Saturated Fat: 16g
- Unsaturated Fat: 14g
- Trans Fat: 0g
- Carbohydrates: 78g
- Fiber: 4g
- Protein: 11g
- Cholesterol: 85mg
Tips & Variations
This chocolate hazelnut milkshake recipe is wonderfully adaptable. Here’s how to customize it to match your preferences and dietary needs:
Flavor Variations:
- Dark Chocolate Hazelnut: Use dark chocolate ice cream and add 1 tablespoon cocoa powder for a more sophisticated, less sweet version
- White Chocolate Hazelnut: Substitute vanilla ice cream and add 2 tablespoons white chocolate chips, blending until smooth
- Mocha Hazelnut: Add a shot of espresso or 2 tablespoons cold brew concentrate for coffee lovers
- Banana Hazelnut: Blend in half a frozen banana for natural sweetness and creamier texture
- Mint Chocolate Hazelnut: Add 1/4 teaspoon peppermint extract for a refreshing twist
- Salted Caramel Hazelnut: Mix in 2 tablespoons caramel sauce and increase salt to 1/4 teaspoon
Texture Modifications:
- Extra Thick Shake: Use 4 cups ice cream and only 1/4 cup milk for a spoon-only consistency
- Lighter Version: Replace half the ice cream with frozen banana or Greek yogurt
- Chunky Style: Add 1/4 cup roughly chopped toasted hazelnuts for textural contrast
- Smooth & Silky: Blend extra-long (60 seconds) and strain through a fine-mesh sieve for zero graininess
Dietary Adjustments:
- Vegan Chocolate Hazelnut Shake: Use non-dairy chocolate ice cream (coconut or cashew-based work beautifully) and plant milk; verify your hazelnut spread is vegan
- Lower Sugar: Use no-sugar-added chocolate ice cream and sugar-free chocolate hazelnut spread (though flavor will differ)
- Protein-Packed: Add a scoop of chocolate or vanilla protein powder for a post-workout treat
- Keto-Friendly: Use keto chocolate ice cream, sugar-free hazelnut spread, and unsweetened almond milk (significantly reduces carbs)
- Nut Allergy Alternative: This is challenging since hazelnut is core to the recipe, but try sunflower seed butter with cocoa powder and maple syrup as a substitute
Fun Add-Ins:
- Crushed Ferrero Rocher candies for ultra-indulgence
- A tablespoon of peanut butter for a chocolate-nut explosion
- Mini chocolate chips for extra chocolate punch
- A graham cracker or two for a s’mores-inspired version
Pro Chef Tips
Transform your chocolate hazelnut milkshake from delicious to absolutely extraordinary with these professional techniques:
The Perfect Temperature: Professional milkshake makers know that temperature control is everything. Your ice cream should be cold enough to keep the shake thick, but soft enough to blend without excessive liquid. The ideal consistency is when you can easily press your ice cream scoop through the ice cream but it still holds its shape. Remove from freezer 5-7 minutes before blending, and remember that slightly softened ice cream requires less milk, resulting in a thicker, more luxurious shake.
Toast Your Hazelnuts: This extra step takes 5 minutes but elevates your milkshake dramatically. Toasting hazelnuts releases their natural oils and intensifies their flavor exponentially. Even if you’re not using hazelnuts as garnish, consider toasting 1/4 cup and blending them directly into your shake for authentic hazelnut flavor that complements the spread beautifully.
Layer for Visual Drama: Create a professional two-tone effect by blending your milkshake, pouring half into glasses, adding a layer of straight chocolate hazelnut spread (not blended), then topping with remaining shake. When you stir or sip, you get beautiful ribbons of darker hazelnut spread swirling through the lighter shake—incredibly photogenic and texturally interesting.
The Salt Secret: Professional pastry chefs always add a pinch of salt to chocolate desserts because salt enhances sweetness perception and makes chocolate taste more chocolatey. Don’t skip the salt—it’s the secret ingredient that makes people say, “What makes this taste so good?”
Chill Everything: Beyond just the ice cream, place your milk in the coldest part of your refrigerator and freeze your serving glasses for 15-20 minutes before serving. Cold glasses keep your shake colder longer and prevent immediate melting at the edges. Some professionals even chill the blender jar in the freezer for 10 minutes before use.
The Drizzle Technique: For those Instagram-worthy drizzles inside the glass, warm your chocolate hazelnut spread until it’s honey-like in consistency (not hot, just pourable). Hold the glass at a 45-degree angle and slowly rotate it while drizzling the spread in a spiral motion from top to bottom. This creates professional-looking stripes that won’t immediately slide down when you pour the shake.
Blending Speed Matters: Don’t just crank your blender to high immediately. Start low to create the vortex, then gradually increase speed. This incorporates less air (air makes shakes thinner and melts them faster) and creates a denser, creamier final product. Professional milkshake makers never blend longer than 45 seconds total—over-blending generates heat through friction, which melts your ice cream.
Common Mistakes to Avoid
Even simple recipes have pitfalls. Here’s how to sidestep the most common chocolate hazelnut milkshake mistakes:
Using Frozen-Solid Ice Cream: This is the single biggest mistake home cooks make. Rock-hard ice cream requires so much liquid to blend that you end up with chocolate milk instead of a milkshake. Always let ice cream soften for 5 minutes. If you forget, pulse it in the blender first without any liquid to break it into smaller pieces, then add milk gradually. Your blender motor will thank you, and your shake will be infinitely better.
Adding Too Much Liquid at Once: Once you’ve thinned a milkshake, there’s no going back without adding more ice cream (which then requires more hazelnut spread for flavor balance, creating a cycle). Start with much less milk than the recipe suggests—begin with just 1/4 cup. You can always add 1-2 tablespoons more, but you can’t remove it. Professional shake makers always err on the side of too thick.
Cold Hazelnut Spread: Trying to blend cold, thick hazelnut spread straight from the pantry creates lumps and streaks throughout your shake. Always bring it to room temperature or warm it slightly. Those few seconds in the microwave make the difference between a smooth, uniformly flavored shake and one with disappointing pockets of unsweetened ice cream.
Over-Blending: More blending does not equal better results. Excessive blending incorporates air (creating a foamy, less dense shake) and generates heat through blade friction (melting your ice cream). Blend just until smooth—30-45 seconds maximum. If you see a uniform color with no streaks, stop immediately.
Using Low-Quality Ice Cream: Economy ice cream is full of air, stabilizers, and less cream, resulting in icy, thin shakes that melt quickly and taste flat. This is not the place to save money. Premium chocolate ice cream with a high butterfat content (check the label—look for at least 14% fat) creates dramatically better texture and flavor. You’re using ice cream as the primary ingredient, so quality matters enormously.
Skipping the Salt: Many home cooks think salt has no place in sweet desserts, but professional bakers know better. That tiny pinch of salt doesn’t make your shake taste salty—it enhances the chocolate flavor and balances the sweetness, preventing that one-dimensional sugary taste. It’s the difference between “good” and “I can’t stop drinking this.”
Serving in Warm Glasses: A room-temperature or warm glass immediately begins melting your milkshake from the outside in, creating an unpleasant watery layer. Always use chilled glasses—just 10 minutes in the freezer makes a noticeable difference in how long your shake maintains its perfect thick consistency.
Storage & Meal Prep
While chocolate hazelnut milkshakes are undeniably best enjoyed fresh and frosty, here’s how to handle leftovers and plan ahead:
Immediate Storage: If you have leftover milkshake (unlikely, but possible!), pour it into an airtight container or freezer-safe jar and freeze immediately. It will freeze solid and can be stored for up to 2 weeks. The texture won’t be identical to fresh when you “reconstitute” it, but it’s still delicious. To bring it back to life, let it thaw at room temperature for 15-20 minutes until you can break it into chunks, then re-blend with a splash of milk (2-3 tablespoons) until smooth.
Don’t Refrigerate: This is crucial—never try to store a milkshake in the refrigerator. Within 30 minutes, it will separate into an unappetizing mixture of icy chunks and liquid. The emulsion breaks down, and you can’t fix it. If you need to pause for any reason, freeze it instead, then re-blend.
Single-Serving Strategy: This recipe halves perfectly if you’re making milkshakes for one person. Use 1.5 cups chocolate ice cream, 2.5 tablespoons chocolate hazelnut spread, 1/4 cup milk, and adjust garnishes accordingly. Blend in a smaller container or personal blender cup for easier handling.
Pre-Portioned Prep: For the quickest possible shake-making, pre-scoop ice cream into 1.5-cup portions in airtight containers and freeze. Pre-measure chocolate hazelnut spread into small containers (2-3 tablespoons each). When the craving strikes, just dump and blend—takes literally 2 minutes.
Leftover Uses: If you have frozen leftover milkshake that you don’t want to re-blend, let it thaw slightly and eat it like ice cream, or use it as a dessert sauce over brownies, pancakes, or waffles.
Make-Ahead & Freezer Notes
Planning ahead for a party or want milkshakes ready faster? Here’s your strategy:
Decorative Drizzles: Prepare your chocolate hazelnut glass drizzles up to 3 days ahead. Create the swirls inside clean, dry glasses, then place them on a tray, cover loosely with plastic wrap, and refrigerate. The spread will harden and stay in place. Remove from refrigerator just before serving and pour your freshly made shake directly into the prepared glasses.
Toasted Hazelnut Prep: Toast and chop hazelnuts up to 1 week ahead. Store in an airtight container at room temperature. This saves time when you’re ready to garnish and keeps them crispy and fresh.
Whipped Cream in Advance: Make fresh whipped cream up to 4 hours ahead and store in the refrigerator in a piping bag or container. Give it a quick whisk before using to refresh the texture.
Not Suitable for Full Make-Ahead: Unfortunately, you cannot make complete milkshakes in advance and maintain quality. The texture degrades during freezing and will never match a freshly blended shake. Milkshakes are meant to be ephemeral treats—made and enjoyed in the moment.
Party Batch Strategy: When entertaining, don’t make all your milkshakes at once. Instead, prepare all ingredients (ice cream slightly softened, hazelnut spread at room temperature, glasses chilled and drizzled), then blend in batches of 2-3 servings every 10-15 minutes throughout your event. This ensures everyone gets a perfectly thick, cold shake at optimal quality.
Freezer Shake Kits: Create complete “milkshake kits” by combining pre-portioned ice cream and chocolate hazelnut spread in freezer-safe containers. When ready to use, dump the frozen contents into your blender, add milk, blend, and serve. These kits last up to 1 month and make spontaneous milkshake-making incredibly easy.
Serving Suggestions
A chocolate hazelnut milkshake is spectacular on its own, but here’s how to create a complete dessert experience:
Classic Dessert Pairings:
- Serve alongside warm brownies or blondies for temperature and texture contrast
- Pair with chocolate chip cookies fresh from the oven—dunk them in your shake
- Offer with biscotti for that authentic Italian café experience
- Serve with warm churros dusted with cinnamon sugar for ultimate indulgence
Brunch & Breakfast Treats:
- Pair with Belgian waffles drizzled with maple syrup and topped with fresh strawberries
- Serve alongside French toast for a decadent weekend brunch
- Offer with warm croissants or chocolate croissants for a European-inspired breakfast
- Pair with banana bread or chocolate chip muffins for a complete morning treat
Salty-Sweet Combinations:
- Serve with salted pretzels for that addictive sweet-salty contrast
- Pair with potato chips (trust us—the combination is amazing)
- Offer with cheese and crackers for sophisticated flavor balance
- Serve with bacon strips for the ultimate sweet-savory experience
Party & Entertaining Ideas:
- Create a milkshake bar with various toppings: crushed cookies, sprinkles, chocolate chips, caramel sauce, and whipped cream for guests to customize
- Serve in mason jars with colorful paper straws for casual gatherings
- Offer mini 6-8 oz versions as part of a dessert tasting menu
- Float a scoop of vanilla ice cream on top for an over-the-top sundae-shake hybrid
Seasonal Pairings:
- Summer: Serve with fresh berries and shortcake
- Fall: Pair with pumpkin bread or apple crisp
- Winter: Offer alongside gingerbread cookies or peppermint bark
- Spring: Serve with lemon bars or coconut macaroons for flavor contrast
Coffee House Style:
- Pair with an espresso shot on the side for sophisticated guests
- Serve with biscotti or shortbread for dunking
- Offer sparkling water with lemon to cleanse the palate between sips
- Present with a small chocolate truffle on the saucer for extra elegance
FAQs Section
Q: Can I use a different type of chocolate hazelnut spread instead of Nutella? A: Absolutely! Any chocolate hazelnut spread works beautifully in this recipe. Popular alternatives include Justin’s Chocolate Hazelnut Butter (more natural ingredients), Nocciolata (organic option), Trader Joe’s Cocoa Almond Spread, or store-brand versions. Each has slightly different sweetness levels and consistency, so you may need to adjust the amount slightly. Some artisanal spreads are less sweet, so you might add a teaspoon of sugar if needed.
Q: My milkshake turned out too thin. How do I fix it? A: Add more chocolate ice cream! Start with 1/2 cup additions, blending briefly between each until you reach your desired thickness. If you don’t have more ice cream on hand, place the thin milkshake in the freezer for 10-15 minutes until it firms up slightly, then re-blend—this will thicken it considerably. For your next batch, use less milk (start with only 1/4 cup) and remember that slightly softened ice cream is your friend for achieving thick consistency.
Q: Can I make this dairy-free or vegan? A: Yes! Use your favorite non-dairy chocolate ice cream (coconut milk-based varieties like So Delicious or cashew-based like Häagen-Dazs non-dairy tend to be the creamiest) and plant-based milk such as oat milk, almond milk, or coconut milk. The great news is that most chocolate hazelnut spreads, including Nutella, are already dairy-free (always verify your specific brand’s label). For garnish, use coconut whipped cream instead of dairy whipped cream. The result is just as indulgent!
Q: How can I make this milkshake healthier without sacrificing too much flavor? A: Try these modifications: use frozen banana as part of your base (replace 1 cup ice cream with 1 frozen banana), choose low-fat frozen yogurt instead of ice cream, use unsweetened almond milk, reduce chocolate hazelnut spread to 2-3 tablespoons, add Greek yogurt for protein (1/4 cup), and include a scoop of chocolate protein powder. Another option is using dark chocolate ice cream and adding cocoa powder for intense flavor with less sugar. That said, milkshakes are inherently indulgent—sometimes it’s better to enjoy a full-flavored version in moderation.
Q: Can I add alcohol to make an adult version? A: Definitely! This milkshake becomes a sophisticated dessert cocktail with alcohol additions. Try 1-2 oz of Frangelico (hazelnut liqueur) for intense hazelnut flavor, Bailey’s Irish Cream for creamy richness, Kahlúa or coffee liqueur for mocha notes, chocolate vodka for boozy sweetness, or even amaretto for almond-chocolate harmony. Add the alcohol during the blending process. Remember that alcohol thins the shake slightly, so reduce your milk by 2-3 tablespoons to compensate.
Q: What’s the best way to get that smooth, lump-free consistency? A: The secret is ingredient temperature and blending order. Always warm your chocolate hazelnut spread until it’s pourable (15-20 seconds in the microwave), use slightly softened ice cream (not frozen solid), and add ingredients in the correct order: ice cream first, then hazelnut spread, then milk. Blend on low speed first to create a vortex, then gradually increase to medium-high. Don’t rush—let the blender work for 30-45 seconds for perfectly smooth results. If you still see streaks, stop, scrape down the sides, and blend another 10 seconds.
Q: How long will this milkshake stay thick if I’m not drinking it right away? A: Realistically, you have about 10-15 minutes before noticeable melting begins, even in a chilled glass.