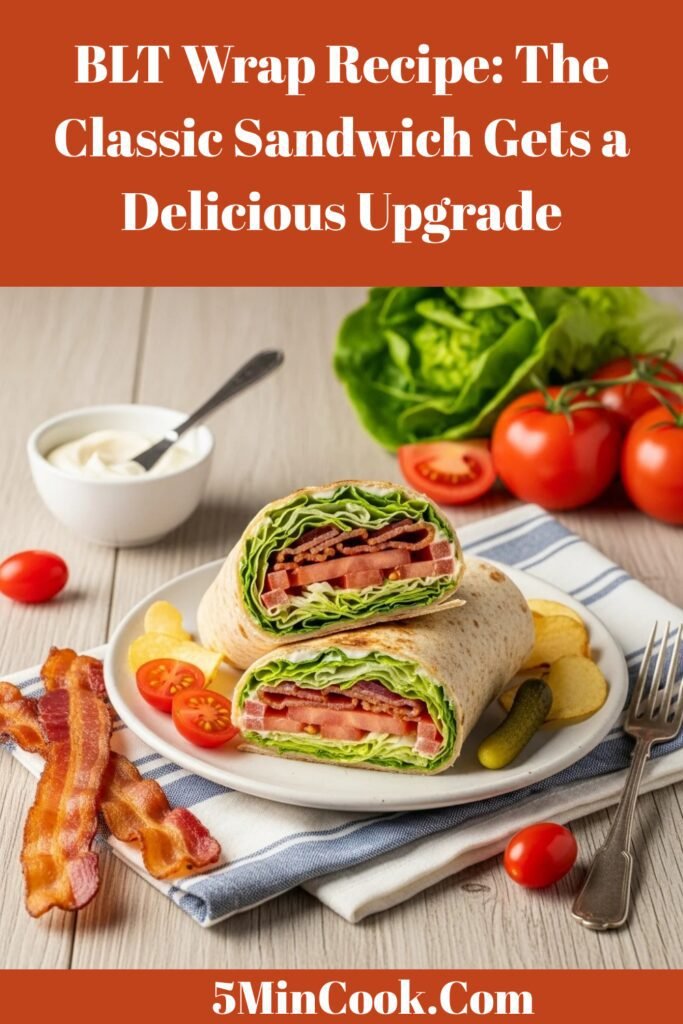
BLT Wrap Recipe: The Classic Sandwich Gets a Delicious Upgrade
The BLT wrap is a brilliant reimagining of the beloved classic BLT sandwich, taking all those iconic flavors—crispy bacon, fresh lettuce, juicy tomatoes, and creamy mayo—and wrapping them up in a soft, portable tortilla! This modern twist on an American favorite combines the satisfying crunch and savory-fresh flavor profile we all love with the convenience of a handheld wrap that’s perfect for eating on the go. The combination of smoky bacon, crisp vegetables, and creamy spread creates an irresistible taste experience that’s both comforting and refreshing. This easy BLT wrap is perfect for countless occasions: pack it for work lunches where you need something that travels well and stays fresh, make it for quick weeknight dinners when you don’t want to fuss over complicated recipes, prepare it for casual gatherings where guests can grab and eat easily, enjoy it as a summer lunch that doesn’t require hot cooking, create it for meal prep Sundays to have grab-and-go lunches ready, or whip it up when you’re craving classic comfort food with a convenient twist. The beauty of this BLT wrap for lunch lies in its perfect balance—it’s substantial enough to keep you satisfied for hours, fresh enough that you won’t feel weighed down, simple enough that anyone can make it, and comes together in just 15 minutes from start to finish. Whether you’re a busy professional seeking better lunch options, a parent packing school lunches, someone who loves classic American flavors, or simply a wrap enthusiast looking for the perfect combination of taste and convenience, this classic BLT wrap recipe delivers incredible flavor, satisfying crunch, and pure deliciousness in every single bite!
History / Background
The BLT wrap is a modern interpretation of one of America’s most iconic sandwiches—the BLT. To truly appreciate this wrap, we need to understand the rich history of its predecessor and how it evolved into the convenient format we enjoy today.
The BLT sandwich (Bacon, Lettuce, and Tomato) has been a staple of American cuisine since the early 1900s, though its exact origins are somewhat murky. The combination likely emerged during the Victorian era when tea sandwiches were fashionable, but the BLT as we know it gained mainstream popularity in the 1920s and 1930s. This timing coincided with several key developments: the invention of pre-sliced bread in 1928, the rise of the American diner, and the increasing availability of fresh produce through improved refrigeration and transportation.
The BLT represents a perfect storm of American culinary innovation. Bacon, while having ancient roots, became deeply embedded in American breakfast culture in the early 20th century. The iceberg lettuce commonly used in BLTs became widely available in the 1920s when improved refrigerated rail cars made it possible to ship this crisp variety across the country. Tomatoes, once considered poisonous in early American history, had by this time become beloved summer staples. Mayonnaise, invented in Europe but mass-produced in America starting in 1913 with the creation of Hellmann’s, became the essential creamy element that bound these components together.
The BLT gained particular prominence in the post-World War II era of the 1950s and 1960s when American diner culture flourished. It became a menu staple alongside other classic sandwiches like the club and the Reuben. The simplicity of the BLT—just three main ingredients plus bread and mayo—made it accessible to home cooks and professional kitchens alike. Its popularity never waned; in fact, it became so iconic that “BLT” needs no explanation—everyone knows exactly what it is.
The wrap format that transformed the BLT into today’s recipe emerged much later, in the 1990s, as part of the broader wrap sandwich trend that swept American casual dining. California cuisine and health-conscious eating movements promoted wraps as lighter alternatives to traditional sandwiches made with heavy bread. Tortillas and flatbreads offered a thinner, more portable vessel that could hold generous fillings without feeling heavy.
The BLT wrap likely first appeared on menus in the mid-to-late 1990s at fast-casual chains and trendy cafes looking to offer familiar flavors in contemporary formats. It perfectly captured the millennial appetite for foods that were simultaneously nostalgic and modern, convenient yet fresh. The wrap format solved some traditional BLT challenges—less bread meant fewer carbs, and wraps were easier to eat without ingredients sliding out.
By the 2000s and 2010s, the BLT wrap had become a fixture in delis, cafeterias, food trucks, and home kitchens across America. Food bloggers and Pinterest users embraced it as an ideal lunch recipe—photogenic, simple to make, perfect for meal prep, and endlessly customizable. Today, the BLT wrap represents the best of both worlds: honoring a century-old American classic while adapting it for contemporary tastes and lifestyles.
Why You’ll Love This Recipe
This BLT wrap recipe takes a timeless favorite and shows you exactly how to make it perfectly every time! While wraps might seem straightforward—just roll ingredients in a tortilla—there are actually specific techniques that separate a mediocre wrap from an exceptional one: cooking bacon to ideal crispness, preparing vegetables so they add freshness without making things soggy, layering ingredients in the right order for structural integrity, and rolling tightly so nothing falls out when you eat it.
What makes this particular approach to the easy BLT wrap special is the attention to detail and the focus on maximizing flavor while maintaining convenience. We’re not just throwing bacon and vegetables in a tortilla—we’re thinking about how to enhance each component, how to create the perfect ratio of ingredients, how to keep everything fresh and crisp, and how to make a wrap that’s delicious, beautiful, and easy to eat without making a mess.
Here’s why this classic BLT wrap will become your new favorite lunch:
- Ready in 15 Minutes – From raw bacon to finished wrap in just fifteen minutes
- Uses Simple Ingredients – Everything you need is probably already in your kitchen
- Kid-Friendly Classic – Even picky eaters love the familiar BLT flavors
- Perfect for Meal Prep – Make multiple wraps at once for the whole week
- Incredibly Portable – Travels beautifully in lunchboxes and coolers
- Customizable – Easy to adjust ingredients to your preferences
- Budget-Friendly – Costs much less than buying lunch out
- Fresh & Satisfying – Light yet filling, perfect for warm weather
- No Special Skills Required – Simple enough for beginner cooks
- Crowd-Pleaser – Great for parties, potlucks, and gatherings
- Gluten-Free Option – Use gluten-free tortillas and you’re all set
- Lower Carb – Less bread than a traditional sandwich
Ingredient Notes
This wrap uses classic, simple ingredients where quality really makes a difference!
Bacon: The star ingredient! Regular bacon provides classic flavor, thick-cut bacon offers extra meatiness, turkey bacon is a leaner option, and center-cut bacon has less fat. Amount: 2-3 strips per wrap depending on size. Cooking tip: Cook until crispy but not burnt—crispy bacon is essential for proper texture! Substitution: Turkey bacon, Canadian bacon, or for vegetarians, coconut bacon or tempeh bacon.
Lettuce: The essential crunch! Iceberg lettuce is traditional and provides maximum crunch. Romaine offers more nutrition and a sturdy texture. Butter lettuce is tender and mild. Mixed greens add variety. Amount: About 1 cup per wrap. Preparation: Wash and thoroughly dry—wet lettuce ruins wraps! Substitution: Spinach, arugula, or spring mix all work well.
Tomatoes: The juicy freshness! Vine-ripened tomatoes offer consistent quality year-round. Heirloom tomatoes (when in season) provide incredible flavor. Roma tomatoes have less water and fewer seeds, reducing mess. Cherry or grape tomatoes work great—just slice them. Key tip: Use room temperature tomatoes and remove excess seeds and moisture!
Mayonnaise: The creamy binding element! Regular mayonnaise is classic, light mayo reduces calories, avocado oil mayo offers healthier fats. Amount: About 2 tablespoons per wrap. Quality matters: Good mayo makes a difference! Substitution: Greek yogurt for tanginess, mashed avocado for healthy fats, or ranch dressing for extra flavor.
Large Tortillas: Your wrap vessel! Flour tortillas are traditional and soft, whole wheat adds fiber and nutrition, spinach or tomato wraps add color, low-carb tortillas reduce carbs. Size: Use “burrito-size” or large 10-12 inch tortillas for proper wrapping. Pro tip: Warm tortillas slightly before rolling for easier wrapping!
Optional Add-Ins:
- Avocado or guacamole for creaminess
- Cheese (cheddar, Swiss, or pepper jack) for extra richness
- Red onion for sharpness
- Cucumber for extra crunch
- Ranch dressing instead of mayo
- Hot sauce or jalapeños for spice
- Fried egg for a breakfast BLT
- Pickles for tangy crunch
Equipment Needed
This simple recipe requires minimal kitchen tools!
- Large skillet or baking sheet (for cooking bacon)
- Tongs or fork (for flipping bacon)
- Paper towels (for draining bacon)
- Sharp knife (for slicing tomatoes and bacon)
- Cutting board
- Plate (for assembling wraps)
- Salad spinner or paper towels (for drying lettuce)
- Microwave or skillet (optional, for warming tortillas)
- Plastic wrap or parchment paper (for wrapping finished wraps)
That’s it! Basic kitchen equipment is all you need.
Print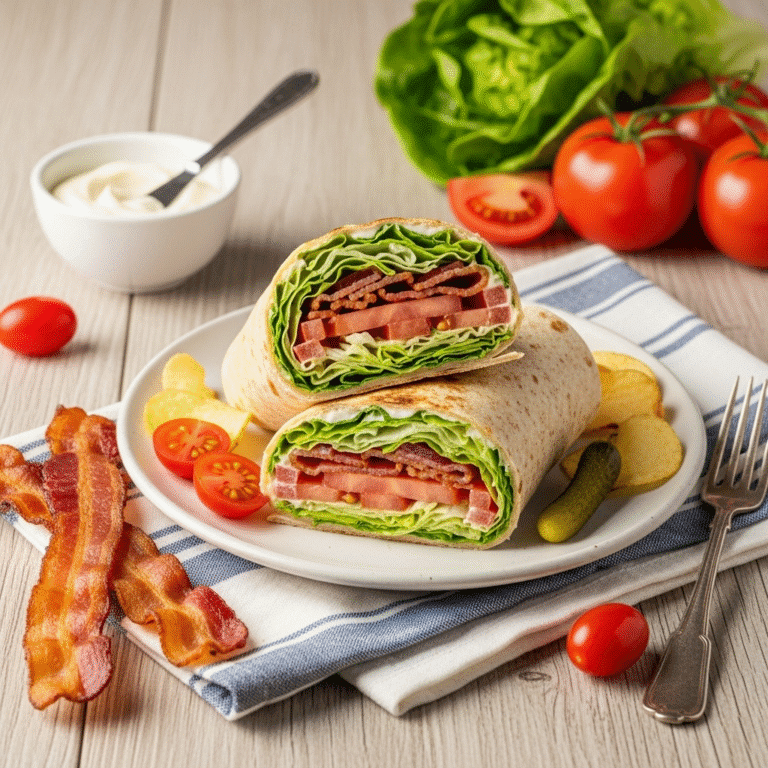
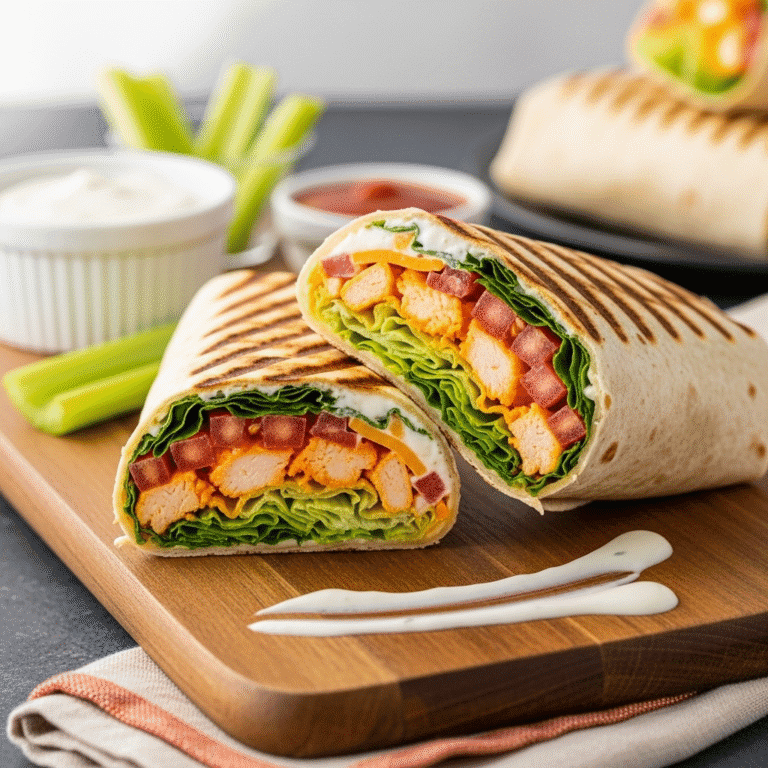
BLT Wrap Recipe
Easy BLT wrap with crispy bacon, fresh lettuce, juicy tomatoes, and creamy mayo wrapped in a soft tortilla. A classic sandwich reimagined as a convenient, portable lunch ready in just 15 minutes!
- Total Time: 15 minutes
- Yield: 4 wraps 1x
Ingredients
For the Wraps:
- 12 strips bacon (regular or thick-cut)
- 4 large flour tortillas (10-12 inch, burrito size)
- 4 cups lettuce, chopped or whole leaves (iceberg, romaine, or your favorite)
- 2 medium tomatoes, sliced (or 1 cup cherry tomatoes, halved)
- ½ cup mayonnaise (about 2 tablespoons per wrap)
- Salt and black pepper to taste
- Optional: 1 avocado, sliced
- Optional: ½ cup shredded cheese
- Optional: hot sauce or ranch dressing
Instructions
Cook the Bacon:
- Prepare for Cooking: Line a plate with several layers of paper towels for draining cooked bacon. Arrange bacon strips in a single layer in a large cold skillet (don’t preheat the pan—starting with a cold pan helps bacon cook more evenly).
- Cook the Bacon: Turn heat to medium. Cook bacon for 5-7 minutes, flipping occasionally with tongs, until it reaches your desired level of crispness. For wraps, aim for crispy but not burnt—you want it to hold up structurally but still have some chew. Watch carefully in the final minutes as bacon can go from perfect to burnt quickly!
- Drain and Cool: Transfer cooked bacon to the paper towel-lined plate. Let it drain and cool for 2-3 minutes. Pat the tops with additional paper towels to remove excess grease. Once cool enough to handle, break or cut each strip in half for easier wrap assembly.
Prepare the Vegetables:
- Prep the Lettuce: Wash lettuce thoroughly and dry completely using a salad spinner or by patting with paper towels. If using leafy lettuce like romaine or butter lettuce, leave whole. If using iceberg, chop into bite-sized pieces. Dry lettuce is crucial—wet lettuce makes soggy wraps!
- Prep the Tomatoes: Slice tomatoes into ¼-inch thick slices. Place slices on paper towels and gently pat to remove excess moisture and seeds (this prevents soggy wraps). If using cherry tomatoes, simply slice them in half.
Assemble the Wraps:
- Warm the Tortillas: Warm tortillas for 10-15 seconds in the microwave wrapped in a damp paper towel, or heat briefly (15-20 seconds per side) in a dry skillet over medium heat. This makes them more pliable and easier to roll without cracking.
- Lay Out Tortilla: Place one warmed tortilla on a clean work surface or large plate.
- Spread Mayo: Spread about 2 tablespoons of mayonnaise over the entire tortilla, leaving a 1-inch border clear around the edges. This acts as both flavor and a moisture barrier.
- Add Lettuce: Place about 1 cup of lettuce in the center of the tortilla, arranging it in a horizontal line rather than a pile. Leave 2-3 inches clear on each side and about 3 inches clear at the bottom edge.
- Add Bacon: Layer 6 bacon halves (3 whole strips’ worth) over the lettuce, arranging them in a line.
- Add Tomatoes: Layer tomato slices over the bacon. Season lightly with a pinch of salt and pepper.
- Add Optional Ingredients: If using avocado, cheese, or other add-ins, layer them now.
- Fold and Roll: Fold the bottom edge of the tortilla up and over the filling, pulling it tight to enclose the ingredients. Fold in the left and right sides, then continue rolling away from you, keeping it tight as you roll. The final roll should seal at the top.
- Slice and Serve: Slice the wrap in half diagonally. Serve immediately, or wrap tightly in plastic wrap or parchment paper for later.
- Repeat: Continue with remaining tortillas and ingredients to make 3 more wraps.
Notes
- Bacon Crispness: For wraps, bacon should be crispy enough to break cleanly but not so brittle it shatters. This provides structure and texture without making wraps fall apart.
- Dry Vegetables: Cannot emphasize enough—dry lettuce and tomatoes are essential! Moisture is the enemy of a good wrap.
- Mayo Options: Mix mayo with ranch dressing or add garlic powder for extra flavor. Start with less mayo and add more if needed.
- Storage: Wrapped tightly in plastic wrap or parchment, these keep in the fridge for 1 day. They’re always best fresh, but overnight storage is acceptable if needed.
- Rolling Tight: The tighter you roll initially, the easier the wrap is to eat. Don’t overfill—you should be able to fold and roll without ingredients escaping.
- Prep Time: 5 minutes
- Cook Time: 10 minutes
- Category: Lunch
- Method: Stovetop
- Cuisine: American
- Diet: Gluten Free
Nutrition
- Serving Size: 1 wrap
- Calories: 465
- Sugar: 4g
- Sodium: 890mg
- Fat: 28g
- Saturated Fat: 8g
- Unsaturated Fat: 18g
- Trans Fat: 0g
- Carbohydrates: 35g
- Fiber: 3g
- Protein: 16g
- Cholesterol: 45mg
Tips & Variations
BLAT (BLT with Avocado): Add sliced fresh avocado or spread mashed avocado on the tortilla before adding other ingredients for creamy, healthy fats.
Ranch BLT: Use ranch dressing instead of mayo, or mix equal parts mayo and ranch for a tangy, herbaceous flavor boost.
Club BLT Wrap: Add sliced turkey or chicken breast along with the bacon for a club sandwich-inspired version with extra protein.
Spicy BLT: Add sliced jalapeños, pepper jack cheese, and chipotle mayo for a spicy kick that elevates the classic.
Fried Egg BLT: Add a fried egg for a breakfast BLT wrap that’s hearty and delicious—perfect for brunch!
Veggie BLT: Use tempeh bacon, coconut bacon, or marinated mushroom “bacon” for a vegetarian version that’s still smoky and satisfying.
Caprese BLT: Add fresh mozzarella slices, fresh basil leaves, and a drizzle of balsamic glaze for an Italian-inspired twist.
Caesar BLT: Add Caesar dressing instead of mayo and sprinkle with Parmesan cheese for a Caesar salad-BLT hybrid.
Southwest BLT: Add pepper jack cheese, jalapeños, cilantro, and chipotle mayo for Southwestern flavors.
Lettuce Wrap: For low-carb, skip the tortilla entirely and use large lettuce leaves (butter lettuce or romaine hearts) as your “wrap.”
Pro Chef Tips
The Cold Pan Bacon Method: Professional chefs know that starting bacon in a cold pan (not preheated) produces more evenly cooked, crispy bacon with less curling. The gradual heat allows fat to render slowly and evenly. Place bacon in cold skillet, then turn heat to medium. This technique gives you restaurant-quality results every time!
Pat, Don’t Rub: When drying bacon on paper towels, gently pat rather than rubbing. Rubbing can tear apart the bacon strips, especially if they’re still hot. A gentle pat removes excess grease while keeping bacon intact for perfect wrap assembly.
The Dry Lettuce Rule: This cannot be overstated! Restaurant kitchens always use a salad spinner and then additional paper towels to ensure lettuce is bone-dry. Any moisture will make wraps soggy and cause tortillas to tear or become slimy. Dry lettuce = successful wraps, every single time.
Seed Your Tomatoes: Professional sandwich makers remove the seedy, watery gel from tomato centers before using them in sandwiches and wraps. This one step reduces moisture by 60% and prevents soggy wraps. Simply slice the tomato, then use your finger or a small spoon to scoop out the seeds and gel, keeping only the firm outer walls.
Warm the Tortilla: Cold tortillas from the fridge are stiff, crack when rolled, and can tear. Warm tortillas are pliable, soft, and roll beautifully. Just 10-15 seconds in the microwave (wrapped in damp paper towel) or 30 seconds in a dry skillet transforms them. This is standard practice in professional kitchens.
The Tight First Fold: The secret to wraps that hold together is the very first fold. After arranging ingredients, fold the bottom edge up and over the filling, then pull it TIGHT back toward you before folding in the sides. This tension creates a compact wrap that won’t fall apart. Think of it like tucking in a bed sheet—tension is key!
Room Temperature Tomatoes: Cold tomatoes from the refrigerator have muted flavor compared to room temperature tomatoes. Take tomatoes out of the fridge 20-30 minutes before making wraps. The difference in taste is remarkable—warmer tomatoes release more flavor compounds and taste sweeter and more vibrant.
Common Mistakes to Avoid
Overfilling the Wrap: The most common mistake! Piling too much filling makes wraps impossible to roll, causes ingredients to fall out when eating, and creates a messy situation. Be generous but reasonable—about 3 strips of bacon, 1 cup lettuce, and 3-4 tomato slices per wrap is the sweet spot. You want a portable meal, not an overstuffed burrito!
Using Limp or Greasy Bacon: Undercooked bacon that’s limp and greasy makes for an unpleasant texture and adds excess grease that makes wraps soggy. Conversely, bacon cooked too dark tastes burnt and shatters into pieces. Aim for golden-brown, crispy bacon that still has slight flexibility—crisp enough to break cleanly but not brittle.
Wet Vegetables: Putting freshly washed lettuce or juicy tomatoes directly into wraps guarantees failure. The excess moisture dilutes mayo, makes everything soggy, and causes tortillas to get slimy and tear. Always thoroughly dry lettuce with a salad spinner and paper towels, and pat tomatoes dry after slicing. This prevents 90% of wrap disasters!
Too Much Mayo or Spread: Drowning the tortilla in mayonnaise makes everything slippery, greasy, and impossible to roll properly. It also creates a mess when eating. Start with less than you think you need—about 1-2 tablespoons per wrap is perfect. You can always add more, but you can’t take it away!
Cold Tortillas: Trying to roll cold, stiff tortillas from the refrigerator results in cracked, torn wraps that fall apart. Always warm tortillas before rolling—it takes just seconds and makes them pliable and easy to work with. This simple step prevents frustration and failed wraps.
Wrong Rolling Technique: Rolling wraps loosely or haphazardly creates wraps that fall apart, leak, or unravel. The correct method is: fill the center, fold bottom up TIGHT, fold in sides firmly, then roll away from you while maintaining tension. The first fold is the most important—pull it tight over the filling before proceeding!
Storage & Meal Prep
Immediate Storage: If not eating immediately, wrap each completed wrap very tightly in plastic wrap or parchment paper, then store in the refrigerator. Properly wrapped BLT wraps stay fresh for up to 24 hours, though they’re always best the day they’re made (bacon stays crisper, lettuce stays crunchier).
Component Prep Strategy: For optimal freshness and texture, especially for meal prep, keep components separate and assemble fresh:
- Cooked bacon: Store in airtight container lined with paper towels for up to 5 days
- Washed, dried lettuce: Wrap in paper towels, store in container or bag for 5-7 days
- Sliced tomatoes: Best sliced fresh daily, but can be prepped 1 day ahead
- Mayo: Keep in jar or bottle in refrigerator
- Tortillas: Store at room temperature or refrigerated
- Assemble: Takes just 2-3 minutes per wrap when components are ready
Lunchbox Packing: Pack wrapped BLT wraps with an ice pack or in an insulated lunch bag to keep them cold and fresh. Don’t let them sit at room temperature for more than 2 hours for food safety. The bacon and mayo need to stay refrigerated.
Texture Changes: Wraps made the night before for next-day lunch are still good and safe to eat, but expect some texture changes—lettuce may soften slightly, bacon may lose a bit of crispness, and tortilla may become less crispy. For absolute best quality, assemble the morning of, but overnight storage is perfectly acceptable if needed.
Freezing Note: Do NOT freeze assembled BLT wraps. The lettuce and tomatoes become soggy and mushy, the bacon gets weird texture, and mayo separates. Frozen and thawed wraps are unpleasant. Only freeze if you plan to remove the vegetables first!
Make-Ahead & Freezer Notes
Component Make-Ahead: You can absolutely prep components ahead to streamline assembly:
- Cook bacon: Up to 5 days ahead, store refrigerated in airtight container
- Wash and dry lettuce: Up to 5 days ahead
- Prep other ingredients: 1-2 days ahead
- Assemble wraps: Best same-day, acceptable 1 day ahead
Freezing Cooked Bacon: YES! Cooked bacon freezes beautifully for up to 1 month. Lay strips in a single layer on parchment paper, freeze until solid, then transfer to a freezer bag. Thaw in refrigerator overnight or microwave for 15-20 seconds. This is a great time-saver for busy weeks!
Freezing Assembled Wraps: Unfortunately, assembled BLT wraps do NOT freeze well. The lettuce and tomatoes become soggy, watery, and limp when thawed. The texture is completely ruined. If you must freeze, remove lettuce and tomatoes first, freeze just the bacon-wrapped tortilla, then add fresh vegetables after thawing.
Best Approach: Cook a big batch of bacon on Sunday, store it refrigerated, and assemble fresh wraps throughout the week. Each assembly takes under 3 minutes when bacon is already cooked. This gives you convenience without sacrificing quality!
Reheating Note: BLT wraps are traditionally served cold or at room temperature. If you’ve stored one in the fridge, remove it 10-15 minutes before eating to take the chill off for best flavor. Don’t microwave—the lettuce will wilt and become unappetizing.
Serving Suggestions
Potato Chips: Classic pairing! Serve with kettle chips, sea salt chips, BBQ chips, or your favorite variety for that satisfying crunch.
Fresh Fruit: Pair with grapes, apple slices, watermelon, berries, or a fresh fruit salad for refreshing balance.
Pickle Spear: Dill pickles, bread and butter pickles, or pickled vegetables add tangy crunch that complements the rich bacon.
Soup Pairing: Serve with tomato soup, chicken noodle soup, or potato soup for a classic, comforting lunch combination.
French Fries or Sweet Potato Fries: For an indulgent meal, add crispy fries (baked or fried) on the side.
Coleslaw: Creamy or vinegar-based coleslaw provides cooling contrast and extra vegetables.
Side Salad: A simple green salad with vinaigrette balances the rich, savory wrap.
Pasta Salad or Potato Salad: Perfect for picnics, potlucks, or outdoor gatherings.
Beverage Pairings: Serve with iced tea (sweetened or unsweetened), lemonade, sparkling water, fresh juice, or for adults, a crisp beer or light wine.
Vegetable Sticks: Add carrot sticks, celery, bell pepper strips, and ranch dip for extra vegetables.
FAQs Section
Q: Can you make BLT wraps ahead of time?
A: Yes, but with caveats! You can assemble BLT wraps up to 24 hours ahead, wrap them tightly, and refrigerate. However, they’re always best made fresh—the bacon stays crispier and lettuce stays crunchier. For meal prep, the best approach is cooking bacon ahead and storing components separately, then assembling wraps fresh each morning (takes just 2-3 minutes).
Q: How do you keep BLT wraps from getting soggy?
A: Three essential steps prevent sogginess: 1) Make sure lettuce is bone-dry after washing—use a salad spinner and pat with paper towels; 2) Pat tomatoes dry and remove excess seeds/gel; 3) Don’t use too much mayo—a thin, even layer is perfect. These steps keep wraps fresh and crispy for 24 hours!
Q: Can you use turkey bacon for BLT wraps?
A: Absolutely! Turkey bacon is a great lower-fat alternative that still provides that smoky, salty flavor. Cook it until crispy just like regular bacon. The texture is slightly different (less fatty) but still delicious. Many people prefer turkey bacon for health reasons.
Q: What’s the best way to cook bacon for wraps?
A: The cold pan method works best: Place bacon in a cold skillet, then turn heat to medium. Cook 5-7 minutes, flipping occasionally, until crispy but not burnt. For wraps, you want bacon that’s crispy enough to provide crunch but not so brittle it shatters. Alternatively, bake bacon at 400°F for 15-18 minutes on a parchment-lined sheet for hands-off cooking.
Q: Can you make BLT wraps without mayo?
A: Yes! Try mashed avocado for healthy fats and creaminess, ranch dressing for tangy flavor, Greek yogurt for protein and tanginess, hummus for a Mediterranean twist, or even pesto for herbaceous flavor. Each alternative changes the flavor profile but still creates a delicious wrap.
Q: How long do BLT wraps last in the fridge?
A: Properly wrapped in plastic wrap or stored in airtight containers, BLT wraps last 24 hours in the refrigerator. After that, quality declines significantly—lettuce gets soggy, bacon loses crispness, and tortillas become limp. For best results, eat within the first day or assemble fresh from prepped components.
Q: Can you heat up a BLT wrap?
A: BLT wraps are traditionally served cold or at room temperature—they’re not meant to be heated. The lettuce would wilt and become slimy, and the mayo would separate and become greasy. If you want a warm bacon wrap, consider a different style (like a bacon breakfast burrito with eggs) that’s designed to be served hot.
Conclusion
And there you have it—everything you need to make the most delicious, perfectly crispy, absolutely satisfying BLT wrap! While this recipe might seem simple on the surface, paying attention to the details—from properly cooking bacon to thoroughly drying vegetables to rolling tightly—transforms a basic wrap into something truly special and genuinely crave-worthy.
This easy BLT wrap is proof that sometimes the best recipes are the simplest ones. By taking the iconic flavors of a classic American sandwich and reimagining them in a convenient, portable format, you get the best of both worlds: nostalgic comfort food meets modern convenience. It’s the kind of lunch that makes you actually excited about meal prep, and it proves you don’t need complicated recipes to create something absolutely delicious!
Whether you’re making this BLT wrap for lunch meal prep, quick weeknight dinners, casual gatherings, picnic perfection, or simply because you’re craving those classic bacon-lettuce-tomato flavors in a convenient handheld format, this classic BLT wrap recipe delivers every single time. It’s fresh, satisfying, portable, and endlessly customizable—everything a great wrap should be!
Now it’s your turn to create your own perfect BLT wrap! I’d love to hear about your experience—did you try any of the variations? What’s your favorite way to cook bacon? Did you add any creative extras? Share your thoughts, tips, and beautiful wrap photos in the comments below! Your feedback and creativity inspire other readers and help build our cooking community.
Don’t forget to save this BLT wrap recipe to your Pinterest boards—pin it to “Easy Lunch Ideas,” “Wrap Recipes,” “Quick Dinners,” or “Meal Prep Recipes” so you can find it whenever you need lunch inspiration. If you know someone who loves BLTs, is always looking for better lunch options, or wants simple, delicious recipes, share this article with them. And when you make your crispy, fresh, absolutely delicious wraps, snap a photo and tag me on social media—I absolutely love seeing your creations!
Now go create your own portable bacon masterpiece—lunch just got a whole lot better!