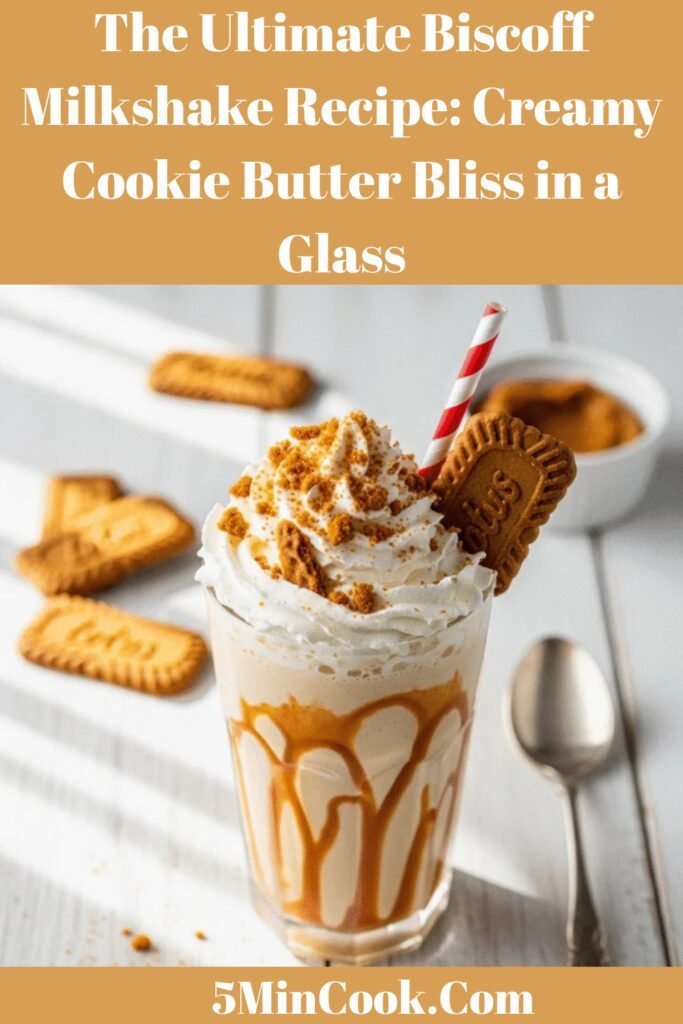
The Ultimate Biscoff Milkshake Recipe: Creamy Cookie Butter Bliss in a Glass
If you’ve ever dreamed of turning your favorite European cookie spread into a drinkable dessert, this Biscoff milkshake recipe is about to become your new obsession. This ultra-creamy, caramel-kissed milkshake combines the distinctive spiced flavor of Biscoff cookies with rich vanilla ice cream to create a treat that’s part nostalgia, part indulgence, and completely irresistible.
Perfect for summer afternoons, birthday celebrations, movie nights, or whenever you need a pick-me-up, this Biscoff cookie butter milkshake takes just five minutes to whip up but tastes like it came from a gourmet ice cream parlor. Whether you’re a longtime Biscoff lover or new to the cookie butter craze, this homemade Biscoff milkshake delivers restaurant-quality results with minimal effort. It’s thick enough to require a spoon, sweet enough to satisfy any craving, and absolutely perfect for sharing on Pinterest with its gorgeous caramel color and photogenic swirls of cookie butter.
The best part? You only need four basic ingredients and a blender to create this magical concoction that tastes like liquid Biscoff heaven.
History / Background
The story of Biscoff begins in 1932 in a small Belgian town called Lembeke, where baker Jan Boone Sr. created a unique spiced cookie recipe that would eventually become a global phenomenon. The name “Biscoff” is derived from “biscuit” and “coffee,” as these thin, caramelized cookies were traditionally served alongside coffee in Belgian cafés. The distinctive flavor comes from a secret blend of cinnamon and other warming spices, combined with caramelized sugar that gives the cookies their signature taste.
For decades, Biscoff cookies remained a European secret, cherished in Belgium and the Netherlands. Everything changed in the 1980s when Delta Airlines began serving these crispy treats on their flights, introducing millions of American travelers to their addictive flavor. Passengers loved them so much they started calling them “airplane cookies,” and demand skyrocketed.
In 2008, the Lotus Bakeries company (the makers of Biscoff) launched Biscoff Cookie Butter—a spreadable version of the beloved cookies. This innovation sparked a dessert revolution in the United States. Food bloggers and home bakers went wild, incorporating cookie butter into everything from cheesecakes to brownies. The Biscoff milkshake emerged as one of the most popular ways to enjoy this spread, combining the nostalgic flavor of those airplane cookies with the classic American milkshake tradition.
Today, Biscoff products are sold in over 5,000 stores across America, and the Biscoff milkshake has become a staple at trendy dessert shops, diners, and home kitchens. This recipe represents the perfect marriage of European cookie tradition and American milkshake culture—a truly international treat that brings joy to dessert lovers everywhere.
Why You’ll Love This Recipe
This Biscoff cookie butter milkshake isn’t just another dessert—it’s an experience that combines convenience, flavor, and pure indulgence in one glassy serving. If you’re looking for a show-stopping treat that requires minimal skill but delivers maximum wow factor, you’ve found your recipe.
Here’s why this easy Biscoff milkshake will become your go-to dessert:
- Ridiculously Quick: Ready in just 5 minutes from start to finish—faster than driving to a fancy ice cream shop
- Only 4 Ingredients: No complicated ingredient lists or specialty items beyond the Biscoff spread itself
- No-Bake Simplicity: Perfect for hot summer days when you don’t want to turn on the oven
- Kid-Approved: Children absolutely love the sweet, cookie flavor that’s not too sophisticated or bitter
- Customizable: Easily adjust thickness, sweetness, or add mix-ins to suit your preferences
- Impressive Presentation: Looks bakery-quality with minimal effort—perfect for Instagram and Pinterest
- Budget-Friendly: Uses pantry staples and makes your expensive Biscoff spread go further
- Nostalgic Flavor: Captures the taste of those beloved airplane cookies in drinkable form
- No Special Skills Required: If you can operate a blender, you can make this masterpiece
- Year-Round Treat: While refreshing in summer, it’s equally cozy and comforting during fall and winter months
Ingredient Notes
Understanding your ingredients is the key to milkshake perfection. Here’s what makes this creamy Biscoff shake so special and what you can substitute if needed:
Vanilla Ice Cream: This forms the creamy base of your milkshake. Choose a high-quality, full-fat vanilla ice cream for the richest texture and best flavor. Premium brands with higher butterfat content (14-16%) will give you a thicker, more luxurious shake. Avoid low-fat or “light” ice creams as they contain more air and less cream, resulting in a thinner, less satisfying consistency. Substitution: Vanilla frozen yogurt works for a tangier, slightly lighter version, or use vanilla bean ice cream for extra visual appeal with those gorgeous specks.
Biscoff Cookie Butter Spread: This is the star ingredient that gives the milkshake its distinctive caramelized, spiced flavor. Available in both smooth (creamy) and crunchy varieties, either works beautifully. The smooth version blends more seamlessly, while crunchy adds delightful texture bits throughout. Make sure to use Biscoff brand specifically—other cookie butter brands have different flavor profiles. Substitution: In a pinch, you could use speculoos spread (the Dutch equivalent), though the flavor will be slightly different.
Whole Milk: This adjusts the consistency of your milkshake to your preferred thickness. Whole milk provides richness without making the shake too thin. The fat content helps carry the flavors and creates that smooth mouthfeel. Substitution: Heavy cream for an ultra-decadent version, 2% milk for slightly lighter (though I don’t recommend going lower), or non-dairy alternatives like oat milk or almond milk for a dairy-free option (though texture will differ).
Biscoff Cookies: These are used both as mix-ins and garnish. The actual Biscoff cookies add texture, visual appeal, and intensify that signature flavor. Crushing some into the shake creates delightful cookie pieces throughout, while whole or halved cookies make a stunning garnish. Substitution: Speculoos cookies or even graham crackers in a pinch, though you’ll lose some authenticity.
Optional Additions: Vanilla extract (1/2 teaspoon) deepens the vanilla notes, a pinch of cinnamon enhances the spiced flavor profile, and a tablespoon of caramel sauce adds extra sweetness and visual drama when drizzled.
Equipment Needed
You don’t need a professional kitchen to create this creamy Biscoff milkshake. Here’s everything you’ll need:
- High-Powered Blender: A quality blender is essential for achieving that smooth, creamy consistency. Vitamix, Blendtec, or Ninja blenders work beautifully. Standard blenders work too, but may require more blending time.
- Measuring Cups: For accurately measuring your ice cream, milk, and cookie butter.
- Measuring Spoons: If you’re adding optional vanilla extract or other flavor enhancers.
- Rubber Spatula: For scraping down the sides of the blender and getting every last bit of milkshake goodness.
- Tall Glasses: Classic milkshake glasses, mason jars, or any tall glass (12-16 oz capacity) for serving.
- Straws: Thick smoothie straws or regular straws for sipping (though this shake is thick enough you might want a spoon too!).
- Ice Cream Scoop: Makes portioning the ice cream much easier than digging with a spoon.
- Optional – Piping Bag: For creating decorative drizzles with extra cookie butter on the inside of your glass.

Biscoff Milkshake Recipe
This ultra-creamy Biscoff milkshake combines caramelized cookie butter with vanilla ice cream for a 5-minute dessert that tastes like liquid cookie heaven. Thick, indulgent, and topped with crushed Biscoff cookies, it’s the perfect no-bake treat.
- Total Time: 5 minutes
- Yield: 2 servings 1x
Ingredients
- 3 cups vanilla ice cream (about 4 large scoops, slightly softened)
- 1/4 cup Biscoff cookie butter spread (smooth or crunchy)
- 1/2 cup whole milk (adjust for desired thickness)
- 4-6 Biscoff cookies (divided: some for blending, some for garnish)
- Optional: 1/2 teaspoon vanilla extract
- Optional: Whipped cream for topping
- Optional: Extra Biscoff spread for drizzling
- Optional: Pinch of ground cinnamon
Instructions
- Prep Your Ingredients: Remove ice cream from freezer and let it sit at room temperature for 3-5 minutes to soften slightly. This makes blending much easier and prevents strain on your blender. Measure out your Biscoff cookie butter—if it’s very thick, you can microwave it for 10-15 seconds to make it more pourable.
- Crush the Cookies: Take 2-3 Biscoff cookies and place them in a sealed plastic bag. Use a rolling pin or the bottom of a heavy glass to crush them into various-sized pieces—some fine crumbs and some larger chunks for texture. Set aside a few whole or halved cookies for garnish.
- Add to Blender: Place the softened vanilla ice cream into your blender first (bottom layer), followed by the Biscoff cookie butter, whole milk, and half of the crushed cookies. If using vanilla extract or cinnamon, add them now.
- Blend Until Smooth: Start blending on low speed to combine ingredients, then gradually increase to medium-high. Blend for 30-45 seconds until completely smooth and creamy. Stop and scrape down the sides with a spatula if needed, then blend for another 10-15 seconds. The milkshake should be thick but pourable—it should coat the back of a spoon and slowly drip off.
- Check Consistency: If your milkshake is too thick, add milk 1-2 tablespoons at a time and pulse to combine. If it’s too thin, add more ice cream (1/2 cup at a time) and blend again. Remember: it’s easier to thin a milkshake than to thicken it, so err on the side of less milk.
- Prepare Glasses (Optional but Impressive): Warm extra Biscoff spread in the microwave for 15-20 seconds until it’s liquid enough to drizzle. Using a spoon or piping bag, create decorative swirls on the inside of your glass, then place glasses in the freezer for 2-3 minutes to set while you finish blending.
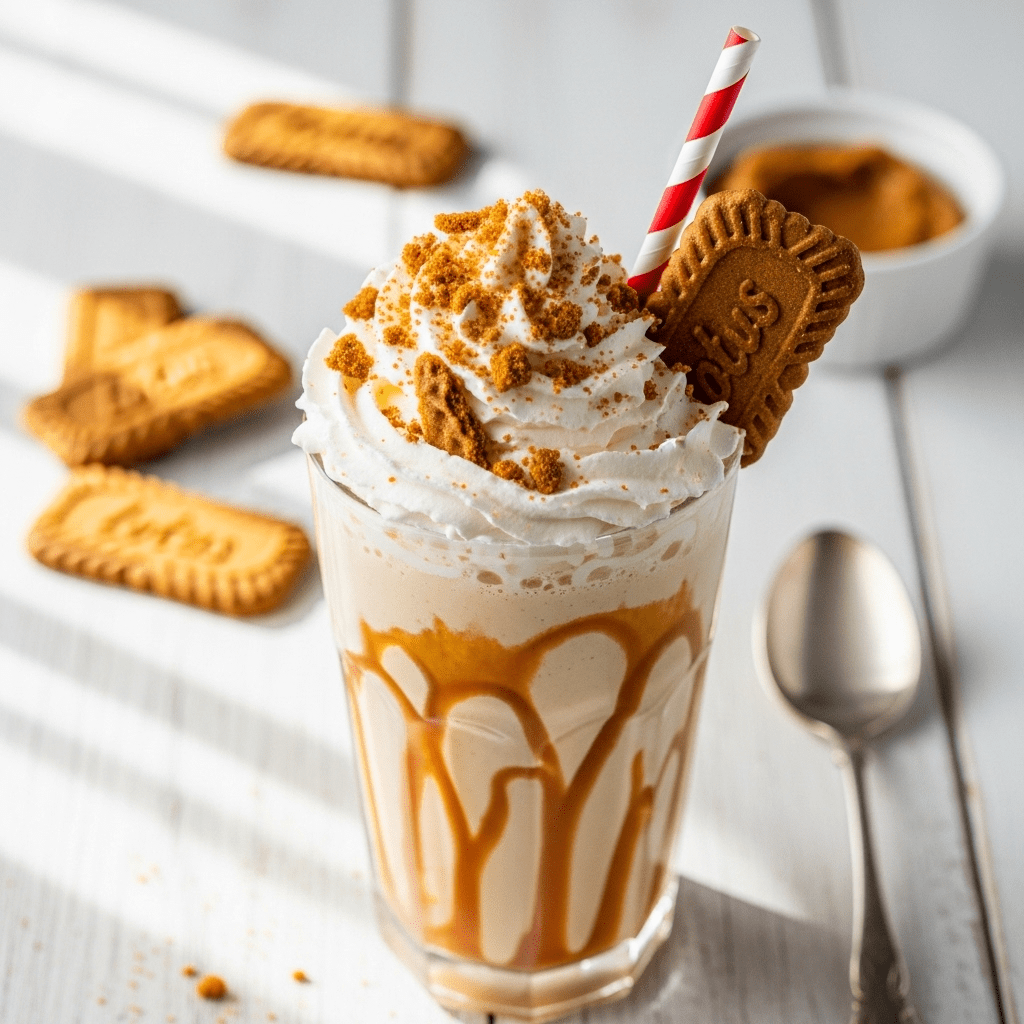
- Pour and Garnish: Pour the Biscoff milkshake into your prepared glasses, dividing evenly. Top with whipped cream if desired, sprinkle remaining crushed cookies over the top, and add a whole or halved Biscoff cookie to the rim of the glass for that bakery-style presentation. Drizzle with additional cookie butter if you’re feeling extra indulgent.
- Serve Immediately: This milkshake is best enjoyed right away while it’s perfectly thick and cold. Serve with both a thick straw and a long spoon—this shake is thick enough that you’ll want both options!
Notes
I
- ce Cream Temperature: Slightly softened ice cream (but not melted) is the key to easy blending without adding too much liquid.
- Cookie Butter Consistency: If your Biscoff spread is very cold and thick, warm it slightly before adding to ensure it blends smoothly without clumps.
- Thickness Preference: Start with less milk than called for—you can always add more, but you can’t take it away.
- Make It Boozy: Adults can add 1-2 oz of bourbon, Irish cream, or coffee liqueur for a spiked version.
- Dairy-Free Option: Use non-dairy ice cream and milk alternatives, though texture may be slightly different.
- Prep Time: 5 minutes
- Cook Time: 0 minutes
Nutrition
- Serving Size: 1 large milkshake (approximately 16 oz)
- Calories: 545
- Sugar: 58g
- Sodium: 185mg
- Fat: 24g
- Saturated Fat: 14g
- Unsaturated Fat: 8g
- Trans Fat: 0g
- Carbohydrates: 75g
- Fiber: 1g
- Protein: 8g
- Cholesterol: 75mg
Tips & Variations
This Biscoff milkshake recipe is wonderfully versatile. Here’s how to customize it to suit your preferences:
Flavor Variations:
- Chocolate Biscoff: Add 2 tablespoons cocoa powder or chocolate syrup for a chocolate-Biscoff fusion
- Coffee-Infused: Mix in 2 tablespoons cold brew concentrate or 1 shot of espresso for a sophisticated twist
- Salted Caramel: Add a pinch of sea salt and drizzle with caramel sauce for sweet-salty perfection
- Banana Biscoff: Blend in half a frozen banana for natural sweetness and creamier texture
- Nutty Version: Add a tablespoon of peanut butter or almond butter for extra richness
Texture Modifications:
- Extra Thick Shake: Use 4 cups ice cream and only 1/4 cup milk for a spoon-only consistency
- Lighter Version: Substitute half the ice cream with frozen yogurt or reduce overall portions
- Chunky Style: Use crunchy Biscoff spread and add extra crushed cookies for more texture
- Smooth & Silky: Use only smooth cookie butter and blend extra-long for zero chunks
Dietary Adjustments:
- Vegan Biscoff Shake: Use non-dairy ice cream (coconut or cashew-based work best) and plant-based milk
- Lower Sugar: Use no-sugar-added ice cream and reduce cookie butter to 2-3 tablespoons
- Protein-Boosted: Add a scoop of vanilla protein powder for a post-workout treat
- Gluten-Free: Ensure your cookie butter brand is certified gluten-free and omit cookie garnish or use GF cookies
Pro Chef Tips
Elevate your Biscoff milkshake from good to absolutely exceptional with these professional techniques:
Temperature Management: The secret to a perfectly thick milkshake is managing your ice cream temperature. Take it out of the freezer 5 minutes before blending—it should be soft enough to scoop easily but not melting. Ice cream that’s too hard will require excess liquid to blend, resulting in a thin shake. Similarly, chill your glasses in the freezer for 15-20 minutes before serving to keep your shake colder longer.
Layering Technique: For a restaurant-quality presentation, create distinct layers. Pour half your milkshake into the glass, add a thin layer of extra cookie butter (warmed to drizzle consistency), then top with remaining shake. This creates beautiful caramel-colored swirls when you stir.
Blending Order Matters: Always add liquids and softer ingredients (like cookie butter) after the ice cream in your blender. This creates a vortex that pulls everything down into the blades more efficiently, resulting in smoother blending with less air incorporation—which means a thicker final product.
Cookie Butter Integration: For the smoothest possible shake with no cookie butter clumps, warm the spread until it’s pourable (like honey consistency), then drizzle it slowly into the running blender rather than adding it all at once before blending.
Whipped Cream Pro Tip: If topping with whipped cream, add a tiny pinch of salt to the cream before whipping. This enhances the sweetness perception and creates better flavor balance against the very sweet milkshake base.
The Spoon Test: Before pouring, coat the back of a spoon with your milkshake and hold it horizontally. If it slowly drips off in a thick ribbon, you’ve achieved perfect consistency. If it runs right off, add more ice cream. If it doesn’t drip at all, thin with a splash of milk.
Common Mistakes to Avoid
Even simple recipes can go wrong. Here’s how to avoid the most common Biscoff milkshake pitfalls:
Using Ice-Cold, Rock-Hard Ice Cream: This is the number one mistake home cooks make. Blending frozen-solid ice cream requires adding way too much liquid, resulting in a thin, disappointing shake. Always let your ice cream soften slightly—it should be scoop-able but not melty. If you forget, microwave it for 5-10 seconds (watching carefully) rather than adding excess milk.
Over-Blending: Blending too long incorporates air and can actually make your milkshake thinner as the ice cream begins to melt from friction heat. Blend just until smooth (30-45 seconds maximum), then stop. More blending doesn’t equal better texture—it equals soup.
Adding All the Milk at Once: Milk requirements vary based on ice cream brand, temperature, and personal preference. Start with less than the recipe calls for (begin with 1/4 cup), blend, and add more gradually if needed. You can always thin a shake, but you can’t un-thin it without adding more ice cream.
Forgetting to Crush Cookies Properly: Throwing whole cookies into the blender creates uneven chunks and can dull your blender blades. Always pre-crush cookies to your desired size—and remember that some fine powder is good (it distributes flavor), while some larger chunks add pleasant texture.
Serving in Warm Glasses: A warm glass will immediately start melting your milkshake from the outside in. Always use chilled glasses, or at minimum, glasses at room temperature. Those few minutes in the freezer make a huge difference in how long your shake stays thick and frosty.
Using Low-Quality Ice Cream: Bargain-brand ice cream is full of air and stabilizers, not cream. It melts faster, tastes less rich, and creates a thinner, icier shake. Invest in premium ice cream—it makes an enormous difference in the final product and you’re using it as the primary ingredient.
Storage & Meal Prep
While milkshakes are undeniably best enjoyed fresh, here’s how to handle leftovers and plan ahead:
Immediate Leftovers: If you have leftover milkshake, pour it into an airtight container and freeze immediately. It will freeze solid (basically becoming ice cream again) and can be stored for up to 2 weeks. To “reconstitute,” let it thaw slightly at room temperature for 10-15 minutes, break it into chunks, and re-blend with a splash of milk until smooth again. The texture won’t be quite as perfect as fresh, but it’s still delicious.
Refrigerator Storage: Don’t bother. Milkshakes don’t store well in the refrigerator—they separate, become icy, and lose their magic texture within 30 minutes. If you absolutely must save it for a few hours, freeze it instead, then re-blend.
Portion Control: If you’re making milkshakes for one person, this recipe halves beautifully. Use 1.5 cups ice cream, 2 tablespoons cookie butter, 1/4 cup milk, and 2 cookies. Blend in a smaller container or use the personal cup attachment if your blender has one.
Pre-Portioned Ice Cream: To make future milkshakes even faster, pre-scoop ice cream into 1.5-cup portions in airtight containers and freeze. When the craving hits, you’re ready to blend in seconds.
Make-Ahead & Freezer Notes
Planning a party or want to prep ahead? Here’s how:
Cookie Butter Drizzle Prep: You can prepare your decorative cookie butter glass drizzles up to 2 days in advance. Drizzle the inside of your glasses, place them on a tray, cover with plastic wrap, and refrigerate. The cookie butter will harden and stay put. Remove from fridge just before serving and fill with freshly made shake.
Pre-Crushed Cookie Topping: Crush your Biscoff cookies up to 1 week ahead and store in an airtight container at room temperature. This saves time when you’re ready to serve and keeps the cookies crispy.
Freezer Milkshake Packs: Create “milkshake kits” by combining ice cream, cookie butter, and crushed cookies in individual freezer bags. When ready to make, dump the frozen mixture into your blender, add milk, and blend. These kits last up to 1 month in the freezer.
Not Recommended for Full Make-Ahead: Unfortunately, you cannot make the complete milkshake ahead of time and maintain quality. The texture changes dramatically during freezing and thawing, and it will never taste as good as a fresh blend. Milkshakes are meant to be made and enjoyed immediately—that’s part of their charm.
Party Strategy: If serving at a party, keep ingredients ready and blend in small batches (enough for 2-3 servings) throughout the event rather than making everything at once. This ensures everyone gets a perfectly thick, cold shake.
Serving Suggestions
A Biscoff milkshake is delicious on its own, but here’s how to turn it into a complete dessert experience:
Classic Pairings:
- Serve alongside warm chocolate chip cookies for temperature and texture contrast
- Pair with crispy French fries for that iconic sweet-and-salty diner combo
- Offer fresh strawberries or other berries on the side to cut through the richness
- Serve with warm brownies or blondies for an over-the-top dessert experience
Breakfast or Brunch Twist:
- Pair with Belgian waffles or pancakes drizzled with maple syrup
- Serve alongside a warm cinnamon roll for ultimate indulgence
- Offer with fresh fruit salad to balance the sweetness
Movie Night Spread:
- Serve with buttered popcorn (the sweet-salty combo is addictive)
- Pair with warm soft pretzels and chocolate sauce for dipping
- Include mixed nuts and chocolate-covered pretzels for variety
Party Presentation:
- Create a DIY milkshake bar with various toppings: crushed cookies, chocolate chips, caramel sauce, whipped cream, and colorful sprinkles
- Serve in mason jars with colorful paper straws for a casual, Instagram-worthy look
- Offer mini versions (6-8 oz) as part of a dessert tasting menu
Coffee Shop Style:
- Pair with a shot of espresso on the side (affogato style—pour it over!)
- Serve with biscotti or shortbread cookies for dunking
- Offer sparkling water with lemon to cleanse the palate between sips
FAQs Section
Q: Can I use a different type of ice cream instead of vanilla? A: Absolutely! While vanilla is classic and lets the Biscoff flavor shine, you can experiment with other bases. Caramel ice cream intensifies the caramelized flavor, coffee ice cream creates a sophisticated adult version, and even chocolate ice cream works if you love chocolate-Biscoff combinations. Avoid fruit-flavored ice creams as they clash with the spiced cookie flavor.
Q: My milkshake is too thin. How do I fix it? A: Add more ice cream! Start with 1/2 cup additions, blending briefly between each addition until you reach desired thickness. If you don’t have more ice cream, place the thin milkshake in the freezer for 10-15 minutes, then re-blend—this will thicken it up. For future batches, use less milk (start with just 1/4 cup) and remember that slightly softened ice cream is your friend, not melted ice cream.
Q: Can I make this dairy-free or vegan? A: Yes! Use your favorite non-dairy ice cream (coconut-based varieties tend to be the creamiest) and plant-based milk like oat milk or cashew milk. The good news is that most Biscoff cookie butter spread is actually vegan (always check the label on your specific brand), as it’s made primarily from cookies, sugar, and vegetable oils. The Biscoff cookies themselves are also typically vegan, making this an easy recipe to veganize.
Q: How can I make this milkshake healthier? A: While milkshakes are inherently indulgent treats, you can make some modifications: use frozen banana as part of the base (reduces needed ice cream), choose low-fat frozen yogurt instead of ice cream, use unsweetened almond milk instead of whole milk, reduce the cookie butter to 2-3 tablespoons, and add a scoop of vanilla protein powder for extra nutrition. That said, sometimes you just need to enjoy a treat as-is!
Q: Why is my milkshake separating or getting icy? A: This usually happens when the milkshake sits too long before serving or when you’ve over-blended it. Ice cream is an emulsion, and excessive blending or sitting causes the fat and water to separate. Always serve milkshakes immediately after blending. If you must wait, place it in the freezer rather than the refrigerator, then re-blend briefly before serving.
Q: Can I make this without a high-powered blender? A: Yes, though you may need to adjust your technique. With a regular blender, let your ice cream soften more (almost melty), use slightly more milk, and blend in short pulses rather than continuously. You may need to stop and stir with a spatula several times. If your blender really struggles, you can also use the “hand mixer method”: place softened ice cream in a bowl, add cookie butter and milk, and beat with a hand mixer until combined—it won’t be quite as smooth but still tastes great.
Q: What’s the difference between smooth and crunchy Biscoff spread? A: Smooth Biscoff spread has a creamy, uniform texture similar to peanut butter and blends completely smooth into your milkshake. Crunchy Biscoff spread contains small cookie pieces throughout, adding textural interest to your shake—you’ll get little bursts of cookie bits as you drink. Both taste virtually identical, so it’s purely a texture preference. Most people prefer smooth for milkshakes, but crunchy is excellent if you love texture.
Conclusion
There you have it—the ultimate Biscoff milkshake recipe that transforms those beloved caramelized cookies into a creamy, dreamy beverage that’s pure liquid indulgence. Whether you’re a long-time Biscoff devotee or just discovering the magic of cookie butter, this easy five-minute recipe delivers maximum flavor with minimal effort.
The beauty of this homemade Biscoff shake is its versatility. Make it exactly as written for classic perfection, or experiment with the endless variations to suit your taste. Add coffee for morning decadence, swirl in chocolate for extra richness, or keep it pure and simple to let that signature Biscoff flavor shine through. No matter how you customize it, you’re guaranteed a thick, creamy treat that rivals anything from an expensive dessert shop.
Remember the key tips: slightly softened ice cream (not rock-hard), start with less milk than you think you need, and always serve immediately in chilled glasses. These simple tricks ensure your Biscoff cookie butter milkshake turns out perfectly thick and Instagram-worthy every single time.
So grab that jar of Biscoff spread from your pantry, pull out your blender, and treat yourself to this incredibly delicious shake. It’s the perfect reward after a long day, a special treat for weekend guests, or just a Tuesday afternoon pick-me-up when you need something sweet.
I’d love to hear how your Biscoff milkshake turns out! Drop a comment below with your favorite variation, share your creation on Pinterest (tag me so I can see!), and don’t forget to rate this recipe if you try it. Your feedback helps other home cooks discover this delicious treat. Happy blending, and enjoy every caramelized, cookie-buttery sip!