Creamy Orange Banana Smoothie Recipe – Bright, Delicious & Ready in 5 Minutes!

There’s something magical about starting your morning with a glass of sunshine, and this Orange Banana Smoothie delivers exactly that! This vibrant, creamy smoothie combines the natural sweetness of ripe bananas with the bright, citrusy punch of fresh oranges, creating a refreshing drink that’s perfect for busy mornings, post-workout refueling, or even as a healthy afternoon snack.
What makes this smoothie so special is its simplicity. With just a handful of wholesome ingredients and a blender, you can whip up a nutrient-packed drink that tastes like a tropical vacation in a glass. It’s naturally sweet (no added sugars needed!), incredibly creamy, and loaded with vitamin C, potassium, and fiber. Whether you’re a smoothie enthusiast or just beginning your healthy eating journey, this recipe is foolproof and endlessly customizable.
This smoothie is ideal for breakfast on-the-go, a pre-gym energy boost, a kid-friendly snack, or even a light dessert that won’t derail your wellness goals. The best part? It takes less time to make than brewing your morning coffee, and your whole family will love it!
History / Background
Smoothies as we know them today became popular in the United States during the 1960s and 1970s, thanks to the health food movement and the invention of affordable home blenders. However, the concept of blended fruit drinks dates back much further – ancient civilizations enjoyed crushed fruit beverages, and in tropical regions, fresh fruit shakes have been a staple for centuries.
The orange and banana combination specifically has roots in tropical and subtropical cuisines where both fruits grow abundantly. In Brazil, smoothies called “vitaminas” often feature this duo, while in Southeast Asia, similar combinations appear in fresh fruit shakes sold by street vendors. The pairing makes perfect sense from both a flavor and nutritional standpoint – oranges provide bright acidity and vitamin C, while bananas add natural sweetness, creamy texture, and potassium.
In American smoothie culture, the orange-banana blend became a classic in the 1990s when smoothie bars began popping up across the country. It was marketed as the perfect “immunity booster” and energy drink, appealing to health-conscious consumers looking for alternatives to sugary sodas and artificial energy drinks. Today, this combination remains one of the most beloved smoothie flavors worldwide, cherished for its nostalgic taste that reminds many people of childhood orange creamsicles, but in a much healthier form!
The beauty of this recipe is that it honors those traditional flavor combinations while being incredibly simple to make at home – no fancy smoothie bar required!
Why You’ll Love This Recipe
This Orange Banana Smoothie is about to become your new breakfast favorite, and here’s why: it’s the perfect balance of convenience, nutrition, and absolutely delicious flavor. I’ve been making this smoothie for years, and it never gets old. The creamy texture from the banana combined with the bright, refreshing orange creates a flavor profile that’s both comforting and energizing.
Here’s what makes this smoothie a winner:
- Lightning-fast preparation – Ready in just 5 minutes from start to finish, perfect for hectic mornings
- Naturally sweetened – No added sugars needed; the fruit provides all the sweetness naturally
- Kid-approved taste – Even picky eaters love this creamy, fruity combination
- Budget-friendly ingredients – Uses affordable, everyday fruits you probably already have
- Packed with nutrients – Loaded with vitamin C, potassium, fiber, and antioxidants
- Incredibly customizable – Easy to add protein powder, greens, or other superfoods
- Dairy-free friendly – Can be made vegan with plant-based milk alternatives
- Energizing boost – Natural sugars and nutrients provide sustained energy without the crash
- Refreshing any time of year – Delicious whether you’re using fresh or frozen fruit
- No cleanup hassle – Just one blender to wash, and you’re done!
This smoothie fits seamlessly into any lifestyle, whether you’re following a specific diet, trying to eat healthier, or just want something quick and delicious to start your day.
Ingredient Notes
Let’s talk about what makes this smoothie so wonderfully simple and delicious. The beauty of this recipe is that it relies on just a few high-quality ingredients that work together perfectly.
Oranges – The star of the show! Fresh oranges provide natural sweetness, bright citrus flavor, and a hefty dose of vitamin C. I recommend using navel oranges or Valencia oranges for the best flavor. You’ll need to peel and segment them, removing as much of the white pith as possible (it can make your smoothie bitter). If you’re short on time, you can substitute with 1 cup of fresh orange juice, but fresh oranges give you more fiber and a better texture. Substitution: Tangerines, clementines, or blood oranges work beautifully too!
Bananas – This is your smoothie’s secret weapon for creaminess. Ripe bananas (with some brown spots) are ideal because they’re sweeter and blend more smoothly. I always keep frozen banana slices in my freezer specifically for smoothies – they make the texture incredibly thick and frosty without needing ice. Substitution: Frozen mango chunks can replace banana if you have an allergy, though you’ll lose some creaminess.
Milk or Milk Alternative – This helps blend everything smoothly and adds creaminess. Whole milk creates the richest texture, but any milk works! Almond milk adds a subtle nutty flavor, oat milk makes it extra creamy, coconut milk gives tropical vibes, and dairy milk provides extra protein. Choose based on your dietary preferences!
Greek Yogurt (optional but recommended) – This transforms your smoothie into a more substantial breakfast by adding protein, probiotics, and incredible creaminess. Plain or vanilla Greek yogurt both work wonderfully. If you’re dairy-free, use coconut yogurt or simply omit it. Pro tip: Greek yogurt helps your smoothie keep you full for hours!
Honey or Maple Syrup (optional) – Most of the time, the fruit provides plenty of sweetness, but if your oranges are particularly tart or you prefer sweeter smoothies, a drizzle of honey or maple syrup does the trick. Start with just a teaspoon and taste as you go.
Ice (optional) – If you’re using fresh (not frozen) fruit, add a handful of ice to make your smoothie cold and refreshing. If you’re using frozen banana, you can usually skip the ice entirely.
Equipment Needed
One of the best things about smoothie-making is the minimal equipment required. Here’s what you’ll need:
- High-speed blender – This is your most important tool! A powerful blender (like a Vitamix, Blendtec, or even a good Ninja blender) will give you the smoothest, creamiest texture. If you have a less powerful blender, just blend a bit longer and cut your fruit into smaller pieces.
- Cutting board and sharp knife – For peeling and segmenting your oranges and slicing your banana.
- Measuring cups and spoons – To ensure your proportions are perfect every time.
- Tall drinking glasses – This recipe makes about 2 servings, so have your favorite glasses ready! Mason jars work great too and are perfect for Instagram-worthy photos.
- Reusable straws (optional) – Smoothies are just more fun with a straw! Plus, it’s eco-friendly.
- Spatula – To scrape down the sides of your blender and make sure nothing gets wasted.
That’s it! No special gadgets or complicated equipment needed. This is truly a beginner-friendly recipe that anyone can master.
Print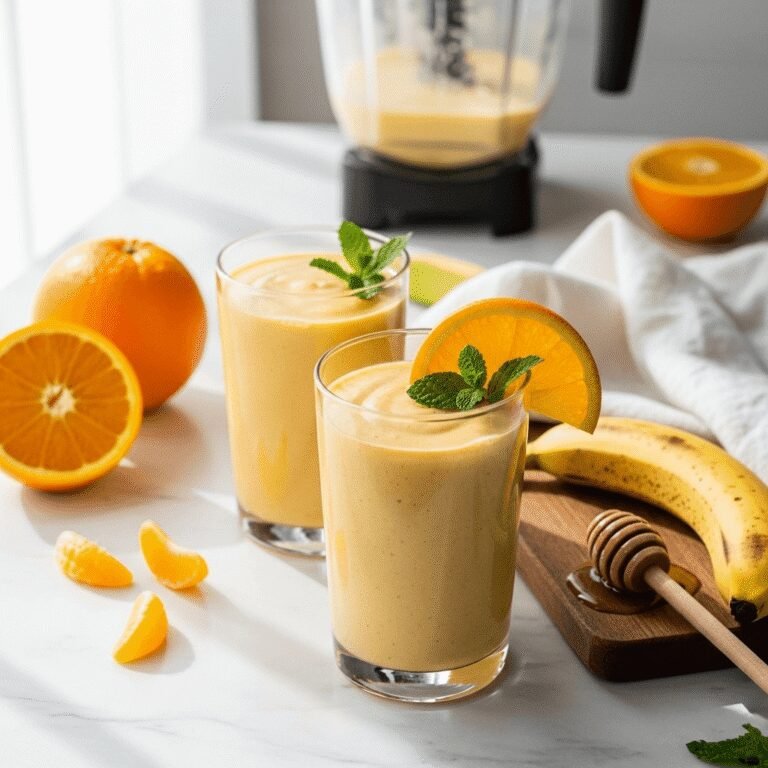
Orange Banana Smoothie Recipe
This refreshing Orange Banana Smoothie combines sweet bananas with bright, citrusy oranges for a creamy, naturally sweet drink that’s perfect for breakfast or snacking. Packed with vitamin C and potassium, it’s healthy, delicious, and ready in just 5 minutes!
- Total Time: 5 minutes
- Yield: 2 servings 1x
Ingredients
- 2 large oranges, peeled and segmented (or 1 cup fresh orange juice)
- 2 ripe bananas, fresh or frozen
- 1 cup milk (dairy or non-dairy alternative like almond, oat, or coconut milk)
- ½ cup plain Greek yogurt (optional, for extra protein and creaminess)
- 1 teaspoon honey or maple syrup (optional, adjust to taste)
- ½ cup ice cubes (omit if using frozen banana)
- Pinch of vanilla extract (optional, for extra flavor)
Instructions
- Prepare your fruit: Peel the oranges and remove as much white pith as possible. Separate into segments and remove any seeds. If using fresh bananas, peel and break them into chunks. If using frozen banana slices, you can add them directly to the blender.
- Add ingredients to blender: Place the orange segments, banana chunks, milk, and Greek yogurt (if using) into your blender. Add ice cubes if you’re using fresh (not frozen) banana.
- Sweeten if needed: If your oranges are particularly tart or you prefer a sweeter smoothie, add honey or maple syrup. You can always add more later, so start conservatively.
- Blend until smooth: Secure the blender lid and blend on high speed for 30-60 seconds, or until completely smooth and creamy. If you have a high-speed blender, 30 seconds should be plenty. For less powerful blenders, you may need up to a full minute.
- Check consistency: Stop the blender and check the texture. If it’s too thick, add a splash more milk and blend again. If it’s too thin, add more banana or a few more ice cubes.
- Taste and adjust: Give your smoothie a quick taste test. Add more sweetener if needed, blend for another 5-10 seconds to incorporate.
- Serve immediately: Pour into tall glasses and enjoy right away for the best texture and temperature. Garnish with an orange slice or a sprinkle of cinnamon if you’re feeling fancy!
Notes
- For meal prep: You can pre-portion your fruit in freezer bags for quick smoothie assembly on busy mornings.
- Thicker smoothie: Use frozen banana instead of fresh, and reduce the milk slightly.
- Protein boost: Add a scoop of vanilla or unflavored protein powder for a more filling breakfast.
- Extra nutrition: Sneak in a handful of fresh spinach – you won’t taste it, but you’ll get extra vitamins!
- Creamier texture: Use full-fat Greek yogurt and whole milk instead of low-fat versions.
- Prep Time: 5 minutes
- Cook Time: 0 minutes
Nutrition
- Serving Size: 1 smoothie (approximately 12 oz)
- Calories: 215
- Sugar: 32g (naturally occurring)
- Sodium: 65mg
- Fat: 2.5g
- Saturated Fat: 1g
- Unsaturated Fat: 1g
- Trans Fat: 0g
- Carbohydrates: 45g
- Fiber: 5g
- Protein: 7g
- Cholesterol: 5mg
Tips & Variations
The beauty of this smoothie recipe is how easily you can customize it to suit your taste preferences or dietary needs. Here are some of my favorite ways to mix things up:
Make it a smoothie bowl: Use less liquid (about ¾ cup instead of 1 cup) to create a thicker consistency. Pour into a bowl and top with granola, sliced almonds, coconut flakes, chia seeds, fresh berries, or banana slices for a beautiful Instagram-worthy breakfast!
Add greens: Toss in a large handful of fresh spinach or a few kale leaves. I promise you won’t taste it at all thanks to the strong orange and banana flavors, but you’ll get an extra boost of vitamins, minerals, and antioxidants.
Protein power: Add a scoop of your favorite protein powder (vanilla or unflavored works best). This transforms your smoothie into a complete meal replacement that’ll keep you satisfied for hours.
Tropical twist: Add ½ cup of frozen mango or pineapple chunks for a more tropical flavor profile. Coconut milk instead of regular milk really enhances this variation!
Creamsicle version: Add a splash of vanilla extract and use vanilla Greek yogurt to create that nostalgic orange creamsicle flavor we all love.
Superfood boost: Stir in a tablespoon of chia seeds, flaxseeds, or hemp hearts for extra omega-3s and fiber. You can also add a teaspoon of maca powder for energy or a small piece of fresh ginger for a zingy kick.
Make it vegan: Simply use plant-based milk (oat milk is my favorite for creaminess) and substitute the Greek yogurt with coconut yogurt or just omit it entirely.
Lower sugar option: Replace one banana with half an avocado for creaminess without the extra sugar. The healthy fats will keep you full longer too!
Pro Chef Tips
Want to take your smoothie game to the next level? Here are some professional secrets I’ve learned over the years:
Always freeze your bananas: Seriously, this is game-changing! Peel ripe bananas, slice them into coins, and freeze in a single layer on a baking sheet before transferring to a freezer bag. Frozen bananas create that thick, frosty texture that makes smoothies feel indulgent without any ice cream. Plus, they’re naturally sweeter than fresh bananas.
Segment oranges over a bowl: When you’re preparing your oranges, do it over a bowl to catch all those precious juices. Pour that juice right into your smoothie – waste nothing! The juice adds extra flavor and helps with blending.
Layer ingredients strategically: Put liquids and soft ingredients (like yogurt and orange segments) in the blender first, then add frozen items on top. This helps your blender blades move more efficiently and creates a smoother blend with less stopping and starting.
Don’t over-blend: Once your smoothie looks creamy and uniform (usually 30-60 seconds), stop blending! Over-blending can actually warm up your smoothie and make the texture less appealing. It can also incorporate too much air, making it frothy rather than creamy.
Taste before adding sweetener: The ripeness of your bananas and the sweetness of your oranges vary greatly. Always blend first, then taste, then add sweetener if needed. Most of the time, you won’t need any additional sweetener at all!
Pre-portion for efficiency: On Sunday, portion out all your ingredients for the week into individual freezer bags. Each morning, just dump one bag into the blender with your liquid, and you’re done in 60 seconds!
Use room temperature liquids: If everything else in your smoothie is frozen, using cold milk straight from the fridge can make your blender work harder. Room temperature milk blends more easily, though this is only necessary if you have a less powerful blender.
Common Mistakes to Avoid
Even with such a simple recipe, there are a few pitfalls that can affect your smoothie’s texture and taste. Here’s what to watch out for:
Using unripe bananas: Green or barely yellow bananas won’t provide the natural sweetness or creamy texture you need. They can actually make your smoothie taste chalky or starchy. Always use bananas with at least some brown spots – these are perfect for smoothies! If you only have unripe bananas, you’ll definitely need to add honey or maple syrup to compensate.
Including orange pith: That white, spongy layer between the orange peel and the fruit is extremely bitter. If too much pith makes it into your smoothie, it can create an unpleasant, bitter aftertaste. Take an extra minute to remove as much as possible when segmenting your oranges.
Adding too much liquid: This is the number one complaint I hear – “my smoothie is too thin and watery!” Start with less liquid than you think you need. You can always add more, but you can’t take it away. For a thick, spoonable smoothie, start with just ¾ cup of milk and add more only if needed.
Skipping the taste test: Never assume your smoothie is perfectly sweetened without tasting it first. The sweetness of fruit varies dramatically depending on ripeness and variety. Always blend, taste, adjust, and blend again briefly if needed.
Using ice instead of frozen fruit: While ice makes your smoothie cold, it also waters down the flavor and creates a less creamy texture. Frozen banana is far superior – it chills your smoothie while adding sweetness and body. If you must use ice, use less liquid to compensate.
Not cleaning your blender immediately: Smoothie residue can dry and harden quickly, making cleanup a nightmare. Rinse your blender right away, or even better, fill it halfway with warm water and a drop of dish soap, then blend for 30 seconds for a self-cleaning blender!
Storage & Meal Prep
While smoothies are definitely best enjoyed fresh, I understand that busy schedules sometimes require advance preparation. Here’s how to handle storage:
Immediate consumption is ideal: This smoothie tastes best when consumed within 15-20 minutes of blending. The texture is creamiest, the temperature is perfect, and the flavors are at their brightest. If you can make it fresh, always do!
Short-term refrigeration: If you need to make your smoothie ahead for later the same day, store it in an airtight container (like a mason jar with a lid) in the refrigerator for up to 8-12 hours. Give it a good shake or stir before drinking, as separation is natural. The texture won’t be quite as creamy, but the flavor will still be delicious.
Expect separation: Because this smoothie contains fresh fruit with different densities, the ingredients will naturally separate as it sits. This is completely normal! The heavier particles settle to the bottom while lighter components rise to the top. Just shake vigorously or stir well before drinking.
Freezer prep bags (my favorite hack!): This is the ultimate meal prep strategy! Pre-portion all your ingredients (orange segments, banana chunks, yogurt in a small container or ice cube tray) into individual freezer bags. Label them with the date and “Orange Banana Smoothie.” Each morning, dump the contents of one bag into your blender, add your liquid, and blend. Fresh smoothie in 60 seconds with minimal morning effort!
Don’t freeze the finished smoothie: While you might be tempted to freeze batches of blended smoothie, I don’t recommend it. When thawed, the texture becomes grainy and separated, and it’s difficult to restore the creamy consistency. Freezing the ingredients separately (as mentioned above) is much more effective.
Make-Ahead & Freezer Notes
Let’s talk about the best strategies for making smoothie preparation even easier, especially during hectic weekday mornings:
Banana prep is key: As I mentioned earlier, pre-slicing and freezing bananas is the single best thing you can do for smoothie success. When you have bananas that are getting very ripe (beyond what you’d want to eat fresh), peel them, slice into ½-inch rounds, arrange in a single layer on a parchment-lined baking sheet, freeze for 2-3 hours, then transfer to a freezer bag. They’ll keep for up to 3 months and be ready whenever you need them.
Orange segment preparation: You can absolutely segment oranges in advance! Store peeled, segmented oranges (with seeds removed) in an airtight container in the refrigerator for up to 3 days. For longer storage, freeze orange segments on a baking sheet first, then transfer to a freezer bag. They’ll keep for up to 2 months. Frozen orange segments work beautifully in smoothies!
Pre-portioned smoothie packs: This is my go-to method for weekly meal prep. Here’s how: Label 5-7 freezer bags with “Orange Banana Smoothie + 1 cup milk.” In each bag, place 2-3 orange segments (or a small container of OJ), 1 sliced frozen banana, and a small sealed container or baggie with Greek yogurt. Stack flat in your freezer. Each morning, dump one bag into the blender, add your liquid, and blend!
Yogurt preparation: If you’re including Greek yogurt, you can pre-portion it into ice cube trays or small containers. Once frozen, pop them into your smoothie packs. This ensures everything stays frozen and fresh until you’re ready to blend.
Best reheating method: Wait, “reheating” a smoothie? Okay, not exactly! If you’ve stored a smoothie in the fridge and it’s too cold to drink comfortably, just let it sit at room temperature for 5-10 minutes before enjoying. Never microwave a smoothie (trust me on this – the texture becomes weird and unpleasant).
Batch prep ingredients once a week: Dedicate 15 minutes on Sunday to peel and segment oranges and slice and freeze bananas. This small time investment will make weekday mornings infinitely easier and ensure you actually stick to healthy eating habits!
Serving Suggestions
While this Orange Banana Smoothie is absolutely delicious on its own, here are some wonderful ways to serve it and what to pair it with:
For breakfast: Pair your smoothie with a slice of whole grain toast with almond butter, a handful of nuts, or a small bowl of overnight oats for a more substantial meal. The smoothie alone provides good nutrition, but adding some healthy fats and complex carbs will keep you satisfied until lunch.
Post-workout refuel: Enjoy this smoothie within 30 minutes after exercise for optimal recovery. The natural sugars help replenish glycogen stores, the potassium from bananas helps prevent cramping, and if you’ve added Greek yogurt or protein powder, you’re getting muscle-repairing protein too.
Afternoon snack: Serve this smoothie with a small handful of trail mix, a granola bar, or some whole-grain crackers with cheese for a balanced afternoon pick-me-up that’ll prevent the 3 PM slump.
Kid-friendly presentation: Pour smoothies into popsicle molds and freeze for healthy, homemade popsicles that kids will actually get excited about! You can also serve in special cups with colorful straws to make it feel like a treat.
Smoothie bowl transformation: Pour into a bowl and top with sliced strawberries, blueberries, granola, coconut flakes, sliced almonds, hemp hearts, or cacao nibs for a beautiful breakfast that’s as visually appealing as it is nutritious.
Brunch gathering: Serve these smoothies in fancy glasses with an orange wheel on the rim for an elegant brunch beverage that’s sophisticated yet family-friendly. Set up a “smoothie bar” with various toppings so guests can customize their drinks!
Pair with protein: If you’re not adding Greek yogurt or protein powder to your smoothie, consider serving it alongside scrambled eggs, a veggie omelet, or Greek yogurt parfait for a complete, balanced breakfast.
FAQs Section
Can I use store-bought orange juice instead of fresh oranges?
Absolutely! While fresh oranges provide more fiber and a slightly better nutritional profile, fresh-squeezed orange juice or even high-quality store-bought juice works perfectly in a pinch. Use 1 cup of orange juice to replace 2 medium oranges. Just be mindful that many commercial orange juices contain added sugars, so check the label and choose 100% pure orange juice when possible. The texture will be slightly thinner without the orange segments, but the flavor will still be delicious!
Why is my smoothie bitter?
Bitterness usually comes from two sources: including too much orange pith (that white layer between the peel and the fruit) or using unripe bananas. The pith is notoriously bitter and can ruin an otherwise perfect smoothie. Take care to remove as much as possible when segmenting your oranges. Additionally, bananas that are still quite green contain more starch and less sugar, which can create an unpleasant, almost chalky taste. Always use ripe (yellow with brown spots) bananas for the best flavor!
How can I make this smoothie thicker?
There are several strategies! First, use frozen banana instead of fresh – this creates a much thicker, almost ice cream-like texture. Second, reduce your liquid by about ¼ cup; you can always add more if needed. Third, add more Greek yogurt (an extra ¼ cup makes a big difference). Fourth, include a handful of oats, which thicken the smoothie while adding fiber. Finally, if you want the ultimate thick smoothie, add a small piece of frozen avocado – you won’t taste it, but it creates incredible creaminess!
Is this smoothie good for weight loss?
This smoothie can definitely fit into a weight loss plan when consumed mindfully! At about 215 calories per serving (with Greek yogurt), it’s a reasonable breakfast or snack. The fiber from the fruit helps keep you full, and the protein from the yogurt provides satiety. However, smoothies are easier to overconsume than whole foods since you drink them quickly. To optimize for weight loss: use unsweetened almond milk instead of regular milk (saves about 40 calories), skip any added sweeteners, include Greek yogurt or protein powder for staying power, and consider this as a meal replacement rather than something you have in addition to a full meal.
Can I add vegetables to this smoothie?
Yes! This is one of the best smoothies for “hiding” vegetables because the strong orange and banana flavors mask the taste of greens beautifully. Add a large handful (1-2 cups) of fresh spinach or baby kale – I promise you won’t taste it at all. The smoothie might turn a slightly less appealing color (more yellow-orange than bright orange), but the nutritional benefits are incredible. Start with spinach if you’re new to green smoothies; it has the mildest flavor. Frozen cauliflower rice is another sneaky addition that adds creaminess and nutrients without affecting the taste!
How long does this smoothie keep me full?
This depends largely on whether you include Greek yogurt or protein powder. The basic smoothie with just fruit and milk provides quick energy from natural sugars but may leave you hungry within an hour or two. Adding Greek yogurt increases the protein content significantly (from about 3g to 10-15g per serving), which helps you stay satisfied for 2-3 hours. For maximum satiety, add both Greek yogurt AND a tablespoon of nut butter, seeds, or protein powder. The combination of protein, healthy fats, and fiber will keep you full for 3-4 hours, making it a legitimate meal replacement.
Can I make this smoothie without a high-speed blender?
Yes, but you’ll need to make some adjustments! A less powerful blender will struggle with frozen fruit and ice, so here’s what to do: use fresh (not frozen) banana and let all your ingredients come to room temperature before blending. Cut your banana and orange segments into smaller pieces. Add the liquid first, then the softer ingredients, then the fruit. Blend on the highest setting for 60-90 seconds, stopping occasionally to scrape down the sides. The texture might be slightly less smooth, but it’ll still be delicious. If your blender really struggles, consider investing in a more powerful model – it makes such a difference for regular smoothie makers!
Conclusion
And there you have it – everything you need to know to make the most delicious, refreshing Orange Banana Smoothie right in your own kitchen! This simple yet spectacular drink has earned its place as a breakfast staple in countless homes, and once you try it, you’ll understand why.
The combination of bright, tangy oranges and sweet, creamy bananas creates a flavor that’s both comforting and energizing – like sunshine in a glass. Whether you’re rushing out the door on a busy Monday morning, refueling after a workout, or looking for a healthy snack your kids will actually enjoy, this smoothie checks all the boxes. It’s naturally sweet, packed with vitamins and minerals, endlessly customizable, and requires just 5 minutes from start to finish.
I hope you’ll give this recipe a try and experience how delicious healthy eating can be! Remember, the best smoothie is the one you’ll actually make consistently, so don’t stress about perfection. Use what you have, experiment with variations, and make it your own.
I’d love to hear from you! After you make this Orange Banana Smoothie, come back and leave a comment below telling me what you thought. Did you add any creative variations? Do you have questions about customizing it for your dietary needs? I read and respond to every comment, and I’m always excited to hear about your smoothie adventures!
Don’t forget to save this recipe to your Pinterest boards so you can find it again easily! Pin it to your “Healthy Breakfast Ideas,” “Quick Smoothie Recipes,” or “Easy Meal Prep” boards – and share it with friends and family who might enjoy a delicious, nutritious way to start their day.
Here’s to easy mornings, better health, and smoothies that actually taste amazing! Cheers!