Strawberry Kiwi Smoothie Recipe – Refreshing & Healthy in 5 Minutes!

If you’re looking for a smoothie that’s as beautiful as it is delicious, this Strawberry Kiwi Smoothie is about to become your new obsession! The combination of sweet, juicy strawberries and tangy, tropical kiwi creates a flavor explosion that’s perfectly balanced—not too sweet, not too tart, but absolutely refreshing. This stunning green-pink smoothie is packed with vitamin C, antioxidants, and natural energy, making it the ideal way to start your morning or refuel after a workout.
What makes this strawberry kiwi smoothie recipe so special is its incredible versatility. You can enjoy it as a quick breakfast on busy mornings, a post-gym recovery drink, a healthy afternoon snack, or even transform it into a gorgeous smoothie bowl topped with your favorite granola and fresh fruit. It’s naturally gluten-free, easily made vegan or dairy-free, and requires just five basic ingredients that you probably already have in your freezer.
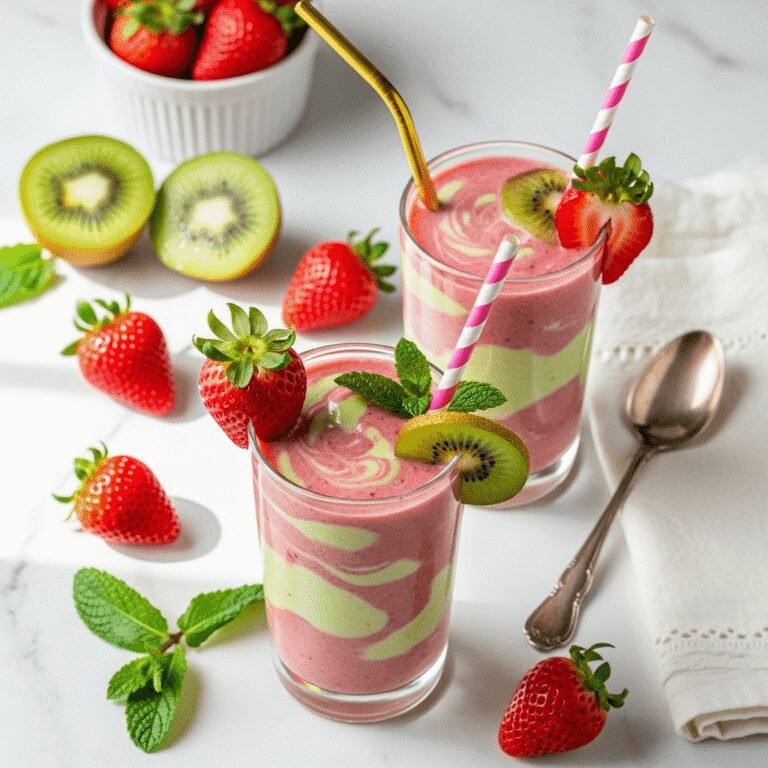
The vibrant color combination makes this smoothie absolutely Instagram and Pinterest-worthy—the bright green of kiwi swirled with the rosy pink of strawberries creates a visual treat that’s almost too pretty to drink! But trust me, you’ll want to drink every last drop of this creamy, refreshing, nutrient-packed beverage. Best of all? It takes just 5 minutes from start to finish, with zero cooking required. This is healthy eating made easy and absolutely delicious!
History / Background
The strawberry kiwi flavor combination has an interesting history that reflects our modern, globally-connected food culture. While both fruits have ancient origins, their pairing as a popular flavor duo is a relatively recent phenomenon that emerged in the late 20th century.
Strawberries have been enjoyed for thousands of years, with wild varieties consumed by ancient Romans and used medicinally throughout history. The modern garden strawberry we know today was developed in France in the 1750s through crossbreeding of varieties from North and South America. Strawberries have long been associated with summer, romance, and indulgence in Western culture.
Kiwi fruit, on the other hand, has a fascinating journey from obscurity to global popularity. Originally called “Chinese gooseberry,” this fuzzy brown fruit is native to China, where it grew wild in the Yangtze River valley for centuries. It wasn’t until the early 1900s that seeds were brought to New Zealand, where farmers began cultivating the fruit commercially. In 1959, New Zealand exporters renamed it “kiwifruit” after their national bird, the kiwi, and the name stuck.
The strawberry kiwi combination really took off in the 1990s with the explosion of the smoothie bar industry in the United States. Health-conscious consumers were drawn to the pairing because both fruits are exceptionally high in vitamin C—in fact, one kiwi contains more vitamin C than an orange! Juice companies and beverage brands quickly caught on, creating strawberry kiwi-flavored drinks, juices, and smoothies that became instant classics.
This particular flavor combination also gained massive popularity on social media platforms like Pinterest and Instagram in the 2010s, thanks to its stunning visual appeal. Food bloggers discovered that the contrasting colors—the bright green of kiwi against the pink-red of strawberries—created show-stopping photos that performed incredibly well online. Today, the strawberry kiwi smoothie is a beloved staple in homes, juice bars, and cafes across America, representing the perfect marriage of nutrition, flavor, and Instagram-worthy beauty.
Why You’ll Love This Recipe
This strawberry kiwi smoothie is about to revolutionize your healthy eating routine, and here’s why: it delivers maximum nutrition and flavor with minimal effort, using just a handful of simple, wholesome ingredients. Unlike complicated smoothie recipes that require expensive superfoods or a dozen different ingredients, this one keeps things beautifully straightforward while still packing a serious nutritional punch that rivals any fancy juice bar creation.
Here’s what makes this healthy strawberry kiwi smoothie absolutely irresistible:
- Lightning-fast prep – Ready in just 5 minutes from start to finish, perfect for hectic mornings
- Vitamin C powerhouse – One serving provides more than 200% of your daily vitamin C needs
- Naturally sweetened – No refined sugars needed; the fruit provides all the natural sweetness
- Kid and adult approved – Everyone loves the familiar, fruity flavor and pretty swirled colors
- Budget-friendly – Uses affordable ingredients available at any grocery store year-round
- Freezer-friendly ingredients – Make smoothie prep packs ahead for even quicker mornings
- Energizing and hydrating – Perfect pre or post-workout fuel that tastes like a treat
- Customizable thickness – Easy to adjust for drinking or eating with a spoon as a smoothie bowl
- Allergy-friendly – Naturally gluten-free and easily adaptable for vegan and dairy-free diets
- No artificial anything – Just real, whole food ingredients you can feel good about
- Digestive benefits – Kiwi contains enzymes that support healthy digestion
- Antioxidant-rich – Both fruits are loaded with antioxidants that support overall health
Whether you’re trying to eat healthier, need a quick breakfast solution, want to get more fruit into your diet, or simply love delicious, refreshing drinks, this easy strawberry kiwi smoothie checks every single box.
Ingredient Notes
Let’s break down what makes this smoothie so delicious and nutritious. Each ingredient plays a specific role in creating the perfect flavor, texture, and nutritional profile.
Fresh or Frozen Strawberries: I actually prefer using frozen strawberries for smoothies because they create that thick, frosty, milkshake-like texture we all love. Frozen berries are also picked at peak ripeness and flash-frozen immediately, which locks in maximum flavor and nutrients. They’re available year-round and more affordable than fresh, especially in winter. If using fresh strawberries, you’ll need to add ice cubes to achieve the right consistency. Make sure to hull your strawberries (remove the green tops) before adding them to the blender.
Fresh or Frozen Kiwi: Kiwi is the star ingredient that makes this smoothie unique! You can use fresh kiwi (peeled and chopped) or buy pre-peeled frozen kiwi chunks, which are increasingly available in grocery stores. Kiwi adds a tropical tang, beautiful green color, and incredible nutrition—it’s loaded with vitamin C, vitamin K, and digestive enzymes. When buying fresh kiwi, look for fruits that give slightly when pressed; they should be ripe but not mushy. You can ripen hard kiwis at room temperature for a few days.
Banana: This is the secret ingredient that gives your smoothie its creamy, smooth texture and natural sweetness without any added sugar. The banana acts as a binder, helping all the ingredients blend together seamlessly. Always use a ripe banana (look for yellow with brown spots) for maximum sweetness and creaminess. If you’re not a banana fan or following a low-sugar diet, you can substitute with ½ cup Greek yogurt, ½ an avocado, or even ¼ cup of raw cashews soaked in water.
Liquid Base (Milk, Juice, or Water): The liquid you choose affects both flavor and nutrition. Regular dairy milk adds protein and calcium; almond milk keeps it light and nutty; coconut milk adds tropical vibes; oat milk provides creaminess; apple juice or white grape juice amplifies the fruity sweetness; or simply use water for the lowest-calorie option. For a protein boost, you can use vanilla protein shake as your liquid base.
Honey or Sweetener (Optional): Most of the time, the natural sugars from the fruit provide plenty of sweetness, but if you prefer a sweeter smoothie or your kiwis are particularly tart, add a small drizzle of honey, maple syrup, or agave nectar. Start with just one teaspoon and taste before adding more—you can always add sweetness, but you can’t take it away!
Greek Yogurt (Optional but Recommended): Adding ½ cup of Greek yogurt transforms this from a simple smoothie into a more substantial, protein-packed meal. Vanilla Greek yogurt adds extra sweetness and flavor, while plain Greek yogurt keeps it less sweet and more protein-focused. For dairy-free options, use coconut yogurt or cashew yogurt instead.
Spinach (Optional Nutrition Boost): Want to sneak in some greens? Add a handful of fresh spinach! I promise you won’t taste it at all—the fruit completely masks the flavor—but you’ll get all those wonderful leafy green nutrients. Since kiwi is already green, adding spinach won’t change the color dramatically.
Equipment Needed
The beauty of smoothie-making is that it requires minimal equipment. Here’s everything you need to create the perfect strawberry kiwi smoothie:
- High-Speed Blender: This is your most important tool. A powerful blender (like Vitamix, Blendtec, Ninja, or Nutribullet) ensures smooth, lump-free results, especially when working with frozen fruit. Even a standard countertop blender works fine; just make sure it can handle ice and frozen ingredients without burning out the motor.
- Sharp Knife: For hulling strawberries and peeling/chopping fresh kiwis
- Cutting Board: For fruit prep
- Measuring Cups and Spoons: For accurate ingredient measurements
- Rubber Spatula: Essential for scraping down the sides of the blender and getting every last bit of smoothie
- Tall Glasses or Mason Jars: For serving your beautiful creation
- Reusable Straws: Optional but fun, especially for kids
- Bowls (Optional): If you’re making smoothie bowls instead of drinkable smoothies
Strawberry Kiwi Smoothie Recipe
This vibrant Strawberry Kiwi Smoothie combines sweet strawberries with tangy kiwi for a refreshing, vitamin C-packed drink that’s ready in just 5 minutes. Perfect for breakfast, post-workout fuel, or a healthy snack!
- Total Time: 5 minutes
- Yield: 2 servings 1x
Ingredients
- 1½ cups frozen strawberries (or fresh strawberries plus ½ cup ice)
- 2 medium ripe kiwis, peeled and roughly chopped (or ¾ cup frozen kiwi chunks)
- 1 medium ripe banana (fresh or frozen)
- 1 cup liquid of choice (almond milk, coconut milk, dairy milk, apple juice, or water)
- ½ cup Greek yogurt (plain or vanilla, optional but recommended)
- 1–2 teaspoons honey or maple syrup (optional, for extra sweetness)
- Handful of ice cubes (only if using all fresh fruit)
Instructions
- Prepare Your Fresh Fruit: If using fresh ingredients, hull the strawberries by removing the green tops and cutting them in half. Peel the kiwis by cutting off both ends and running a spoon between the flesh and skin, then chop roughly. Peel and break the banana into chunks. If using frozen fruit, you can skip this step entirely!
- Add Liquid First: Pour your chosen liquid into the blender first. This crucial step prevents the frozen fruit from getting stuck at the bottom and helps the blades move freely right from the start. If you’re using yogurt, add it now as well.
- Layer Your Ingredients: Add the banana pieces next, followed by the strawberries and kiwi chunks. If using any sweetener or optional add-ins like spinach, add them now. If you’re using fresh fruit instead of frozen, add ice cubes last.
- Blend on Low, Then High: Start blending on the lowest speed for about 10 seconds to break down the large chunks, then gradually increase to high speed. Blend for 30–60 seconds until completely smooth and creamy with no visible chunks. You may need to stop once to scrape down the sides with a spatula.
- Check and Adjust Consistency: Stop the blender and check the thickness. If your smoothie is too thick to blend properly or drink, add 2–4 tablespoons more liquid and blend again. If it’s too thin, add a few more frozen strawberries or a handful of ice and blend again. The perfect consistency should be thick enough to coat a spoon but still pourable.
- Taste and Customize: Give it a quick taste test. Need more sweetness? Add honey and blend for a few more seconds. Want it more tart? Add an extra kiwi. This is your chance to make it perfect for your palate!
- Serve Immediately: Pour into tall glasses and enjoy right away while it’s thick, cold, and at peak texture. For an extra pretty presentation, garnish with a strawberry slice, kiwi wheel, or fresh mint leaf. Take a photo for Pinterest before the first sip!
Notes
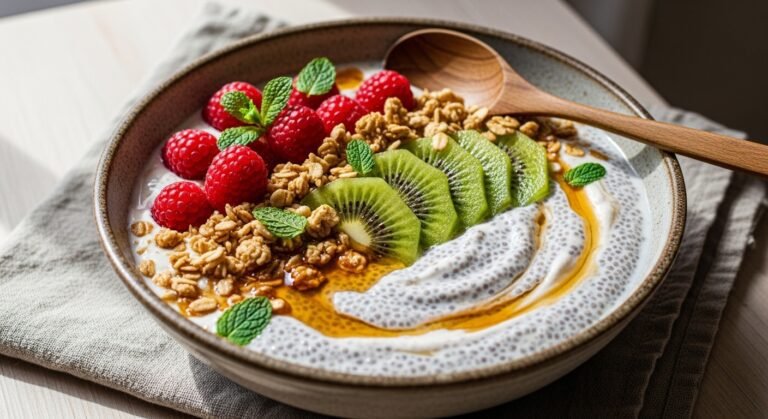
- For Smoothie Bowls: Use only ¾ cup liquid instead of a full cup to create a thick, spoonable consistency. Pour into bowls and top with granola, sliced kiwi and strawberries, coconut flakes, chia seeds, and sliced almonds.
- Frozen Banana Trick: Keep peeled, sliced bananas in your freezer specifically for smoothies. They create an ultra-thick, ice-cream-like texture that’s absolutely divine.
- Green vs. Pink: For a greener smoothie, use more kiwi and add spinach. For a pinker smoothie, use more strawberries. The ratio is completely customizable!
- Protein Power: Add a scoop of vanilla protein powder or 2 tablespoons of almond butter for a more filling, protein-rich breakfast smoothie.
- Kiwi Skin: Did you know kiwi skin is actually edible and packed with fiber? If you have a high-powered blender, you can throw in unpeeled kiwis (just wash them well first). The blender will pulverize the fuzzy skin completely.
- Make It Creamier: For an extra-creamy texture, add 2 tablespoons of rolled oats or ¼ cup of frozen cauliflower (trust me, you won’t taste it!).
- Prep Time: 5 minutes
- Cook Time: 0 minutes
Nutrition
- Serving Size: 1 smoothie (approx. 12 oz)
- Calories: 185
- Sugar: 28g
- Sodium: 45mg
- Fat: 1.5g
- Saturated Fat: 0g
- Unsaturated Fat: 1g
- Trans Fat: 0g
- Carbohydrates: 41g
- Fiber: 6g
- Protein: 5g
- Cholesterol: 3mg
Tips & Variations
One of the best things about this strawberry kiwi smoothie recipe is how easily you can customize it to suit your taste preferences, dietary needs, or whatever ingredients you have on hand!
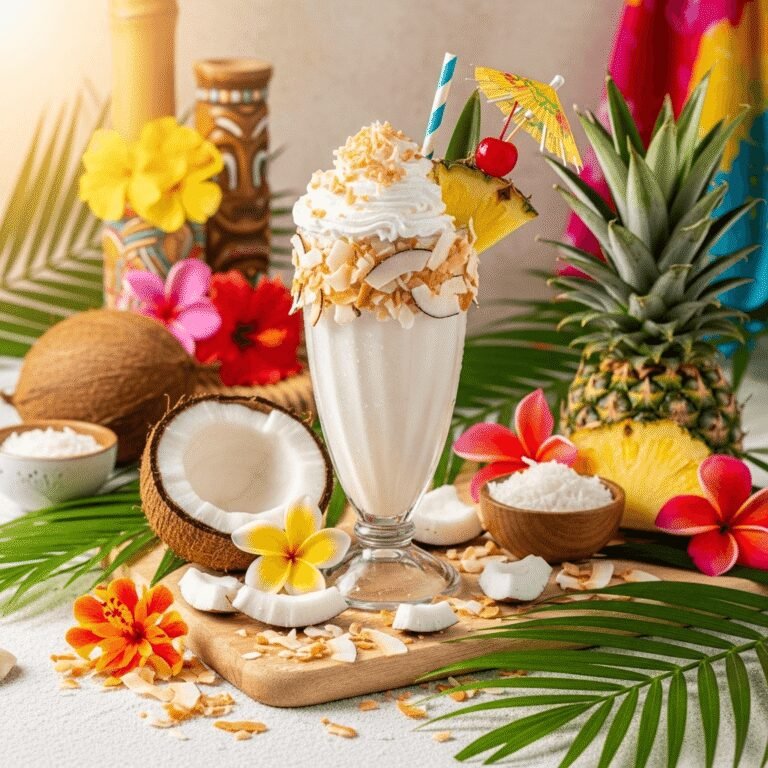
Tropical Twist: Add ½ cup frozen pineapple chunks or mango for a more tropical flavor profile. A tablespoon of coconut cream or a splash of coconut water enhances that island vibe even more!
Green Smoothie Version: Throw in a generous handful of fresh spinach or kale before blending. The fruit completely masks any “green” taste, but you’ll get all those valuable nutrients. This is perfect for picky eaters who won’t eat their vegetables!
Berry Blast: Replace the kiwi with additional mixed berries (blueberries, raspberries, blackberries) for an all-berry smoothie. You’ll lose the tangy kiwi flavor but gain even more antioxidants.
Protein-Packed Breakfast: Add a scoop of vanilla or strawberry protein powder, 2 tablespoons of peanut butter or almond butter, or ¼ cup of rolled oats to make this smoothie more filling and breakfast-worthy. This is perfect for post-workout recovery!
Creamy Dreamy Version: Use coconut milk instead of regular milk and add 2 tablespoons of coconut cream for an ultra-rich, dessert-like texture. It tastes like a milkshake but is still healthy!
Citrus Boost: Add the juice of half a lime or lemon for extra tanginess and brightness. Citrus really makes the strawberry and kiwi flavors pop!
Low-Carb Option: Skip the banana and use ½ ripe avocado instead for healthy fats and creaminess without the extra carbs. Add stevia or monk fruit sweetener if you need extra sweetness.
Superfood Upgrade: Boost nutrition by adding 1 tablespoon of chia seeds, flax seeds, hemp hearts, or a teaspoon of spirulina powder. These add omega-3s, protein, and additional nutrients without significantly changing the flavor.
Kid-Friendly Version: Use apple juice as your liquid base and add a bit more banana for extra sweetness. Kids love the fruity flavor and fun colors!
Pro Chef Tips
Want your strawberry kiwi smoothie to taste like it came from an expensive juice bar? Here are professional secrets that make all the difference:
Freeze Fruit Properly: When freezing fresh fruit yourself, spread strawberries and kiwi pieces in a single layer on a parchment-lined baking sheet first, freeze until solid (about 2 hours), then transfer to freezer bags. This prevents the fruit from clumping into one giant frozen mass that’s impossible to break apart.
The Perfect Blend Order: Always add liquids first, then soft ingredients (banana, yogurt), then frozen or hard ingredients last. This order ensures everything blends smoothly without air pockets or frozen chunks getting stuck under the blades.
Power Blend Technique: Start blending on low speed to break down large chunks, then quickly ramp up to high speed. Let it run continuously on high for a full 30–60 seconds—don’t pulse! This creates that ultra-smooth, professional texture.
Control the Temperature: If your smoothie gets warm from extended blending (common with high-speed blenders), add a few ice cubes and blend again briefly. Smoothies should be enjoyed cold for maximum refreshment!
Ripeness Matters: Always use ripe, sweet fruit for the best flavor. Underripe strawberries and kiwis can taste sour and unpleasant. If your kiwis are too hard, let them ripen at room temperature for 2–3 days, or place them in a paper bag with a banana to speed up the process.
Don’t Skip the Taste Test: Professional smoothie makers always taste and adjust before serving. Check sweetness, tartness, and thickness, then customize with more honey, fruit, or liquid as needed. Those final adjustments make the difference between good and amazing!
Clean Immediately: Fill your blender with warm water and a drop of dish soap immediately after pouring out your smoothie, then blend for 10 seconds and rinse. This prevents dried-on fruit from becoming impossible to clean later and keeps your blender in top condition.
Frozen Banana Game-Changer: Using frozen banana instead of fresh creates a significantly thicker, creamier, almost ice-cream-like texture. Keep a stash of pre-sliced frozen bananas in your freezer at all times!
Common Mistakes to Avoid
Even though smoothies seem foolproof, these common mistakes can prevent yours from turning out perfectly:
Using Too Much Liquid: This is the number one mistake! Starting with too much liquid results in a thin, watery smoothie that’s disappointing to drink. Always start with less liquid than you think you need—you can easily add more, but you can’t remove it. For thick smoothies, start with just ¾ cup of liquid per 2 cups of frozen fruit.
Not Using Frozen Fruit or Ice: If all your ingredients are fresh and room temperature, you’ll end up with a warm, thin smoothie. You need either frozen fruit or ice cubes to create that thick, frosty texture. Keep frozen strawberries and kiwi in your freezer so you’re always prepared!
Over-Blending: Blending for too long warms up the smoothie from friction, deflates the volume, and can create an unappealing frothy or thin texture. Most smoothies only need 30–60 seconds of blending on high speed—as soon as it’s smooth, stop!
Forgetting to Peel Kiwis: While kiwi skin is technically edible, most people find it unpleasant in smoothies unless you have an extremely powerful blender. Always peel your kiwis first unless you’re specifically trying to maximize fiber and don’t mind a slightly different texture.
Using Unripe Fruit: Hard, underripe kiwis and strawberries lack natural sweetness and can taste sour, bitter, or starchy. The ripeness of your fruit directly impacts the final flavor. Wait until your kiwis give slightly when pressed and your strawberries are bright red and fragrant.
Adding Ingredients in the Wrong Order: Dumping everything in randomly can lead to chunks of frozen fruit that never get properly blended. Always add liquids first, soft ingredients next, and frozen ingredients last for the smoothest results.
Skipping the Scrape: Not scraping down the sides of your blender means chunks of unblended fruit get left behind. Stop the blender once halfway through, scrape down the sides with a spatula, then continue blending.
Storage & Meal Prep
Refrigerator Storage: Leftover smoothie can be stored in an airtight container, mason jar, or bottle in the refrigerator for up to 24 hours. Smoothies naturally separate as they sit because there’s no stabilizer, so you’ll need to shake or stir vigorously before drinking. The texture won’t be quite as thick and frosty as fresh, but the flavor remains delicious.
Freezer Storage for Popsicles: Pour leftover smoothie into popsicle molds and freeze for 4–6 hours for a healthy frozen treat that kids and adults love! You can also freeze smoothies in ice cube trays, then pop the cubes into freezer bags. When you want a smoothie, blend the frozen cubes with a splash of fresh milk.
Smoothie Prep Bags: This is my absolute favorite meal prep method! Pre-portion all your fruit ingredients (strawberries, kiwi chunks, banana slices) into individual freezer-safe zip-top bags. Label each bag with “Strawberry Kiwi Smoothie + 1 cup milk.” In the morning, dump one bag into your blender, add the liquid, blend, and you’re done in 60 seconds! You can prep 5–7 bags at once for the entire week.
What NOT to Freeze: Don’t add yogurt, honey, or liquid to your freezer prep bags—only the fruit. Fresh ingredients should always be added right before blending for the best texture and flavor.
Best Practices: For optimal nutrition, flavor, and texture, smoothies are truly best enjoyed immediately after blending. The longer they sit, the more they oxidize (which can dull the bright colors) and separate. If you must store one, consume it within 24 hours for the best quality.
Make-Ahead & Freezer Notes
Make-Ahead Smoothie Packs: As mentioned above, you can prep smoothie ingredient bags up to 3 months in advance. Portion out 1½ cups strawberries, ¾ cup chopped kiwi, and 1 sliced banana per bag. Squeeze out excess air, seal, and freeze flat for easy stacking. When you’re ready to blend, you have perfectly measured ingredients waiting!
Batch Blending: You can double or triple this recipe and freeze the extra smoothie in individual portions. Pour into mason jars (leave 1 inch of headspace for expansion), seal tightly, and freeze for up to 2 months. Thaw overnight in the refrigerator, shake well, and enjoy!
Frozen Smoothie Cubes: Blend a big batch of smoothie, pour into ice cube trays, and freeze. These cubes are perfect for adding to future smoothies (they add flavor and thickness without diluting like regular ice), or you can blend them with a small amount of milk when you want a quick thick smoothie.
Pre-Prep Fresh Fruit: If you prefer using fresh fruit, you can wash, hull, and chop strawberries and peel and chop kiwis up to 2 days in advance. Store them in airtight containers in the refrigerator until ready to use.
Popsicle Meal Prep: Make a double batch of smoothie and pour into popsicle molds. These healthy frozen treats last up to 3 months in the freezer and are perfect for hot summer days, after-school snacks, or whenever you need a cool, nutritious treat.
Rehydrating Frozen Smoothies: If you’ve frozen a prepared smoothie, the best way to enjoy it is to thaw overnight in the refrigerator, then pour it into a blender with a splash of fresh milk and blend for 10–15 seconds to restore the smooth texture. Never microwave a frozen smoothie!
Serving Suggestions
This refreshing strawberry kiwi smoothie is delicious on its own, but here are creative ways to enjoy it as part of a complete meal or special occasion:
Balanced Breakfast: Pair your smoothie with whole grain toast topped with avocado and everything bagel seasoning, a veggie-packed omelet, or overnight oats for a complete, satisfying breakfast that keeps you full until lunch.
Brunch Centerpiece: Serve these vibrant smoothies at your next brunch gathering alongside mini quiches, fruit salad, yogurt parfaits, and pastries. The gorgeous pink-green color looks stunning in clear glasses and photographs beautifully!
Post-Workout Recovery: Drink this smoothie within 30 minutes after exercise to replenish glycogen stores with natural fruit sugars. If you’ve added protein powder or Greek yogurt, you’re getting the protein your muscles need for recovery too.
Healthy Afternoon Snack: When the 3 p.m. energy slump hits, skip the candy bar or chips and blend up this smoothie instead. The natural sugars provide quick energy while the fiber prevents a blood sugar crash.
Smoothie Bowl Party: Turn this into a fun family activity! Make a big batch blended extra thick, pour into bowls, and set out a toppings bar with granola, coconut flakes, chia seeds, sliced almonds, fresh berries, banana slices, cacao nibs, honey drizzle, and edible flowers. Everyone can create their own Instagram-worthy masterpiece!
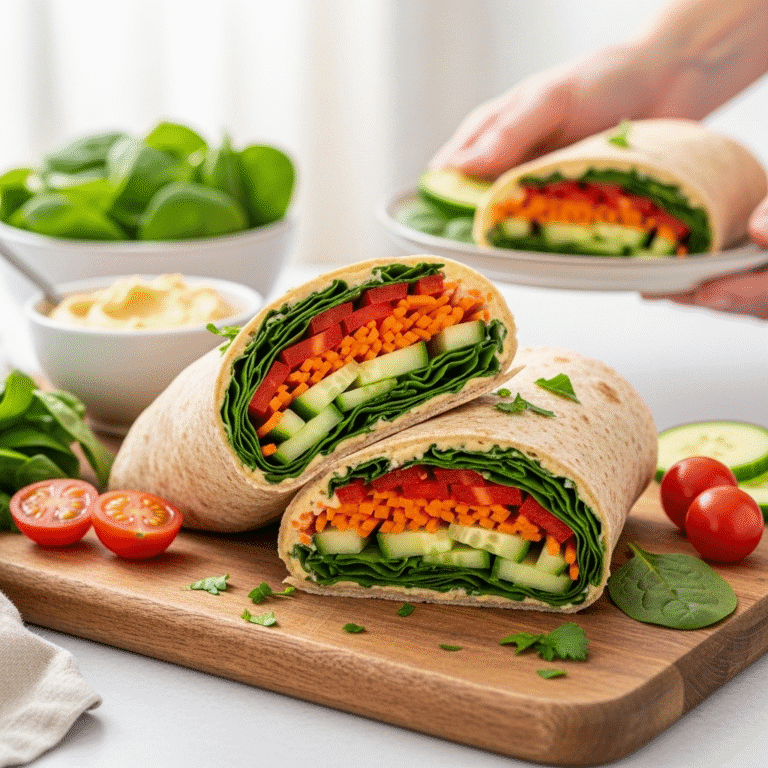
Light Lunch Companion: This smoothie pairs wonderfully with lighter fare like a grilled chicken salad, veggie wrap, quinoa bowl, or Mediterranean grain salad. It adds refreshing sweetness without being too heavy.
Kid-Friendly Treat: Serve this smoothie as an after-school snack or as a “special drink” with dinner. Kids love feeling like they’re drinking something fun and special, and you’ll love that they’re getting vitamins, fiber, and no added sugar!
Picnic or Packed Lunch: Pour into insulated bottles or thermoses to keep cold, and pack for picnics, road trips, or packed lunches. It stays cold and delicious for several hours!
FAQs Section
Can I make this smoothie without a banana?
Absolutely! If you don’t like bananas or want to reduce sugar, substitute with ½ cup Greek yogurt for creaminess, ½ ripe avocado for healthy fats and smooth texture, or ¼ cup frozen cauliflower (you won’t taste it at all, I promise!). You might need to add a touch more sweetener since bananas contribute natural sweetness.
Why is my smoothie brown instead of pretty pink and green?
When you blend strawberries and kiwi together for too long, the colors mix and can turn slightly brown or murky. To keep the colors more distinct, try blending the strawberries with half the liquid first, pouring into glasses, then blending the kiwi with the remaining liquid and carefully layering or swirling it in. Alternatively, embrace the mixed color—it still tastes amazing!
Can I use frozen kiwi?
Yes! Frozen kiwi chunks are increasingly available in grocery stores and work perfectly in smoothies. They’re pre-peeled and create an extra-thick, frosty texture. If you can’t find frozen kiwi, you can peel and chop fresh kiwis and freeze them yourself in portions.
Is this smoothie good for weight loss?
This smoothie can definitely support weight loss goals as part of a balanced diet! It’s naturally low in calories (around 185 per serving), high in fiber to keep you full, and has no added sugars. However, if you’re using it as a meal replacement, consider adding protein powder or Greek yogurt to make it more satisfying and nutritionally complete.
Can I make this smoothie vegan?
Yes! Simply use plant-based milk (almond, oat, coconut, cashew, or soy), skip the Greek yogurt or substitute with coconut or almond yogurt, and use maple syrup or agave instead of honey for sweetening. Easy!
How can I make this smoothie thicker or thinner?
For a thicker smoothie: use less liquid (start with just ¾ cup), add more frozen fruit, include a frozen banana instead of fresh, or add a handful of ice cubes. For a thinner smoothie: add more liquid 2 tablespoons at a time until you reach your desired consistency. It’s all about the liquid-to-frozen-fruit ratio!
Do I have to peel the kiwi?
Technically, kiwi skin is edible and contains additional fiber, but most people find it too fuzzy and unpleasant in smoothies. If you have a very powerful blender (like a Vitamix), you can try leaving the skin on—just wash the kiwis thoroughly first. For most blenders, peeling is recommended for the smoothest texture.
Can toddlers and young children drink this smoothie?
Yes! This smoothie is kid-friendly and packed with nutrients. However, be mindful of potential allergies (kiwi can be allergenic for some children) and adjust the texture if needed—younger kids might prefer a thinner consistency that’s easier to drink through a straw. You can also freeze it into popsicles for a fun, mess-free option!
Conclusion
And there you have it—everything you need to know to make the most delicious, refreshing, Instagram-worthy Strawberry Kiwi Smoothie! This recipe proves that healthy eating doesn’t have to be complicated, time-consuming, or boring. With just five simple ingredients and five minutes of your time, you can create a nutrient-packed drink that tastes like a tropical vacation while fueling your body with vitamins, antioxidants, and natural energy.
Whether you’re rushing out the door on a busy weekday morning, refueling after an intense workout, looking for a healthy afternoon pick-me-up, or simply craving something sweet and refreshing, this easy strawberry kiwi smoothie delivers every single time. The combination of sweet strawberries and tangy kiwi creates a flavor that’s perfectly balanced, naturally delicious, and never boring.
I absolutely love how versatile this recipe is—enjoy it as a quick drinkable breakfast, transform it into a gorgeous smoothie bowl loaded with toppings, freeze it into healthy popsicles for the kids, or customize it with your favorite protein powders and superfoods. It’s naturally gluten-free, easily made vegan or dairy-free, and packed with vitamin C to support your immune system.
Now it’s your turn to blend up some magic! I’d love to hear how your Strawberry Kiwi Smoothie turns out. Did you make it exactly as written, or did you get creative with add-ins and variations? What’s your favorite way to enjoy it—as a drink, smoothie bowl, or frozen treat? Drop a comment below and share your experience! And if this recipe brightened your day (and your breakfast routine), please pin it to your favorite Pinterest board so others can discover it too. Don’t forget to follow me for more easy, healthy, delicious recipes that make nutritious eating actually enjoyable!
Here’s to starting your day with vibrant colors, amazing flavors, and nourishing ingredients—happy blending, friends! 🍓