The Ultimate Peanut Butter Yogurt Dip Recipe: Creamy, Protein-Packed & Ready in 5 Minutes

If you’ve been searching for a snack that’s both indulgent and nutritious, this Peanut Butter Yogurt Dip is about to become your new kitchen obsession. This creamy, dreamy dip combines the rich, nutty flavor of peanut butter with the tangy smoothness of Greek yogurt, creating a protein-packed treat that works for breakfast, snacking, or even a healthier dessert option.
What makes this healthy peanut butter dip so special? It takes just 5 minutes to whip up, requires only a handful of pantry staples, and delivers that perfect balance of sweet and savory that keeps you coming back for more. Whether you’re dipping apple slices for an after-school snack, spreading it on graham crackers for a quick breakfast, or serving it at your next gathering with pretzels and banana chips, this versatile dip fits seamlessly into any occasion.
I started making this easy yogurt dip recipe on those busy weekday mornings when my kids needed something quick but nutritious before school. It quickly evolved from a breakfast solution to our go-to snack for movie nights, afternoon energy boosts, and even packed lunches. The best part? It satisfies sweet cravings while sneaking in protein, probiotics, and healthy fats—making it a win for both taste buds and nutrition goals.
This recipe is perfect for busy parents, meal prep enthusiasts, fitness lovers looking for post-workout fuel, or anyone who wants a healthier alternative to store-bought dips that are often loaded with sugar and preservatives.
History / Background
While peanut butter yogurt dip might seem like a modern healthy eating trend, the combination of nut butters and cultured dairy actually has deep roots in various food cultures around the world. In Middle Eastern cuisine, tahini (sesame seed butter) has been mixed with yogurt for centuries to create savory dips and sauces. In Southeast Asian cooking, peanut sauces combined with tangy ingredients have been staples for generations.
The specific pairing of peanut butter with yogurt gained popularity in the United States during the health food movement of the 1970s and 80s, when Greek yogurt began making its way into American kitchens and home cooks started experimenting with protein-rich combinations. However, it wasn’t until the 2010s, with the explosion of food blogging, Pinterest, and the wellness movement, that this simple dip truly found its moment.
The beauty of this recipe lies in its evolution from a niche health food to a mainstream favorite. Originally popular among bodybuilders and fitness enthusiasts who needed quick protein fixes, it crossed over into family kitchens when parents discovered it was one of the few “healthy” foods their kids would actually get excited about eating. The natural sweetness of peanut butter combined with the creamy texture of yogurt creates a dip that doesn’t taste like a compromise—it tastes like a treat.
Today, this protein-packed peanut butter dip has become a Pinterest sensation, with thousands of variations incorporating everything from chocolate chips to chia seeds, honey drizzles to cinnamon swirls. But sometimes, the original simple version is exactly what you need—no fuss, all flavor, and ready faster than you can slice an apple.
Why You’ll Love This Recipe
This easy peanut butter yogurt dip recipe has everything you’re looking for in a modern, family-friendly snack. It’s the kind of recipe that looks impressive but takes almost no effort, tastes indulgent but keeps your health goals on track, and works for so many different occasions that you’ll find yourself making it several times a week.
Let me tell you why this dip deserves a permanent spot in your recipe rotation:
- Lightning-Fast Preparation: Seriously, 5 minutes from start to finish. No cooking, no baking, just simple stirring. Perfect for those moments when you need something NOW.
- Protein Powerhouse: With Greek yogurt and peanut butter both bringing substantial protein to the table, this dip keeps you fuller longer and provides sustained energy without the crash.
- Budget-Friendly: Made with affordable pantry staples you probably already have, this recipe costs a fraction of what you’d pay for specialty dips at the store.
- Kid-Approved: Even picky eaters love the familiar, comforting flavors. It’s an easy way to sneak in protein and probiotics without any battles.
- Incredibly Versatile: Works as a dip, spread, fruit topping, oatmeal mix-in, or even a frosting substitute for healthier baking.
- Customizable to Your Taste: Sweet, savory, spiced, chocolatey—this base recipe adapts to whatever flavor profile you’re craving.
- Meal Prep Champion: Make a batch on Sunday and enjoy healthy snacking all week long. It stores beautifully and actually tastes better after the flavors meld.
- Naturally Gluten-Free: Suitable for those avoiding gluten, and easily adaptable for other dietary needs.
- No Added Sugar Needed: The natural sweetness of peanut butter and optional honey means you control exactly how sweet it gets.
- Perfect for Entertaining: Serve it at parties, potlucks, or playdates and watch it disappear. It’s always the first dip to empty out.
Ingredient Notes
The magic of this creamy peanut butter dip lies in its simplicity. Each ingredient plays an important role in creating that perfect texture and balanced flavor. Let’s break down what you’ll need and why each component matters:
Greek Yogurt: This is your base and your protein source. Greek yogurt is thicker and creamier than regular yogurt because it’s been strained to remove excess whey. I recommend using plain, full-fat or 2% Greek yogurt for the richest texture and best flavor. Non-fat works too, but the dip may be slightly less creamy. Avoid flavored yogurts as they contain added sugars that compete with the peanut butter. Substitute: Regular plain yogurt can work, but drain it through cheesecloth first, or use Icelandic skyr for an even thicker consistency.
Peanut Butter: Choose a creamy, natural peanut butter for the smoothest texture. Natural peanut butter (the kind where oil separates on top) provides the best flavor without added sugars or hydrogenated oils. If you prefer traditional peanut butter brands, those work too—just check that sugar isn’t the second ingredient. Make sure to stir your peanut butter well before measuring. Substitute: Almond butter, cashew butter, or sunflower seed butter (for nut-free versions) all work beautifully.
Honey: A touch of honey adds gentle sweetness and helps bind the ingredients together. It also provides that glossy finish that makes the dip look as good as it tastes. Raw honey offers additional health benefits and more complex flavor. Substitute: Pure maple syrup, agave nectar, or a few drops of liquid stevia for a lower-glycemic option.
Vanilla Extract: Just a splash enhances all the other flavors and adds warmth. Pure vanilla extract is worth the investment—it makes a noticeable difference. Substitute: Almond extract for a different flavor profile, or omit if making a savory version.
Cinnamon (optional): A pinch of ground cinnamon adds warmth and complexity without overpowering the peanut butter. It also has the added benefit of helping stabilize blood sugar. Substitute: Try cardamom, nutmeg, or pumpkin pie spice for seasonal variations.
Salt: Just a tiny pinch enhances sweetness and balances the richness of the peanut butter. If your peanut butter is already salted, you may not need additional salt.
Equipment Needed
One of the best things about this recipe is that you probably have everything you need already sitting in your kitchen. No special gadgets or expensive equipment required!
- Medium Mixing Bowl: A standard bowl for combining all ingredients
- Whisk or Wooden Spoon: For stirring everything together until smooth
- Measuring Cups: For accurate ingredient portions
- Measuring Spoons: For the smaller ingredients like vanilla and honey
- Rubber Spatula: For scraping down the sides and getting every last bit
- Storage Container: An airtight container for refrigerating leftovers (a glass jar with lid works perfectly)
- Optional – Hand Mixer or Stand Mixer: If you want an ultra-smooth, whipped texture, a mixer works wonders, but it’s absolutely not necessary
That’s it! No blender, food processor, or specialty tools needed. This is truly a mix-and-serve recipe.
Print
Peanut Butter Yogurt Dip Recipe
This creamy Peanut Butter Yogurt Dip is a protein-packed, 5-minute snack that’s perfect for dipping fruit, pretzels, or graham crackers. Made with simple ingredients and no added refined sugar, it’s a healthier alternative to store-bought dips that the whole family will love.
- Total Time: 5 minutes
- Yield: 8 servings (about 2 cups) 1x
Ingredients
- 1½ cups plain Greek yogurt (full-fat or 2%)
- ½ cup creamy natural peanut butter
- 2-3 tablespoons honey (adjust to taste)
- 1 teaspoon pure vanilla extract
- ¼ teaspoon ground cinnamon (optional)
- Pinch of salt (if using unsalted peanut butter)
- Optional toppings: mini chocolate chips, chopped peanuts, drizzle of honey, or a sprinkle of cinnamon
Instructions
- Prepare Your Ingredients: Make sure your peanut butter is well-stirred if using natural peanut butter, as the oil tends to separate. Bring your Greek yogurt to room temperature for easier mixing (optional but recommended).
- Combine Base Ingredients: In a medium mixing bowl, add the Greek yogurt and peanut butter. Using a whisk or sturdy wooden spoon, stir vigorously until the two ingredients are completely combined and smooth. This might take 1-2 minutes of stirring. The mixture should be creamy with no streaks of peanut butter remaining.
- Add Sweetener and Flavorings: Add the honey, vanilla extract, cinnamon (if using), and a pinch of salt. Continue stirring until everything is evenly distributed throughout the dip. Taste and adjust sweetness if needed—some people prefer it sweeter, others like the natural peanut butter flavor to shine through.
- Check Consistency: Your dip should be smooth, creamy, and hold its shape on a spoon but still be easy to dip into. If it’s too thick, add a teaspoon of milk or a little more yogurt. If it’s too thin, add a tablespoon more peanut butter.
- Chill or Serve: You can serve immediately at room temperature, or refrigerate for 15-30 minutes to let the flavors meld and the dip firm up slightly. The chilled version is thicker and more scoopable.
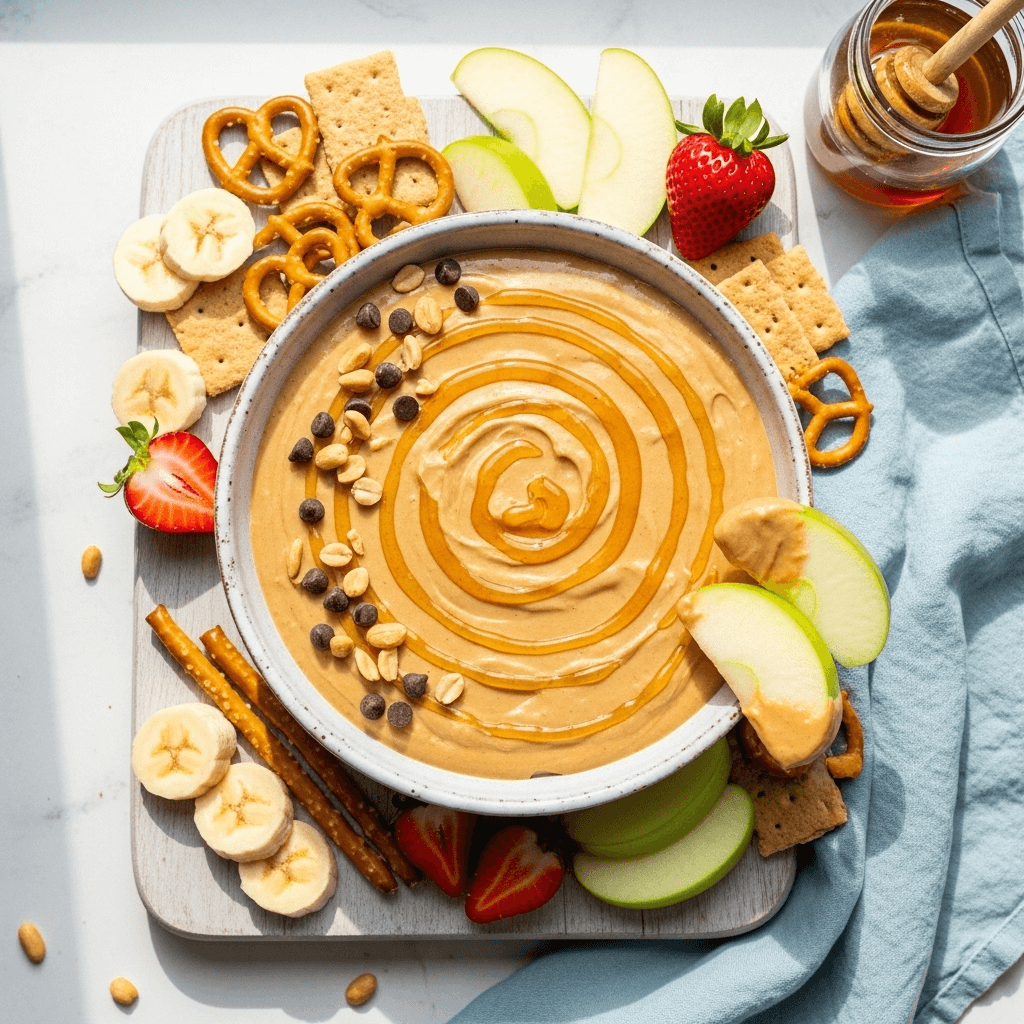
- Add Toppings and Serve: Transfer to a serving bowl, drizzle with extra honey if desired, sprinkle with mini chocolate chips or chopped peanuts, and serve with your favorite dippers. Apple slices, banana chips, pretzels, graham crackers, celery sticks, and strawberries all work beautifully.
Notes
- Consistency Tip: If your dip becomes too thick after refrigeration, simply stir in a teaspoon of milk or water to loosen it up.
- Natural Peanut Butter: Always stir natural peanut butter thoroughly before measuring to ensure the oils are evenly distributed.
- Sweetness Level: Start with 2 tablespoons of honey and add more to taste. Remember, the dip will taste slightly less sweet when cold.
- Make It Vegan: Use dairy-free yogurt (coconut or almond-based) and substitute maple syrup for honey.
- Nut-Free Version: Replace peanut butter with sunflower seed butter or tahini for a nut-free alternative.
- Prep Time: 5 minutes
- Cook Time: 0 minutes
Nutrition
- Serving Size: ¼ cup (approximately 60g)
- Calories: 135
- Sugar: 8g
- Sodium: 85mg
- Fat: 8g
- Saturated Fat: 2g
- Unsaturated Fat: 5g
- Trans Fat: 0g
- Carbohydrates: 10g
- Fiber: 1g
- Protein: 7g
- Cholesterol: 5mg
Tips & Variations
The beauty of this simple peanut butter yogurt dip is how easily you can customize it to match your taste preferences, dietary needs, or what you’re serving it with. Here are some of my favorite ways to switch things up:
Chocolate Peanut Butter Dip: Stir in 2 tablespoons of cocoa powder and an extra tablespoon of honey for a chocolate version that tastes like a healthier brownie batter. Add mini chocolate chips on top for extra indulgence.
Banana Bread Dip: Mash half a ripe banana into the base mixture and add an extra ¼ teaspoon of cinnamon. This version is naturally sweeter and adds extra potassium.
Protein-Boosted Version: Add a scoop of unflavored or vanilla protein powder to bump up the protein content even more. Perfect for post-workout snacking.
Maple Cinnamon Twist: Replace honey with pure maple syrup and double the cinnamon. Add a tiny pinch of nutmeg for a fall-inspired flavor.
Savory Asian-Inspired: Skip the honey and vanilla, and instead add 1 tablespoon of low-sodium soy sauce, ½ teaspoon of sesame oil, and a pinch of red pepper flakes. Use this version for dipping vegetables or rice crackers.
Cookie Dough Dip: Add a tablespoon of brown sugar instead of honey and fold in mini chocolate chips. This tastes remarkably like edible cookie dough.
Berry Swirl: Gently swirl in 2-3 tablespoons of berry jam or fresh mashed berries for a fruity twist. Don’t mix completely—leave pretty swirls for visual appeal.
Chai Spiced: Add ¼ teaspoon each of cinnamon, ginger, and cardamom, plus a tiny pinch of black pepper and cloves for a chai-inspired flavor.
Extra Crunchy: Stir in chopped peanuts, granola, or chia seeds for added texture and nutrition.
Lightened Up: Use non-fat Greek yogurt and powdered peanut butter (PB2) reconstituted with water for a significantly lower-calorie version.
Pro Chef Tips
As someone who’s made this dip hundreds of times (not exaggerating!), I’ve learned a few tricks that elevate it from good to absolutely crave-worthy:
Room Temperature Matters: Let your Greek yogurt sit out for 15-20 minutes before mixing. Cold yogurt is harder to blend smoothly with peanut butter, and you’ll end up with lumps. Room temperature ingredients create a silkier, more uniform texture.
The Stirring Technique: When combining yogurt and peanut butter, use a figure-eight stirring motion rather than circular. This incorporates the ingredients more efficiently and prevents clumps from forming in the corners of your bowl.
Layer Your Flavors: Add honey in two stages—half at the beginning, then taste and add more if needed. This prevents over-sweetening and allows you to adjust based on the natural sweetness of your peanut butter brand.
Toast Your Toppings: If you’re adding chopped peanuts on top, toast them lightly in a dry skillet first. This brings out their oils and intensifies the nutty flavor dramatically.
The Resting Period: While you can eat this immediately, the flavor and texture improve significantly after 30 minutes to an hour in the fridge. The ingredients marry together, the dip firms up to the perfect scoopable consistency, and it actually tastes sweeter as the flavors develop.
Whipped for Elegance: For a lighter, airier texture that looks more impressive when entertaining, use a hand mixer to whip the dip for 2-3 minutes after combining all ingredients. This incorporates air and creates a mousse-like consistency.
Prevent Separation: If your dip separates after sitting (oil pooling on top), this means your peanut butter wasn’t mixed well before adding. Always stir natural peanut butter thoroughly, or use a food processor to completely emulsify it before measuring.
The Honey Drizzle Finish: For presentation, warm a tablespoon of honey in the microwave for 10 seconds until it’s very fluid, then drizzle it over the top in a decorative pattern right before serving. It creates a beautiful glossy finish.
Common Mistakes to Avoid
Even with such a simple recipe, there are a few pitfalls that can affect your results. Here’s what to watch out for:
Using Flavored Yogurt: Vanilla yogurt might seem like it would work well, but store-bought flavored yogurts contain added sugars that make the dip too sweet and can create an artificial aftertaste. Always use plain Greek yogurt and add your own flavorings.
Overmixing or Undermixing: There’s a sweet spot. Undermixing leaves streaks of peanut butter that don’t blend properly. Overmixing can break down the yogurt’s structure, making it runny. Mix until just smooth and uniform, about 1-2 minutes of steady stirring.
Forgetting to Stir Natural Peanut Butter: If you scoop from the top of a jar of natural peanut butter where all the oil has separated, your measurements will be off and your dip will be too oily. Always stir the entire jar first, or store natural peanut butter upside down so the oil redistributes.
Not Tasting as You Go: Peanut butter brands vary wildly in saltiness and sweetness. What works for one brand might not for another. Always taste after adding honey and adjust accordingly. Remember, it will taste slightly less sweet when cold.
Storing Incorrectly: Leaving the dip uncovered in the fridge will cause it to dry out and absorb odors from other foods. Always use an airtight container. Also, don’t leave it at room temperature for more than 2 hours—yogurt is perishable and needs refrigeration.
Using Low-Quality Ingredients: Since this recipe is so simple, ingredient quality really matters. Cheap peanut butter with lots of added sugar and oils, or watery yogurt, will result in a subpar dip. Invest in good Greek yogurt and natural peanut butter for the best results.
Serving with the Wrong Temperature: If you serve it straight from the fridge, it might be too thick and stiff for dipping. Let it sit out for 5-10 minutes before serving, or stir in a tiny splash of milk to loosen it.
Storage & Meal Prep
This make-ahead peanut butter dip is a meal prepper’s dream because it actually improves with time as the flavors meld together. Here’s everything you need to know about storing and keeping this dip fresh:
Refrigerator Storage: Store your peanut butter yogurt dip in an airtight container in the refrigerator for up to 5-7 days. Glass containers work best as they don’t absorb odors or stains. Press a piece of plastic wrap directly onto the surface of the dip before sealing the container to prevent a skin from forming on top.
Texture Changes: The dip will thicken considerably as it chills. This is completely normal and actually makes it more scoopable. If it becomes too thick for your liking, simply stir in a teaspoon of milk, water, or even a little more yogurt until you reach your desired consistency.
Separation is Normal: You might notice a small amount of liquid (whey) separating from the yogurt after a day or two. This is natural. Simply stir it back in before serving—don’t pour it off.
Meal Prep Strategy: I love making a batch on Sunday afternoon and portioning it into individual containers (about ¼ cup each) with pre-cut apple slices or veggies for grab-and-go snacks throughout the week. Pack the dip and dippers separately to prevent sogginess.
Reheating: There’s no need to reheat this dip, but if you prefer it at room temperature, let it sit out for 10-15 minutes before serving. Never microwave, as this can separate the yogurt and make it grainy.
Freshness Indicators: If your dip smells sour (more than yogurt’s natural tang), develops mold, or changes color, it’s time to discard it. Yogurt-based dips are generally safe for about a week when stored properly.
Make-Ahead & Freezer Notes
Make-Ahead Instructions: This is one of those rare recipes that actually tastes better when made ahead. Prepare it up to 3 days in advance and store in the refrigerator. The flavors develop and deepen, the peanut butter integrates more completely, and the overall taste becomes more balanced. Just give it a good stir before serving.
Freezing Basics: Here’s the truth—yogurt-based dips don’t freeze perfectly because yogurt’s texture changes when frozen and thawed. The proteins and fats can separate, creating a grainy, watery texture. However, if you’re okay with a slightly different consistency, you can freeze this dip.
How to Freeze: Transfer the dip to a freezer-safe container, leaving about an inch of headspace for expansion. Press plastic wrap directly onto the surface, then seal with an airtight lid. Label with the date and freeze for up to 2 months.
Thawing Method: Thaw overnight in the refrigerator, never at room temperature. Once thawed, you’ll likely notice separation and graininess. Use an immersion blender, regular blender, or hand mixer to re-emulsify the dip. Add a tablespoon of fresh yogurt to help restore the creamy texture. It won’t be quite as smooth as fresh, but it’s still tasty.
Better Freezer Alternative: Instead of freezing the finished dip, consider freezing portioned amounts of just the peanut butter and honey mixed together. Then when you’re ready to use it, simply mix with fresh Greek yogurt. This yields much better results.
Best Uses for Frozen/Thawed Dip: If you do freeze and thaw this dip, it works better as a smoothie addition, oatmeal mix-in, or spread rather than as a dip for fresh fruit. The slightly grainy texture is less noticeable in these applications.
Serving Suggestions
The versatility of this peanut butter yogurt fruit dip means you can enjoy it in countless ways throughout the day. Here are my favorite serving ideas that have been tested and loved by my family and friends:
Classic Fruit Dippers: Apple slices (toss with lemon juice to prevent browning), banana rounds, strawberries, pear slices, fresh pineapple chunks, and grapes all pair beautifully. For a fun presentation, arrange fruit on a platter around a bowl of dip for a rainbow effect.
Crunchy Options: Pretzels (especially honey wheat), graham crackers, vanilla wafers, animal crackers, rice cakes, pita chips, and even plain potato chips offer satisfying crunch. For a gourmet twist, serve with ginger snaps or biscotti.
Vegetable Dippers: While unconventional, celery sticks, carrot sticks, and even bell pepper strips work surprisingly well, especially if you make the savory version or keep the dip less sweet.
Breakfast Ideas: Spread it on whole grain toast, swirl it into oatmeal, dollop it on pancakes or waffles, use it as a topping for yogurt bowls, or stuff it into crepes with sliced bananas.
Dessert Applications: Use it as a healthier frosting for banana bread, spread it between cookies for sandwich cookies, layer it in parfaits with granola and berries, or use it as a filling for chocolate-covered strawberries.
Party Presentation: Serve in a hollowed-out apple or small pumpkin for a seasonal twist. Garnish with a drizzle of honey, a sprinkle of cinnamon, and some crushed peanuts. Surround with an assortment of dippers on a wooden board for Instagram-worthy presentation.
Kid-Friendly Pairings: My kids love “ants on a log” with this dip—celery sticks filled with the dip and topped with raisins. We also make banana “sushi” by spreading the dip on a tortilla, placing a banana on top, rolling it up, and slicing into rounds.
Beverage Pairings: This dip pairs wonderfully with hot apple cider, chai tea, cold milk, or even a morning coffee. For adult gatherings, it’s surprisingly good with a dessert wine or port.
FAQs Section
Can I use regular yogurt instead of Greek yogurt?
Yes, but your dip will be much thinner and less creamy. Regular yogurt has more liquid content and less protein. For best results, strain regular yogurt through cheesecloth for several hours to remove excess whey, essentially making it more like Greek yogurt. You could also add an extra tablespoon or two of peanut butter to help thicken it.
Is this dip healthy?
It’s definitely a healthier alternative to many store-bought dips and sweet spreads. You’re getting protein from both the Greek yogurt and peanut butter, probiotics from the yogurt, healthy fats from the peanut butter, and you control the sweetener amount. That said, it’s still calorie-dense due to the peanut butter, so portion control matters. A ¼ cup serving is very satisfying and nutritious.
Can I make this dairy-free?
Absolutely! Use coconut yogurt, almond yogurt, or cashew yogurt as your base. Keep in mind that non-dairy yogurts vary significantly in thickness and tanginess, so you may need to adjust the amount of peanut butter or sweetener. Coconut yogurt tends to work best as it’s naturally thick and creamy.
Why is my dip grainy or separated?
This usually happens when the peanut butter wasn’t properly stirred before mixing (especially with natural peanut butter), the ingredients were at very different temperatures, or the dip was overmixed. Make sure your peanut butter is smooth and well-incorporated before adding it to the yogurt, and try to have all ingredients at a similar temperature.
How can I make this dip thicker?
Add more peanut butter a tablespoon at a time, refrigerate for longer (it thickens as it chills), or add a tablespoon of ground flaxseed or chia seeds which will absorb moisture. You can also use a thicker Greek yogurt brand—some are much thicker than others.
Can kids eat this?
Yes! This is a great snack for kids as it provides protein, calcium, and healthy fats. However, be cautious with children under three due to the choking hazard of peanut butter, and obviously avoid this if your child has peanut allergies. Many parents love this recipe because it’s an easy way to get protein into picky eaters.
What’s the best peanut butter to use?
Natural peanut butter (ingredients should be just peanuts and maybe salt) provides the cleanest flavor and is healthiest. However, traditional peanut butter brands work fine too—they’re easier to mix and the dip will be slightly sweeter. Avoid “low-fat” peanut butter as it often contains added sugars and won’t provide the creamy texture you want.
Can I reduce the sugar in this recipe?
Definitely! The honey is adjustable to your taste. Start with just 1 tablespoon and add more only if needed. You can also use stevia drops for a zero-calorie sweetener option, or omit sweetener entirely if you’re pairing it with sweet fruits or cookies. The peanut butter provides some natural sweetness on its own.
Conclusion
There you have it—the ultimate Peanut Butter Yogurt Dip that’s about to revolutionize your snacking game! This simple yet incredibly delicious recipe proves that healthy eating doesn’t have to be complicated or time-consuming. In just 5 minutes with ingredients you likely already have in your kitchen, you can create a protein-packed dip that works for breakfast, snacks, dessert, or entertaining.
What I love most about this recipe is its versatility. Whether you’re packing school lunches, prepping snacks for the week, looking for a post-workout protein boost, or need a crowd-pleasing appetizer, this dip delivers every single time. It’s the rare recipe that genuinely pleases everyone—from health-conscious adults to picky toddlers, from fitness enthusiasts to dessert lovers.
The beauty of this easy peanut butter dip lies in its simplicity and adaptability. Make it sweet or savory, chocolatey or cinnamon-spiced, smooth or chunky—it’s your canvas. And knowing that each creamy, delicious bite is delivering protein, probiotics, and healthy fats makes it taste even better.
I’d love to hear how your Peanut Butter Yogurt Dip turns out! Did you try any of the variations? What did you serve it with? Leave a comment below sharing your experience, and don’t forget to rate this recipe if you loved it. Your feedback helps other home cooks discover this amazing recipe too.
Pin this recipe to your Pinterest boards so you can find it easily whenever that snack craving hits! Save it to your “Healthy Snacks,” “Quick Recipes,” or “Meal Prep Ideas” boards—you’ll be making this over and over again.
If you loved this recipe, you might also enjoy browsing through our other quick and healthy snack ideas. Be sure to subscribe to our newsletter for more simple, delicious recipes delivered right to your inbox every week.
Now grab that Greek yogurt and peanut butter, and let’s get dipping! Your new favorite snack is just 5 minutes away. Happy snacking, friends!