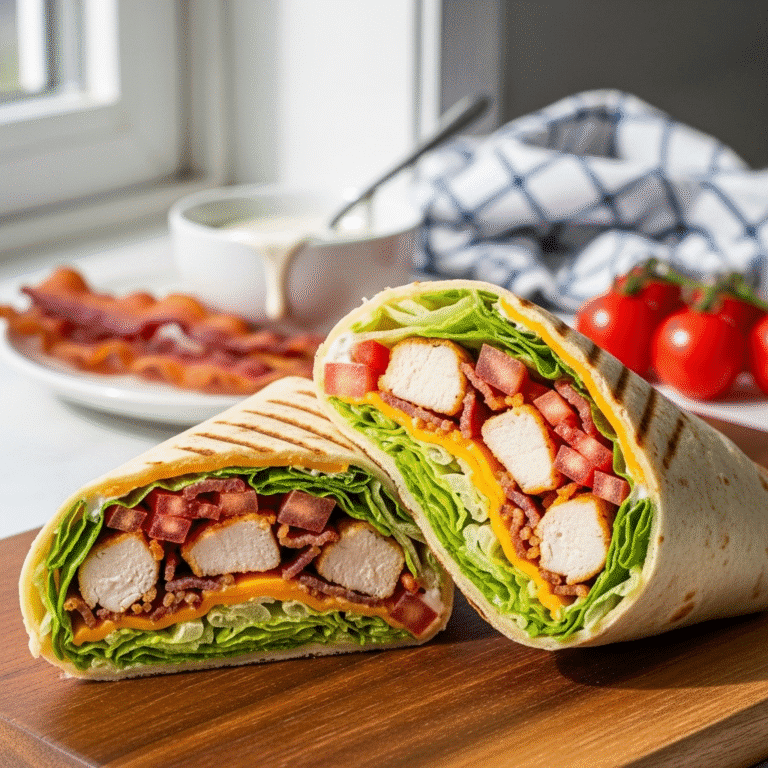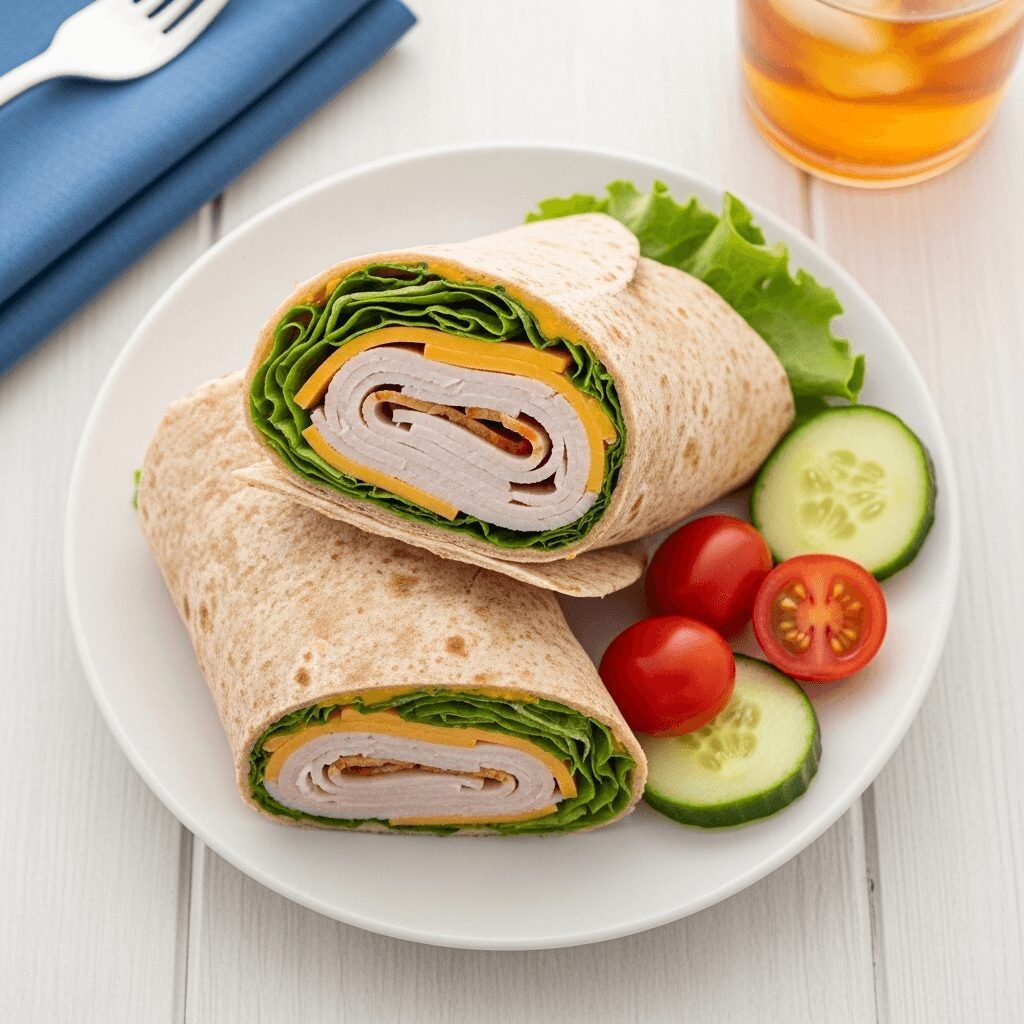
Turkey Cheese Wrap Recipe: The Ultimate Easy Lunch in 5 Minutes

If you’re searching for the perfect quick lunch that’s both satisfying and healthy, this turkey cheese wrap is about to become your new best friend! Imagine tender slices of deli turkey, your favorite cheese, crisp lettuce, juicy tomatoes, and a delicious spread all wrapped up in a soft tortilla that you can make in just minutes. These easy turkey wraps are the ultimate solution for busy weekdays, meal prep Sundays, school lunches, or those days when you need something delicious but don’t have time to cook. Trust me, once you discover how simple and customizable these homemade turkey wraps are, you’ll wonder why you ever bought expensive pre-made sandwiches!
Introduction of Recipe
Turkey cheese wraps are simple, no-cook sandwiches made by layering sliced deli turkey, cheese, fresh vegetables, and flavorful spreads in a soft flour tortilla, then rolling everything into a portable, handheld meal. This easy turkey wrap recipe combines protein-rich turkey with creamy cheese, crunchy vegetables, and your choice of condiments to create a balanced, satisfying lunch that takes less than 5 minutes to assemble.
What makes these healthy turkey wraps so incredibly popular is their unbeatable convenience combined with endless customization options. They require zero cooking, can be made with whatever ingredients you have on hand, and travel beautifully in lunch boxes, coolers, or bags. Unlike traditional sandwiches, wraps hold together better, contain less bread (making them lighter), and somehow just taste more interesting and fun to eat!
Serve these turkey and cheese wraps for weekday lunches (they’re meal prep superstars!), kids’ school lunches, office lunches, picnic outings, road trip snacks, post-workout meals, or quick dinners when you’re too tired to cook. They’re ideal for busy parents, college students, meal preppers, anyone trying to eat healthier, or literally anyone who needs to eat but doesn’t have time to fuss in the kitchen. These wraps are also perfect for using up leftover Thanksgiving turkey, making them a year-round favorite with special popularity during the holiday season!
History / Background
The turkey cheese wrap is a modern American convenience food that emerged from the intersection of several cultural food traditions and the evolution of grab-and-go eating in the late 20th century. To understand where turkey wraps came from, we need to explore both the history of the wrap sandwich format and America’s love affair with turkey as an everyday protein.
Turkey as a sandwich filling has deep American roots. While turkey has been consumed in North America for thousands of years by indigenous peoples, the concept of sliced turkey in sandwiches really took off in the mid-20th century. The development of commercial turkey farms, improved refrigeration, and the advent of pre-sliced deli meats in the 1950s-1960s made turkey accessible as an everyday protein, not just a holiday centerpiece. Turkey became particularly popular in the health-conscious 1980s and 1990s as a lean alternative to fatty luncheon meats like bologna and salami.
The “wrap” format itself has an interesting multicultural background. While flatbreads have been used to hold food for millennia across countless cultures—from Indian chapati to Mexican tortillas to Middle Eastern pita—the modern “wrap sandwich” is distinctly American. The wrap trend exploded in California in the late 1980s and early 1990s, particularly in San Francisco and Los Angeles, where food trucks and health-conscious restaurants began offering colorful, vegetable-packed wraps as lighter alternatives to traditional sandwiches.
Bobby Valentine, a former Major League Baseball manager, is sometimes credited with popularizing wraps in the Northeast. According to food lore, in 1979, while managing a minor league team in Stamford, Connecticut, his restaurant ran out of bread and he improvised by using tortillas instead, creating what he called the “Bobby Valentine.” Whether this story is entirely accurate or partly legend, wraps certainly gained mainstream popularity throughout the 1990s.
By the mid-to-late 1990s, wrap sandwiches were everywhere—in cafeterias, delis, fast-food chains, and home kitchens across America. Subway introduced wraps in the early 2000s, cementing their place in mainstream American food culture. The turkey wrap became particularly popular because it checked all the boxes: high protein, low fat, customizable, portable, and quick to make.
What makes the turkey cheese wrap special today is how it represents the modern American approach to food: quick but not necessarily “fast food,” healthy but satisfying, convenient but customizable, and accessible to anyone regardless of cooking skills. It’s democratized good eating—you don’t need to be a chef or have a fancy kitchen to make a delicious, nourishing meal. The turkey wrap embodies our desire for food that fits our busy lives while still tasting great and making us feel good about what we’re eating.
Why You’ll Love This Recipe
These easy turkey cheese wraps are the definition of simple, satisfying, and versatile eating! The combination of savory turkey, melty cheese, crisp vegetables, and flavorful spreads creates a perfectly balanced meal that somehow manages to be both light and filling at the same time. Every bite delivers protein, vegetables, and just enough carbs to keep you energized without weighing you down.
Here’s why these turkey wraps deserve a permanent spot in your meal rotation:
- Lightning Fast: Ready in 5 minutes or less—no cooking required!
- Perfect for Meal Prep: Make several at once and have lunch ready all week
- Budget-Friendly: Uses affordable deli turkey and simple ingredients
- Kid-Approved: Even picky eaters love these customizable wraps
- High Protein: Keeps you full and satisfied for hours
- Endlessly Customizable: Change flavors based on what you have or crave
- Portable: Perfect for lunchboxes, road trips, and eating on-the-go
- Healthier Than Fast Food: Control ingredients and portions
- No Special Equipment: Just need a cutting board and knife
- Great for Using Leftovers: Perfect for leftover Thanksgiving turkey
- Low Carb Option: Use low-carb tortillas or lettuce wraps
- Year-Round Favorite: Works for any season or occasion
- Beginner-Friendly: Absolutely foolproof—anyone can make these!
Ingredient Notes
Understanding your ingredients helps you create the best possible turkey wraps and adapt them to your preferences:
Deli Turkey: The star of the show! Fresh-sliced turkey from the deli counter is vastly superior to pre-packaged turkey—it’s more flavorful, has better texture, and contains fewer preservatives. Ask for it sliced medium-thin for best results. Substitution: Rotisserie chicken, leftover Thanksgiving turkey, chicken breast, ham, or roast beef all work wonderfully. For vegetarian options, try hummus with extra vegetables or veggie deli slices.
Tortillas: Large flour tortillas (10-12 inches) are traditional and work beautifully because they’re soft, pliable, and have neutral flavor. Substitution: Whole wheat tortillas (healthier option with more fiber), spinach or tomato-flavored tortillas (visual appeal and extra nutrition), low-carb tortillas (for keto diets), or large lettuce leaves for completely carb-free wraps. Always warm tortillas slightly for easier rolling without cracking.
Cheese: Sliced cheese adds creaminess, richness, and helps bind ingredients together. Cheddar, Swiss, provolone, or American cheese are classic choices. Substitution: Pepper jack (for spice), mozzarella (mild and melty), Colby Jack (creamy and kid-friendly), or cream cheese spread (for tanginess). You can also use shredded cheese, though slices work better structurally.
Lettuce: Provides essential crunch and freshness. Romaine or iceberg work best because they’re crisp and sturdy. Substitution: Spinach leaves (more nutritious), mixed greens, arugula (peppery flavor), or coleslaw mix for extra crunch.
Tomatoes: Add juiciness, color, and fresh flavor. Roma or plum tomatoes are less watery than regular tomatoes. Substitution: Cherry tomatoes (halved), sun-dried tomatoes (concentrated flavor), roasted red peppers, or simply omit if packing wraps ahead to prevent sogginess.
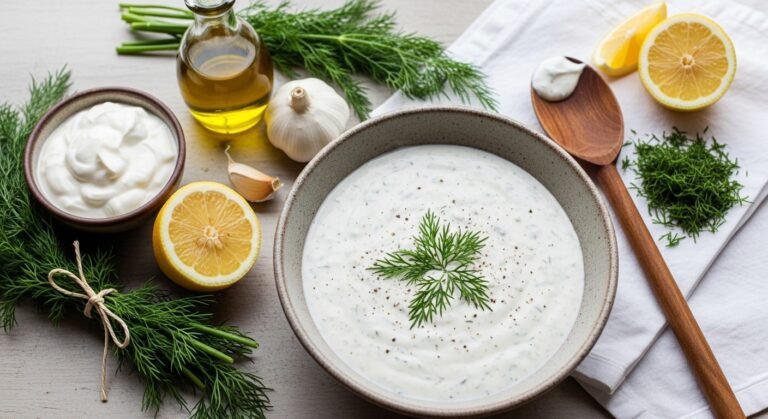
Spreads and Condiments: This is where you add moisture and flavor! Mayo, mustard, ranch dressing, or hummus are popular choices. Options: Pesto, tzatziki, avocado or guacamole, cream cheese, buffalo sauce, honey mustard, Italian dressing, or barbecue sauce. The spread keeps the wrap from being dry and adds tons of flavor.
Optional Add-Ins: Bacon (crispy bacon makes everything better!), avocado slices (creamy and healthy), pickles, red onion, cucumber, bell peppers, sprouts, or shredded carrots all add texture, nutrition, and flavor variety.
Equipment Needed
You’ll need minimal equipment for these no-cook wraps—just the basics:
- Cutting Board
- Sharp Knife (for slicing vegetables and cutting finished wraps)
- Plate or Clean Work Surface (for assembling wraps)
- Paper Towels (for drying vegetables)
- Optional: Panini Press or Skillet (if making grilled/toasted wraps)
- Plastic Wrap or Parchment Paper (for wrapping and storing)
- Airtight Containers (for meal prep storage)
That’s it! No cooking equipment needed, which is part of what makes these so incredibly convenient.
Print
Turkey Cheese Wrap Recipe
This easy turkey cheese wrap takes just 5 minutes to make! Layered with deli turkey, cheese, crisp vegetables, and your favorite spreads, it’s the perfect quick lunch that’s healthy, satisfying, and completely customizable.
- Total Time: 5 minutes
- Yield: 1 wrap (easily multiplied) 1x
Ingredients
For One Turkey Wrap:
- 1 large flour tortilla (10-12 inches)
- 4-6 slices deli turkey (about 4 ounces)
- 2 slices cheese (cheddar, Swiss, provolone, or your choice)
- 2-3 large lettuce leaves (romaine or iceberg)
- 3-4 tomato slices
- 2-3 tablespoons mayonnaise, mustard, or your preferred spread
- Optional: 2 strips cooked bacon
- Optional: ¼ avocado, sliced
- Optional: 2-3 pickle slices
- Optional: thin red onion slices
- Optional: 2-3 tablespoons shredded carrots
Popular Spread Combinations:
- Classic: 2 tablespoons mayo + 1 tablespoon Dijon mustard
- Ranch: 2-3 tablespoons ranch dressing
- Healthy: 2-3 tablespoons hummus
- Spicy: 2 tablespoons mayo mixed with 1 teaspoon sriracha
- Tangy: 2 tablespoons cream cheese + 1 tablespoon honey mustard
Instructions
- Prep Your Ingredients: Start by gathering and preparing all your ingredients. If your tomatoes are particularly juicy, slice them and place on paper towels to drain excess moisture—this prevents soggy wraps. Wash and dry your lettuce thoroughly, patting with paper towels to remove all water. If using bacon, cook it until crispy and drain on paper towels. Having everything ready before you start assembling makes the process quick and smooth.
- Warm the Tortilla (Optional but Recommended): For the most pliable, easy-to-roll wrap that won’t crack, warm your tortilla slightly. You can do this several ways: microwave it wrapped in a damp paper towel for 15-20 seconds, heat it directly over a gas burner for 10-15 seconds per side, or warm it in a dry skillet over medium heat for about 20 seconds per side. Warm tortillas are significantly easier to roll without tearing. If you’re in a huge rush, you can skip this step, but warming really does help!
- Lay Out Your Tortilla: Place your tortilla flat on a clean cutting board or plate. Position it so you’ll be rolling from the bottom up—the side closest to you will be where you start rolling.
- Spread Your Condiments: Using a butter knife or spoon, spread your chosen condiment(s) across the center of the tortilla in a horizontal band, leaving about 2 inches clear on the left and right sides and about 1 inch clear at the top and bottom. This spread acts as a flavor base and helps other ingredients stick to the tortilla. Don’t spread condiments all the way to the edges or they’ll squeeze out when you roll. If using multiple spreads (like mayo and mustard), you can spread them together or in layers.
- Layer the Lettuce: Place your lettuce leaves on top of the spread in the center of the tortilla. The lettuce acts as a protective barrier between the tortilla and wetter ingredients like tomatoes, helping prevent sogginess—especially important if you’re making these ahead for meal prep. Arrange the lettuce in a horizontal line across the middle, covering the area where your other fillings will go.
- Add the Turkey: Layer your turkey slices on top of the lettuce. Don’t just stack them flat—fan them out or slightly fold them for better texture and distribution. You want even coverage across the center area, but remember not to overfill. Four to six slices (about 4 ounces) is the sweet spot—enough to be substantial but not so much that the wrap won’t close.
- Add the Cheese: Place your cheese slices over the turkey. If using sliced cheese, you might need to tear or fold the slices to fit nicely. The cheese will help bind everything together, especially if you decide to grill or toast the wrap. Position the cheese so it covers most of the turkey surface.
- Add Vegetables and Extras: Now add your tomato slices, arranging them in a line down the center. If using bacon, lay the strips on top of the cheese. Add any other extras you’re including—avocado slices, pickles, onions, carrots, cucumbers, or peppers. Remember, less is more when it comes to rolling—too many fillings make wraps impossible to roll and messy to eat.
- The Rolling Technique: Here’s the crucial step that makes or breaks your wrap! First, fold the left and right sides of the tortilla toward the center (about 1-2 inches on each side). These folded edges will act as barriers to keep fillings from falling out the ends. Next, starting from the bottom edge (the side closest to you), fold it up and over the fillings. Use your fingers to tuck the fillings in as you start the roll, keeping everything tight and compact. Continue rolling away from you, keeping tension so the wrap stays tight and compressed. Roll all the way to the top edge, creating a complete cylinder. The tighter you roll, the better the wrap will hold together.
- Secure and Slice: Once rolled, you can secure your wrap with a toothpick or simply keep the seam side down. For easier eating and a beautiful presentation, use a sharp serrated knife to cut the wrap in half diagonally. Cutting on a diagonal creates two pointed ends that look more appealing and are easier to eat. If you’re packing this for later, wrap it tightly in plastic wrap or parchment paper to keep it together and fresh.
- Optional: Grill or Toast: For a warm, crispy turkey wrap with melted cheese, heat a skillet or panini press over medium heat. Lightly brush the outside of your rolled wrap with olive oil or butter, or spray with cooking spray. Place the wrap seam-side down in the heated skillet and cook for 2-3 minutes per side, or until golden brown and the cheese is melted. If using a panini press, cook for 3-4 minutes total. This step is completely optional but transforms the wrap into something really special!
- Serve: Serve your wrap immediately, or wrap it tightly and refrigerate for up to 24 hours. These wraps are best enjoyed within a few hours of making for optimal texture and freshness.
Notes
- Don’t Overfill: The most common mistake is adding too much filling. Stick to the amounts listed—about 4 ounces of turkey, 2 slices of cheese, and modest amounts of vegetables. Overfilled wraps won’t roll properly and fall apart when eating.
- Dry Your Vegetables: Pat tomatoes, lettuce, and any other vegetables completely dry with paper towels. Excess moisture is the enemy of a good wrap and causes sogginess.
- Warm Your Tortilla: This 20-second step makes rolling dramatically easier and prevents cracking. Cold tortillas from the refrigerator are stiff and prone to tearing.
- Lettuce Barrier: Always put lettuce between the tortilla and wetter ingredients like tomatoes. This protective layer significantly reduces sogginess.
- Tight Rolling: Keep tension as you roll, tucking ingredients inward. A tight roll means ingredients won’t fall out and the wrap stays together.
- Make-Ahead: These wraps are fine for 4-6 hours when tightly wrapped and refrigerated. For longer storage, pack components separately and assemble when ready to eat.
- Scaling: To make multiple wraps for meal prep, set up an assembly line with all ingredients and make 4-5 at once. Takes about 15-20 minutes total.
- Prep Time: 5 minutes
- Cook Time: 0 minutes
Nutrition
- Serving Size: 1 wrap
- Calories: 420
- Sugar: 4g
- Sodium: 1180mg
- Fat: 18g
- Saturated Fat: 7g
- Unsaturated Fat: 10g
- Trans Fat: 0g
- Carbohydrates: 38g
- Fiber: 3g
- Protein: 28g
- Cholesterol: 65mg
Tips & Variations
The beauty of turkey cheese wraps is their incredible versatility—customize them endlessly to match your tastes or dietary needs:
Flavor Variations:
- Classic Club Wrap: Turkey, bacon, lettuce, tomato, mayo, and avocado
- Ranch Turkey Wrap: Ranch dressing, turkey, bacon, cheese, lettuce, and tomato
- California Turkey Wrap: Turkey, avocado, sprouts, cucumber, Swiss cheese, and hummus
- Southwest Turkey Wrap: Turkey, pepper jack cheese, salsa, sour cream, and shredded lettuce
- Buffalo Turkey Wrap: Mix mayo with buffalo sauce, add turkey, blue cheese crumbles, and celery
- Italian Turkey Wrap: Add Italian dressing, pepperoncini, red onion, and provolone
- Cranberry Turkey Wrap: Add cranberry sauce, cream cheese, and spinach for holiday vibes
Protein Swaps:
- Chicken Caesar Wrap: Grilled chicken, romaine, parmesan, and Caesar dressing
- Ham and Cheese: Substitute ham for turkey with Swiss cheese and honey mustard
- Roast Beef: Use roast beef with cheddar, horseradish mayo, and caramelized onions
- Tuna Salad Wrap: Tuna salad, lettuce, and tomato
- Veggie Wrap: Hummus, roasted vegetables, feta, and spinach (no meat)
Dietary Adaptations:
- Low-Carb/Keto Turkey Wrap: Use low-carb tortillas or large lettuce leaves as wraps, add extra cheese and avocado
- Gluten-Free: Use certified gluten-free tortillas
- Dairy-Free: Omit cheese or use dairy-free cheese alternatives
- Lighter Version: Use light mayo or replace with hummus, skip cheese, load up on vegetables
- High-Protein: Use high-protein tortillas, add extra turkey, include hard-boiled egg slices
Temperature Variations:
- Cold Wrap: Traditional, fresh, and crisp (described in main recipe)
- Grilled Wrap: Toast in a skillet or panini press for warm, melty goodness
- Breakfast Turkey Wrap: Add scrambled eggs and breakfast cheese
Vegetable Add-Ins:
- Roasted red peppers (sweet and smoky)
- Shredded carrots (crunch and color)
- Cucumber slices (refreshing coolness)
- Bell pepper strips (sweet crunch)
- Baby spinach (more nutritious than lettuce)
- Coleslaw (pre-made slaw adds crunch and creaminess)
- Sprouts (alfalfa or bean sprouts for texture)
Pro Chef Tips
Elevate your turkey wraps from basic to extraordinary with these professional techniques:
1. The Salt-and-Drain Technique: If you’re including tomatoes and want your wrap to stay fresh for several hours, lightly salt your tomato slices and let them sit on paper towels for 10 minutes before assembly. This draws out excess moisture that would otherwise make your wrap soggy. Pat them completely dry before adding to your wrap. This restaurant technique makes a significant difference in wrap longevity, especially for meal prep.
2. Strategic Spread Application: Don’t just slap condiments randomly on the tortilla. Create a “glue zone” by spreading your condiment in a horizontal rectangle across the center of the tortilla, leaving clear margins on all sides. This ensures every bite has flavor while preventing squeezing-out when you roll. Professional wrap makers also slightly warm mayo or cream cheese spreads for easier, more even application.
3. Shingle Your Turkey: Instead of stacking turkey slices in a pile, overlap them in a shingle pattern (like roof tiles) across the tortilla. This creates even distribution, better texture, and ensures every bite contains turkey. Bunched or piled turkey creates thick spots that make rolling difficult and eating uneven.
4. The Compression Roll: Here’s the professional rolling technique: After folding the sides in, use the heel of your palm to gently press down on the filling as you begin your roll from the bottom. This compression creates a denser, more stable wrap that holds together beautifully. Continue applying gentle downward pressure as you roll forward, maintaining tension the entire way.
5. Proper Cutting Technique: Always use a sharp serrated knife and a sawing motion to cut wraps—never press straight down, which squishes everything and causes fillings to squirt out. For the cleanest cut, if you have time, refrigerate the wrapped wrap for 15 minutes before cutting. This firms everything up and makes slicing much cleaner and prettier.
6. The Double-Layer Trick: For wraps that need to survive several hours in a lunch box or bag, use two smaller tortillas instead of one large one. Place your filling on one tortilla, roll it, then wrap that entire rolled wrap in a second tortilla. This double-wrap method provides extra protection and structure, preventing leaks and maintaining freshness longer.
7. Toast for Next-Level Flavor: Even if you’re serving a “cold” wrap, lightly toasting the tortilla before assembly (15-20 seconds per side in a dry skillet) adds subtle flavor and creates a slightly more moisture-resistant surface. It takes just 30 seconds but adds a professional touch. Just let it cool completely before adding fillings.
Common Mistakes to Avoid
Even though turkey wraps are incredibly simple, these common errors can sabotage your success:
1. Overstuffing the Wrap: This is by far the most common mistake! More filling seems better, but overstuffed wraps are impossible to roll, fall apart when eating, and result in a frustrating mess. Stick to the recommended amounts: 4-6 slices of turkey (about 4 ounces), 2 slices of cheese, modest vegetables. A properly filled wrap should have ingredients in a 2-3 inch wide band across the center, not piled high or covering the entire tortilla. Less is more here—trust the process!
2. Using Cold, Stiff Tortillas: Rolling cold tortillas straight from the refrigerator almost always results in cracking and tearing along the fold lines. Cold tortillas are stiff and inflexible. Always warm your tortillas for 15-30 seconds before assembling—this makes them soft, pliable, and cooperative. This simple 20-second step prevents so much frustration and wasted tortillas!
3. Wet Ingredients Without Precaution: Adding wet tomatoes, pickles, or juicy vegetables directly to your wrap without drying them or using a lettuce barrier creates soggy wraps within an hour or two. Always pat vegetables thoroughly dry with paper towels. Use lettuce or spinach as a protective layer between the tortilla and wet ingredients. For meal prep, consider packing wet items separately and adding them just before eating.
4. Poor Rolling Technique: Many people try to roll wraps like burritos, just rolling from one end without folding the sides first. This creates wraps that leak filling from both ends. The correct method: fold sides in first (creating barriers), then roll from bottom to top while maintaining tension and tucking fillings inward as you go. Practice makes perfect—your first few might be messy, but you’ll get the hang of it quickly!
5. Cutting Immediately After Rolling: If you cut your wrap immediately after rolling, especially with a dull knife or by pressing down instead of sawing, you’ll squish everything and cause fillings to squirt out. For the cleanest cuts, either use a very sharp serrated knife with a gentle sawing motion, or better yet, wrap your finished wrap in plastic wrap and refrigerate for 10-15 minutes before cutting. This allows everything to settle and firm up, resulting in much cleaner slices.
Storage & Meal Prep
Turkey cheese wraps are excellent for meal prep when stored correctly:
Assembled Wrap Storage: Fully assembled wraps can be stored in the refrigerator for up to 24 hours maximum, though they’re best within 4-6 hours. Wrap each wrap tightly in plastic wrap or parchment paper, making sure it’s completely sealed. Store in an airtight container for extra protection. The lettuce barrier and properly dried vegetables help extend freshness, but moisture will gradually soften the tortilla no matter what you do.
Component Storage (Best Method): For the freshest wraps, especially if meal prepping for several days, store all components separately and assemble just before eating. Slice your deli turkey and store in an airtight container for up to 5 days. Keep cheese in its original packaging or wrapped well. Prep vegetables and store in separate containers lined with paper towels (to absorb moisture) for up to 3 days. Keep spreads in small containers. This method takes slightly more planning but results in wraps that taste freshly made!
Preventing Soggy Wraps: To maximize wrap longevity when storing assembled wraps, follow these steps: use extra lettuce as a moisture barrier, pat all vegetables bone-dry, don’t add tomatoes to wraps being stored longer than 2-3 hours (pack separately), use less condiment than you think you need (you can always add more when eating), and wrap very tightly in plastic wrap to prevent air exposure.
Lunchbox Packing: If packing turkey wraps for school or office lunches, assemble them the night before or morning of, wrap tightly in plastic wrap or parchment paper, and pack in an insulated lunchbox with an ice pack. For absolute best results, pack spreads and tomatoes in small separate containers and add them just before eating. The wrap will stay fresh and crisp this way.
Leftover Turkey: These wraps are fantastic for using up leftover Thanksgiving or rotisserie chicken turkey. Slice or shred the cooked turkey and store in an airtight container for up to 4 days. Use it just like deli turkey in your wraps!
Make-Ahead & Freezer Notes
Turkey wraps work well for advance preparation with the right strategy:
Morning Meal Prep: The ideal make-ahead window is assembling wraps in the morning for lunch that same day. Make your wraps in the morning, wrap each tightly in plastic wrap or parchment paper, and refrigerate until lunch time. They’ll stay fresh and maintain good texture for 6-8 hours when properly wrapped and kept cold.
Night-Before Prep: You can assemble turkey wraps the night before, but texture will be slightly softer by lunchtime the next day. To minimize sogginess, use extra lettuce as a barrier, skip tomatoes and add them fresh before eating, use less condiment, and wrap very tightly. Store in the refrigerator overnight.
Component Prep: The best make-ahead strategy is prepping all components separately. Slice all your vegetables on Sunday, cook bacon if using, portion out deli turkey and cheese into individual servings, and store everything in separate containers. Each morning (or whenever you need a wrap), assembly takes just 2-3 minutes. Components stay fresh for 3-5 days when stored properly.
Freezing Considerations: Unfortunately, fully assembled turkey wraps with fresh vegetables don’t freeze well at all. The high water content in lettuce, tomatoes, and cucumbers causes them to become mushy and waterlogged when thawed, resulting in soggy, unappetizing wraps. The texture of the tortilla also suffers after freezing.
What You CAN Freeze: While you can’t freeze assembled wraps with fresh vegetables, you can freeze certain components. Cooked bacon freezes excellently for up to 3 months—cook a big batch, freeze in portions, and reheat as needed. Cheese can be frozen for up to 3 months (texture changes slightly but still fine for wraps). Some spreads like cream cheese-based mixtures freeze okay. Tortillas also freeze well—just thaw overnight in the refrigerator before using.
Best Approach for Meal Prep: For maximum convenience, prep components on Sunday for the week ahead. Store everything separately and create an “assembly station” in your refrigerator with all wrap ingredients easily accessible. Each morning, you can make a fresh wrap in under 5 minutes, and it will taste infinitely better than a pre-assembled one that’s been sitting for days.
Serving Suggestions
Turkey cheese wraps pair beautifully with numerous sides to create a complete, satisfying meal:
Classic Side Pairings:
- Potato Chips or Pretzels: Classic lunch combo—the crunch contrasts perfectly with soft wraps
- Fresh Fruit: Apple slices, grapes, berries, or fruit salad add natural sweetness and nutrition
- Vegetable Sticks with Dip: Carrot sticks, celery, bell peppers with ranch or hummus
- Pickle Spears: Dill pickles or pickle chips on the side add tangy crunch
- Coleslaw: Creamy or vinegar-based slaw complements turkey beautifully
Soup Pairings:
- Tomato Soup: Classic comfort food combination
- Chicken Noodle Soup: Light and satisfying alongside a turkey wrap
- Broccoli Cheddar Soup: Creamy and comforting
- Minestrone: Italian vegetable soup adds heartiness
- French Onion Soup: Rich and flavorful pairing for cold days
Salad Sides:
- Simple Green Salad: Mixed greens with vinaigrette adds freshness
- Caesar Salad: Classic pairing with any sandwich or wrap
- Pasta Salad: Cold pasta salad with Italian dressing
- Potato Salad: Creamy potato salad for picnics and gatherings
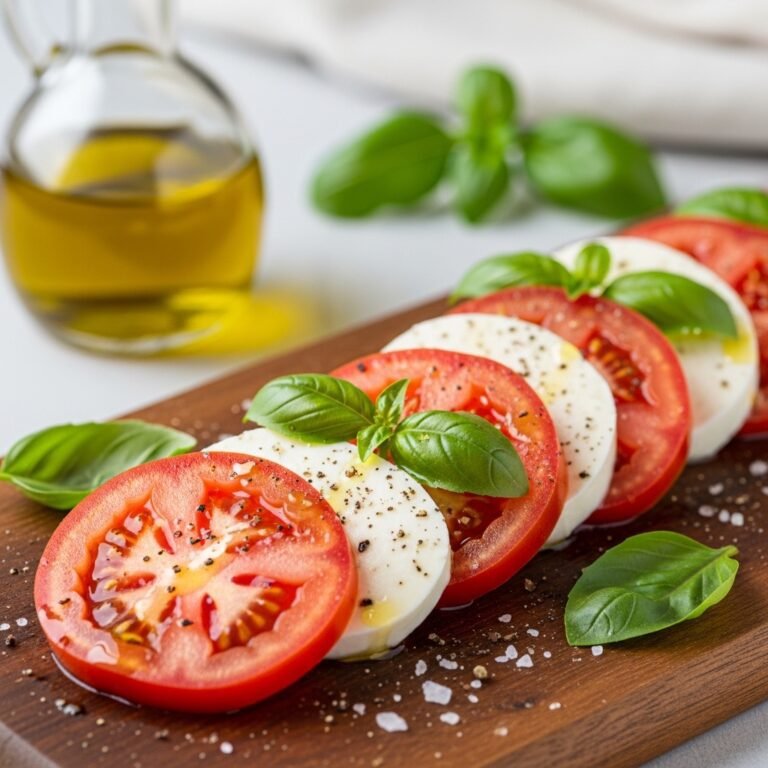
- Caprese Salad: Fresh mozzarella, tomatoes, and basil
Healthier Sides:
- Hummus and Vegetables: Carrot sticks, celery, bell peppers with hummus
- Greek Yogurt with Berries: Protein-rich, refreshing side
- Trail Mix: Nuts, dried fruit, and dark chocolate for energy
- Edamame: Steamed and lightly salted
- Apple Slices with Almond Butter: Sweet, crunchy, and protein-rich
Beverage Pairings:
- Iced Tea: Sweet or unsweetened, perfect refreshment
- Lemonade: Fresh and tangy
- Sparkling Water: Light and refreshing
- Coffee: For breakfast turkey wraps
- Smoothies: Fruit smoothies add nutrition
Complete Lunch Box: Create the perfect packed lunch by including: 1 turkey wrap cut in half, small bag of chips or crackers, fresh fruit or vegetable sticks, a small cookie or granola bar, and your favorite beverage. This balanced meal provides protein, vegetables, fruits, and just enough treats!
FAQs Section
Q: How long do turkey wraps last in the refrigerator?
A: Fully assembled turkey wraps with fresh vegetables stay fresh for about 4-6 hours at room temperature (in a lunch box) and up to 24 hours maximum when refrigerated, though they’re best within 6-8 hours. The tortilla gradually softens as it absorbs moisture from vegetables and spreads. For longest freshness, use extra lettuce as a barrier layer, pat all vegetables completely dry, and wrap tightly in plastic wrap. For meal prep lasting more than 24 hours, store components separately and assemble fresh when ready to eat.
Q: Can I make turkey wraps the night before?
A: Yes, you can make turkey wraps the night before for lunch the next day, though they won’t be quite as crisp as freshly made. To minimize sogginess: use extra lettuce as a moisture barrier, skip tomatoes and add them fresh before eating (pack separately), use less condiment than usual, pat all vegetables completely dry, wrap very tightly in plastic wrap, and refrigerate overnight. The wrap will be slightly softer but still good. For best results, pack wet ingredients separately and add just before eating.