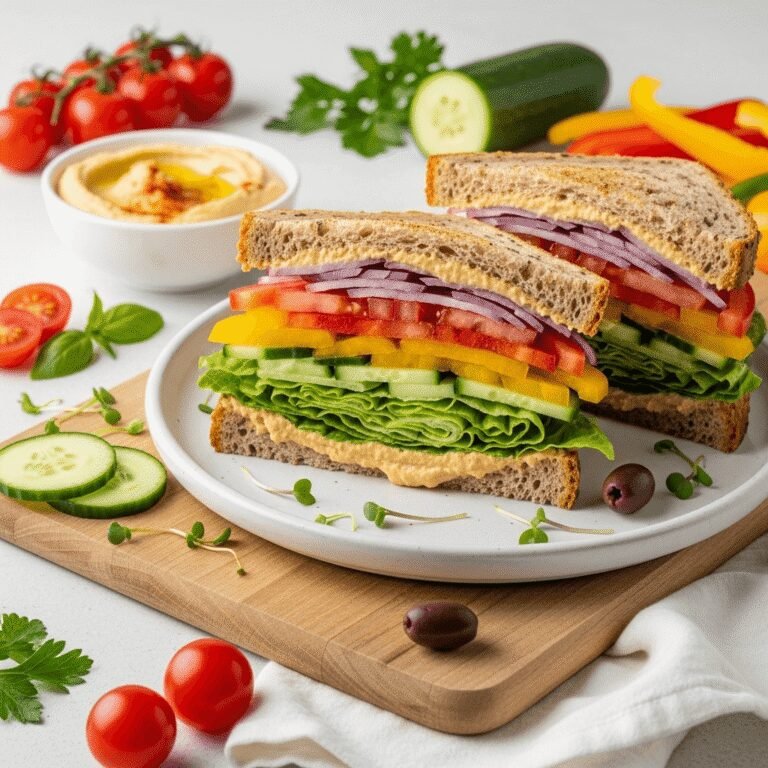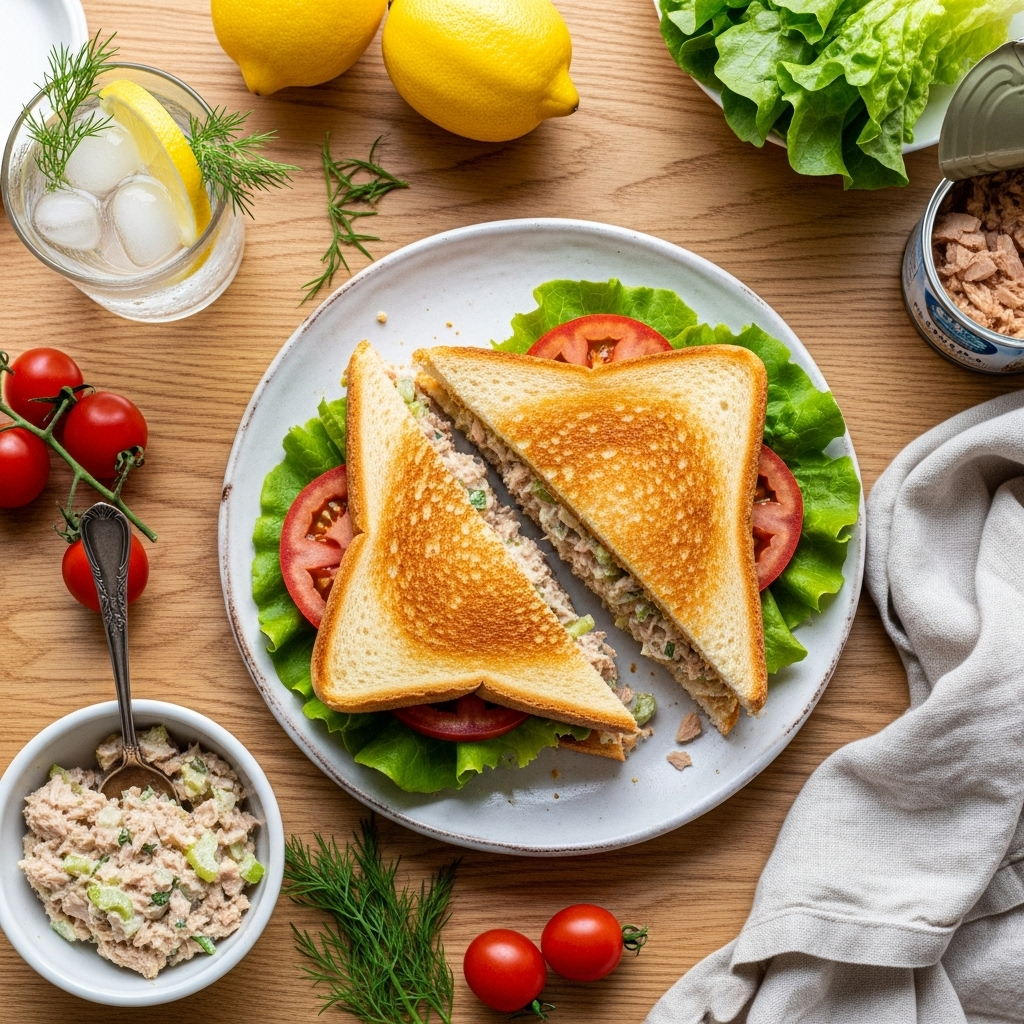
The Ultimate Tuna Mayo Sandwich Recipe: Easy, Creamy & Perfect Every Time

There’s something wonderfully comforting about a classic tuna mayo sandwich. This beloved staple has graced lunch boxes, picnic baskets, and quick weeknight dinners for generations, and for good reason. It’s the kind of recipe that comes together in mere minutes but delivers maximum satisfaction with every bite.
A tuna mayo sandwich is essentially flaked canned tuna mixed with creamy mayonnaise, often enhanced with crunchy celery, onions, and a squeeze of lemon juice, all nestled between two slices of your favorite bread. It’s the perfect solution when you need something quick, nutritious, and absolutely delicious. Whether you’re packing lunches for the week, need a protein-packed post-workout meal, or simply want comfort food that doesn’t require turning on the stove, this easy tuna sandwich recipe has you covered.
This tuna salad sandwich is ideal for busy weekdays, casual lunches, picnics, potlucks, or anytime you need a reliable meal that everyone will love. It’s also incredibly versatile—serve it cold on soft white bread, toasted on whole wheat, tucked into a croissant, or even wrapped in lettuce for a low-carb option.
History / Background
The tuna sandwich as we know it today has fascinating roots in American culinary history. While tuna fish has been consumed for thousands of years across Mediterranean and Asian cultures, the canned tuna industry didn’t truly take off until the early 1900s. The story begins in Southern California around 1903, when sardine fishermen began canning the abundant albacore tuna swimming in Pacific waters.
However, it was the First World War that really catapulted canned tuna to household fame. As meat became rationed and expensive, canned tuna emerged as an affordable, shelf-stable protein source. By the 1920s and 1930s, home economists and cookbook authors began promoting canned tuna as a versatile ingredient for modern homemakers.
The addition of mayonnaise—which itself had become commercially available in the early 1900s thanks to brands like Hellmann’s—was a natural evolution. Mayonnaise provided moisture, creaminess, and richness that complemented tuna’s slightly dry texture perfectly. The combination became a Depression-era favorite because it stretched expensive protein with affordable mayo, creating a filling meal from humble ingredients.
By the mid-20th century, the tuna mayo sandwich had secured its place as an American classic. It appeared in school cafeterias, office lunch rooms, and family kitchens coast to coast. The post-World War II era saw the rise of convenient, quick meals, and the tuna sandwich fit perfectly into this new lifestyle. It became synonymous with efficiency, economy, and no-fuss nutrition—values that still resonate with home cooks today.
Why You’ll Love This Recipe
This homemade tuna mayo sandwich recipe strikes the perfect balance between simplicity and satisfaction. Unlike store-bought versions that can taste bland or overly processed, making your own allows you to control every element, from the quality of tuna to the perfect mayo-to-tuna ratio.
Here’s why this recipe will become your go-to:
- Lightning-fast preparation – Ready in just 10 minutes from start to finish, perfect for those hectic mornings or last-minute lunch needs
- Budget-friendly – Uses affordable pantry staples and canned tuna, making it one of the most economical meals you can prepare
- Protein-packed nutrition – Each sandwich delivers substantial protein to keep you full and energized throughout your day
- Endlessly customizable – Easy to adjust flavors, add vegetables, or modify to suit dietary preferences and taste buds
- No cooking required – Absolutely perfect for hot summer days when you want to avoid heating up the kitchen
- Meal prep champion – The tuna salad mixture stores beautifully, making it ideal for weekly meal preparation
- Kid-approved – Even picky eaters typically love this classic combination, making it a reliable family favorite
- Portable and packable – Travels well for work lunches, school cafeterias, picnics, and road trips
Ingredient Notes
Let’s talk about what makes this tuna sandwich recipe truly shine. Each ingredient plays an important role in creating that perfect creamy, flavorful filling.
Canned Tuna: The star of the show. You’ll want to choose between tuna packed in water or oil. Water-packed is lighter and allows the other flavors to shine, while oil-packed is richer and more flavorful. Solid white albacore has a milder taste and firmer texture, while chunk light tuna is more affordable and has a stronger flavor. Always drain thoroughly to avoid a watery mixture. For sustainability-conscious cooks, look for “pole and line caught” or “dolphin-safe” labels.
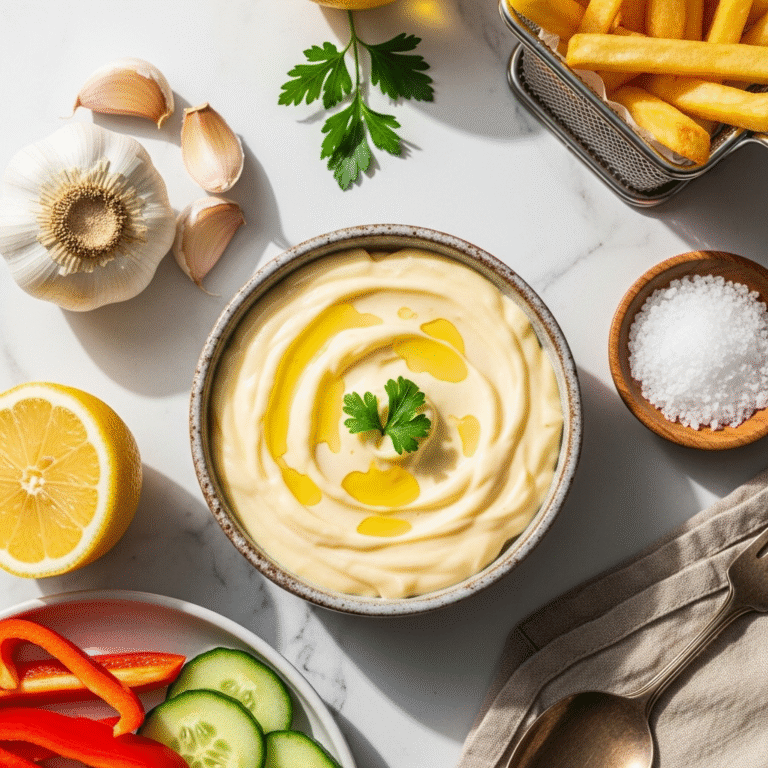
Mayonnaise: This provides the essential creaminess and binds everything together. Use full-fat mayo for the richest flavor—low-fat versions can make the mixture taste thin or tangy. Brands like Hellmann’s, Duke’s, or Kewpie (Japanese mayo) each bring slightly different flavors. If you’re avoiding eggs, vegan mayo works beautifully as a substitute.
Celery: Adds crucial crunch and freshness. The crisp texture contrasts perfectly with the creamy tuna mixture. If you don’t have celery, try diced cucumber, bell peppers, or even apple for a sweet crunch.
Red Onion: Brings a sharp, slightly sweet bite that cuts through the richness. Red onion is milder than white or yellow varieties. If raw onion is too strong for your taste, try green onions (scallions) or even a tiny bit of onion powder.
Lemon Juice: Brightens the entire mixture and adds acidity to balance the rich mayo. Fresh is always best, but bottled lemon juice works in a pinch. Lime juice or a splash of pickle juice are excellent alternatives.
Dijon Mustard: Optional but highly recommended—it adds depth and a subtle tang that elevates the flavor profile from good to great.
Bread: Your choice here is personal! Classic white bread is traditional and soft, whole wheat adds fiber and nuttiness, sourdough brings tang, and croissants make it feel luxurious. For low-carb diets, try lettuce wraps or cucumber slices.
Equipment Needed
The beauty of this tuna sandwich recipe is that you likely have everything you need already:
- Medium mixing bowl – For combining the tuna salad ingredients
- Fork – To flake the tuna and mix everything together
- Can opener – Unless you’re using pull-tab cans
- Sharp knife – For chopping celery and onions
- Cutting board – A clean workspace for prep
- Measuring cups and spoons – For accurate proportions (though this recipe is forgiving!)
- Small strainer or colander – To drain the tuna thoroughly
- Spoon or spatula – For spreading the mixture on bread
- Toaster or toaster oven (optional) – If you prefer your sandwich toasted
That’s it! No fancy gadgets, no specialized tools—just basic kitchen essentials that make this recipe accessible to everyone.
Print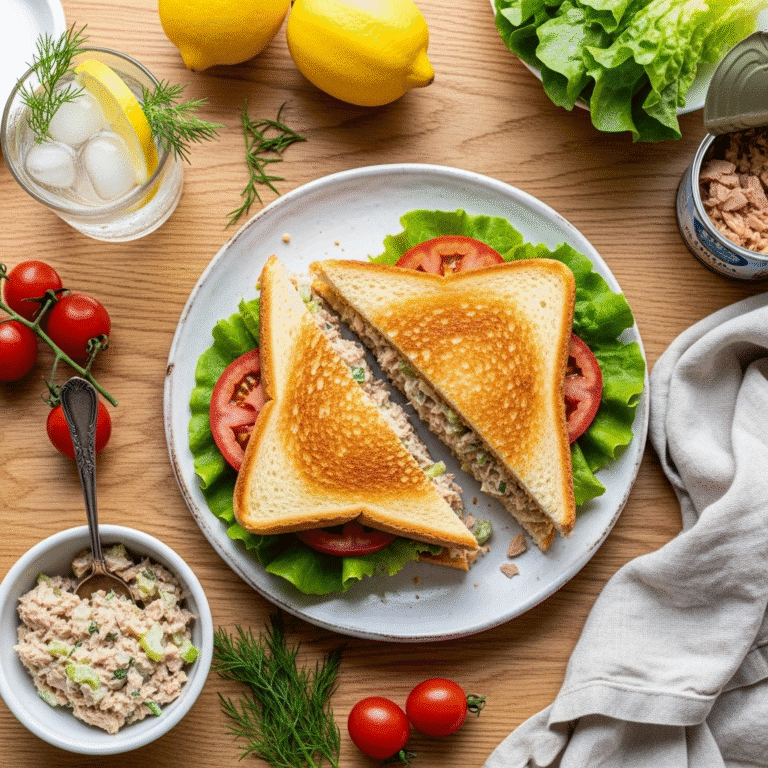
Tuna Mayo Sandwich Recipe
This classic tuna mayo sandwich recipe features flaky tuna mixed with creamy mayonnaise, crunchy celery, and zesty lemon juice for the perfect quick lunch or easy dinner. Ready in just 10 minutes with simple pantry ingredients!
- Total Time: 10 minutes
- Yield: 4 sandwiches (or 2 generous servings) 1x
Ingredients
For the Tuna Salad:
- 2 (5-ounce) cans tuna, drained well
- ⅓ cup mayonnaise (adjust to your preferred creaminess)
- 2 tablespoons finely diced celery
- 2 tablespoons finely diced red onion
- 1 tablespoon fresh lemon juice
- 1 teaspoon Dijon mustard (optional)
- ¼ teaspoon garlic powder
- ¼ teaspoon black pepper
- ⅛ teaspoon salt (to taste)
- 1 tablespoon chopped fresh dill or parsley (optional)
For Assembly:
- 8 slices bread of your choice
- Lettuce leaves (butter lettuce or romaine)
- Tomato slices (optional)
- Sliced cheese (optional—cheddar, Swiss, or American work well)
Instructions
Step 1: Drain and Prepare the Tuna
Open your cans of tuna and drain them thoroughly by pressing down with a fork or using a small strainer. You want to remove as much liquid as possible—excess moisture will make your sandwich soggy. Transfer the drained tuna to a medium mixing bowl and use a fork to flake it into smaller, even pieces. This creates better texture and helps the mayonnaise coat every bite.
Step 2: Prepare Your Vegetables
While your tuna is draining, dice your celery and red onion into very small, uniform pieces—about ¼-inch or smaller. Small pieces distribute better throughout the mixture and provide crunch without overwhelming bites. If you’re sensitive to raw onion, you can rinse the diced pieces under cold water to mellow the flavor.
Step 3: Make the Tuna Salad
Add the mayonnaise to your flaked tuna and mix well with a fork until evenly combined and creamy. Add the diced celery, red onion, lemon juice, Dijon mustard (if using), garlic powder, black pepper, and salt. Fold everything together gently but thoroughly until all ingredients are well distributed. Taste and adjust seasoning—you might want more lemon juice for brightness, more mayo for creaminess, or more pepper for spice.
Step 4: Let It Rest (Optional but Recommended)
If you have time, cover the bowl and refrigerate the tuna salad for 15-30 minutes. This resting period allows the flavors to meld together beautifully and makes the mixture easier to spread. However, if you’re in a hurry, you can skip this step and proceed immediately.
Step 5: Assemble Your Sandwiches
Lay out your bread slices on a clean surface. If you’re toasting your bread, do that first and let it cool slightly. Place lettuce leaves on the bottom slice of each sandwich—this creates a barrier that prevents the bread from getting soggy. Divide the tuna salad evenly among your sandwiches, spreading it generously from edge to edge. Add tomato slices and cheese if desired. Top with the second slice of bread and press down gently.
Step 6: Cut and Serve
Cut each sandwich in half diagonally (or straight down the middle—your preference!). Serve immediately, or wrap tightly in plastic wrap or parchment paper if packing for later. Enjoy with your favorite chips, pickles, or fresh fruit on the side!
Notes
- Make it creamier: Add an extra tablespoon of mayo or a dollop of Greek yogurt for added creaminess and protein.
- Add more crunch: Try diced pickles, diced bell peppers, or even chopped nuts for additional texture.
- Spice it up: Add a pinch of cayenne pepper, hot sauce, or diced jalapeños for heat.
- The tuna salad mixture keeps well: Store in an airtight container in the refrigerator for up to 3 days. Don’t assemble sandwiches until you’re ready to eat to prevent soggy bread.
- Bread matters: Use fresh, quality bread for the best results. Stale bread will compromise the entire sandwich.
- Prep Time: 10 minutes
- Cook Time: 0 minutes
- Category: Sandwich
- Method: No-Cook
- Cuisine: American
- Diet: Gluten Free
Nutrition
- Serving Size: 1 sandwich (with 2 slices white bread)
- Calories: 385
- Sugar: 3g
- Sodium: 685mg
- Fat: 18g
- Saturated Fat: 3g
- Unsaturated Fat: 14g
- Trans Fat: 0g
- Carbohydrates: 28g
- Fiber: 2g
- Protein: 26g
- Cholesterol: 35mg
Tips & Variations
One of the best things about this tuna mayo sandwich is how easily you can customize it to suit your taste preferences and dietary needs.
For a Mediterranean Twist: Add chopped Kalamata olives, sun-dried tomatoes, crumbled feta cheese, and a sprinkle of dried oregano. Serve on toasted pita bread or focaccia for an elevated lunch experience.
Make it a Tuna Melt: After assembling your sandwich, butter the outside of the bread and grill it in a hot skillet until golden brown and the cheese melts. This transforms your cold sandwich into a warm, comforting meal that’s perfect for cooler weather.
Go Low-Carb: Skip the bread entirely and serve your tuna salad in lettuce cups, over a bed of greens, stuffed in tomatoes, or with cucumber slices. You can also use cloud bread or low-carb wraps for a lighter option.
Add Avocado: Mash half an avocado into your tuna mixture or slice it and layer it on your sandwich. The healthy fats and creamy texture complement tuna beautifully.
Try Different Herbs: Fresh dill is classic with tuna, but try basil, cilantro, tarragon, or chives for different flavor profiles. Each herb brings its own unique character to the dish.
Make it Sweet and Savory: Add a handful of halved grapes or diced apple to your tuna salad. The sweet fruit creates an interesting contrast with the savory tuna and adds refreshing juiciness.
Spicy Version: Mix in sriracha mayo, add diced jalapeños, include a pinch of red pepper flakes, or use pepper jack cheese for heat lovers.
Healthier Swap: Replace half the mayo with Greek yogurt to reduce calories while adding extra protein and probiotics. The tanginess works wonderfully with tuna.
Pro Chef Tips
Taking your tuna sandwich from good to exceptional comes down to these professional insights:
Quality matters with your tuna. While any canned tuna works, splurging on higher-quality brands makes a noticeable difference. Look for solid white albacore or even jarred Italian tuna packed in olive oil for restaurant-quality results.
Temperature is everything. Cold ingredients make better sandwiches. Keep your mayo, tuna salad, and any add-ins refrigerated until assembly. Cold tuna salad spreads more easily and tastes more refreshing than room-temperature mixture.
Don’t skip the acid. Lemon juice (or vinegar) is crucial—it brightens flavors and cuts through the richness of the mayonnaise. Without it, your tuna salad can taste flat and one-dimensional. Fresh lemon is always superior to bottled.
Salt your tomatoes. If you’re adding fresh tomato slices, lightly salt them and let them sit on a paper towel for a few minutes before adding to your sandwich. This draws out excess moisture and concentrates their flavor, preventing soggy bread.
Toast matters. If you’re toasting your bread, let it cool for 1-2 minutes before assembling. Hot toast will wilt your lettuce and warm your cold tuna salad, creating an unpleasant temperature contrast.
The mayo-to-tuna ratio is personal. Start with less mayo than you think you need—you can always add more, but you can’t take it away. The perfect consistency should be creamy but not swimming in mayo, with the tuna still being the star.
Use a barrier. Always place lettuce between your bread and the tuna salad. This creates a moisture barrier that keeps your bread from getting soggy, especially important if you’re making sandwiches ahead of time.
Common Mistakes to Avoid
Even with a simple recipe like this, there are a few pitfalls that can compromise your perfect tuna sandwich:
Not draining the tuna thoroughly. This is the number one mistake. Excess liquid makes your tuna salad watery and causes soggy bread. Press down firmly on the tuna in the can or use a strainer, and even give the tuna a gentle squeeze to remove all moisture before mixing.
Over-mixing or mashing the tuna. You want defined flakes, not a paste. Mix just until combined—over-working the tuna creates a mushy texture that’s less appetizing. Use a gentle folding motion rather than aggressive stirring.
Using low-quality or expired mayo. Since mayonnaise is a primary ingredient, its quality directly impacts your sandwich. Check expiration dates, and always use full-fat mayo for the best flavor and texture. Low-fat versions often taste tangy and thin.
Adding too many mix-ins. While it’s tempting to throw in everything, too many additions overwhelm the tuna and create texture chaos. Stick to 2-3 add-ins maximum so you can still taste the tuna as the star ingredient.
Assembling too far in advance. While the tuna salad mixture stores well, assembled sandwiches don’t. The moisture from the filling will make even the best bread soggy within an hour or two. Always assemble right before eating or packing, and keep the mixture separate until the last moment.
Storage & Meal Prep
This tuna mayo sandwich recipe is excellent for meal prep, with some important considerations:
Refrigerator Storage: Store the tuna salad mixture (not assembled sandwiches) in an airtight container in the refrigerator for up to 3 days. Press plastic wrap directly onto the surface of the tuna salad before sealing the container to prevent oxidation and drying out. The flavors actually improve after a day as they meld together.
Assembled Sandwiches: If you must prepare complete sandwiches ahead, wrap each one tightly in plastic wrap or parchment paper and refrigerate for no more than 4-6 hours. Use heartier bread like sourdough or whole wheat, which holds up better to moisture than soft white bread.
Lunch Packing: For work or school lunches, pack the tuna salad in a small container separate from your bread, lettuce, and tomatoes. Assemble just before eating for the freshest taste and best texture. Include a small ice pack in your lunch bag to keep everything cold and safe.
Shelf Life: Once mayonnaise-based tuna salad is made, it must be kept refrigerated and consumed within 3 days for food safety. Never leave it at room temperature for more than 2 hours (or 1 hour if the temperature is above 90°F).
Reheating: Tuna salad is meant to be served cold. Don’t reheat it unless you’re making a tuna melt, in which case you’d heat the entire assembled sandwich in a pan or oven until just warmed through and any cheese melts.
Make-Ahead & Freezer Notes
Planning ahead can save you significant time during busy weeks:
Make-Ahead Strategy: Prepare a double or triple batch of the tuna salad mixture on Sunday for easy lunches throughout the week. Store in an airtight container and simply scoop out portions as needed. Pre-chop your vegetables and store them separately from the tuna-mayo mixture if you prefer maximum crunch—combine just before serving.
Freezer Considerations: Unfortunately, tuna salad with mayonnaise does not freeze well. Mayo separates and becomes watery and grainy when frozen and thawed, creating an unappetizing texture. The celery and onions also become mushy after freezing. If you want freezer-friendly tuna options, freeze plain drained tuna or make tuna patties without mayo that can be frozen and reheated.
Best Approach: Since the recipe comes together so quickly (just 10 minutes!), it’s better to make fresh batches as needed rather than trying to freeze it. Keep canned tuna in your pantry so you always have the ingredients on hand for a last-minute meal.
Pre-Portioning: If you’re meal prepping for the week, divide your tuna salad into individual serving-size containers (about ½ cup each). This makes grabbing lunch effortless and helps with portion control.
Serving Suggestions
A great tuna sandwich deserves equally delicious accompaniments:
Classic Pairings: Serve alongside crispy potato chips (kettle-cooked or ridged varieties stand up well), dill pickles or pickle spears, and a handful of baby carrots or celery sticks. This combination is nostalgic, satisfying, and provides variety in texture and flavor.
Healthier Sides: Pair with a fresh green salad dressed lightly with vinaigrette, vegetable sticks with hummus, fresh fruit salad, or baked veggie chips for a lighter meal that still feels complete.
Soup and Sandwich Combo: Tomato soup is the classic pairing, but try creamy potato soup, vegetable soup, or even gazpacho in summer for a satisfying lunch combination.
Beverage Pairings: Iced tea (sweetened or unsweetened), lemonade, sparkling water with lemon, or even a cold beer on a hot day all complement this sandwich beautifully.
Make it a Plate: Turn your sandwich into a composed plate by deconstructing it—serve the tuna salad over mixed greens, add sliced avocado, cherry tomatoes, cucumber slices, and serve the toasted bread on the side for dipping.
Picnic Perfect: Pack your tuna sandwiches with pasta salad, coleslaw, fresh berries, cookies, and cold drinks for the ultimate picnic spread. Just remember to keep everything cold with ice packs for food safety.
FAQs Section
Q: Can I use fresh tuna instead of canned?
A: Absolutely! Poach or grill fresh tuna steaks until just cooked through, let them cool completely, then flake with a fork and proceed with the recipe. Fresh tuna will have a meatier texture and milder flavor. You’ll need about 10-12 ounces of fresh tuna to replace two 5-ounce cans.
Q: How can I make this tuna sandwich healthier?
A: There are several easy swaps: use whole wheat or sprouted grain bread for added fiber, replace half the mayonnaise with plain Greek yogurt to cut calories while adding protein, add extra vegetables like shredded carrots or diced cucumber, and serve it in a lettuce wrap instead of bread for a low-carb option. You can also use light mayo or avocado oil mayo for a healthier fat profile.
Q: My tuna salad is too dry. What did I do wrong?
A: You likely didn’t add enough mayonnaise or you over-drained your tuna. The perfect consistency should be creamy and spreadable but not soupy. Add mayo one tablespoon at a time until you reach your desired creaminess. You can also add a splash of olive oil or a dollop of Greek yogurt to add moisture without making it too heavy.
Q: Can I substitute the mayonnaise with something else?
A: Yes! Popular substitutions include Greek yogurt (plain, full-fat works best), sour cream, mashed avocado, hummus, or a combination of these. Each will create a slightly different flavor profile—Greek yogurt is tangier, avocado is creamier and richer, and hummus adds earthy notes. Vegan mayo works perfectly for plant-based diets.
Q: How long does tuna salad last in the refrigerator?
A: Properly stored in an airtight container, homemade tuna salad will last 3-4 days in the refrigerator. Always smell it before using—if it smells off or looks discolored, discard it. For maximum freshness and food safety, try to use it within 3 days.
Q: Can I make this tuna sandwich spicy?
A: Definitely! Add diced jalapeños or serrano peppers, mix in sriracha or hot sauce (start with ½ teaspoon and adjust), include a pinch of cayenne pepper or red pepper flakes, use pepper jack cheese instead of regular cheese, or add a spoonful of spicy brown mustard. Adjust the heat level to your preference.
Q: What type of bread works best for tuna sandwiches?
A: This is truly personal preference! Classic white bread is soft and traditional, whole wheat adds nuttiness and fiber, sourdough provides tanginess and structure that holds up to moisture, croissants make it feel indulgent, rye bread adds distinct flavor, and English muffins create interesting texture when toasted. Choose based on your taste and dietary needs—there’s no wrong answer!
Conclusion
This classic tuna mayo sandwich recipe proves that sometimes the simplest recipes are the most satisfying. With just a handful of ingredients and 10 minutes of your time, you can create a delicious, protein-packed meal that works for busy weekdays, lazy weekends, packed lunches, or casual dinners. The beauty lies in its versatility—make it your own by experimenting with different add-ins, breads, and serving styles until you find your perfect combination.
Whether you’re feeding a crowd, meal prepping for the week, or just need a quick bite, this easy tuna sandwich recipe delivers every single time. The creamy, flaky filling with crisp vegetables and zesty lemon creates flavors and textures that work in perfect harmony. It’s budget-friendly, nutritious, requires zero cooking, and tastes absolutely delicious—what more could you ask for?
I’d love to hear how your tuna sandwiches turn out! Did you add any creative mix-ins? Serve it a special way? Found a new favorite bread combination? Drop a comment below and share your experience. And don’t forget to save this recipe to your Pinterest boards so you can find it whenever that tuna sandwich craving hits. Happy sandwich making, friends—here’s to simple, satisfying home cooking that never goes out of style! 🥪