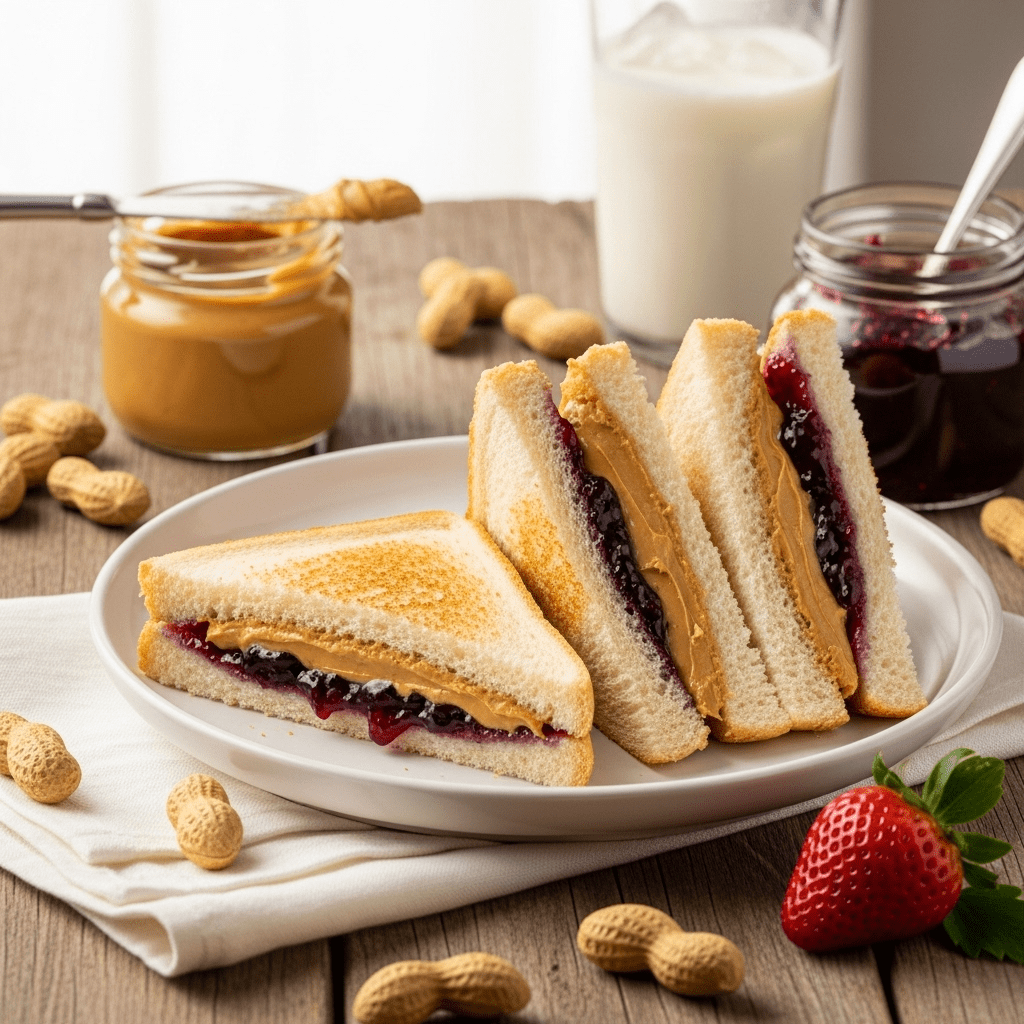
Peanut Butter and Jelly Sandwich Recipe: The Classic American Favorite

The peanut butter and jelly sandwich is arguably America’s most beloved sandwich—a timeless classic that transcends generations and brings comfort with every bite! This iconic sandwich features creamy or crunchy peanut butter paired with sweet jelly or jam, all sandwiched between two soft slices of bread. While it might seem impossibly simple (and it is!), there’s actually an art to making the perfect PB&J that elevates it from basic to brilliant. This classic PB&J sandwich is the ultimate comfort food that works for absolutely any occasion—pack it in school lunchboxes where it’s been a staple for decades, enjoy it as a quick breakfast when you’re running late, grab it as an easy lunch that requires zero cooking, reach for it as a satisfying snack that hits the spot, or even indulge in it as a nostalgic late-night treat that takes you back to childhood. The beauty of the peanut butter and jelly sandwich lies in its perfect balance of flavors and textures: the rich, nutty creaminess of peanut butter paired with the sweet, fruity brightness of jelly, all held together by soft bread that’s easy to bite through. It’s budget-friendly (costing less than a dollar per sandwich!), kid-approved, endlessly customizable, and can be made in under 3 minutes. Whether you’re feeding picky toddlers, packing lunches for the week, or simply craving that familiar comfort food flavor, this best peanut butter jelly sandwich recipe delivers every single time!
History / Background
The peanut butter and jelly sandwich has a fascinating history that’s deeply intertwined with American food culture and innovation. While peanuts have been cultivated for thousands of years in South America, and various cultures have ground nuts into pastes throughout history, the peanut butter we know today is distinctly American.
The story begins in the late 1800s when several inventors were working on creating peanut paste. Dr. John Harvey Kellogg (yes, the cereal pioneer!) patented a process for making peanut butter in 1895, initially creating it as a protein source for patients at his health sanitarium in Battle Creek, Michigan. Around the same time, other innovators like Dr. Ambrose Straub and George Washington Carver were promoting peanuts and developing various peanut-based products. By the early 1900s, peanut butter was being manufactured commercially and gaining popularity at food exhibitions and fairs.
The “jelly” part of the equation has equally interesting origins. Fruit preserves, jams, and jellies have been made for centuries as methods of food preservation, but they became much more accessible to American households in the late 1800s and early 1900s with improved manufacturing and canning techniques. Welch’s, founded in 1869, began mass-producing grape jelly, making it affordable and available to the average American family.
The first known reference to a peanut butter and jelly sandwich appeared in a 1901 article in the Boston Cooking School Magazine, where Julia Davis Chandler described a sandwich made with peanut butter and currant or crab-apple jelly as a “delicious and novel” treat for afternoon tea parties. However, this early version was considered somewhat upscale and sophisticated—far from the everyday lunch staple it would become.
The PB&J truly became an American icon during World War II. The U.S. military included both peanut butter and jelly in soldiers’ rations, and when soldiers returned home from the war, they craved the sandwich they’d eaten overseas. This coincided with the post-war boom in sliced bread production (commercial sliced bread had been invented in 1928 but gained widespread popularity in the 1940s), making sandwich-making easier than ever.
The 1950s and 60s saw the PB&J become the quintessential American children’s lunch. As more mothers entered the workforce and convenience became increasingly important, the easy-to-make, no-refrigeration-needed, shelf-stable sandwich became a lunchbox staple. It was economical during a time when families were growing, didn’t spoil without refrigeration, and was universally loved by children.
Today, it’s estimated that the average American child will eat 1,500 peanut butter and jelly sandwiches before graduating from high school! The sandwich has become so iconic that April 2nd is National Peanut Butter and Jelly Day in the United States. While the classic combination remains beloved, modern variations include everything from grilled PB&Js to gourmet versions with artisanal nut butters and house-made preserves. Despite all the innovations, though, the simple, classic version remains an enduring symbol of American childhood and comfort.
Why You’ll Love This Recipe
I know what you might be thinking—does the world really need a recipe for a peanut butter and jelly sandwich? But hear me out! While making a PB&J is certainly simple, there are actually tricks and techniques that can take this humble sandwich from ordinary to extraordinary. This easy PB&J recipe focuses on the details that make a difference: the proper ratio of peanut butter to jelly, the best spreading techniques to prevent soggy bread, the ideal bread choices for different preferences, and creative ways to elevate this classic.
What makes this particular approach special is that we’re being intentional about every element. We’re not just slapping ingredients together—we’re thinking about how to achieve the perfect texture balance, prevent common pitfalls, and customize the sandwich to suit different tastes and dietary needs. Whether you’re making this for yourself, your kids, or teaching someone else to make it, these tips and insights will help you create the best possible version of this American classic.
Here’s why this classic peanut butter and jelly sandwich recipe will become your go-to:
- Ready in 3 Minutes – Literally one of the fastest meals you can make from start to finish
- Only 3 Main Ingredients – Bread, peanut butter, jelly—simple perfection
- Kid-Approved Classic – Beloved by children of all ages and picky eaters
- Incredibly Budget-Friendly – Costs less than $1 per sandwich with basic ingredients
- No Cooking Required – Perfect for kids learning to make their own meals
- Lunchbox Champion – Doesn’t require refrigeration and tastes great at room temperature
- Customizable – Endless variations to suit every taste preference
- Nostalgic Comfort Food – Takes you right back to childhood with every bite
- Allergy-Friendly Options – Can be adapted for various dietary restrictions
- Portable & Mess-Free – Easy to pack, transport, and eat on the go
- Balanced Nutrition – Provides protein, carbs, and fruit in one convenient package
- No Special Skills Needed – Perfect first recipe for beginner cooks
Ingredient Notes
Even though this recipe uses just three main ingredients, let’s talk about choosing the best options and when you might want to substitute!
Bread: Your foundation matters! White bread is the traditional choice—soft, slightly sweet, and universally loved by kids. Whole wheat bread adds fiber, nutrients, and a slightly nutty flavor that complements peanut butter perfectly. Sourdough offers tangy complexity and sturdier texture. Multigrain provides hearty texture and extra nutrition. Gluten-free bread works perfectly for those with celiac disease or gluten sensitivity. Pro tip: Slightly day-old bread actually works better than super-fresh bread—it’s sturdier and less likely to get soggy!
Peanut Butter: The star of the show! Creamy peanut butter spreads easily and provides smooth, consistent texture throughout—it’s the classic choice and what most people prefer. Crunchy peanut butter adds delightful texture with peanut pieces and a more rustic feel. Natural peanut butter (just peanuts and salt) offers pure peanut flavor without added oils or sugars, though it requires stirring and may be slightly harder to spread. Regular peanut butter (like Skippy or Jif) is pre-sweetened and ultra-smooth, with added oils that make spreading effortless. Substitution: Almond butter, cashew butter, sunflower seed butter (for nut-free options), or any nut/seed butter works beautifully!
Jelly or Jam: The sweet counterpart! Grape jelly is the most traditional and iconic choice—it’s what most Americans grew up with. Strawberry jam offers bright, fruity flavor and is the second most popular choice. Raspberry preserves provide tartness that balances rich peanut butter. Blueberry, blackberry, apricot, or any fruit preserve you love works wonderfully. What’s the difference? Jelly is made from fruit juice and is clear and smooth, jam contains crushed fruit and has texture, and preserves have whole or large pieces of fruit. Any works great—it’s purely personal preference! Substitution: Fresh sliced fruit (bananas or strawberries), honey, Nutella, or even marshmallow fluff for a Fluffernutter variation!
Optional Add-Ins: This is where you can get creative:
- Sliced bananas (Elvis Presley’s favorite addition!)
- Fresh strawberries or other berries
- Honey for extra sweetness
- Cinnamon for warmth
- Chocolate chips for indulgence
- Granola for crunch
- Bacon for sweet-savory combination
Equipment Needed
The beauty of this recipe is that you need virtually no equipment—just the basics you already have!
- Butter knife or offset spatula (for spreading)
- Plate or cutting board (work surface)
- Sharp knife (for cutting sandwich in half or removing crusts)
- Paper towel or napkin (for cleanup)
- Optional: Sandwich container or plastic bag (for storage or transport)
That’s it! No toaster, no stove, no special tools—just a knife and a surface. This is what makes the PB&J the ultimate accessible recipe.
Print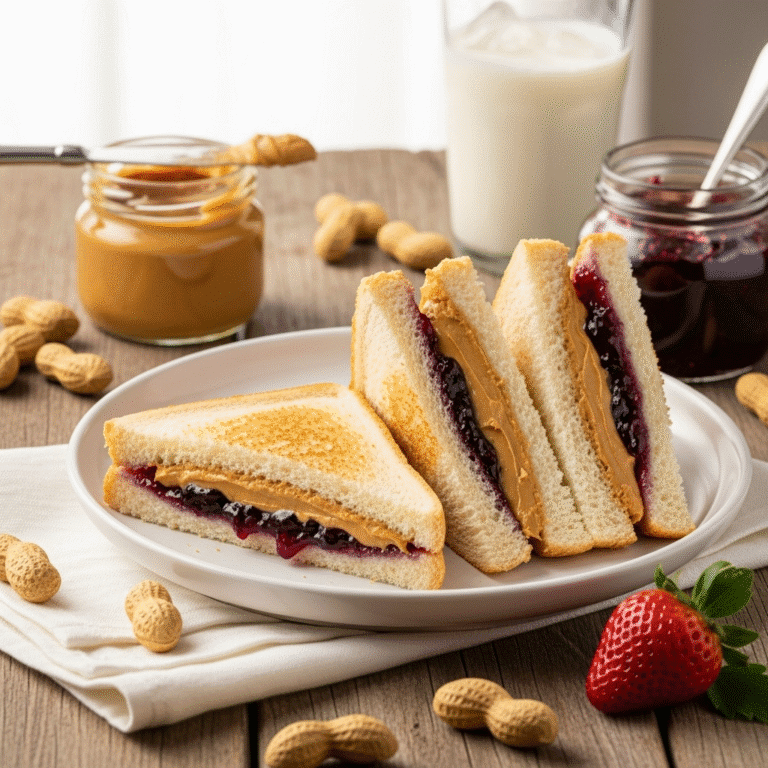
Peanut Butter and Jelly Sandwich Recipe
The classic peanut butter and jelly sandwich made perfect! This iconic American sandwich features creamy peanut butter and sweet jelly on soft bread—simple, satisfying, and nostalgic. Ready in just 3 minutes!
- Total Time: 3 minutes
- Yield: 1 sandwich (easily multiplied) 1x
Ingredients
Basic Recipe:
- 2 slices bread of your choice (white, whole wheat, multigrain, or gluten-free)
- 2 tablespoons peanut butter (creamy or crunchy)
- 1-2 tablespoons jelly or jam (grape, strawberry, or your favorite flavor)
Optional Add-Ins:
- ½ banana, sliced (for a classic upgrade)
- 2-3 fresh strawberries, sliced
- 1 teaspoon honey
- Pinch of cinnamon
- Small handful of chocolate chips
- 1 tablespoon granola
Instructions
- Prepare Your Workspace: Lay out both slices of bread on a clean plate or cutting board. Have your peanut butter and jelly containers nearby with clean spreading utensils.
- Spread the Peanut Butter: Using a butter knife or offset spatula, scoop about 2 tablespoons of peanut butter and spread it evenly over one slice of bread, covering all the way to the edges. Apply gentle, even pressure and work from the center outward to prevent tearing the bread. The edge-to-edge coverage is important—it creates a barrier that prevents jelly from soaking into the bread.
- Spread the Jelly: On the second slice of bread, spread 1-2 tablespoons of jelly or jam (adjust amount to your preference), again covering edge to edge. Use a clean knife to avoid getting peanut butter in your jelly jar! Spread evenly for consistent flavor in every bite.
- Add Optional Ingredients (If Using): If you’re adding banana slices, strawberries, or any other additions, layer them on top of the peanut butter at this point. Arrange them evenly so every bite gets some of the add-ins.
- Assemble the Sandwich: Carefully place the jelly-covered slice on top of the peanut butter slice, jelly side down, so the spreads are touching. Press down very gently to help them adhere together.
- Cut and Serve: If desired, cut the sandwich in half diagonally (for triangles) or straight down the middle (for rectangles). Some people prefer to cut it into quarters for easier eating, especially for young children. You can also cut off the crusts if preferred, though the crusts contain nutrients and fiber!
- Enjoy Immediately: Serve right away, or wrap in plastic wrap, parchment paper, or place in a sandwich container for later. The sandwich is best eaten within 4-6 hours of making for optimal texture.
Notes
- Preventing Soggy Bread: Spread peanut butter on both slices of bread first, creating a barrier, then add jelly in the center. This keeps jelly from soaking through!
- Room Temperature is Best: Peanut butter spreads much easier at room temperature. If it’s been refrigerated, let it sit out for 15-20 minutes before using.
- Jelly Amount: Start with less jelly than you think you need. You can always add more, but too much makes the sandwich soggy and causes it to squish out when you bite into it.
- Make it Vegan: Use vegan bread (most bread is naturally vegan, but check labels) and jelly (most jelly is vegan, but some brands use gelatin).
- Nut-Free Version: Substitute sunflower seed butter, soy nut butter, or Wow butter for peanut butter to make it safe for nut allergies.
- Prep Time: 3 minutes
- Cook Time: 0 minutes
- Category: Lunch
- Method: No-Cook
- Cuisine: American
- Diet: Vegetarian
Nutrition
- Serving Size: 1 sandwich
- Calories: 350
- Sugar: 16g
- Sodium: 380mg
- Fat: 16g
- Saturated Fat: 3g
- Unsaturated Fat: 12g
- Trans Fat: 0g
- Carbohydrates: 42g
- Fiber: 4g
- Protein: 11g
- Cholesterol: 0mg
Tips & Variations
Grilled PB&J: Butter the outside of your assembled sandwich and cook it in a skillet over medium heat for 2-3 minutes per side until golden brown and the insides are warm and melty. Game-changer!
Stuffed French Toast PB&J: Make your PB&J, then dip it in beaten egg mixed with milk and cinnamon, and cook like French toast. Breakfast meets lunch in the most delicious way!
Open-Face PB&J: Spread both peanut butter and jelly on a single slice of bread and eat it open-faced. Great for toddlers learning to self-feed!
Triple-Decker Club: Use three slices of bread, alternating layers of peanut butter and jelly, for an extra-hearty sandwich.
Banana Elvis: Add sliced bananas and honey to your classic PB&J for the sandwich Elvis Presley loved. For the full Elvis experience, add crispy bacon!
Berry Medley: Use a combination of strawberry jam and fresh blueberries for a multi-berry experience.
Cinnamon Apple PB&J: Spread peanut butter, add thin apple slices, drizzle with honey, and sprinkle with cinnamon instead of using jelly.
Chocolate PB&J: Replace jelly with Nutella for a chocolate-peanut butter combination that’s absolutely irresistible.
Protein-Packed: Add a layer of granola or hemp seeds between the peanut butter and jelly for extra crunch and nutrition.
Uncrustables Style: Use a round biscuit cutter to cut the sandwich into circles, pressing and sealing the edges to create homemade “uncrustables.”
Pro Chef Tips
The Barrier Method: Professional sandwich makers use this trick: spread a thin layer of peanut butter on BOTH slices of bread, then add jelly on top of the peanut butter on one side. This creates a moisture barrier that prevents the jelly from making the bread soggy, which is especially important if you’re making sandwiches ahead for lunch boxes.
Ratio Matters: The ideal ratio is about 2:1 peanut butter to jelly. Too much jelly overwhelms the nutty flavor and makes things messy and soggy. You want just enough sweetness to complement, not overpower, the peanut butter.
Edge-to-Edge Coverage: Always spread your peanut butter and jelly all the way to the edges. This ensures every single bite has both flavors, and there are no disappointing dry-bread-only corners. It also helps seal the sandwich and prevent it from falling apart.
Layer Strategically: If adding extras like banana slices, place them on the peanut butter side, not the jelly side. Peanut butter is stickier and holds additions in place better than jelly does.
The Gentle Press: After assembling, press down gently but firmly on the sandwich for about 3 seconds. This helps the two halves adhere together and prevents them from sliding apart, but don’t press so hard that everything squishes out the sides!
Diagonal Cut Psychology: Studies show people perceive diagonally-cut sandwiches as more appealing and even tastier than sandwiches cut straight across. Something about the triangular shape is just more inviting! Plus, it’s easier to take that first bite from a pointed corner.
Temperature Consideration: If you know you won’t eat the sandwich for several hours, leave the peanut butter and jelly jars at room temperature for 30 minutes before making the sandwich. This makes spreading easier and creates a more cohesive texture that holds up better over time.
Common Mistakes to Avoid
Using Too Much Jelly: The most common error! More jelly seems like it would be better, but it actually makes the sandwich soggy, messy, and overwhelming. The jelly squishes out the sides when you bite, and the flavors become unbalanced. Start with just 1 tablespoon and add more only if needed.
Spreading Too Aggressively: Trying to spread cold, stiff peanut butter with too much force tears holes in soft bread, creating a frustrating mess. Always use room-temperature peanut butter, and spread gently with patience. If your peanut butter is cold, microwave it for 10-15 seconds to soften slightly.
Using Fresh Jelly Directly From the Fridge: Just like peanut butter, super-cold jelly is harder to spread smoothly and can tear delicate bread. Room temperature spreads are easier to work with and blend better. Let your jelly sit out for 10-15 minutes before making sandwiches.
Cross-Contaminating Jars: Never use the same knife for peanut butter and jelly without wiping it clean! Getting peanut butter in the jelly jar (or vice versa) introduces moisture and oils that can cause spoilage and creates an unappetizing mixed layer in your jars. Use separate knives or wipe thoroughly between uses.
Making Them Too Far Ahead: PB&J sandwiches are best eaten within 4-6 hours of making. Beyond that, even with the best techniques, they start to get soggy and lose their appeal. If you must make them the night before, use the barrier method (peanut butter on both slices) and store properly.
Forgetting to Cut: While this is personal preference, uncut sandwiches are harder for kids to handle and harder to eat neatly. The simple act of cutting makes the sandwich more manageable, especially for small hands or lunchbox situations.
Storage & Meal Prep
Short-Term Storage (Same Day): If making a PB&J in the morning to eat at lunch, wrap it tightly in plastic wrap, parchment paper, or aluminum foil, or place it in a reusable sandwich container. Store at room temperature—these sandwiches don’t need refrigeration (in fact, cold refrigeration can make the bread hard and less appealing).
Overnight Storage: You can make PB&J sandwiches the night before, but use the barrier method (thin peanut butter layer on both slices of bread before adding jelly) to prevent sogginess. Wrap tightly and store at room temperature. Don’t store for more than 12-14 hours ahead, as bread begins to dry out and textures deteriorate.
Preventing Freezer Burn: If storing longer-term (see freezer notes below), double-wrap sandwiches first in plastic wrap, then in aluminum foil, or use freezer-safe bags with the air pressed out.
School Lunch Packing: PB&J is perfect for school lunches because it doesn’t require refrigeration (important for schools without access to fridges). Pack it with an ice pack if you’re including perishable sides like yogurt or cheese sticks, but the sandwich itself is fine at room temperature all morning.
Component Prep: For fastest morning assembly, keep your peanut butter, jelly, and bread in an easy-to-access spot (a designated “sandwich station”). Pre-measure peanut butter into small containers the night before if you’re making multiple sandwiches.
Leftover Management: Honestly, there are rarely leftover PB&J sandwiches! But if you have half a sandwich left, wrap it tightly and eat it within 2-3 hours for best quality. Don’t save partially-eaten sandwiches overnight—they don’t hold up well.
Make-Ahead & Freezer Notes
Freezing Assembled Sandwiches: Yes, you can freeze PB&J sandwiches! This is a game-changer for meal prep. Make a batch of sandwiches using the barrier method, wrap each individually in plastic wrap, then place in a freezer-safe bag. Freeze for up to 1 month. They’ll thaw by lunchtime if you take them out in the morning, or you can thaw in the refrigerator overnight.
Best Freezing Practices: Use bread that’s sturdy (not super-soft, fluffy bread that will get mushy). Spread both peanut butter and jelly slightly thinner than you normally would, as freezing can intensify flavors. Don’t add fresh fruit or other additions before freezing—these don’t freeze well.
Thawing Instructions: Remove a frozen sandwich from the freezer and place it in a lunchbox in the morning. It will thaw naturally over 3-4 hours and be perfect by lunch time. The sandwich also acts as an ice pack, keeping other items cool! Alternatively, thaw in the refrigerator overnight, though this can make the bread slightly less soft.
What Not to Freeze: Don’t freeze sandwiches with fresh fruit (bananas, strawberries), honey, or other add-ins. These ingredients don’t freeze and thaw well and will make the sandwich soggy or change the texture drastically. Stick to plain PB&J for freezing.
Batch Prep for Freezer: Many busy parents make 10-20 sandwiches at once, freeze them, and have a month’s worth of ready-to-grab lunches! Use an assembly line: lay out all the bread slices, spread peanut butter on all of them, spread jelly on half, assemble, wrap, and freeze. Makes meal prep incredibly efficient.
Reviving Slightly Stale Bread: If you have bread that’s a day or two past prime freshness but not moldy, it’s actually perfect for PB&J! The firmer texture holds up better to spreading and the sandwich holds together better throughout the day.
Serving Suggestions
Classic Lunch Pairing: Serve your PB&J with baby carrots, celery sticks, or apple slices for a balanced lunch. Add a handful of chips or pretzels and a juice box or milk for a complete meal.
Soup and Sandwich Combo: Pair with tomato soup for a classic comfort food combination. The sweet PB&J contrasts beautifully with savory soup!
Side Salad: For adults, serve alongside a simple green salad with vinaigrette for a light lunch that balances the richness of the sandwich.
Fresh Fruit: Accompany with fresh fruit like grapes, orange slices, melon cubes, or berries. The fresh fruit complements the fruit preserves in the sandwich.
Vegetables and Dip: Add veggies like cucumber slices, cherry tomatoes, or snap peas with ranch dressing or hummus for a nutritious, colorful plate.
Chips and Pickles: For a classic American lunch, serve with potato chips and dill pickle spears. The salty, tangy additions balance the sweet sandwich perfectly.
Yogurt Parfait: Pair with a yogurt parfait (yogurt, granola, and berries) for a protein-rich, balanced meal that covers all your nutritional bases.
Beverage Pairings: Serve with cold milk (a classic!), chocolate milk, apple juice, lemonade, or for adults, coffee or iced tea.
After-School Snack: Serve with a glass of cold milk and a piece of fruit for a satisfying, energy-boosting after-school snack.
FAQs Section
Q: Can I make peanut butter and jelly sandwiches ahead of time?
A: Yes! PB&J sandwiches can be made several hours ahead or even the night before. Use the barrier method (thin layer of peanut butter on both slices before adding jelly) to prevent sogginess. Wrap tightly and store at room temperature for up to 12 hours, or freeze for up to 1 month for longer storage.
Q: How do I keep my PB&J from getting soggy?
A: The key is creating a moisture barrier! Spread peanut butter edge-to-edge on both slices of bread, then add jelly only on top of the peanut butter on one side. The peanut butter’s oils prevent the jelly’s moisture from soaking into the bread. Also, don’t use too much jelly—1 tablespoon is usually perfect.
Q: What’s the best bread for peanut butter and jelly sandwiches?
A: It’s truly personal preference! White bread is traditional and soft, whole wheat offers more nutrition and a nutty flavor, and sourdough provides tangy complexity. For meal prep or freezing, choose sturdier bread like whole wheat or sourdough rather than very soft, fluffy white bread which can get mushy.
Q: Can you freeze peanut butter and jelly sandwiches?
A: Absolutely! PB&J sandwiches freeze beautifully. Make them using the barrier method, wrap individually in plastic wrap, place in a freezer bag, and freeze for up to 1 month. They’ll thaw naturally over 3-4 hours in a lunchbox. This is a huge time-saver for busy families!
Q: What’s better—jelly or jam for PB&J?
A: Both work perfectly—it’s just personal preference! Jelly is made from fruit juice and is smooth and spreadable. Jam contains crushed fruit and has more texture. Preserves have even larger fruit pieces. Kids often prefer smooth jelly, while adults might enjoy the texture of jam or preserves. Try different varieties to find your favorite!
Q: How do I make a nut-free version for someone with allergies?
A: Simply substitute sunflower seed butter (also called sunbutter), soy nut butter, or Wow butter for the peanut butter. These alternatives taste surprisingly similar and work exactly the same way! This makes PB&J safe for schools with nut-free policies and for children with peanut allergies.
Q: What’s the proper peanut butter to jelly ratio?
A: The ideal ratio is about 2:1—two parts peanut butter to one part jelly. This usually means 2 tablespoons of peanut butter and 1 tablespoon of jelly per sandwich. This ratio gives you that perfect balance of nutty richness and fruity sweetness without being too messy or overwhelming.
Q: Can adults eat PB&J, or is it just a kids’ food?
A: Absolutely adults can (and do!) enjoy PB&J! There’s no age limit on delicious, nostalgic comfort food. Many adults pack PB&J for work lunches, enjoy them as quick meals, or even make gourmet versions with artisan nut butters and house-made preserves. Don’t let anyone shame you for loving this classic!
Conclusion
And there you have it—everything you could ever want to know about making the perfect peanut butter and jelly sandwich! While this might be one of the simplest recipes in existence, it’s also one of the most beloved, nostalgic, and universally enjoyed. There’s something magical about the combination of creamy peanut butter and sweet jelly between two slices of soft bread—it’s comfort food in its purest, most accessible form.
Whether you’re making this classic PB&J sandwich for your children’s lunch boxes, teaching your kids to make their own first meal, enjoying it yourself for a quick lunch or snack, or even creating gourmet variations with artisan ingredients, this recipe is endlessly adaptable and always satisfying. The beauty of the peanut butter and jelly sandwich is that it’s both foolproof and customizable—you literally cannot mess it up, yet there are countless ways to make it your own.
This best peanut butter jelly sandwich transcends being just food—it’s a cultural touchstone, a childhood memory, a symbol of simpler times, and proof that sometimes the most basic things in life are also the most perfect. From the first PB&J you ate as a child to the ones you’ll make for your own family, this sandwich connects generations through shared experience and pure, simple deliciousness.
Now I’d love to hear from you! What’s your favorite way to make a PB&J? Are you team creamy or team crunchy? Grape jelly or strawberry jam? Do you cut it into triangles or rectangles, or are you a no-cut rebel? Do you have any creative variations or secret techniques? Share your PB&J stories, preferences, and tips in the comments below—I love hearing about how people personalize this classic!
Don’t forget to save this recipe to your Pinterest boards—pin it to “Easy Lunch Ideas,” “Kid-Friendly Recipes,” “Quick Meals,” or “Back to School Recipes” so you can find it whenever you need lunch inspiration. If you know someone who could use a dose of nostalgia or some practical lunch-packing tips, share this article with them. And if you make a PB&J (I know you will!), tag me on social media with a photo—yes, even of this simple sandwich! Every recipe deserves to be celebrated.
Now go make yourself (or your loved ones) a perfect PB&J and enjoy every nostalgic, delicious bite!