Easy Garlic Herb Butter Toast Recipe – Crispy, Buttery & Irresistibly Delicious!

Get ready to make the most incredible garlic herb butter toast that’s crispy, golden, and absolutely bursting with flavor! This easy garlic toast recipe transforms simple bread into something extraordinary with a luxurious mixture of butter, fresh garlic, and aromatic herbs. With its perfectly golden exterior, rich buttery flavor, and irresistible aroma, this toast is the ultimate side dish that elevates any meal from ordinary to restaurant-quality in just 15 minutes!
This homemade garlic bread toast is exactly what you need when you want something impressive but incredibly easy. The combination of melted butter infused with fresh garlic and herbs creates a coating that soaks into every crevice of the bread, while the oven creates that perfect crispy-yet-tender texture. It’s like the best parts of garlic bread and buttered toast combined – rich, savory, aromatic, and completely addictive. Plus, your kitchen will smell absolutely amazing while it bakes!
Whether you’re serving it alongside pasta and marinara sauce, pairing it with soup or salad, making it for a dinner party, needing the perfect accompaniment to Italian dishes, or just craving something warm and comforting, this garlic butter toast recipe delivers every time. It’s naturally vegetarian, can easily be made vegan, takes just 15 minutes start to finish, and costs pennies to make. Serve it as a side dish, appetizer, snack, or alongside any meal. Once you taste this golden, garlicky, herb-infused toast, you’ll be making it weekly!
History / Background
Garlic herb butter toast represents the delicious evolution of garlic bread, a beloved staple that has roots in both Italian and American culinary traditions. To understand this dish, we must first appreciate the history of its key components and how they came together.
Garlic bread as we know it today is actually an American-Italian invention rather than a purely Italian creation. While Italians have long enjoyed bruschetta (toasted bread rubbed with garlic and drizzled with olive oil), the butter-heavy, herb-laden garlic bread popular in America was created by Italian-American immigrants in the early-to-mid 20th century. These resourceful cooks adapted their traditional recipes to American ingredients and tastes, using readily available butter instead of the olive oil more common in Italy.
The practice of rubbing toasted bread with garlic dates back centuries in Mediterranean cuisine. Ancient Romans ate bread with garlic, and various cultures around the Mediterranean have versions of garlic-enhanced bread. However, the specific combination of butter, garlic, and herbs slathered on bread before toasting became popular in American Italian restaurants in the 1940s-1950s, particularly in Italian-American communities in New York, New Jersey, and California.
The herb component – typically parsley, oregano, and basil – reflects the Italian love of fresh herbs and the American abundance of these ingredients. Italian immigrants brought their herb traditions with them, and combining butter with garlic and herbs became a signature flavor profile in Italian-American cooking.
Garlic herb butter toast specifically – using sliced bread rather than baguettes or Italian loaves – became popular more recently as home cooks discovered they could create restaurant-quality garlic bread using everyday sandwich bread or artisan sliced bread. This adaptation made the dish even more accessible, requiring no special bread and cooking faster than traditional garlic bread made with whole loaves.
The trend of making garlic toast on regular sliced bread gained particular popularity on social media and food blogs in the 2010s, as people shared how they could get that crispy, golden, garlicky goodness without needing a bakery-fresh baguette. Food bloggers discovered that using thick-sliced bread created perfect individual portions that were easier to serve and eat than traditional garlic bread.
What makes this easy garlic toast recipe special is how it captures all the beloved flavors of classic garlic bread in a simpler, faster format that works with any bread you have on hand!
Why You’ll Love This Recipe
This homemade garlic bread toast is about to become your new favorite side dish! What makes this recipe absolutely irresistible is the incredible combination of flavors and textures. The garlic butter mixture soaks into the bread while it bakes, creating layers of flavor in every bite. The butter becomes golden and slightly caramelized on top, the garlic becomes mellow and aromatic (not harsh or bitter), and the herbs add fresh, savory notes that make this taste restaurant-quality.
The beauty of this garlic herb butter toast is its versatility and crowd appeal. It pairs with literally everything – pasta, soup, salad, grilled meats, roasted vegetables, you name it! Kids love it because it’s buttery and delicious, adults love it because it’s sophisticated and flavorful, and everyone loves it because it makes any meal feel more special. Plus, it’s so easy that anyone can make it perfectly on their first try!
Here’s why you’ll absolutely love this garlic herb butter toast:
- Ready in 15 minutes – Faster than ordering takeout!
- Only 6 main ingredients – Simple pantry staples
- Incredibly flavorful – Restaurant-quality taste at home
- Perfectly crispy – Golden edges with tender centers
- Endlessly versatile – Pairs with any meal
- Budget-friendly – Costs less than $2 for 4 servings
- Kid-approved – Even picky eaters love it
- Impressive but easy – Looks gourmet, takes minutes
- Great for entertaining – Always a crowd-pleaser
- Naturally vegetarian – Can be vegan too
- Customizable – Endless flavor variations
- Makes kitchen smell amazing – That garlic butter aroma!
- Perfect for meal prep – Butter mixture stores well
Ingredient Notes
Let’s talk about the simple ingredients that create this perfect garlic herb butter toast:
Bread – Your foundation! Choose sturdy, thick-sliced bread that can absorb butter without becoming soggy. Sourdough is ideal for its tangy flavor and chewy texture, but French bread, Italian bread, ciabatta, or even regular white or whole wheat bread work beautifully. You’ll need 4-6 slices. For gluten-free, use your favorite sturdy GF bread. Thicker slices (¾-1 inch) work best. Fresh bakery bread is wonderful, but even store-bought sandwich bread becomes amazing with this treatment!
Butter – The rich, indulgent base! Use real butter (not margarine) for best flavor – you’ll need about ½ cup (1 stick). Unsalted butter is preferred so you can control salt levels. The butter should be softened to room temperature for easy mixing but not melted. European-style butter with higher fat content creates extra richness if you want to splurge! For dairy-free, use vegan butter (Earth Balance or Miyoko’s work great).
Fresh Garlic – The star flavor! Use fresh garlic cloves (about 3-4 cloves), not jarred or powdered garlic. Fresh garlic provides that authentic, robust flavor and aroma that makes this special. Minced very finely or pressed through a garlic press works best. The garlic mellows beautifully when baked in butter, creating sweet, savory notes without harshness.
Fresh Herbs – The aromatic element! Fresh parsley is traditional and adds bright, grassy notes. Fresh or dried oregano and basil complete the Italian herb profile. You’ll need about 2 tablespoons fresh herbs total (or 1-2 teaspoons dried). Fresh herbs are preferred for brightest flavor, but dried herbs work when fresh aren’t available. Italian seasoning (a blend of dried herbs) is a convenient alternative!
Parmesan Cheese (Optional) – For extra savory depth! Freshly grated Parmesan cheese (about ¼ cup) adds nutty, salty, umami flavors and helps create a golden crust. This is optional but highly recommended! Use real Parmigiano-Reggiano for best quality, not the powdery stuff in cans. For vegan, use nutritional yeast or vegan parmesan.
Salt and Black Pepper – Essential seasonings! A pinch of salt enhances all flavors, while freshly cracked black pepper adds subtle bite.
Optional Enhancements:
- Red pepper flakes – For gentle heat
- Lemon zest – For brightness
- Extra herbs – Thyme, rosemary, or chives
- Garlic powder – Boosts garlic flavor alongside fresh
Equipment Needed
Making this garlic herb butter toast requires minimal kitchen equipment:
- Small mixing bowl – For combining butter mixture
- Fork or small whisk – For mixing ingredients
- Garlic press or chef’s knife – For mincing garlic
- Baking sheet – For toasting bread
- Parchment paper or aluminum foil (optional) – For easy cleanup
- Butter knife or pastry brush – For spreading butter mixture
- Measuring cups and spoons – For accurate portions

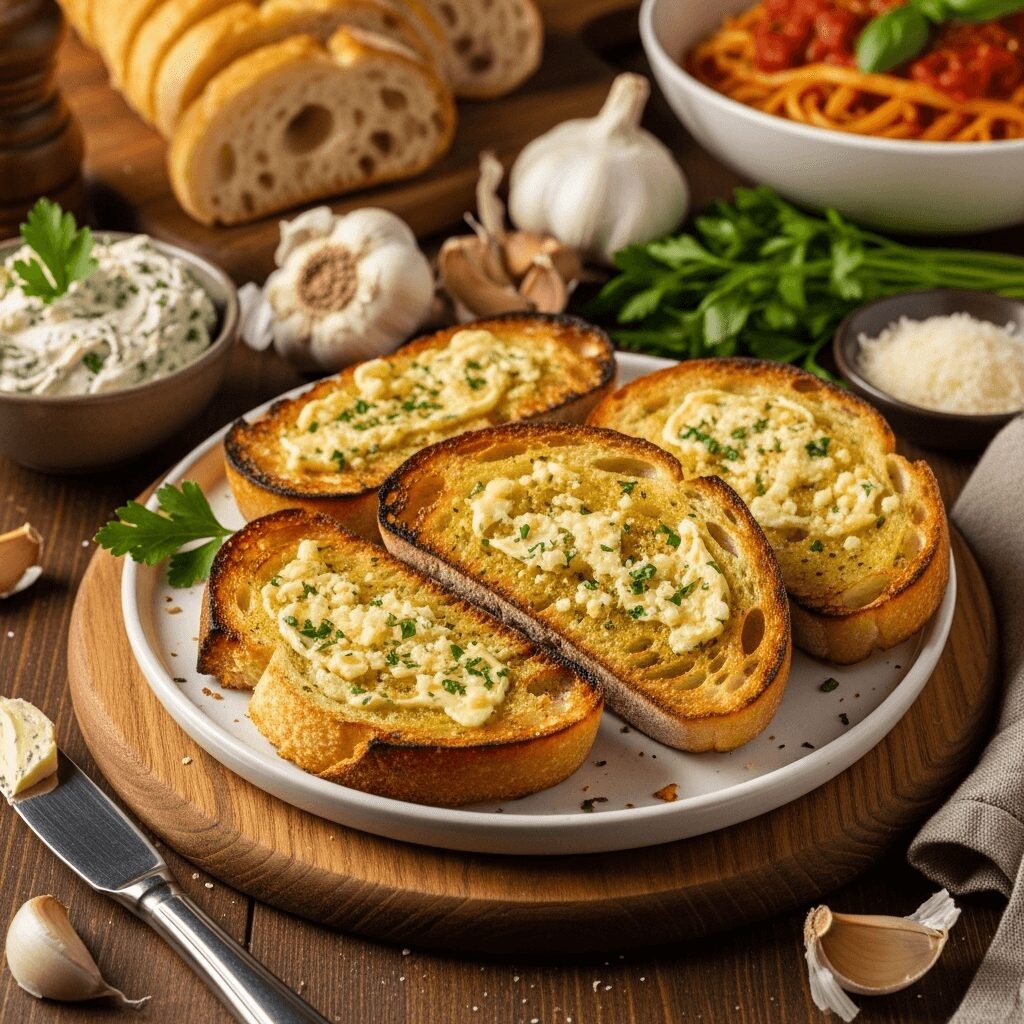
Garlic Herb Butter Toast Recipe
This easy Garlic Herb Butter Toast features thick slices of bread topped with a rich mixture of butter, fresh garlic, and herbs, then baked until golden and crispy. It’s buttery, garlicky, and absolutely delicious – ready in just 15 minutes!
- Total Time: 15 minutes
- Yield: 4 servings (4-6 slices) 1x
Ingredients
- 4-6 slices thick-cut bread (sourdough, French, Italian, or your favorite)
- ½ cup (1 stick) unsalted butter, softened to room temperature
- 3-4 cloves fresh garlic, minced or pressed
- 2 tablespoons fresh parsley, finely chopped (or 1 tablespoon dried)
- 1 teaspoon dried oregano (or 1 tablespoon fresh)
- ½ teaspoon dried basil (or 1 tablespoon fresh)
- ¼ cup freshly grated Parmesan cheese (optional but recommended)
- ¼ teaspoon salt
- ¼ teaspoon freshly cracked black pepper
- Optional: pinch of red pepper flakes for heat
Instructions
- Preheat the Oven – Preheat your oven to 400°F (200°C). Line a baking sheet with parchment paper or aluminum foil for easy cleanup (optional but recommended). Position the oven rack in the upper-middle position for best browning.
- Make the Garlic Herb Butter – In a small mixing bowl, combine softened butter, minced garlic, fresh parsley, dried oregano, dried basil, Parmesan cheese (if using), salt, and black pepper. Using a fork or small whisk, mix everything together thoroughly until well combined and the garlic and herbs are evenly distributed throughout the butter. The mixture should be smooth and spreadable. If your butter is too cold and hard, microwave for 5-10 seconds to soften slightly.
- Arrange Bread on Baking Sheet – Place bread slices in a single layer on the prepared baking sheet. Make sure slices don’t overlap so each one gets crispy and golden.
- Spread the Butter Mixture – Generously spread the garlic herb butter mixture on top of each bread slice, making sure to cover the entire surface all the way to the edges. Use about 1-2 tablespoons of butter mixture per slice depending on bread size. Don’t be shy with the butter – this is what makes it delicious! Make sure to scoop up any garlic or herb pieces from the bottom of the bowl so each slice gets plenty of flavor.
- Bake Until Golden – Place the baking sheet in the preheated oven and bake for 8-12 minutes, or until the toast is golden brown around the edges, the butter is melted and bubbling, and the top is lightly crispy. Watch carefully toward the end as the toast can go from perfect to burnt quickly! For extra-crispy toast, you can broil for the last 1-2 minutes, but watch constantly!
- Optional Broiling for Extra Crispiness – If you want extra-golden, extra-crispy edges (highly recommended!), turn on the broiler to high and broil the toast for 1-2 minutes, watching constantly to prevent burning. The toast should develop beautiful golden-brown spots and crispy edges.
- Cool Slightly and Serve – Remove from oven and let cool for 2-3 minutes – the butter will be extremely hot! Transfer to a serving platter or board. If desired, sprinkle with additional fresh parsley and grated Parmesan for garnish.
- Enjoy Warm – Serve immediately while warm and crispy. These are best eaten fresh from the oven when the butter is still slightly melty and the toast is at peak crispiness!
Notes
- Butter Temperature: Room temperature butter mixes easily; cold butter is hard to spread; melted butter runs off bread. Aim for soft, spreadable consistency.
- Garlic Freshness: Fresh garlic is essential for best flavor. Jarred minced garlic works in a pinch but has less flavor.
- Herb Substitutions: Use whatever fresh herbs you have! Thyme, chives, or rosemary work beautifully.
- Bread Thickness: Thicker slices (¾-1 inch) work best – they absorb butter without becoming soggy.
- Storage: Best fresh, but butter mixture stores well for making fresh batches later!
- Scaling: Recipe easily doubles or triples for larger gatherings.
- Prep Time: 5 minutes
- Cook Time: 10 minutes
- Category: Bread
- Method: Baking
- Cuisine: Italian-American
- Diet: Vegetarian
Nutrition
- Serving Size: 1 slice of garlic herb butter toast
- Calories: 240
- Sugar: 2g
- Sodium: 380mg
- Fat: 14g
- Saturated Fat: 8g
- Unsaturated Fat: 5g
- Trans Fat: 0g
- Carbohydrates: 24g
- Fiber: 1g
- Protein: 6g
- Cholesterol: 35mg
Tips & Variations
This garlic herb butter toast is perfect as-is, but here’s how to customize it:
Bread Variations:
- Sourdough: Tangy, chewy, classic choice
- French bread: Crispy crust, soft interior
- Ciabatta: Rustic, holey texture absorbs butter
- Whole wheat: Nutty, more nutritious
- Rye: Distinctive flavor
- Gluten-free: Use your favorite GF bread
Flavor Variations:
- Cheesy Garlic Toast: Double the Parmesan, add mozzarella
- Spicy Garlic Toast: Add red pepper flakes or cayenne
- Lemon Garlic: Add lemon zest and juice
- Everything Bagel Garlic Toast: Top with everything bagel seasoning
- Mediterranean: Add sun-dried tomatoes and feta
Herb Combinations:
- Classic Italian: parsley, oregano, basil
- French: tarragon, chives, parsley
- Garden: cilantro, dill, mint
- Simple: just parsley
- Rustic: rosemary and thyme
Cheese Options:
- Parmesan (classic)
- Asiago (sharp, nutty)
- Romano (salty, tangy)
- Mozzarella (melty, mild)
- Gruyère (rich, nutty)
- Vegan parmesan or nutritional yeast
Healthy Modifications:
- Use whole grain bread for fiber
- Reduce butter by ¼ cup, replace with olive oil
- Use light butter or olive oil spread
- Skip cheese or use reduced-fat
Indulgent Add-Ons:
- Cream cheese layer under butter
- Caramelized onions
- Roasted garlic (sweeter, mellower)
- Bacon bits
- Truffle oil drizzle
Pro Chef Tips
Want to make absolutely perfect garlic herb butter toast? Here are professional secrets:
Use Room Temperature Butter – This is crucial! Butter at room temperature (soft but not melted) mixes easily with garlic and herbs and spreads smoothly without tearing bread. Cold butter won’t incorporate ingredients well; melted butter runs off the bread. Take butter out 30-60 minutes before making this, or microwave for 5-10 seconds to soften.
Don’t Skip Fresh Garlic – Pre-minced jarred garlic or garlic powder don’t provide the same robust, authentic flavor as fresh garlic cloves. Fresh garlic has oils and compounds that become sweet and mellow when baked in butter, creating depth that jarred garlic can’t match. Mince garlic finely or use a garlic press for best distribution.
Spread Butter to the Very Edges – Don’t leave bare bread around the edges! Spread butter mixture all the way to the crust edges. This ensures every bite is flavorful and prevents dry, sad edges. The edges actually become the most delicious, crispy, golden bits!
Watch Closely at the End – Garlic toast can go from perfectly golden to burnt in 30 seconds, especially under the broiler! Stay near the oven during the last few minutes and check frequently. You want golden-brown edges and bubbling butter, but not dark brown or black spots.
Use Quality Butter – Since butter is the star ingredient, quality matters! Use real butter (never margarine), and if you want to splurge, European-style butter with higher fat content creates extra richness and flavor. The butter should taste good on its own!
Let Herbs Bloom in Butter – For even more flavor, you can gently warm the butter with garlic and herbs in a small saucepan for 1-2 minutes before spreading. This “blooms” the herbs and infuses the butter more deeply. Just don’t let it boil!
Toast Bread Slightly First – For extra-crispy results, lightly toast bread before adding butter mixture. This creates a barrier that prevents sogginess while adding extra crunch.
Grate Parmesan Fresh – Pre-grated Parmesan from a container doesn’t melt or taste as good as freshly grated from a block. Buy a small block of Parmigiano-Reggiano and grate it yourself for superior flavor!
Common Mistakes to Avoid
Don’t let these errors ruin your perfect garlic herb butter toast!
Using Cold, Hard Butter – Cold butter is impossible to mix with garlic and herbs, and it won’t spread on bread without tearing it. You’ll end up with uneven coverage and chunks of hard butter that don’t melt evenly. Always soften butter to room temperature (soft but still holding its shape) before making this recipe!
Burning the Garlic – While rare with this baking method, if you broil too long or bake at too high a temperature, the garlic can burn and become bitter. Burnt garlic tastes acrid and ruins the toast. Watch carefully during baking, especially if broiling. The goal is golden brown, not dark brown.
Skimping on Butter – A wimpy, thin layer of butter won’t provide enough flavor or that signature rich, indulgent taste. Be generous! Use at least 1-2 tablespoons of butter mixture per slice. This isn’t diet food – it’s garlic BUTTER toast. The butter is what makes it amazing!
Using Dried-Out or Stale Bread – Very dry, stale bread absorbs butter too quickly and can become greasy rather than crispy. It also crumbles when you try to spread butter. Use relatively fresh bread (1-3 days old is perfect). If bread is slightly stale, that’s actually fine, but rock-hard, old bread doesn’t work well.
Overcrowding the Baking Sheet – If bread slices overlap or touch, they’ll steam instead of crisping, resulting in soggy toast. Always arrange slices in a single layer with space between them. Use two baking sheets if needed!
Not Seasoning the Butter Mixture – Butter on its own is bland. Don’t forget the salt, pepper, and herbs! These seasonings are what transform plain butter into a flavor-packed coating. Taste your butter mixture before spreading – it should be noticeably seasoned!
Storage & Meal Prep
While garlic herb butter toast is best enjoyed fresh, here’s how to handle storage:
Immediate Consumption: Garlic herb butter toast is at its absolute best within 15-20 minutes of baking, while it’s still warm, crispy, and the butter is aromatic. After about 30 minutes, it begins to lose its crispy texture and becomes softer. Still delicious, but not at peak perfection!
Short-Term Storage: If you have leftovers (unlikely!), store in an airtight container at room temperature for up to 24 hours. To re-crisp: place in a 350°F oven or toaster oven for 3-5 minutes. It won’t be quite as perfect as fresh but still tasty!
Garlic Herb Butter Storage: This is key for meal prep! The butter mixture stores beautifully:
- Refrigerator: Store mixed garlic herb butter in an airtight container for up to 1 week
- Freezer: Freeze butter mixture for up to 3 months in an airtight container or roll into a log wrapped in plastic wrap
Meal Prep Strategy: Make a big batch of garlic herb butter, then:
- Use throughout the week on fresh toast whenever you want
- Spread on vegetables before roasting
- Toss with pasta
- Melt over grilled meats or fish
- Top baked potatoes
Make-Ahead & Freezer Notes
You can’t really make the finished toast ahead (it gets soggy), but you can prep components:
Advance Preparation:
- Make butter mixture: Up to 1 week ahead (refrigerate) or 3 months ahead (freeze)
- Slice bread: Same day or night before (store in sealed bag)
- Assemble and bake fresh: Takes just 15 minutes, best done right before serving
Freezing the Butter Mixture:
- Make a double or triple batch of garlic herb butter
- Portion into ¼ cup amounts in small containers OR
- Roll into a log in plastic wrap (like compound butter)
- Freeze for up to 3 months
- Thaw in fridge overnight or at room temp for 1 hour when needed
- Spread on bread and bake fresh!
Freezing Assembled (Unbaked) Toast:
- Spread butter on bread slices
- Freeze on a baking sheet until solid
- Transfer to freezer bag, store up to 1 month
- Bake from frozen: add 2-3 minutes to baking time
Reheating: Leftover baked toast reheats best in a 350°F oven or toaster oven for 3-5 minutes until warmed and crisped. Microwave makes it soggy (avoid!).
Serving Suggestions
This garlic herb butter toast pairs perfectly with:
Italian Dishes:
- Spaghetti with marinara or meat sauce
- Lasagna or baked ziti
- Chicken parmesan
- Meatballs
- Minestrone or pasta e fagioli soup
- Caesar salad
Soups:
- Tomato soup (classic combo!)
- Vegetable soup
- French onion soup
- Potato leek soup
- Chicken noodle soup
- Creamy soups
Salads:
- Caesar salad
- Italian salad
- Caprese salad
- Mixed greens with Italian vinaigrette
- Greek salad
Main Dishes:
- Grilled steak or chicken
- Roasted vegetables
- Shrimp scampi
- Pot roast
- Meatloaf
- Any pasta dish
Appetizer Spread:
- Cut into smaller pieces for appetizers
- Serve with marinara for dipping
- Include on charcuterie board
- Pair with cheese and olives
Party Ideas:
- Make a garlic bread bar with different toppings
- Serve alongside Italian buffet
- Include in bread basket
- Use as bruschetta base
FAQs Section
Q: Can I make this without Parmesan cheese?
A: Absolutely! The Parmesan adds extra flavor and helps create a golden crust, but the toast is still delicious without it. Simply omit it for a dairy-free version (using vegan butter), or substitute with nutritional yeast for a cheesy flavor without dairy. The garlic and herbs provide plenty of flavor on their own!
Q: Can I use garlic powder instead of fresh garlic?
A: You can, but fresh garlic is strongly recommended for best flavor! Fresh garlic has oils and compounds that create that authentic, robust garlic flavor and aroma. If you must substitute, use 1-1½ teaspoons garlic powder mixed into the softened butter. The flavor will be different – more mellow and less pungent – but still good.
Q: How do I prevent the butter from running off the bread?
A: Use softened (not melted) butter! Butter should be soft enough to spread easily but still hold its shape. If butter is melted or too soft, it runs off the bread and pools in the pan instead of soaking into the bread. Room temperature butter (soft but not melted) has the perfect consistency. You can also very lightly toast the bread first to create a slight barrier.
Q: Can I make this in an air fryer?
A: Yes! Air fryer works great for garlic toast. Spread butter on bread as directed, place slices in a single layer in the air fryer basket (you may need to work in batches), and air fry at 350°F for 5-7 minutes, checking halfway through. The edges get extra crispy in an air fryer!
Q: My toast came out soggy – what went wrong?
A: Several possible causes: (1) Too much butter or melted butter instead of softened, (2) Bread slices were too thin or too stale and absorbed too much butter, (3) Slices overlapped on baking sheet and steamed instead of crisping, (4) Oven temperature was too low. Use thick-sliced bread, softened (not melted) butter, arrange in single layer, and bake at 400°F for crispy results!
Q: What’s the best bread for garlic toast?
A: Sourdough is the top choice – its tangy flavor complements garlic beautifully, it has great texture, and it crisps up perfectly. Other excellent options: French bread, Italian bread, ciabatta, or any artisan bread with good structure. Even regular sandwich bread works! Choose thick-cut slices (¾-1 inch) for best results. Day-old bread actually works slightly better than super fresh bread!
Q: Can I make this on the stovetop instead of the oven?
A: Yes! Melt butter in a large skillet over medium heat, add garlic and herbs and cook for 30 seconds, then add bread slices and cook 2-3 minutes per side until golden. This method is faster but you need to watch carefully and it’s harder to make large batches. Oven method allows you to make many slices at once with more even browning!
Q: How do I store leftover garlic herb butter?
A: Store the butter mixture (not assembled toast) in an airtight container in the refrigerator for up to 1 week, or freeze for up to 3 months! This is actually a great meal prep strategy – make a big batch of the butter mixture, store it, and make fresh toast whenever you want by spreading on bread and baking. The butter mixture is also excellent on vegetables, pasta, or grilled meats!
Conclusion
And there you have it – the ultimate garlic herb butter toast recipe that’s crispy, buttery, and absolutely irresistible! This easy garlic toast recipe proves that sometimes the simplest recipes are the most delicious, especially when they fill your kitchen with incredible aromas and deliver restaurant-quality flavor. With golden, crispy edges, rich garlic butter soaked into every bite, and aromatic fresh herbs, this toast elevates any meal from ordinary to extraordinary!
This homemade garlic bread toast is perfect for busy weeknights, special dinners, entertaining guests, or anytime you want to make a meal feel more special with minimal effort. Whether you’re serving it alongside pasta, soup, salad, or any main dish, this toast always steals the show. The combination of butter, garlic, and herbs is timeless perfection that never goes out of style!
I absolutely can’t wait to hear how your garlic herb butter toast turns out! Drop a comment below and tell me about your experience. Did you add any creative variations? What did you serve it with? Did your family devour it immediately? Share all the delicious details! And please pin this recipe to your Pinterest boards – save it to your “Easy Side Dishes,” “Italian Recipes,” and “Quick Dinner Ideas” collections so you can find it whenever you need the perfect accompaniment. Share a photo of your golden, garlicky creation on Instagram and tag me!
Now grab that butter and garlic – the most delicious, aromatic side dish you’ve ever made is just 15 minutes away! 🧈🧄