Classic Vanilla Bean Milkshake Recipe – Pure, Elegant & Simply Perfect!

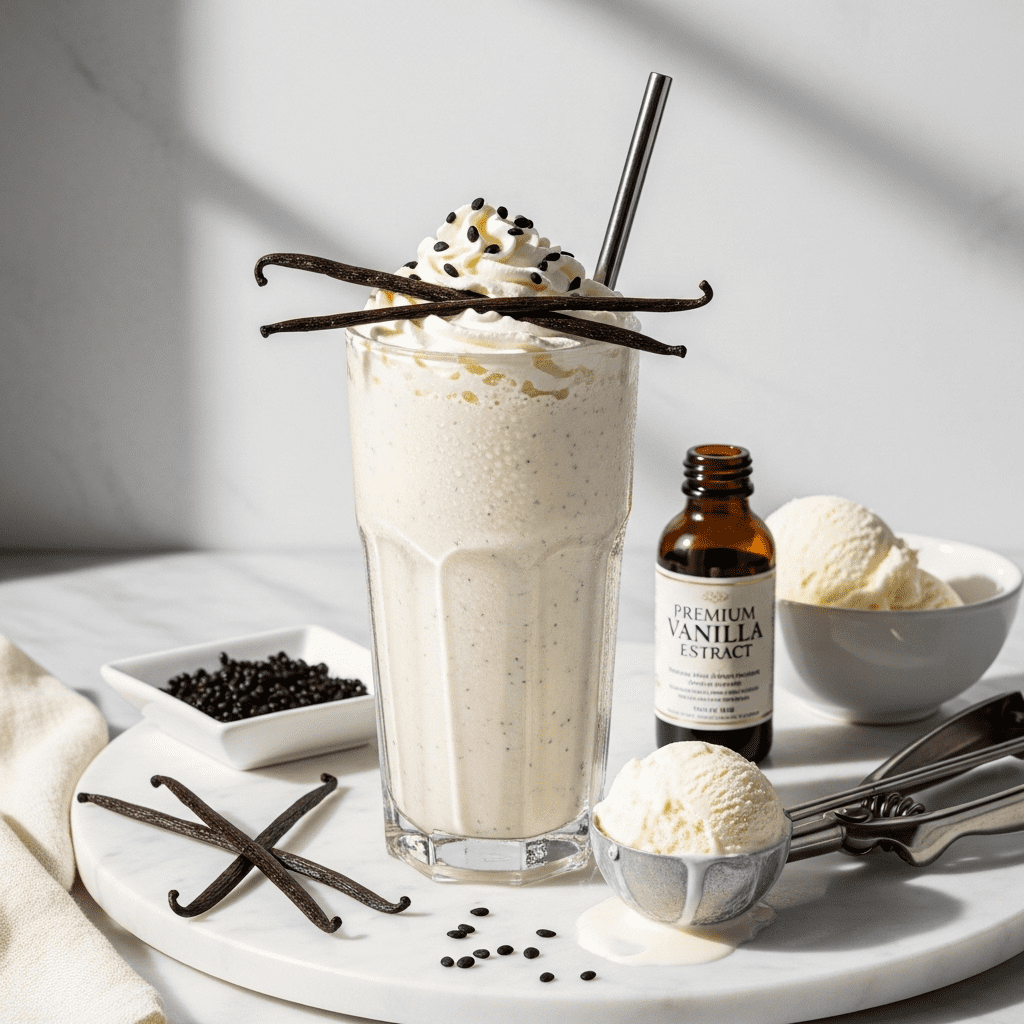
Get ready to experience milkshake perfection with this vanilla bean milkshake that’s pure, elegant, and tastes like a dream! This homemade vanilla bean milkshake elevates the classic vanilla shake by using real vanilla beans instead of just extract, creating a luxuriously creamy drink with those beautiful black vanilla bean specks throughout. It’s thick, rich, and delivers the most authentic, aromatic vanilla flavor you’ve ever tasted in a milkshake. This is vanilla the way it was meant to be enjoyed!
This easy vanilla bean shake is exactly what you need when you’re craving something simple yet extraordinary. Unlike ordinary vanilla shakes made with just extract, using real vanilla beans creates layers of complex flavor – sweet, floral, slightly woody, with incredible aromatic depth. Those gorgeous vanilla bean specks make it visually stunning too, giving it that gourmet ice cream parlor appearance. It’s proof that sometimes the simplest flavors, when done right with quality ingredients, are the most sophisticated and satisfying.
Whether you’re treating yourself to something special, serving an elegant dessert to guests, pairing it with your favorite pie or cake, celebrating a milestone, or just appreciating the pure beauty of real vanilla, this vanilla bean shake recipe is perfection. It’s naturally gluten-free, ready in just 5 minutes, and can easily be made dairy-free. Serve it as a standalone dessert that needs no embellishment, pair it with classic American comfort foods, or make it the star of your next special occasion. Once you taste a milkshake made with real vanilla beans, you’ll never go back!
History / Background
Vanilla, one of the world’s most beloved and expensive flavors, has a fascinating history that spans centuries and continents. Vanilla beans come from orchids in the genus Vanilla, native to Mexico and Central America. The Totonac people of Mexico were the first to cultivate vanilla, and later the Aztecs used it to flavor their chocolate drinks, calling it “tlilxochitl.”
When Spanish conquistador Hernán Cortés encountered vanilla in the early 16th century, he brought it back to Europe, where it became highly prized. However, vanilla remained expensive and rare because the vanilla orchid could only be successfully pollinated by a specific species of bee native to Mexico. It wasn’t until 1841 that a 12-year-old enslaved boy named Edmond Albius on Réunion Island discovered how to hand-pollinate vanilla orchids, making large-scale cultivation possible.
Today, Madagascar produces about 80% of the world’s vanilla, followed by Indonesia, Tahiti, Mexico, and other tropical regions. Real vanilla beans are labor-intensive to produce – the orchids must be hand-pollinated, the beans require months of curing, and the entire process takes about a year. This is why real vanilla is one of the most expensive spices in the world, second only to saffron.
Vanilla ice cream became America’s favorite flavor in the early 1900s, and vanilla milkshakes naturally followed as soda fountains became popular. While vanilla extract made vanilla flavor accessible, connoisseurs always knew that real vanilla beans created incomparably superior flavor. The vanilla bean milkshake represents the pinnacle of this classic – it’s the vanilla shake made the way it would be in the finest ice cream parlors, using actual vanilla beans with their thousands of tiny aromatic seeds.
The beautiful black specks from vanilla beans not only add visual appeal but indicate quality and authenticity. They’ve become a mark of premium vanilla products, from ice cream to coffee drinks to desserts. Today’s homemade vanilla bean milkshake honors vanilla’s rich heritage while making gourmet flavor accessible in your own kitchen!
Why You’ll Love This Recipe
This easy vanilla bean shake is about to redefine what you think a vanilla milkshake can be! What makes this recipe absolutely extraordinary is how it showcases vanilla in its purest, most beautiful form. Real vanilla beans create a depth of flavor that’s impossible to achieve with extract alone – it’s sweet, floral, aromatic, complex, and utterly delicious. The flavor is cleaner and more elegant than artificial vanilla, letting you truly taste what real vanilla is supposed to be.
The beauty of this vanilla bean milkshake is its sophisticated simplicity. There’s nowhere to hide when you’re making a vanilla shake – it’s all about quality ingredients and perfect technique. Using real vanilla beans elevates it from everyday to extraordinary, making it feel special and gourmet. Those gorgeous black vanilla bean specks throughout are visually stunning and signal to everyone that this is the real deal, made with premium ingredients!
Here’s why you’ll absolutely love this vanilla bean milkshake:
- Ready in 5 minutes – Quickest way to feel fancy!
- Real vanilla bean flavor – Authentic, complex, aromatic
- Gorgeous vanilla bean specks – Beautiful and visually impressive
- Pure and elegant – Simple perfection done right
- Restaurant-quality taste – Rivals high-end ice cream parlors
- Perfect classic flavor – Never goes out of style
- Incredibly versatile – Pairs with everything
- Kid and adult approved – Everyone loves real vanilla
- Naturally gluten-free – Safe for those avoiding gluten
- Impressive yet easy – Looks and tastes gourmet
- Great base for variations – Build on this perfection
- Pure indulgence – No artificial flavors, just quality
- Timeless and sophisticated – Classic never gets old
Ingredient Notes
Let’s talk about the premium ingredients that create this perfect vanilla bean milkshake:
Vanilla Bean – The star of the show! You’ll need 1 whole vanilla bean. Madagascar (Bourbon) vanilla beans are the most common and have that classic, rich, sweet vanilla flavor. Tahitian vanilla beans are more floral and fruity. Mexican vanilla beans are bold and spicy. Choose based on your preference, though Madagascar is the classic choice for milkshakes. The vanilla bean should be plump, moist, and aromatic – avoid dry, brittle beans. To use: split the bean lengthwise with a sharp knife and scrape out the tiny black seeds (the caviar). Both the seeds AND the scraped pod can be used for maximum flavor! Save the pod to make vanilla sugar or infuse into cream.
Premium Vanilla Ice Cream – The foundation! Use the absolute best quality vanilla ice cream you can afford – preferably one that already uses vanilla beans! Look for ice cream with cream as the first ingredient and minimal additives. French vanilla, vanilla bean, or Madagascar vanilla ice cream all work beautifully. You’ll need about 3 cups (6 scoops). The better your ice cream, the better your shake. Can’t do dairy? Use premium vanilla bean ice cream made from oat milk or coconut milk – several brands now make excellent dairy-free vanilla bean options.
Whole Milk – For the perfect consistency. Whole milk creates the creamiest, richest texture. You’ll need about ½-¾ cup – start with less and add more if needed. For extra richness, use half milk and half heavy cream. Can’t do dairy? Use oat milk for the creamiest dairy-free option, or unsweetened almond milk.
Pure Vanilla Extract – Yes, even with vanilla beans! Adding ½ teaspoon of pure vanilla extract alongside the vanilla bean creates even more depth and aromatic complexity. Use Madagascar vanilla extract to complement your vanilla bean.
Sugar (Optional) – Most premium vanilla ice cream is sweet enough that you won’t need added sugar, but you can add 1-2 teaspoons if desired. Vanilla sugar (sugar that’s been infused with vanilla beans) is perfect if you have it!
Pinch of Salt – Enhances all the flavors and makes the vanilla taste even more pronounced. Don’t skip this tiny but mighty ingredient!
Optional Enhancements:
- Heavy cream (2-3 tablespoons) – For ultra-luxurious richness
- Vanilla bean paste – For even MORE vanilla bean flavor and specks
- White chocolate – Melted into the shake for extra decadence
- Vanilla wafers – Blend in 2-3 for cookie flavor
Equipment Needed
Making this vanilla bean milkshake requires basic tools plus one special item:
- Sharp paring knife – Essential for splitting vanilla beans
- Blender – Any standard countertop blender works perfectly
- Measuring cups and spoons – For accurate ingredient portions
- Ice cream scoop – For portioning ice cream
- Tall glasses – For serving (16 oz glasses are ideal)
- Thick straws or long spoons – For enjoying your creation
- Spatula – For scraping down blender sides and getting every drop
- Small bowl – For vanilla bean seeds if prepping ahead

Vanilla Bean Milkshake Recipe
This elegant Vanilla Bean Milkshake uses real vanilla beans to create the most luxurious, aromatic vanilla shake you’ve ever tasted! With premium vanilla ice cream, milk, and those gorgeous vanilla bean specks throughout, it’s pure perfection in a glass. Ready in just 5 minutes!
- Total Time: 5 minutes
- Yield: 2 servings 1x
Ingredients
- 1 whole vanilla bean (Madagascar/Bourbon vanilla recommended)
- 3 cups premium vanilla ice cream (about 6 scoops), slightly softened
- ¾ cup whole milk (adjust for desired thickness)
- ½ teaspoon pure vanilla extract
- 1-2 teaspoons sugar (optional, usually not needed)
- Pinch of salt (enhances vanilla flavor)
For Serving (Optional):
- Fresh whipped cream
- Extra vanilla bean seeds for garnish
- Vanilla wafer cookie
- Chocolate or caramel drizzle
Instructions
- Prepare the Vanilla Bean – This is the most important step! Place the vanilla bean on a cutting board. Using a sharp paring knife, slice the bean lengthwise down the middle, keeping one end intact. Open the bean like a book. Use the back of your knife to scrape out all the tiny black seeds (vanilla caviar) from both sides of the bean. You should get about ½-1 teaspoon of seeds from one bean. Save the scraped pod – it still has flavor! You can add it to a container of sugar to make vanilla sugar, or steep it in milk or cream for other recipes.
- Soften Ice Cream Slightly – Remove vanilla ice cream from the freezer and let it sit at room temperature for 3-5 minutes. It should be soft enough to scoop easily but still very cold and firm, not melting or drippy. This makes blending easier and creates the perfect texture.
- Add Ingredients to Blender in Order – Layer strategically for best results: milk first (helps blender blades move freely), then all those precious vanilla bean seeds, slightly softened ice cream scoops, pure vanilla extract, and a pinch of salt. If your ice cream isn’t very sweet, add 1-2 teaspoons of sugar now.
- Start Blending on Low Speed – Secure the blender lid tightly. Start on the lowest speed setting for 10-15 seconds to begin combining everything and distributing those vanilla bean seeds evenly. This prevents splashing and protects your motor.
- Increase to Medium Speed – Once ingredients start moving and combining, gradually increase to medium speed (NOT high – you don’t want to over-blend). Blend for 20-30 seconds until the mixture is smooth, creamy, and uniformly colored with beautiful black vanilla bean specks distributed throughout. Use your blender’s tamper if you have one to push ingredients toward the blades.
- Stop and Scrape Down Sides – Turn off the blender and use a spatula to scrape down any ingredients or vanilla seeds stuck to the sides. This ensures every sip has that gorgeous vanilla bean flavor and those beautiful specks!
- Blend Again Briefly – Give it one more 10-15 second blend for perfect smoothness and even vanilla distribution.
- Check Consistency – Your shake should be thick and creamy but still pourable – like premium soft-serve consistency. If it’s too thick and won’t blend, add 2-3 tablespoons more milk and pulse briefly. If it’s too thin (rare, but possible), add another scoop of ice cream.
- Taste for Perfection – Give it a taste! You should taste pure, aromatic vanilla with complex notes. If you want more vanilla flavor, you can add another ¼ teaspoon vanilla extract. If it needs sweetness (usually it doesn’t), add 1 teaspoon sugar and blend for 10 seconds.
- Serve Immediately with Elegance – Pour into tall, chilled glasses (pre-chilling glasses in the freezer for 15 minutes keeps shakes colder longer). The shake should be so thick it cascades slowly into the glass. Those vanilla bean specks throughout are absolutely gorgeous! Top with whipped cream if desired, or keep it pure and simple. Serve with a thick straw or long spoon and enjoy immediately while perfectly cold and thick!
Notes
- Vanilla Bean Quality: Plump, moist, aromatic beans create the best flavor. Avoid dry, brittle beans.
- Ice Cream Quality: This recipe is only as good as your ice cream. Use the best you can afford!
- Don’t Over-Blend: Blend just until smooth (30-40 seconds total). Over-blending warms the shake and makes it thin.
- Vanilla Bean Storage: Store vanilla beans in an airtight container in a cool, dark place. They should be pliable, not dry.
- Milk Amount: Start with ½ cup and add more only if needed. Thick is better than thin!
- Save That Pod: The scraped vanilla pod still has flavor! Use it to make vanilla sugar or infuse cream.
- Prep Time: 5 minutes
- Cook Time: 0 minutes
Nutrition
- Serving Size: 1 milkshake (approximately 14 oz)
- Calories: 420
- Sugar: 48g
- Sodium: 170mg
- Fat: 20g
- Saturated Fat: 12g
- Unsaturated Fat: 7g
- Trans Fat: 0g
- Carbohydrates: 52g
- Fiber: 0g
- Protein: 9g
- Cholesterol: 75mg
Tips & Variations
This vanilla bean milkshake is perfection as-is, but here’s how to customize it:
Vanilla Variations:
- French Vanilla: Use French vanilla ice cream and add 1 egg yolk for ultra-rich texture
- Double Vanilla Bean: Use 2 vanilla beans for maximum vanilla impact
- Vanilla Bean Malt: Add 2-3 tablespoons malted milk powder
- Vanilla Bean & Honey: Drizzle in 1 tablespoon honey for floral sweetness
- Madagascar vs. Tahitian: Try different vanilla bean origins for flavor exploration
Flavor Add-Ins:
- Vanilla Bean Chocolate: Add 2 tablespoons chocolate syrup
- Vanilla Bean Caramel: Swirl in caramel sauce
- Vanilla Bean Coffee: Add 1 shot of espresso
- Vanilla Bean Bourbon: Add ½ teaspoon bourbon extract
- Vanilla Bean Brownie: Blend in 1 small brownie
Texture Adjustments:
- Extra Thick: Use only ½ cup milk, add extra ice cream
- Standard Thick: ¾ cup milk to 3 cups ice cream (recipe as written)
- Thinner: Use 1 cup milk
- Ultra-Creamy: Replace ¼ cup milk with heavy cream
Dietary Modifications:
- Dairy-Free: Use oat milk or coconut milk ice cream and plant-based milk
- Lower Sugar: Use low-sugar ice cream, skip added sweetener
- Protein-Packed: Add 1 scoop vanilla protein powder
- Egg-Free: Recipe is already egg-free (unless making French vanilla variation)
Topping Ideas:
- Fresh whipped cream
- Vanilla bean seeds sprinkled on top
- Vanilla wafer cookie on the rim
- Caramel or chocolate drizzle
- Vanilla bean pod as garnish (dramatic!)
- Fresh berries
- Edible flowers
Pro Chef Tips
Want to make an absolutely perfect vanilla bean milkshake? Here are professional secrets:
Scrape Every Last Seed – Those vanilla bean seeds are precious! After your initial scrape, run the back of your knife along the pod again to get every single seed. Some chefs even rinse the pod in the milk you’re using for the shake to capture any remaining seeds and flavor!
Don’t Waste the Pod – The scraped vanilla bean pod still contains tons of flavor! You have several options: (1) add it directly to your milk before blending and remove it after, (2) place it in a jar with sugar to make vanilla sugar, (3) add it to a bottle of vodka to make homemade vanilla extract, or (4) toss it in your coffee grounds for vanilla-scented coffee. Never throw away vanilla pods!
Choose the Right Vanilla Bean Origin – Different vanilla origins create different flavor profiles. Madagascar vanilla is sweet and creamy (classic choice). Tahitian vanilla is floral and fruity (elegant). Mexican vanilla is bold and spicy (complex). For your first vanilla bean shake, Madagascar is the safe, delicious choice!
Store Vanilla Beans Properly – Vanilla beans should be plump and pliable, never dried out. Store them in an airtight container or resealable bag in a cool, dark place (NOT the refrigerator, which can make them moldy). Well-stored vanilla beans last 1-2 years.
Use Premium Ice Cream – This cannot be overstated! Since vanilla is the only flavor, ice cream quality makes or breaks this recipe. Look for ice cream with: cream as the first ingredient, visible vanilla bean specks already in it, short ingredient list, and premium price tag. Cheap ice cream creates a cheap-tasting shake!
Don’t Over-Blend – Vanilla bean milkshakes need gentle blending. Over-blending (more than 40 seconds) warms the shake, makes it thin, and can actually dull the delicate vanilla flavor. Blend just until smooth and stop!
Add Salt for Vanilla Enhancement – That pinch of salt is crucial! Salt makes vanilla taste more complex and pronounced. Professional pastry chefs always salt their vanilla desserts for this reason.
Chill Your Glasses Thoroughly – Put serving glasses in the freezer for 15-20 minutes before making your shake. This keeps the shake colder longer and maintains that perfect thick texture. Presentation matters with something this elegant!
Common Mistakes to Avoid
Don’t let these errors ruin your perfect vanilla bean milkshake!
Using Dry or Old Vanilla Beans – Dry, brittle vanilla beans have lost most of their flavor and are difficult to scrape. A good vanilla bean should be plump, moist, flexible, and intensely aromatic. If your beans are dried out, you won’t get the flavor you’re expecting. Always buy fresh vanilla beans from reputable sources and store them properly.
Throwing Away the Vanilla Bean Pod – The scraped pod still contains valuable flavor compounds! Don’t waste it. At minimum, add it to a jar of sugar to create vanilla sugar. Professional chefs maximize every part of these expensive beans.
Adding Too Much Milk – This is the #1 texture mistake! Since vanilla is delicate, you want a thick shake that lets the flavor shine. Too much milk creates a thin, watery shake that dilutes the beautiful vanilla flavor. Start with ½ cup milk and add more only if absolutely necessary for blending.
Using Extract Instead of Beans to Save Money – While this recipe uses both vanilla bean AND extract, don’t try to skip the vanilla bean and use extra extract instead. Extract cannot replicate the complex flavor and visual beauty of real vanilla beans. This is meant to be a special, premium shake – if you want to save money, make a different flavor!
Over-Blending – Gentle blending is key! Over-blending (more than 40 seconds total) warms up your shake, makes it thin and frothy, and can actually damage the delicate vanilla flavor compounds. Vanilla is subtle – treat it gently!
Not Distributing Vanilla Seeds Evenly – Make sure to scrape down the sides of the blender to redistribute vanilla seeds that get stuck. You want those gorgeous black specks throughout the shake, not all stuck to the blender walls!
Storage & Meal Prep
While vanilla bean milkshakes are best enjoyed fresh, here’s how to handle storage:
Immediate Consumption: Vanilla bean milkshakes are at their absolute best within the first 10-15 minutes of making them. The texture is perfect, they’re ice-cold, and the delicate vanilla flavor is at its peak. With something this elegant and made with such premium ingredients, serve and drink immediately whenever possible!
Short-Term Refrigeration: If needed, pour the shake into an airtight container filled to the top (to minimize air exposure and prevent the vanilla from oxidizing) and refrigerate for up to 2 hours maximum. The shake will separate as ice cream melts. Before drinking, give it a vigorous stir or quick 10-second re-blend to re-incorporate everything.
Freezer Storage: Pour leftover shake into freezer-safe containers and freeze for up to 1 month. When ready to enjoy, let it thaw in the refrigerator for 20-30 minutes until it reaches a thick, slushy consistency. You can drink it semi-frozen or give it a quick blend to restore creaminess.
Vanilla Bean Prep: You can scrape vanilla beans ahead of time! Scrape the seeds and store them in a small airtight container in the refrigerator for up to 1 week. This makes shake-making even faster when the craving hits.
Make-Ahead & Freezer Notes
Vanilla bean milkshakes are best fresh, but here are prep strategies:
Pre-Scrape Vanilla Beans: Scrape vanilla bean seeds and store in a small airtight container in the refrigerator for up to 1 week. This cuts prep time significantly! Make sure the container is well-sealed so the seeds don’t dry out.
Pre-Portion Ice Cream: Scoop ice cream portions onto a parchment-lined tray and refreeze until solid. Store frozen scoops in a container for up to 1 week. Grab pre-portioned scoops when making shakes – no struggling with hard ice cream!
Make Vanilla Sugar: Use your scraped vanilla pods to make vanilla sugar by burying them in a jar of granulated sugar. After a week, you’ll have aromatic vanilla sugar perfect for adding to future shakes or desserts!
Chill Glasses Ahead: Keep serving glasses in the freezer so they’re always ready. This maintains the perfect cold temperature.
Best “Reheating” Method: If your milkshake has been refrigerated or frozen, pour into the blender, add 1-2 fresh scoops of vanilla ice cream, and blend for 10-15 seconds. This restores perfect texture better than just stirring.
Serving Suggestions
This vanilla bean milkshake is elegant on its own, but here’s how to serve it:
Classic American Pairing:
- Cheeseburgers and fries (classic diner combo!)
- Apple pie or cherry pie
- Chocolate cake or brownies
- Fresh-baked cookies
- Grilled cheese sandwich
- Hot dogs and onion rings
Elegant Dessert Service:
- Serve in fancy stemware for sophistication
- Pair with French macarons
- Alongside crème brûlée or panna cotta
- With shortbread cookies
- After a special dinner
- At brunch with pastries
Special Occasions:
- Birthday celebrations
- Anniversary dinners
- Bridal showers
- Valentine’s Day (pure romance!)
- Date night at home
- Graduation parties
Create an Ice Cream Social:
- Vanilla bean shake station
- Multiple topping options
- Different sauce drizzles
- Various cookies for pairing
- Let guests customize
FAQs Section
Q: Can I use vanilla extract instead of vanilla beans?
A: While you technically can, this recipe specifically celebrates real vanilla beans and their unique flavor and appearance. The whole point is those gorgeous black specks and the complex flavor only real beans provide! If you want a regular vanilla shake with extract, use 1-2 teaspoons of vanilla extract instead of the bean, but know it won’t have the same gourmet quality or visual appeal.
Q: Why are vanilla beans so expensive?
A: Vanilla beans are one of the most labor-intensive crops to grow! The orchids must be hand-pollinated, beans take 9 months to mature, then require several months of careful curing. A single vanilla bean represents almost a year of work. They’re the second most expensive spice after saffron. That said, one bean makes 2 servings of this incredible shake, so it’s worth the splurge!
Q: Where do I buy vanilla beans?
A: Quality vanilla beans are available at: specialty grocery stores, high-end supermarkets (in the baking or spice aisle), online retailers (Amazon, Vanilla Bean Kings, Beanilla), gourmet food shops, and sometimes Costco (great bulk pricing!). Look for plump, moist, aromatic beans in airtight tubes or vacuum-sealed packages.
Q: Can I reuse the vanilla bean pod?
A: Yes! The scraped pod still has tons of flavor. Best uses: (1) Make vanilla sugar – bury pods in granulated sugar for 1-2 weeks, (2) Make vanilla extract – add pods to vodka and steep for months, (3) Infuse cream or milk – add pod while warming for other recipes, (4) Add to coffee grounds for vanilla-scented coffee, or (5) Blend directly into the shake then strain before serving.
Q: What’s the difference between Madagascar, Tahitian, and Mexican vanilla beans?
A: Each origin has distinct flavor: Madagascar (Bourbon) – Sweet, creamy, rich, classic vanilla flavor (best for this shake), Tahitian – Floral, fruity, cherry-like notes (more delicate), Mexican – Bold, spicy, smoky undertones (more complex). For your first vanilla bean shake, Madagascar is the reliable, delicious choice. Advanced vanilla lovers might experiment with other origins!
Q: How do I make this dairy-free?
A: Easy! Use premium dairy-free vanilla ice cream (look for brands that use vanilla beans – some do!) and plant-based milk. Oat milk creates the creamiest dairy-free shake. Coconut milk ice cream also works wonderfully. Several premium brands now make excellent vanilla bean dairy-free ice cream that’s just as good as regular!
Q: My vanilla beans are dried out – can I still use them?
A: Dried beans won’t give good results. You can try to rehydrate them by wrapping in a damp paper towel and microwaving for 5-10 seconds, but honestly, dried beans have lost most of their flavor compounds. It’s better to buy fresh, properly stored beans. Prevention: store beans in an airtight container in a cool, dark place to keep them pliable!
Q: Can I make this without a blender?
A: A blender is really necessary for this recipe to properly incorporate the vanilla bean seeds and create that smooth, creamy texture. An immersion blender might work in a tall container, but a regular blender is ideal. The good news: even a basic, inexpensive blender will work for milkshakes!
Conclusion
And there you have it – the ultimate vanilla bean milkshake recipe that’s pure elegance in a glass! This homemade vanilla bean milkshake proves that sometimes the simplest things, when made with the finest ingredients, are the most extraordinary. With real vanilla beans creating complex flavor and those gorgeous black specks throughout, this shake is both a visual masterpiece and a delicious treat that honors vanilla in its most authentic form.
This easy vanilla bean shake is perfect for vanilla lovers who appreciate quality and want to experience what real vanilla truly tastes like. Whether you’re treating yourself to something special, impressing guests with gourmet flair, pairing it with your favorite dessert, or celebrating a milestone, this shake delivers pure perfection every time. The investment in real vanilla beans is absolutely worth it for the incredible flavor and elegant presentation!
I absolutely can’t wait to hear how your vanilla bean milkshake turns out! Drop a comment below and tell me about your experience. Did you use Madagascar vanilla? Save the pod for vanilla sugar? Pair it with something amazing? Share all the delicious details! And please pin this recipe to your Pinterest boards – save it to your “Gourmet Desserts,” “Special Occasion Treats,” and “Classic Milkshakes” collections so you can find it when you’re ready to indulge. Share a photo of your gorgeous creation with those beautiful vanilla specks on Instagram and tag me!
Now grab a vanilla bean and fire up your blender – the most elegant, delicious milkshake you’ve ever tasted is just 5 minutes away!